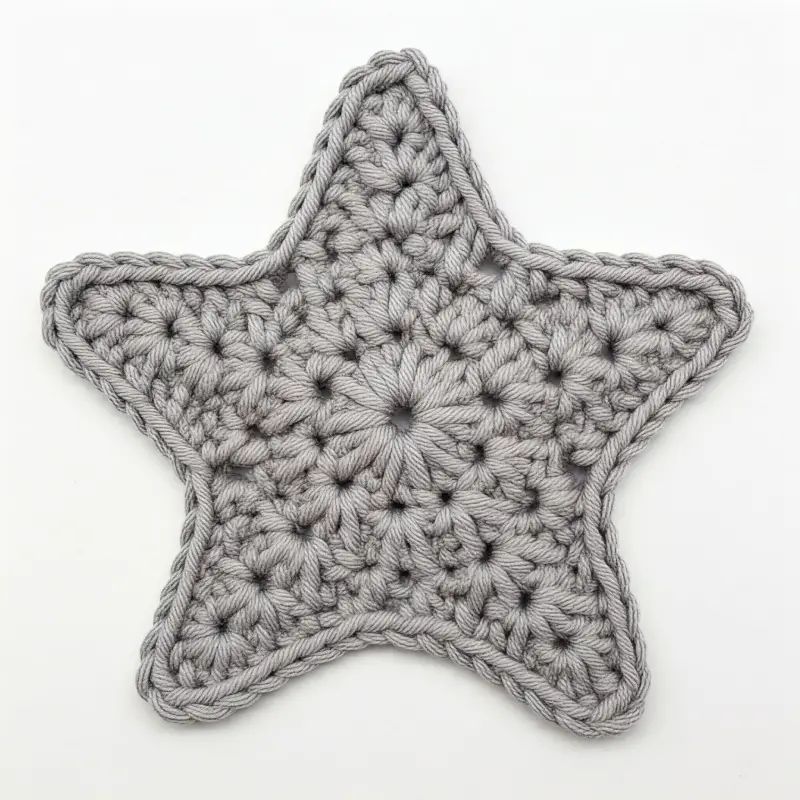
Crochet star-shaped coasters are a delightful addition to any home decor, adding a touch of whimsy and charm to your table settings. These cute coasters not only protect your furniture from unwanted water rings but also serve as eye-catching decor pieces. With their intricate design and unique shape, they make for a fun and rewarding crochet project for crafters of all skill levels. Whether you're a beginner looking to learn a new stitch or an experienced crocheter seeking a quick and satisfying project, these coasters are a perfect choice. Imagine setting your favorite hot beverage on one of these adorable star-shaped coasters, instantly brightening up your day with their cheerful design. So grab your yarn and crochet hook, and get ready to add a touch of handmade magic to your home with these delightful coasters!
Yarn: Medium-weight (size 4) cotton yarn in the color of your choice. Cotton is best for coasters as it’s absorbent and easy to wash.
Crochet Hook: A 4 mm (G-6) crochet hook works perfectly for this project.
Tapestry Needle: For weaving in ends.
Scissors: For trimming yarn.
Abbreviations (U.S. terms):
Step 1: Start with a Magic Ring
Begin by creating a magic ring, a common technique used in crocheting in the round.
This ensures that your starting hole is small and tight, which is important for coasters.
If you’re unfamiliar with the magic ring technique, you can alternatively chain 4 and slip stitch to the first chain to form a ring.
Make a magic ring.
Round 1: Ch 3 (this counts as your first dc), then crochet 14 dc into the ring.
You should have 15 stitches total, including the initial ch-3.
Pull the tail of the magic ring to tighten the circle, and join with a sl st to the top of the ch-3.
Step 2: Form the Points of the Star
Now, we’ll work on creating the points of the star. This step involves forming five “petals” or points to give your coaster its distinct shape.
Round 2:
Ch 6.
Skip the next 2 sts, then sl st into the next st.
Repeat this step four more times (you’ll have 5 loops forming the base of the star).
At the end of this round, you should have 5 chain loops evenly spaced around the circle.
Step 3: Building the Star Points
Now, let’s start forming the points of your star by working into each of the 5 loops you just created.
Round 3:
Sl st into the first loop.
Ch 1, sc, hdc, dc, tr, dc, hdc, sc, sl st into the same loop.
Move to the next loop and repeat: Ch 1, sc, hdc, dc, tr, dc, hdc, sc, sl st.
Continue this pattern around for each of the 5 loops, completing the star shape.
After finishing the last point, sl st into the base of the first loop to complete the round.
Step 4: Finishing the Star Shape
Once you’ve completed the five points of the star, your coaster should be taking shape beautifully.
Now, we’ll work on finishing and adding any optional embellishments or details to personalize your star-shaped coaster.
Finishing the Edges:
To create a smooth and finished look for your coaster, you can add a final round of slip stitches or single crochets around the edges of the star points.
Round 4:
Starting from the base of any star point, sl st along the edges of each point, including along the tops of the tr and dc stitches.
This will give the coaster a more defined and polished look.
Alternatively, you could use sc stitches around the edges for a slightly thicker border.
Both options help the star’s points stand out and give the coaster a professional finish.
Step 5: Weave in Ends
After you’ve finished crocheting your coaster, it’s time to weave in the loose ends.
Use a tapestry needle to tuck any yarn tails into the back of the coaster, ensuring they are hidden and secure.
Trim any excess yarn.
If you want to stiffen your coaster to make it sturdier, you can lightly block it using a blocking mat and pins, or even starch it slightly.
Step 6: Customizing Your Star-Shaped Coaster
One of the most enjoyable parts of crocheting your own star-shaped coaster is that you can customize it however you like. Here are some fun ways to make each coaster unique:
Play with Colors:
Two-Tone Star: Crochet the base of the coaster in one color and the points of the star in another.
For example, make the body of the star white and the points yellow for a sun-inspired look.
Striped Coaster: Alternate yarn colors after each round to create a striped, vibrant coaster.
Gradient Star: Use variegated yarn that gradually changes color as you crochet, giving your coaster a beautiful gradient effect.
Add Surface Embellishments:
Surface Crocheting: You can surface crochet a border around the star’s edges for added dimension and texture.
Beaded Edges: For a decorative touch, thread small beads onto your yarn and incorporate them into the final round of slip stitches for a sparkly effect.
Step 7: Care and Maintenance
Cotton yarn is the best choice for coasters because it’s absorbent and durable.
To care for your star-shaped coaster, machine wash it on a gentle cycle and lay it flat to dry.
Since this project uses cotton, you don’t have to worry about it shrinking too much or losing its shape.
Blocking your coaster after washing will help maintain its neat, crisp edges, especially if you’ve used a more intricate pattern or shape.