Fabric pumpkins are a delightful and charming way to add a touch of cozy fall vibes to your home decor. These adorable decorations come in various sizes, colors, and patterns, making them a versatile and fun addition to any room. Whether you place them on your mantel, scatter them across your dining table, or use them as a centerpiece, fabric pumpkins instantly bring a warm and inviting feel to your space. Their soft texture and whimsical design make them a lovely alternative to traditional pumpkins, perfect for those looking to add a touch of whimsy to their autumn decor. Plus, they are reusable year after year, making them a sustainable and cute seasonal accent that you'll love bringing out each fall.

I used fat quarters for all of mine which makes pumpkins that are about 7″ wide and 6-8″ tall. You can customize the size easily by using bigger or smaller fabric pieces. I used fat quarters because they are super inexpensive and you can get so many patterns and colors.
Skill Level
Beginner
Materials
1 fat quarter per pumpkin – Approximate measurements are typically about 18″x18″
Stuffing
Patchwork Scissors – (Art No. 493)
Yarn, twine or string that matches your pumpkin fabric, approx. 15-20 feet
Hot glue gun
Something to use for a stem – wine cork, small branches, etc.
Embellishments – yarn, ribbon, beads, etc.
For the no-sew version:
One hair tie or rubber band
For the sewing version:
Thread that matches your fabric
Quilting Pins – (Art No. Q2508)
Sewing machine
Needle
Finished Dimensions
Approximately 7″ x 6-8″
No-Sew Instructions
1. Fold the fat quarter in half with the right sides together on the inside.
2. Flip approximately one inch of the fabric back so that you can hot glue down the seam. Press together after gluing.
3. Gather the bottom end together into a fan shape and wrap the hair tie or rubber band around it tightly about 1.5″ from the bottom to cinch it together. Add hot glue in and around the band and the fabric to secure.
4. Turn the fabric right side out. You should have something that resembles a bag at this point.
5. Stuff with stuffing to the desired height. I used both poly-fil and a combination of yarn and faux fur scraps I had in my stash. Anything that is squishy will work for the stuffing. You’ll want to fill it up a little taller than you want the finished height to be since it will compact down a bit once it’s finished.
6. Fold the top edges down until they are compacting the top of the stuffing a little bit then glue the center.
7. Pull one side of the top edge into the center of the pumpkin, making sure to keep it tight, and glue down.
8. Repeat for the other side.
9. Cut about 15 feet of yarn, string or twine and fold in half to make the pumpkin dents. Fold your string in half and starting at the top of the pumpkin, loop your string around to the bottom, going around the middle of the pumpkin and tie a knot at the bottom tightly.
10. Now you will make the next section by moving over about 3″, then going from the bottom to the top, loop your yarn to make the second section and tie a knot tightly at the top. Center the last section between the dents you previously made and go from the top to the bottom and tie the final knot. Make sure to tie it tightly and add a little glue to secure it.
11. Hot glue your stem to the center of the top; I have used pieces of branches from my yard, wine corks and ribbon. Add any embellishments you want after adding the stem. I like to use fake leaves from the dollar store along with wooden beads, twine and ribbon for mine.
Sewing Instructions
1. Fold the fat quarter in half with the right sides together on the inside and pin together.
2. Sew a seam down the long edge with a 5/8″ seam allowance.
3. Fold the bottom edge like an accordion with as many layers as your sewing machine can handle and sew back and forth a few times about 1-1/5″ from the edge to secure the end.
4. Turn the fabric right side out. You should have something that resembles a bag at this point.
5. Stuff with stuffing to the desired height. I used both poly-fil and a combination of yarn and faux fur scraps I had in my stash. Anything that is squishy will work for the stuffing. You’ll want to fill it up a little taller than you want the finished height to be since it will compact down a bit once it’s finished.
6. Cut a piece of yarn, thread or string about 20 feet long and fold in half. Use the double thickness for the next few steps.
7. Thread a needle with the double length of string and sew in and out every 1″ of the fabric right above the stuffing.
8. Pull the ends so that about half is on each side of the pumpkin, tuck the extra fabric inside the top of the pumpkin and then cinch the top closed. Leave a small hole to stick your pumpkin stem into and hot glue so you can make the pumpkin dents around it.
9. To make the pumpkin dents, use the two long tails at the top of the pumpkin and loop your string around to the bottom, going around the middle of the pumpkin and tie a knot at the bottom tightly.
10. Now you will make the next section by moving over about 3″, then going from the bottom to the top, loop your yarn to make the second section and tie a knot tightly at the top. Center the last section between the dents you previously made and go from the top to the bottom and tie the final knot. Make sure to tie it tightly and add a little glue to secure it.
11. Add any embellishments you want after adding the stem. I like to use fake leaves from the dollar store along with wooden beads, twine and ribbon for mine.
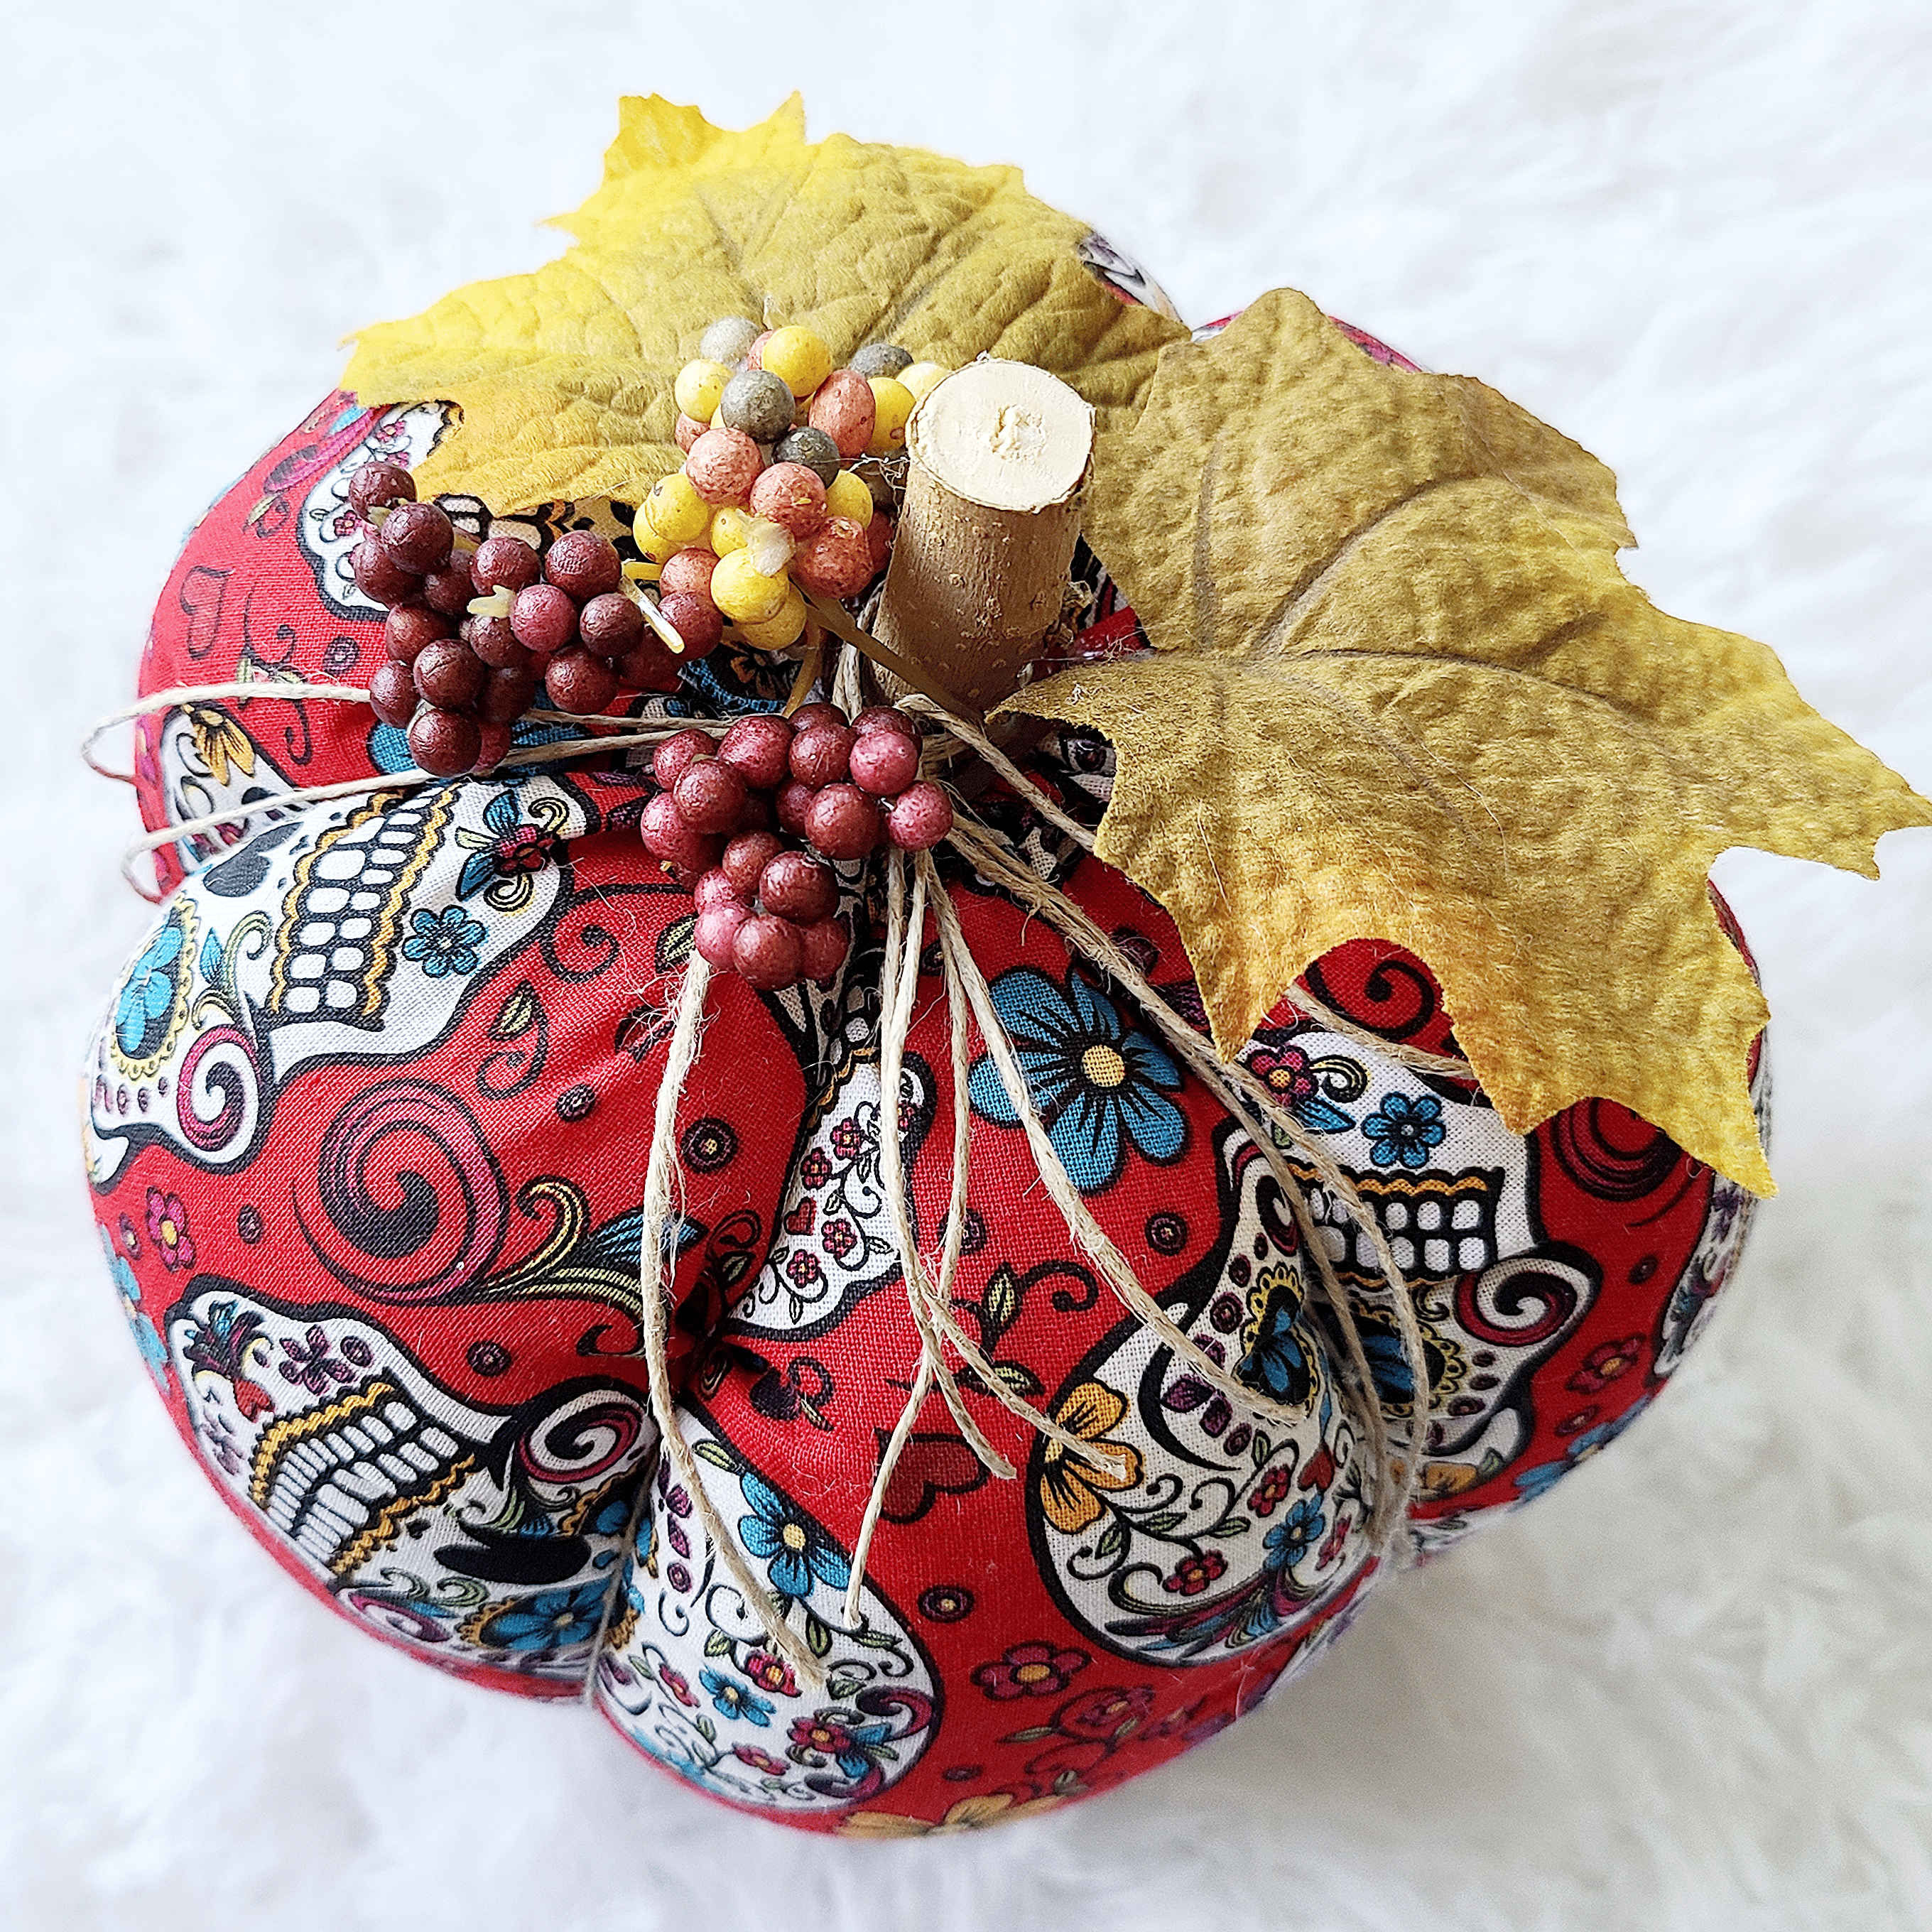
Trim up any extra strings or ends that you have and rearrange the fabric so it’s smooth between the dents and shaped the way you want. Add that little cutie to your fall decorations and tell everyone you made it yourself!