Make an Adorable Crochet Bunny Stuffy — Easy Beginner Pattern (4" x 6.5")
This beginner-friendly crochet pattern walks you through making a small, snuggly Bunny Stuffy — finished size approximately 4" wide across the face and 6.5" tall from ear tip to bottom. The pattern is written in US crochet terms and uses worsted weight yarn and a 4.00 mm (G) hook. It's a quick, customizable project that's great for gifts, nursery decor, or practicing basic shaping and embroidery.
If you're looking to add a touch of coziness and cuteness to your space, look no further than the Crochet Adorable Bunny Stuffy! This delightful creation is perfect for snuggling or simply adding a charming touch to your home decor. With its soft texture and lovable bunny design, it's sure to bring a smile to your face every time you see it. Whether you're a crochet enthusiast or just someone who appreciates adorable decor, this bunny stuffy is a must-have. So why wait? Add a sprinkle of whimsy to your life with this lovable crochet creation!
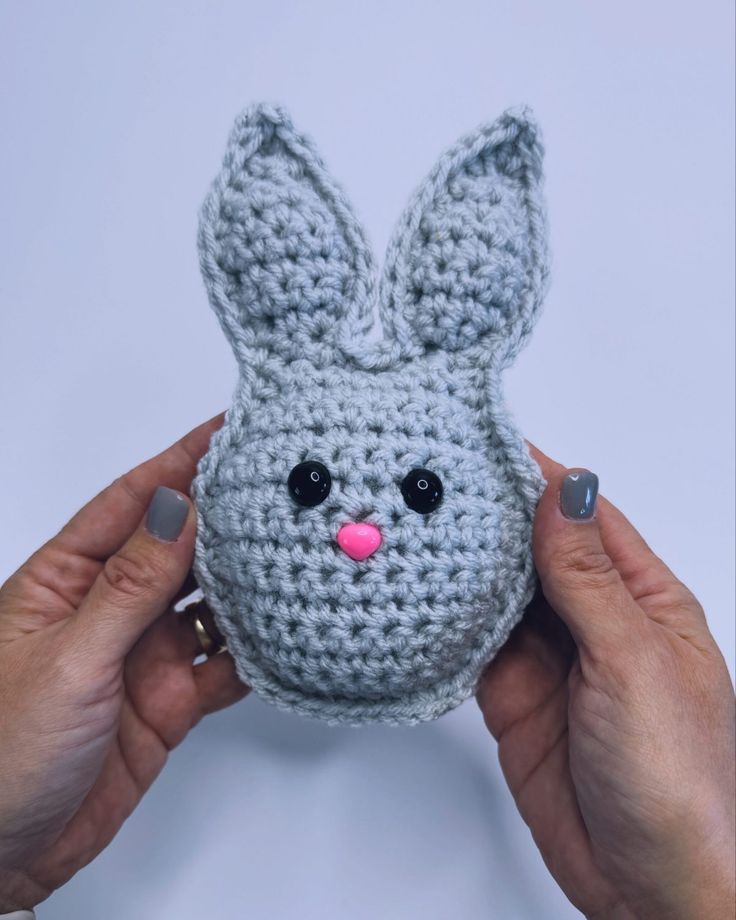
Handmade Crochet Bunny Stuffy — a small, snuggly bunny with long ears, perfect for snuggling or home decor.
What you will need for the Bunny Stuffy crochet pattern
- Worsted weight (#4) yarn
- 48 yds per coaster
- 4.00 mm (G) hook
- Yarn needle
- Scissors
- Poly-fil
- Optional: Safety eyes (10mm), safety nose (13mm), 1″ pom for bunny tail, small amounts of pink and black worsted weight yarn to embroider the eyes/nose
Pattern Notes
- * Beginner pattern.
- ** Written in US crochet terms.
- * Finished size: 4″ at the widest point across the face x 6.5″ tall from tip of ear to bottom.
- ** Gauge: 7 sc x 7 rows = 2″.
- * Chain stitch at the beginning of Row does not count as a stitch.
Stitch Key
- ch = chain
- dec = single crochet decrease
- hdc = half double crochet
- inc = single crochet increase
- rep = repeat
- sc = single crochet
- slst = slip stitch
- sp = space
- st = stitch
Pattern Instructions
Body (Make 2)
Ch 10.
Row 1:
sc in 2nd ch from hook and each remaining ch, ch 1, turn. (9)
Row 2:
sc in each st across, ch 1, turn.
Row 3:
sc, inc, sc in next 5, inc, sc, ch 1, turn. (11)
Row 4:
rep Row 2.
Row 5:
sc, inc, sc in next 7, inc, sc, ch 1, turn. (13)
Rows 6 – 9:
rep Row 2.
Row 10:
sc, dec, sc in next 7, dec, sc, ch 1, turn. (11)
Row 11:
rep Row 2.
Row 12:
sc, dec, sc in next 5, dec, sc, ch 1, turn. (9)
Row 13:
rep Row 2.
Row 14:
sc, dec, sc in next 3, dec, sc, ch 1, turn. (7)
First Ear
Row 15:
sc in next 2, ch 1, turn. (2)
Row 16:
inc in next 2, ch 1, turn. (4)
Row 17:
inc, sc in next 3, ch 1, turn. (5)
Rows 18 – 19:
rep Row 2.
Row 20:
dec, sc in next 3, ch 1, turn. (4)
Row 21:
dec, sc in next 2, ch 1, turn. (3)
Row 22:
dec, sc in next st, ch 1, turn. (2)
Row 23:
dec, ch 1, turn. (1)
Row 24:
sc.
Finish off and weave in ends.
Second Ear
Join yarn into 1st st on Row 14, ch 1. (The 7th sc on Row 14).
Row 1:
sc in same st as join and in next st, ch 1, turn.
Rows 2 – 10:
rep Rows 16 – 24.
Finish off and weave in ends.
NOTE: Continue to the border if using safety eyes/nose. To embroider the eyes/nose do that now on one of the bunny heads.
Border
Step 1:
Hold bunny heads together. Join yarn at bottom right corner, ch 1.
Step 2:
Work 2 hdc in corner, hdc in each row end up side of head and ear, slst in sc at tip of ear, ch 2, slst in same st, hdc down other side of ear, add Poly-fil to ear, hdc in next 3 on Row 14, continue to hdc up side of next ear, slst in sc at tip of ear, ch 2, slst in same st, hdc down other side of ear, add Poly-fil to ear.
Step 3:
Add eyes between Rows 8 & 9. Add nose between Rows 7 & 8, continue to hdc down side of head, finish adding Poly-fil to head, work 2 hdc in corner, hdc in each ch st across the bottom, slst to lst hdc.
Finish off, weave in ends.
OPTIONAL:
Add 1″ pom for cotton tail. On the back attach pom in the center between Rows 4 & 5.
Embroidering the nose –
Use a 10″ strand of pink yarn to embroider the
nose into Row 8. The nose will span 1.5 stitches
wide and be looped through twice. Be sure to
make sure it’s centered using the space in
between the ears as a guide. Finish off.
Embroidering the eyes –
Use a 10″ strand of black yarn to embroider each
eye into the top of Row 10. The eyes will span 1 stitch
wide and be looped through twice. Finish off.
Quick tips: Use safety eyes/nose if making for an adult-only project; if the toy will go to a child, embroider eyes and nose securely. Stuff the ears lightly for a softer, floppy look or more firmly for a structured ear.