Paper Plate Witch Craft
Creating paper plate witch crafts is a fun and versatile activity that children and adults can enjoy together. With just a few simple materials like paper plates, markers, and craft paper, you can unleash your creativity and make spooky or cute witches that add a festive touch to any Halloween decor. From drawing intricate witch hats to attaching yarn for hair, the possibilities are endless for customizing your paper plate witch. Whether you're looking for a quick and easy craft or a more detailed project, the magic of creating these whimsical witches is sure to bring a smile to everyone's face. So grab your supplies and get ready to brew up some crafty fun with these enchanting paper plate witch creations!

Supplies:
- paper plate
- green acrylic paint
- paint brush
- big googly eyes
- small wood slice
- red pipe cleaner
- glue
- cardstock paper : black and purple
- hole punch
- orange yarn
- pony beads
- scissors
How to Make a Witch Paper Plate Craft

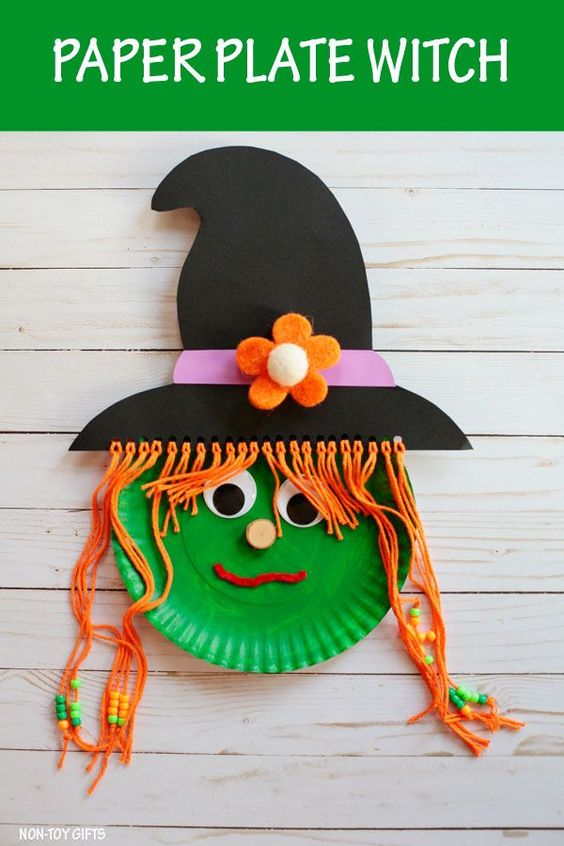
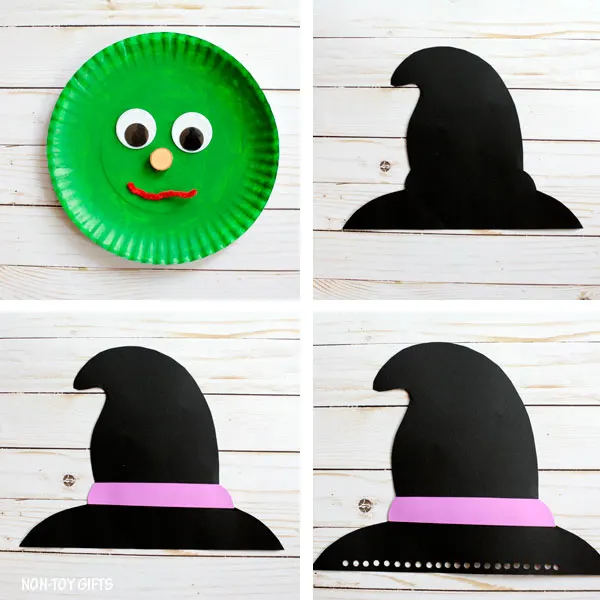
Step 1: Start by painting the paper plate green and let it dry completely. If you want to skip this step, you can start with a green paper plate. This is particularly a good idea if you plan on making the witch in the classroom with your students, and want a mess-free Halloween craft.
Step 2: Glue the googly eyes and the nose onto the paper plate. We used a small wood slice for the nose but a cork stopper can also work very well. You can paint the nose green or leave its natural color.
Also you can make a nose out of paper.
Step 3: Cut part of a red pipe cleaner and glue it at the bottom of the paper plate. This will be the witch’s mouth. As an alternative you can use a red or black marker to draw the mouth.
Step 4: Draw a hat on black construction paper and cut it out. Add a hat band made out of purple paper. Use hole punch to make a row of holes at the bottom end of the brim.

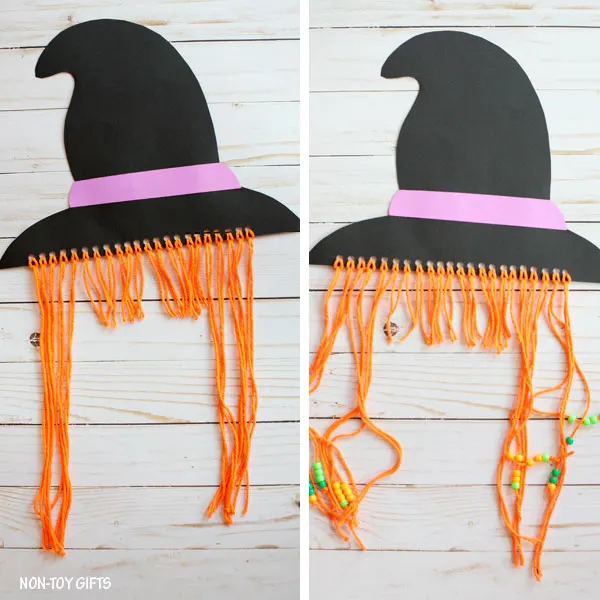
Step 5: Cut strands of 2 different sizes from the orange yarn (short for the bangs and longer for the sides) and thread them through the holes.
Step 6: Thread beads on some of the orange yarn or all of them (It’s up to you). You can also add a flower to the hat.