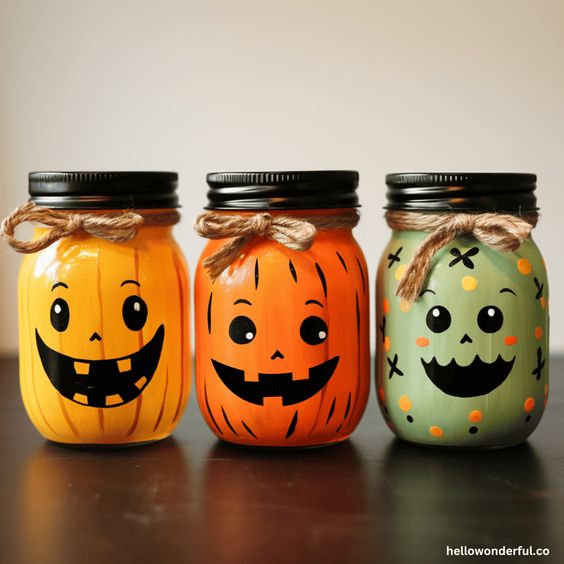
Spooky Cute Halloween Mason Jar Craft
If you're looking to add a touch of spooky cuteness to your Halloween decor, consider making your very own Halloween Mason Jar! This fun and easy DIY project involves painting mason jars with adorable and spooky designs like ghosts, pumpkins, or black cats. You can fill these jars with fairy lights or candies to create a charmingly eerie ambiance for your Halloween festivities. Get creative with googly eyes, ribbons, and paint to customize your jars to fit your Halloween aesthetic. Whether you display them on your porch, mantelpiece, or dining table, these Spooky Cute Halloween Mason Jars are sure to bring a smile to both trick-or-treaters and guests alike!

Halloween Jars – Materials
- Mason jars (clean and dry)
- Acrylic paint for glass or chalk paint (which adheres to jars very well). *You can also use spray paints. Make sure the paints you use can be used on glass.
- Paint brushes or foam brushes
- Primer (optional, but helps with paint adhere more)
- Paint markers (for face features)
- Sealer (like a spray sealer or Mod Podge)
How to Paint Mason Jars
1. Prepare the Jars
- Make sure your mason jars are clean. Wash them with soapy water, rinse, and allow them to dry completely. If there’s any residue or stickiness on the outside, you can use rubbing alcohol to clean it off. It also helps to to clean with alcohol on the outside to get rid of any greasy fingerprints or residue.
- (Optional) If you’re using a primer, apply a thin coat to the jar and allow it to dry completely.
2. Painting:
- Shake or stir your paint well.
- Dip your brush or foam brush into the paint, wiping off any excess.
- Apply the paint in thin, even layers.
- Let the first coat dry usually an hour or two.
- Apply a second coat if necessary and allow it to dry.
- Use shades of orange for the pumpkins and greens for Frankensteins.
- Optional: paint or spray paint your lids black or buy ready made jars with black lids
3. Adding faces
- You can use fine-tip paint brushes and paint to paint on faces, but we like to use paint markers because they are already fine-tipped and work well to add small details. If you want you can pencil in your face details and then paint over them.
- Add decorating touches last like lines around the jars or crosses or dot designs.
4. Sealing:
- To protect your painted jars, spray or brush on a clear sealer or Mod Podge. Let the sealer dry according to the product’s directions.
5. Decorating:
- Once your jars are painted and sealed, you can decorate them further with ribbons, twine, or add electric tea lights. These would be cute as jars to put out to line your home on Halloween night.
Conclusion:
Painting Halloween mason jars is a simple way to recycle old jars and add a spooky cute touch to your home! Kids can have fun decorating their faces and making adorable Halloween lanterns out of them too!