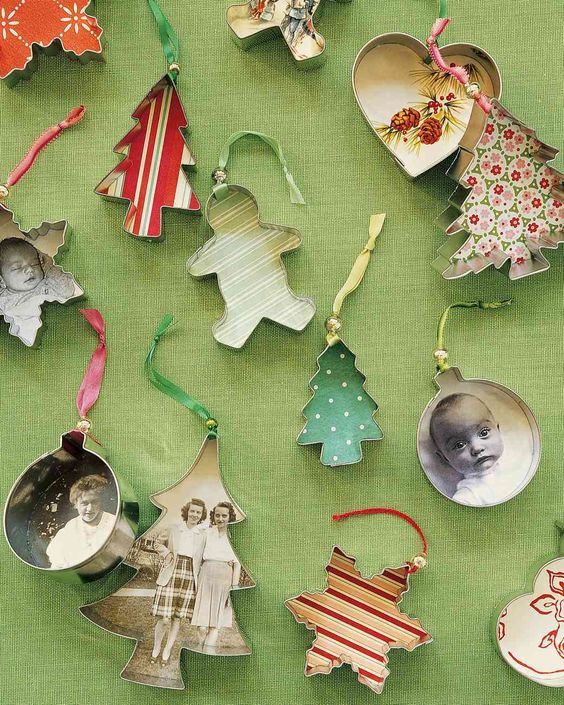
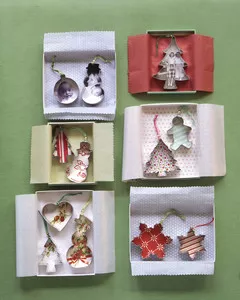
How to Make Cookie Cutter Ornaments
Creating cookies ornaments is a delightful way to add a touch of charm and sweetness to your holiday decorations. Whether you're shaping them into festive shapes like snowflakes, trees, or bells, or simply decorating plain round cookies with colorful icing and sprinkles, the process is bound to bring joy and creativity to your home. Not only do these edible ornaments make your space look and smell wonderful, but they also offer a fun activity for family and friends to enjoy together. So, grab your favorite cookie cutters, sprinkle on some imagination, and let the baking and decorating begin!
Materials
- Aluminum cookie cutters
- Patterned paper
- Color-photocopy pictures
- Card stock
- Pencil
- Scissors
- White craft glue
- Needle
- Ribbon
- Beads
Instructions:
Step 1:
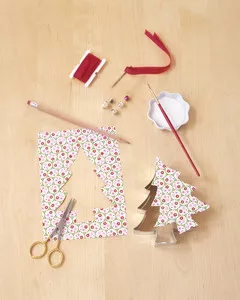
Choose patterned papers or color-photocopy pictures onto card stock. Trace cookie cutter on top; cut out.
Step 2:
Dab white craft glue along cutter's edge. Press paper in place; let dry.
Step 3:
Thread narrow ribbon through needle; poke between paper and cutter, and wrap ribbon around top of cutter. Slip a bead over ribbon's ends; knot.