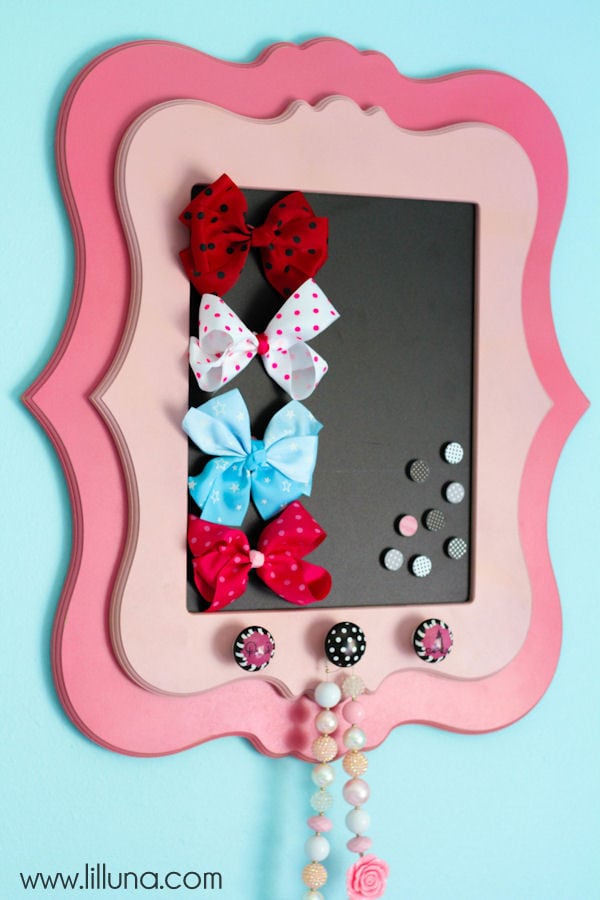
Framed Magnetic Bow Holder
The Framed Magnetic Bow Holder is a charming and practical addition to any bow enthusiast's collection. This innovative holder keeps your bows organized and easily accessible, allowing you to showcase your collection with style. The magnetic feature ensures that your bows stay securely in place while giving you the flexibility to rearrange them effortlessly. With its elegant frame design, this bow holder not only serves a functional purpose but also adds a touch of flair to your space. Whether you're a seasoned archer or just starting out, the Framed Magnetic Bow Holder is a delightful way to display and protect your bows with a friendly touch.

Supplies:
- Wooden Frame with wide edges
- Paint (craft or spray paint)
- Magnetic Sheet Metal (Bought mine at Hobby Lobby)
- Any saw that will cut sheet metal if you need to cut your piece
- Hot Glue Gun and glue sticks
- Magnets
- Scrapbook Paper
- Mod Podge
- Foam Brush
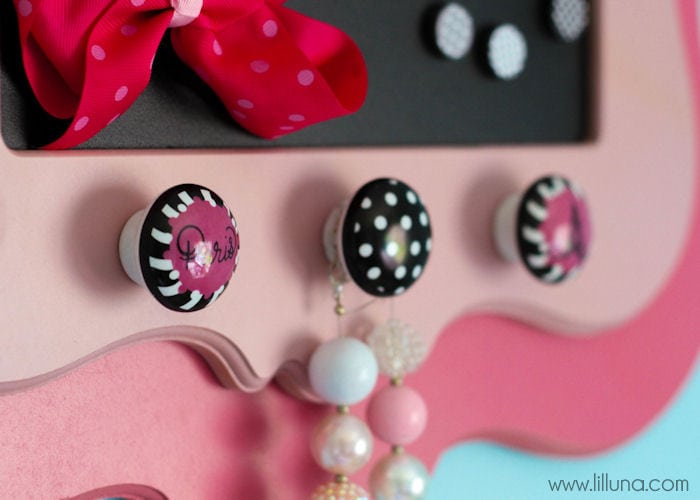
- Knobs
- Command Strips/Nails to hang
- Magnets
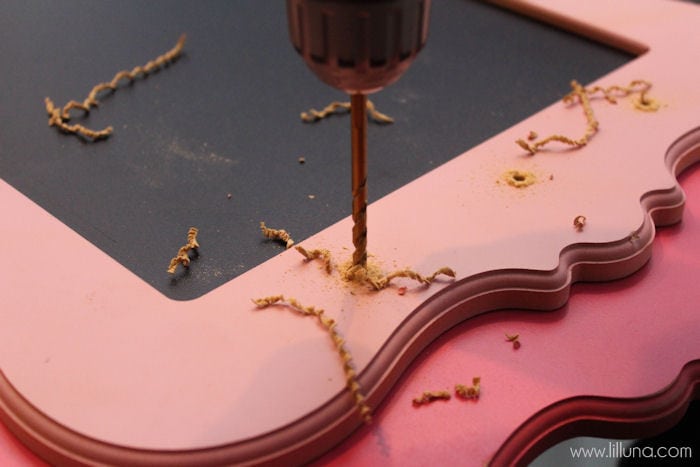
- Drill and Drill bits that match the diameter of the nut for the knobs
DIRECTIONS:
1. Paint your frame(s) and let dry.
2. On the backside of the frame, measure how large of a sheet of metal you can put on the inner-lip of the frame. For us it was 11 ⅛″ x 14 ⅛″. We cut our sheet metal slightly smaller than these dimensions.
**Any type of sheet metals works as long as magnets stick to it.
To cut the metal to the desired dimensions we used a 4″ skill saw with a sheet metal blade. You can also use a jigsaw with a fine-tooth metal blade.
To round sharp edges we used a metal file.
3. Insert the metal into the frame and hot glue the edges to securely hold it in.
{Recessed hole in back for the nuts that hold on the knobs}
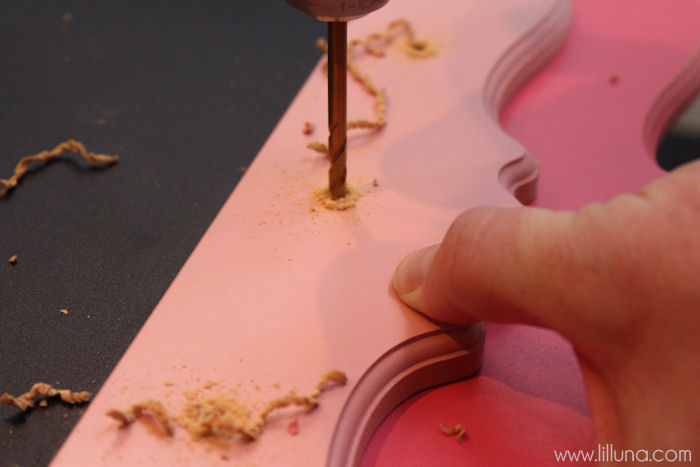
4. Drill holes where you want your knobs to be. If there is a thick bolt to hold on your knobs like there was for ours, drill a recessed hole in the back with a larger drill bit to accommodate the nut.
*NOTE: If threads on the bolt for the knob are too long simply use a metal hacksaw to cut off the excess.
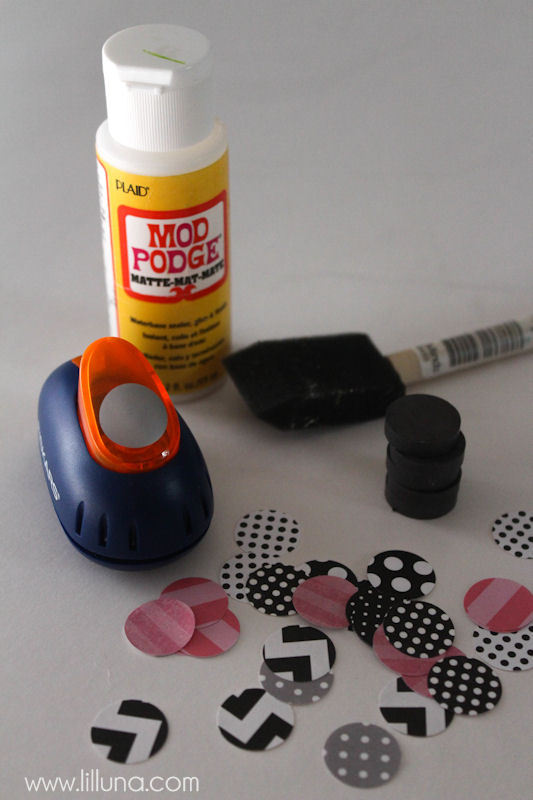
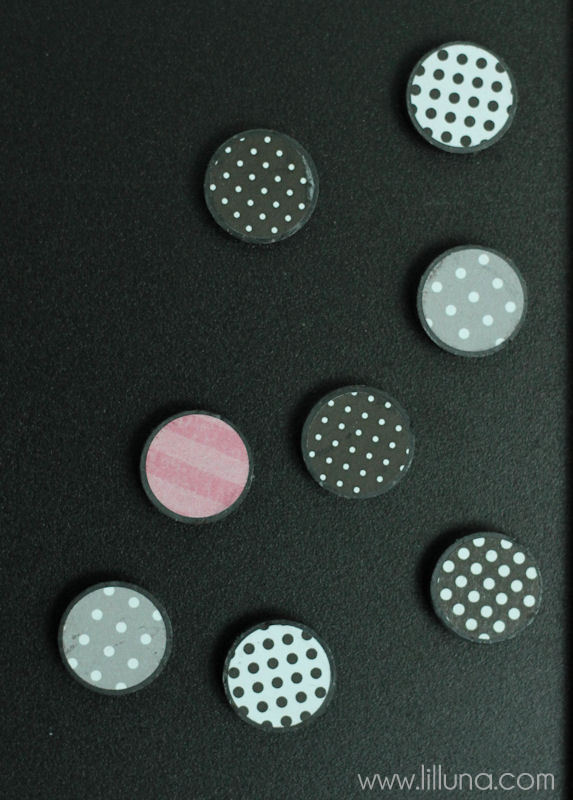
5. Cut pieces of scrapbook paper just slightly smaller than your magnets. Mod podge these on by applying a thin layer of mod podge with a foam brush and adhering the paper. Let dry.
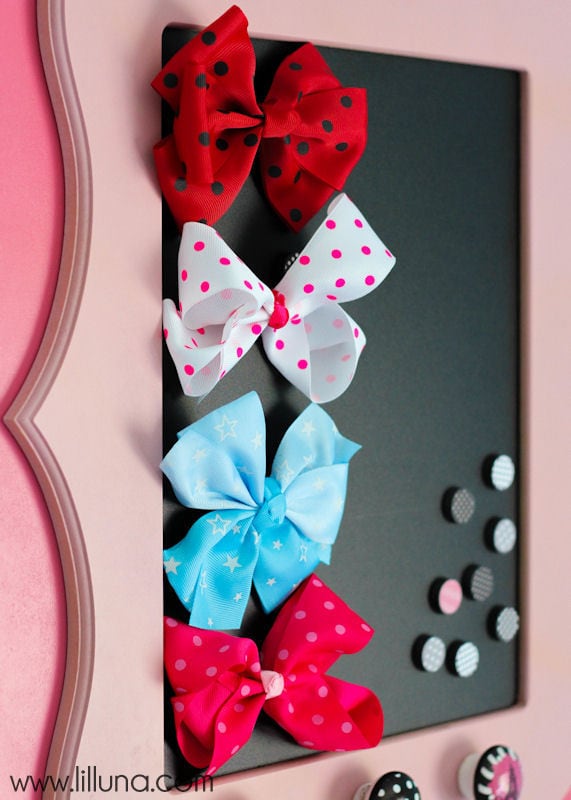
Place your magnets on your sheet metal (they provide a stronger magnetic connection) and your bows should stick right to the magnets!
All of the bows we had worked since most clips are metal