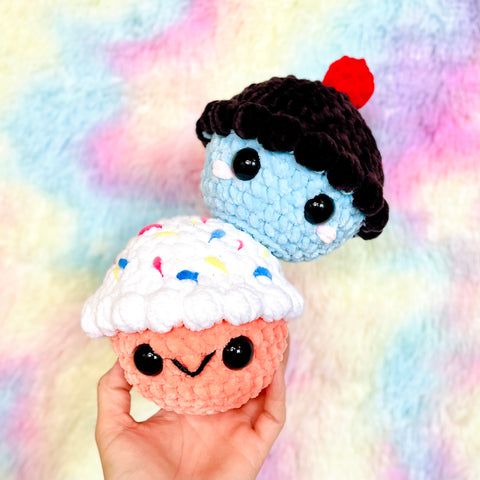
Crochet Beautiful Cupcake
Crocheting a beautiful cupcake is not only a fun and creative activity but also a deliciously adorable way to add charm to your home décor or give as a thoughtful handmade gift. With just a few basic crochet stitches and some colorful yarn, you can whip up a sweet cupcake complete with sprinkles and frosting that will make anyone smile. Whether you're a seasoned crocheter or just starting out, this project is perfect for all skill levels and allows you to unleash your imagination to customize your cupcake with different colors and designs. So grab your crochet hook, pick out your favorite yarn shades, and get ready to create a delightful treat that will bring joy to your day!

Materials:
- Weight 6 yarn
- Size J/6.0mm
- Stuffing
- 20 mm Safety Eyes or felt eyes
- Yarn needle
- Stitch Marker
Abbreviations:
- ch = chain
- sc = single crochet
- inc = increase (2 sc in next stitch)
- dec = invisible decrease (sc 2 stitches together)
- st = stitch
This pattern is worked in continuous rounds and using a stitch marker to mark the first stitch is recommended.
*Safety eyes are NOT recommended for children who are three years old or younger.
Bobble Stitch (bo):
If you are unfamiliar with the bobble stitch, here is how you make it:
Yarn over, insert hook into stitch and pull up a loop.
Yarn over again and pull through two loops, leaving 2 loops on your hook.
Continue these steps until you have 5 loops on your hook.
Yarn over and pull through all 5 loops. Chain 1 to finish stitch.
Cupcake:
R1: 8 sc in a magic ring
R2: 8 inc (16)
R3: (1 sc, inc) x 8 (24)
R4: 24 sc in the back loop only
R5: (3 sc, inc) x 6 (30)
R6-7 (2 rounds): 30 sc
R8: (4 sc, inc) x 6 (36)
R9: 36 sc
Switch to frosting colour:
R10: In the front loop only, (1 bo, sc) x 18 (36)
R11: In the back loops of the previous round, 36 sc
It is easier to see the back loops if you push the bobble stitches of the previous round down with your thumb as you work.
There should be two “rounds” of stitches to work through
R12: Work 36 sc around, working through both stitches
Insert safety eyes between rounds 7 & 8, about 4 visible stitches apart.
R13: (4 sc, dec) x 6 (30)
R14: (3 sc, dec) x 6 (24)
R15: 24 sc
Start stuffing the cupcake. Do not overstuff the bottom, or else it will not sit flat.
R16: (2 sc, dec) x 6 (18)
R17: (1 sc, dec) x 6 (12)
Stuff the top of the cupcake, making sure it is round.
R18: 6 dec (6)
Fasten off and sew hole shut. Embroider a mouth, sprinkles, or any other details you want to make your cupcake special!
Cherry
R1: 5 sc in a magic ring
R2: 5 inc (10)
R3-4 (2 rounds): 10 sc
R5: 5 dec (5)
Stuff, fasten off, and sew hole shut. Attach onto the top of the cupcake.