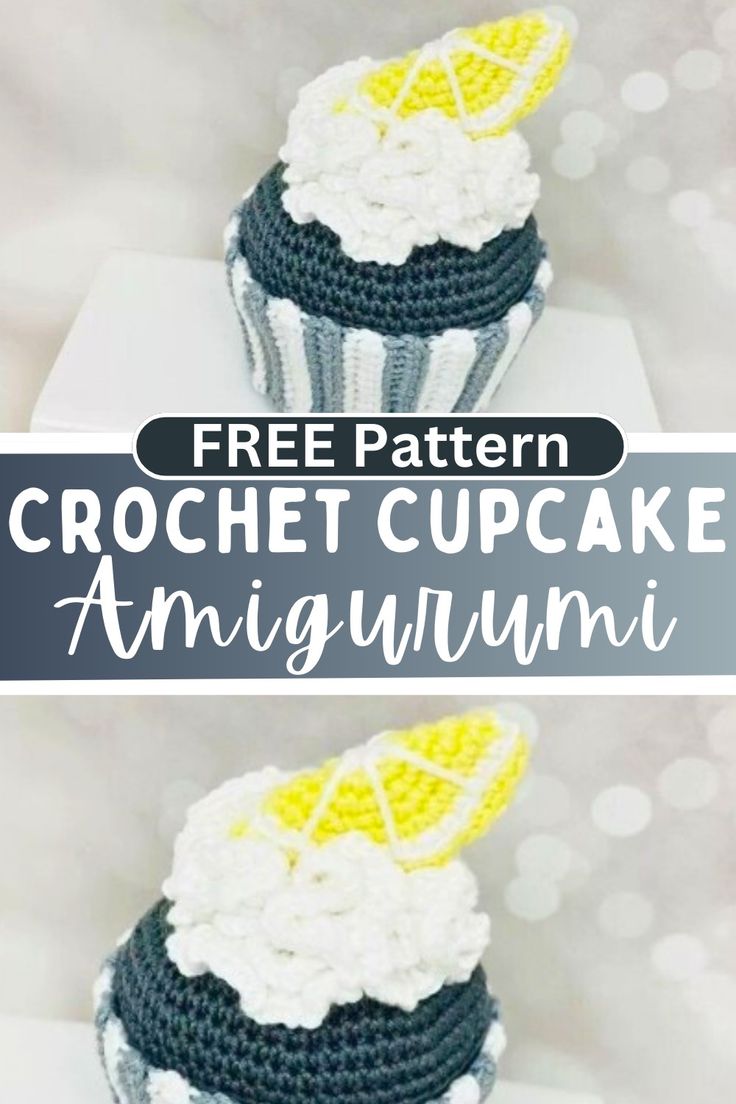
Crochet Cupcake Amigurumi
Crochet Cupcake Amigurumi is a delightful craft that brings a touch of sweetness to your day! These adorable mini cupcakes made from yarn are not only cute decorations but also make lovely handmade gifts for your friends and family. Using your crochet skills, you can create these tiny treats in various colors and designs, adding a fun and personal touch to your space. Whether you're a crochet expert or a beginner looking for a charming project, crafting these Cupcake Amigurumi is sure to bring a smile to your face and warmth to your heart. So grab your hooks, pick out your favorite yarn, and let's create some whimsical crochet cupcakes together!

Materials:
- White yarn – used for the cupcake liner and whipped cream
- Grey yarn – used for the cupcake bottom and the muffin
- Dark grey yarn – used for the muffin
- Yellow yarn – used for the lemon slice
- A crochet hook (size as per yarn manufacturer's guide)
- A yarn needle
- Stitch marker
- Fiberfill or stuffing material
Abbreviations
- ch(s) - chain
- hdc- half double crochet
- dc- double crochet
- sl st - slip stitch
- sc- single crochet
- BLO-back loop only
Step by step Pattern
CUPCAKE LINER (white/grey)
- Working in rows (ch1 and turn at the end of each row)
- Row 1: 13 ch, 1 sc in the 2nd ch from the hook, 11 sc (12); ch 1 and turn
- Row 2 - 51: working in BLO, sc even (12); ch 1 and turn
- Row 52: working in BLO, sc even (12)
- Join with a sl st the last sc of row #52 with the 1st one of the same row, and ch 1
CUPCAKE BOTTOM (grey)
- Rnd 1: 6 sc in a mr (6)
- Rnd 2: sc inc around (12)
- Rnd 3: (1 sc, inc) rep around (18)
- Rnd 4: (2 sc, inc) rep around (24)
- Rnd 5: (3 sc, inc) rep around (30)
- Rnd 6: (4 sc, inc) rep around (36)
- Rnd 7: (5 sc, inc) rep around (42)
- Rnd 8: (6 sc, inc) rep around (48)
- Rnd 9: (11 sc, inc) rep around (52)
- Leave long tail for sewing.
- Sew the bottom and liner together.
MUFFIN (dark grey)
- Rnd 1: 8 sc in a mr (8)
- Rnd 2: sc inc around (16)
- Rnd 3: (1 sc, 1 sc inc) rep around (24)
- Rnd 4: (2 sc, 1 sc inc) rep around (32)
- Rnd 5: (3 sc, 1 sc inc) rep around (40)
- Rnd 6: (4 sc, 1 sc inc) rep around (48)
- Rnd 7: (5 sc, 1 sc inc) rep around (56)
- Rnd 8: sc even (56)
- Rnd 9: (6 sc, 1 sc inc) rep around (64)
- Rnd 10 - 11: sc even (64)
- Rnd 12: working in BLO, (6 hdc, 1 hdc dec) rep around (56)
- Rnd 13: working in both loops now, sc even (56)
- Rnd 14: (5 sc, 1 sc dec) rep around (48)
- Rnd 15-23: sc even (48); start stuffing the cupcake
- Rnd 24: (4 sc, 1 sc dec) rep around (40)
- Rnd 25: (3 sc, 1 sc dec) rep around (32)
- Rnd 26: (2 sc, 1 sc dec) rep around (24)
- Rnd 27: (1 sc, 1 sc dec) rep around (16); finish stuffing
- Rnd 28: sc dec around (8)
- Cut the yarn and wave in end.
WHIPPED CREAM (white yarn)
- Rnd 1: 8 sc in a mr (8)
- Rnd 2: sc inc around (16)
- Rnd 3: (1 sc, 1 sc inc) rep around (24)
- Rnd 4: working in FLO, 3 sc in each st around (72)
- Rnd 5: insert the hook into the back loop of the 1st st of rnd #3, ch2 and work 3 dc into the same st; keep crocheting in the BLO, work 3 dc in each st around (72)
- Fasten off and leave a long strand of yarn to sew the whipped cream on top of the cupcake.
LEMON SLICE (white/yellow yarn)
- (white yarn)
- Rnd 1. Sc 6 in MC (6 sts)
- (yellow yarn)
- Rnd 2. Sc inc 6. (12 sts)
- Rnd 3. (Sc inc 1, sc 1) 6 times. (18 sts)
- Rnd 4. Sc 1, sc inc 1, (sc 2, sc inc 1) 5 times, sc 1. (24 sts)
- Rnd 5. (Sc inc 1, sc 3) 6 times. (30 sts)
- (white yarn)
- Rnd 6. Sc 2, sc inc 1, (sc 4, sc inc 1) 5 times, sc 2. (36 sts)
- (yellow yarn)
- Rnd 7(BLO). (Sc inc 1, sc 5) 6 times. (42 sts)
- With some white yarn, make a few long sts between round 1 and round 6.
ASSEMBLING
- With the right side out, fold the fruit slice in half.
- Using the long tail of yarn from Round 7, join the sts of Round 7. Insert your needle through the inner loop of the first st on one half of the fruit slice with a movement from the centre of the fruit slice to the outside.
- With a movement in the opposite direction, insert your needle through the inner loop of the first st on the other half of the fruit slice.
- Keep repeating steps 2 and 3 until all the sts are joined.