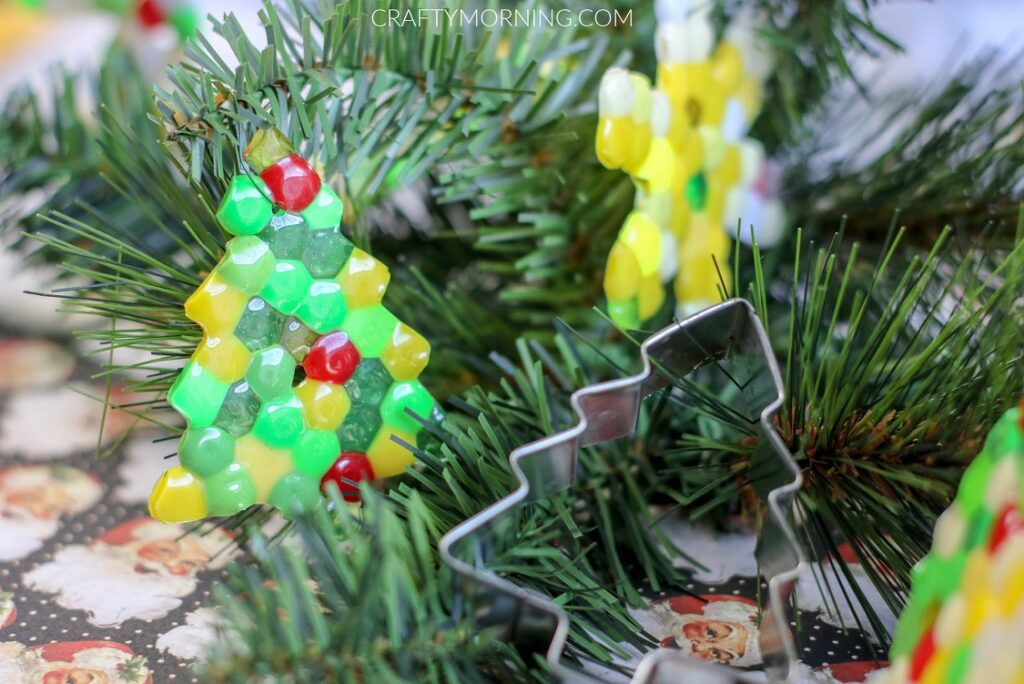
Make Melted Bead Ornaments in a Toaster Oven
Making melted bead ornaments in a toaster oven can be a fun and creative project for all ages! Simply arrange your colorful beads in a single layer on a heat-safe tray and preheat your toaster oven. Once ready, pop in your tray and watch as the beads slowly melt and fuse together to form unique and vibrant ornaments. Keep an eye on them to prevent overheating and ensure they cool down before handling. Whether you're crafting with kids or looking for a relaxing DIY activity, creating these beautiful decorations is a delightful way to add a pop of color to your holiday décor.
Ingredients
- Plastic pony beads
- Metal cookie or clay cutters
- Baking pan
- Aluminum foil
- Drill fitted with ⅛ inch drill bit
Instructions
- Preheat oven to 400 degrees.
- Line baking pan with aluminum foil to protect the pan and make it easier for the ornaments to release from the pan.
- Place cookie cutters on aluminum foil in baking pan. Fill each ornament with a single layer of beads. Use a toothpick or bamboo skewer to arrange the beads.
- Carefully put the baking sheet in the oven and melt the beads. The time can vary based on the type of bead. Begin checking at 5 minutes. (My ornaments took 15 minutes to melt.) The ornaments are ready when the beads are melted and the hole in each bead has disappeared.
- Remove from oven and allow to cool completely prior to removing from the cookie cutters. To remove the ornaments, gently pull the sides of the cookie cutter away from the ornament.
- Use the drill to create a small hole in each ornament for hanging.
Notes
Note: Please be aware that the beads do release plastic smells/fumes as they melt. To avoid the smell, you can use a toaster oven outside.
No comments
Write a comment