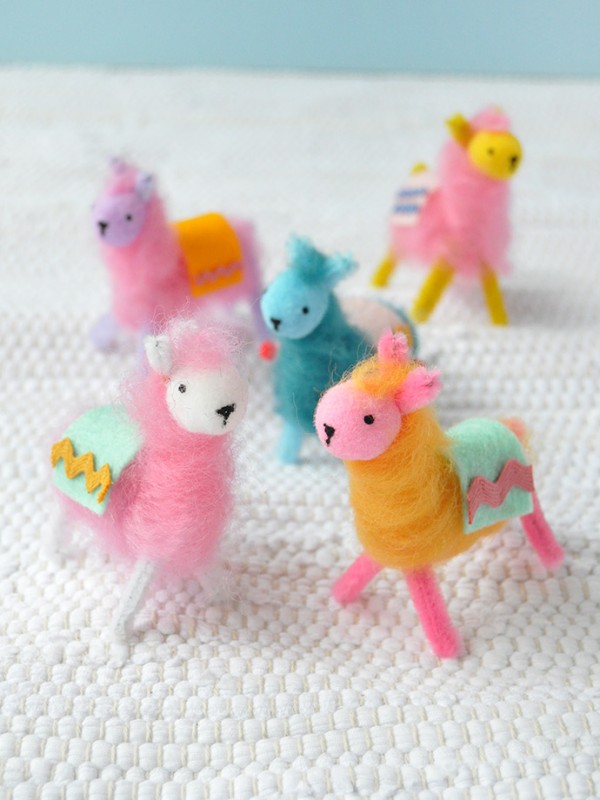
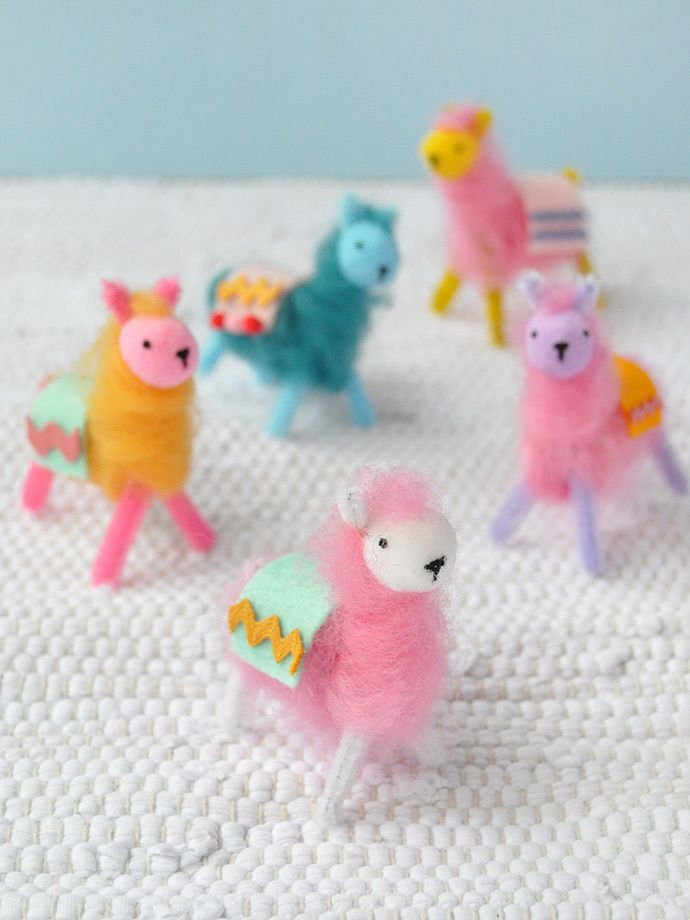
Pipe Cleaner And Wool Llamas
Creating pipe cleaner and wool llamas can be such a delightful and crafty experience! These quirky little creatures are fantastic to make with their fluffy wool bodies and bendable legs made of colorful pipe cleaners. Whether you're looking to add a touch of whimsy to your home decor or searching for a fun crafting project, pipe cleaner and wool llamas are a lively choice. You can let your creativity run wild by customizing their personalities with different colored wool and playful accessories like tiny scarves or hats. So gather your supplies and get ready to craft your very own herd of charming pipe cleaner and wool llamas that will bring a smile to anyone's face!
What you need:
- Pipe cleaners
- Scissors
- White glue (and/or hot glue)
- Ric rac (or other trim)
- Pom poms (to match your pipe cleaners)
- Felt
- Black acrylic paint
- Toothpick
- Wool (we used spearmint, cheesecake, and pink)
Instructions:
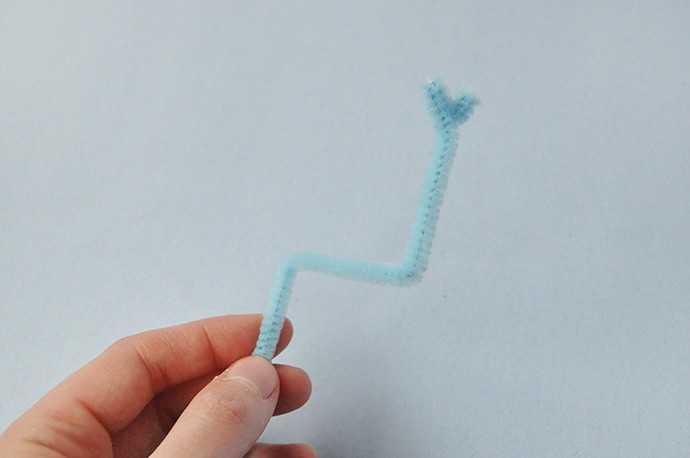
Step 1
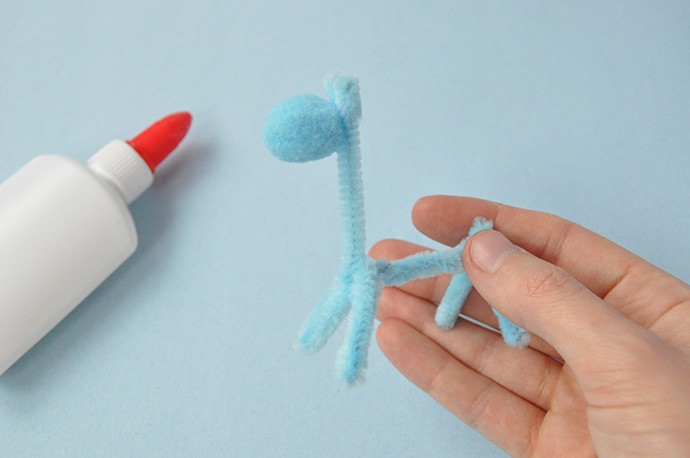
Bend your first pipe cleaner into this shape – start by folding two small ears connected to the neck, and then bending to form the body.
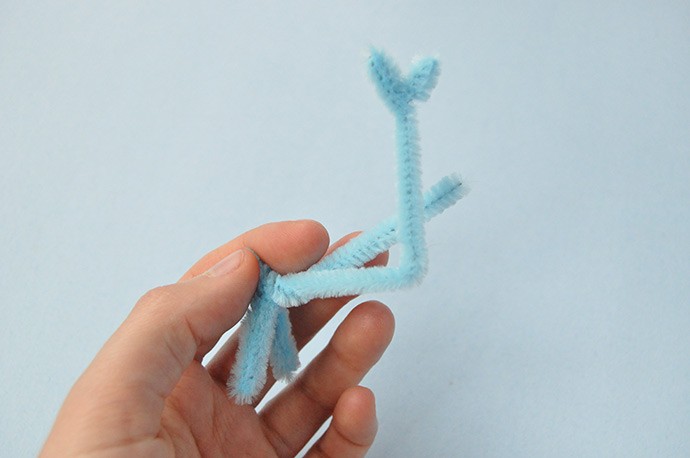
Step 2
Continue bending this same pipe cleaner – at the end of the body you just made, fold the pipe cleaner down and back up to form a leg, bend a little tail sticking up, and then go back down and fold up again to form the second leg. You should have some excess pipe cleaner, so twist that around the body to strengthen it.
Step 3
With a second matching pipe cleaner, bend the front two legs in the same way that you just made the back ones, twisting it to attach in place, and cutting off any excess pipe cleaner. Glue a matching pom pom onto the neck to form the llama’s face.

Step 4
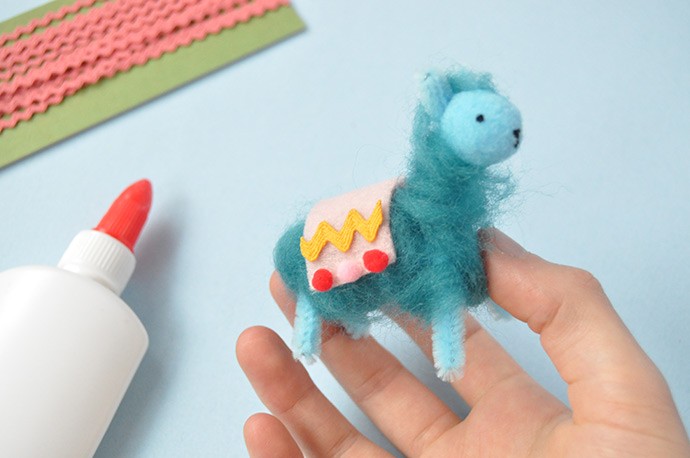
Now the fun part: adding the wool onto the llama! We used a few different shades and textures of wool from The Woolery – the colors we picked out are super bright and fun for some playful rainbow llamas, but if you wanted a more natural look these mini llamas would be adorable in whites, greys, and browns too! Gently separate a piece of wool and puff it up a bit with your fingers. Begin wrapping the strip loosely around the body and up the llama’s neck. This step will take some playing with to get just right. You can use small dabs of glue to secure the wool in place if needed, and add on additional small pieces of wool if you need a little more. We like to use one piece for the body and neck, and then a tiny piece glued on top of the llama’s head as hair.
Step 5
Add a felt blanket on top (glued in place) and decorate with trim and mini pom poms. For the llama’s face, use a toothpick to apply the paint to look like eyes, a nose, and mouth.