Clay Thumbprint Snowman Ornament
Creating a Clay Thumbprint Snowman Ornament is a delightful way to spread holiday cheer and capture memories. Using just a few simple materials, you can press your thumbprints onto the clay to form adorable snowman figures that can be personalized with colorful scarves, buttons, and tiny faces. These handmade ornaments are not only a fun craft activity but also make heartwarming gifts for loved ones. So, gather your family or friends, roll up your sleeves, and get ready to craft some charming snowman ornaments that will surely bring smiles all around!
What you need:
1. Polymer clay (white, black, orange, and other colors for embellishments)
2. Cute little thumbs
3. String, twine, or ribbon
4. Optional: jewelry wire
5. Optional: Glaze
What you do:
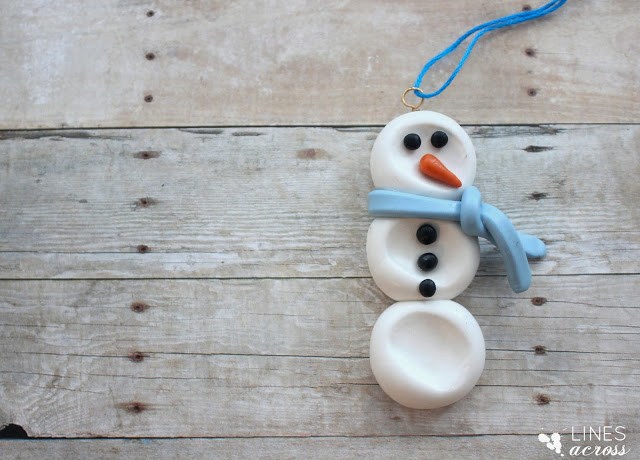
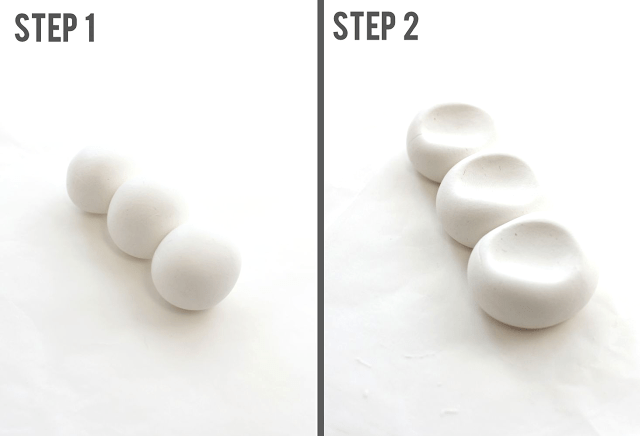
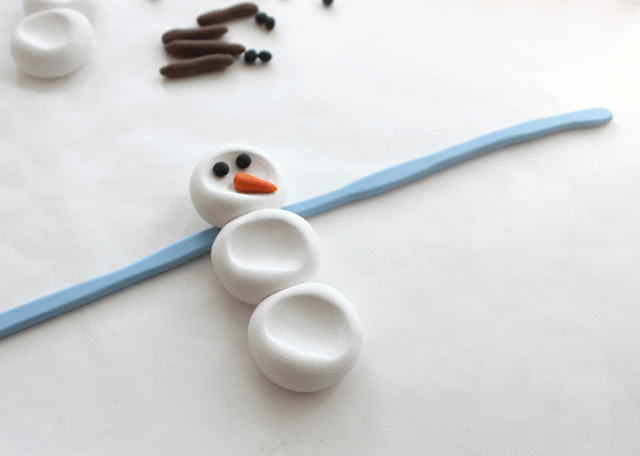
1. Start by rolling three even balls of white clay. I used plain white but a shimmery white would also be beautiful.
2. Stack the three balls closely together. Now help your kids press their thumbs evenly into each of the three balls. Polymer clay is a little dense to work with, so they probably will need help. Make sure they wash their hands right away after touching the clay.
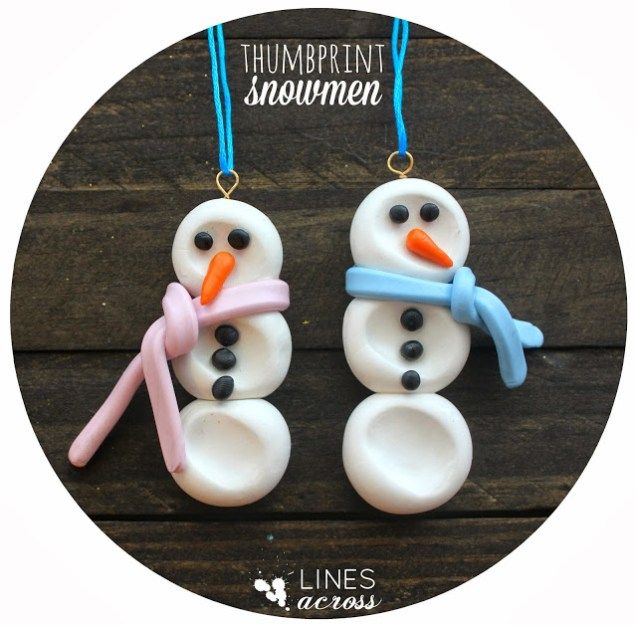
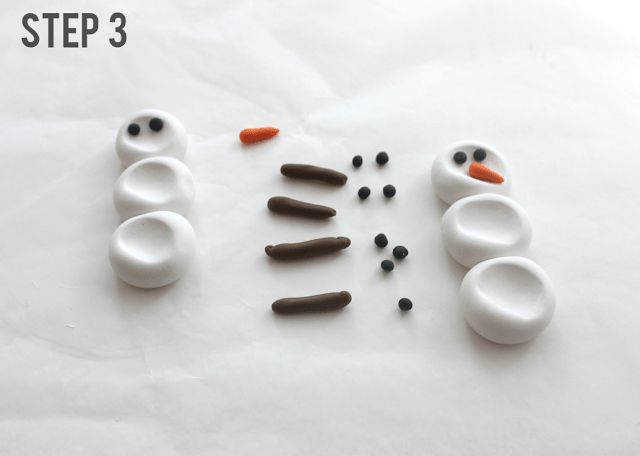
3. Add decorations. I thought about adding arms and a hat, but stuck with just the basics. To Make the scarf, I rolled out a long piece of clay. Then I slightly flattened it and wrapped it around the snowman’s neck.
4. Optional – Use jewelry wire to make a loop. Stick this into the top of your snowman before you bake it. If you’re not familiar with jewelry making tools at all, you can just glue ribbon to the back of the ornament after it is baked.
5. Bake the ornaments. Follow the instructions on the brand of polymer clay you used. The size and color of the ornament will not change after you bake it.
6. Optional – Let the ornament fully cool. Paint a thin coat of Glaze
over the ornament for a finished look. (I also added a dab of glue around the jewelry wire to make sure it was fully secure.)