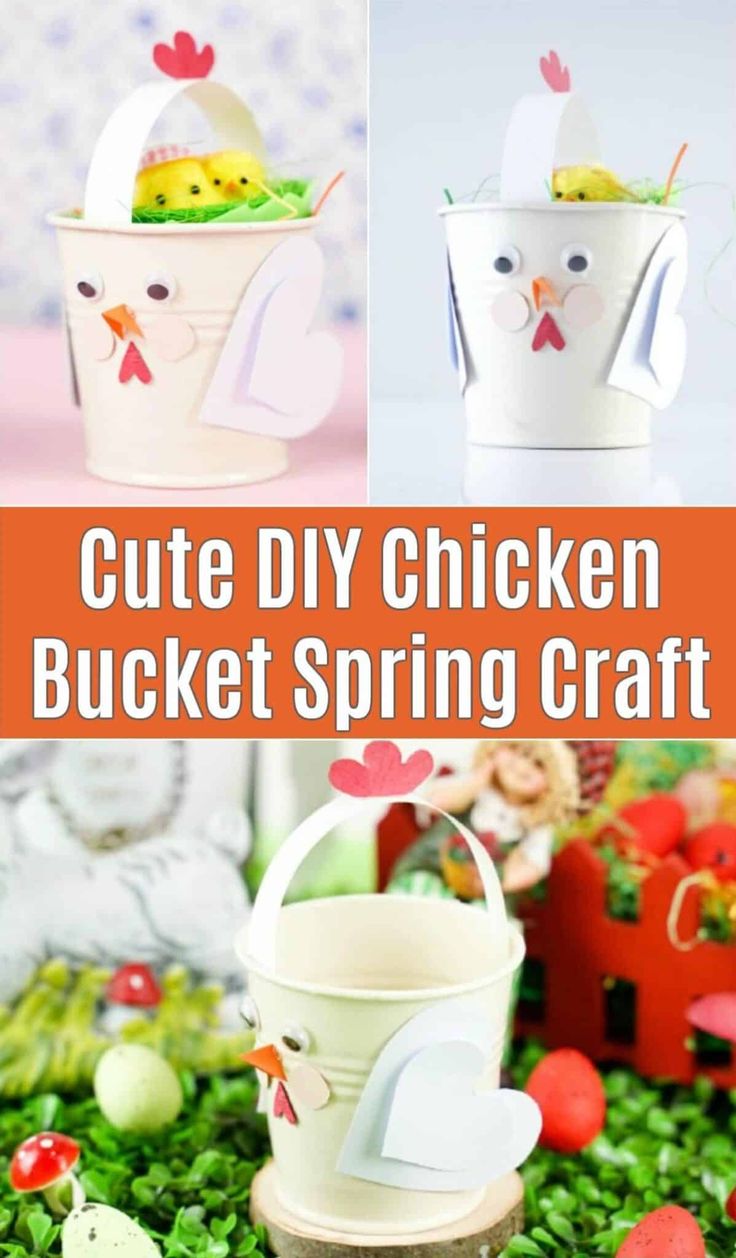
Upcycled Bucket Chicken Spring
Looking to add some charm to your backyard this spring? Why not try creating an upcycled bucket chicken spring craft! This project is easy and fun to make. It can be completed in no time. It is also a great project that can be made by kids and adults alike. This project is a great way for families to engage and spend time with their kids and loved ones. It is a great addition to your handmade items.
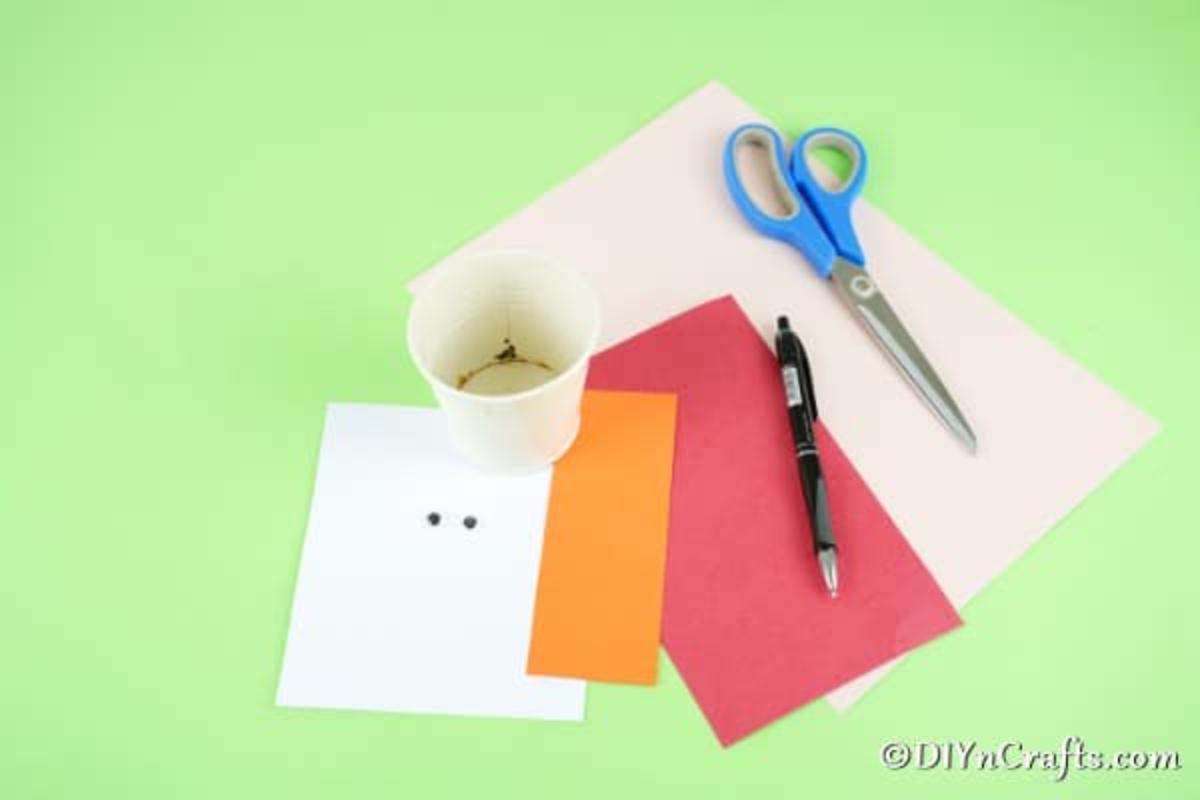
Supplies Needed
- Small tin bucket
- White craft paper
- Orange craft paper
- Red craft paper
- Googly eyes
- Pen
- Scissors
- Craft glue
How to Make a Bucket Chicken Spring Craft
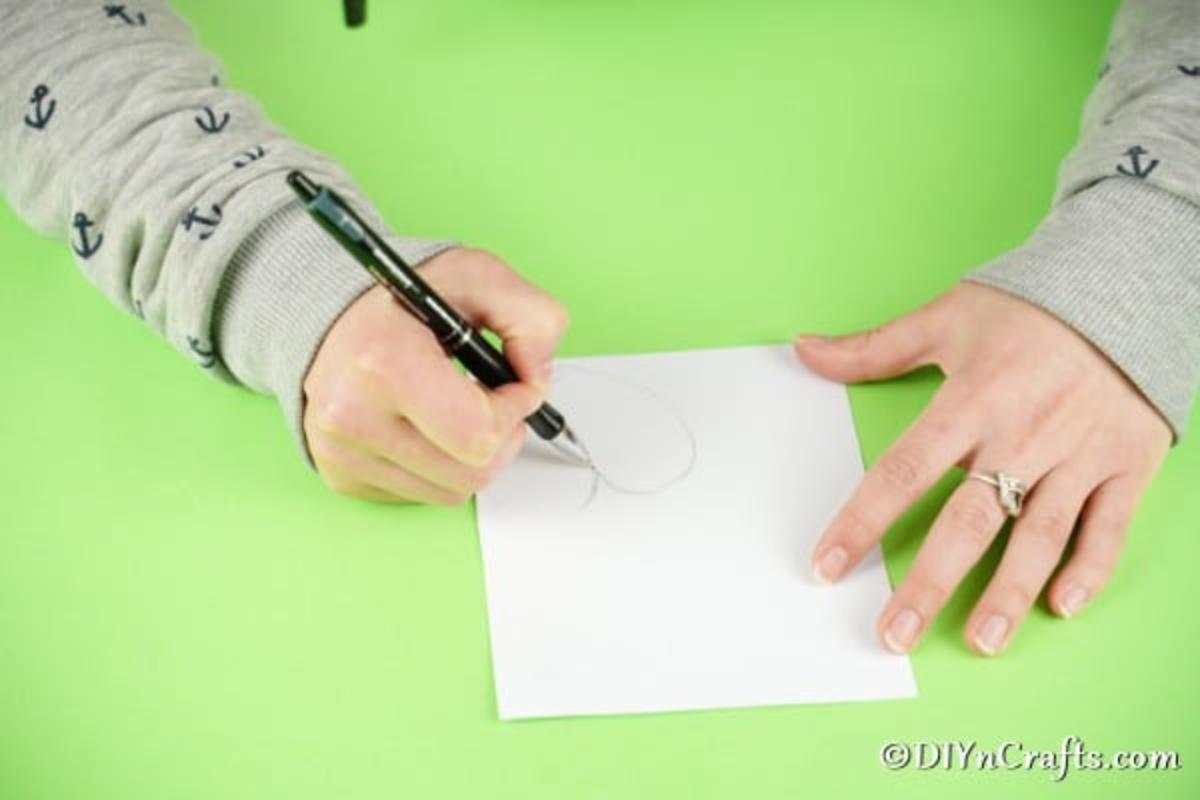
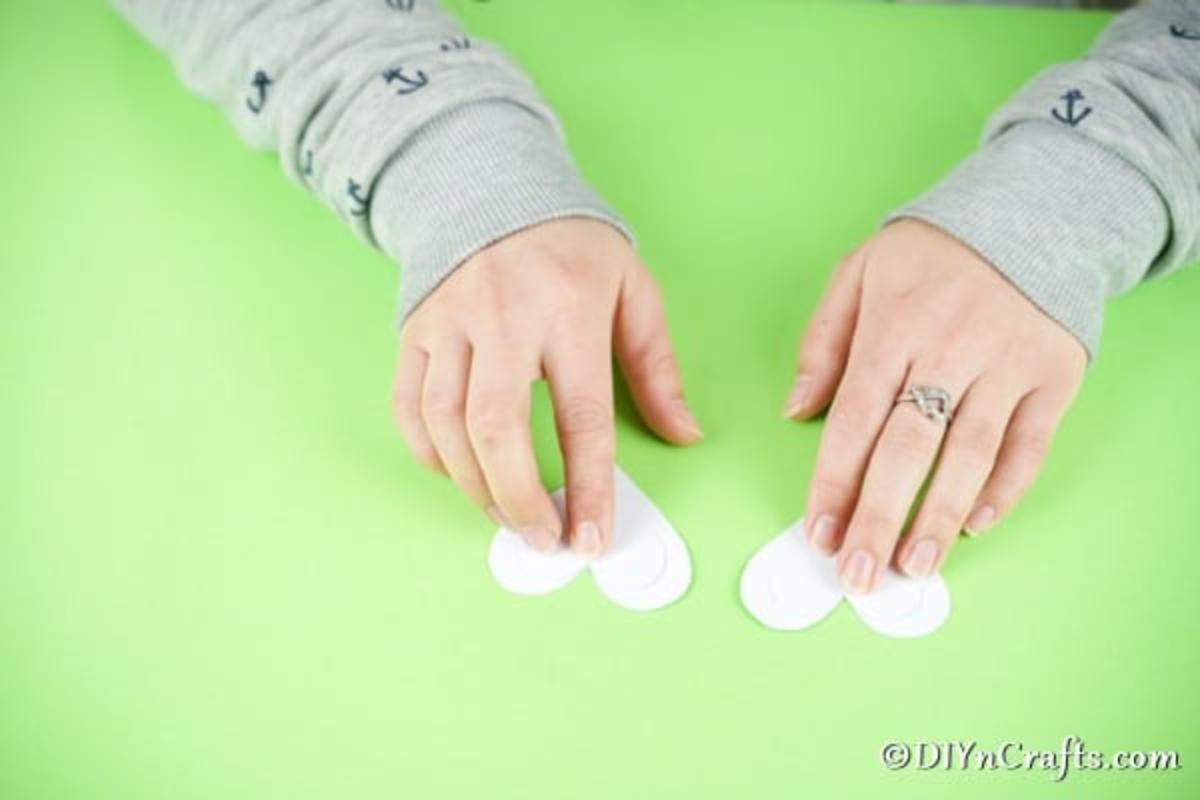
For this craft, you will start by tracing some of the shapes onto paper. On the white paper, you will draw 4 hearts. Two large and two medium-sized hearts.
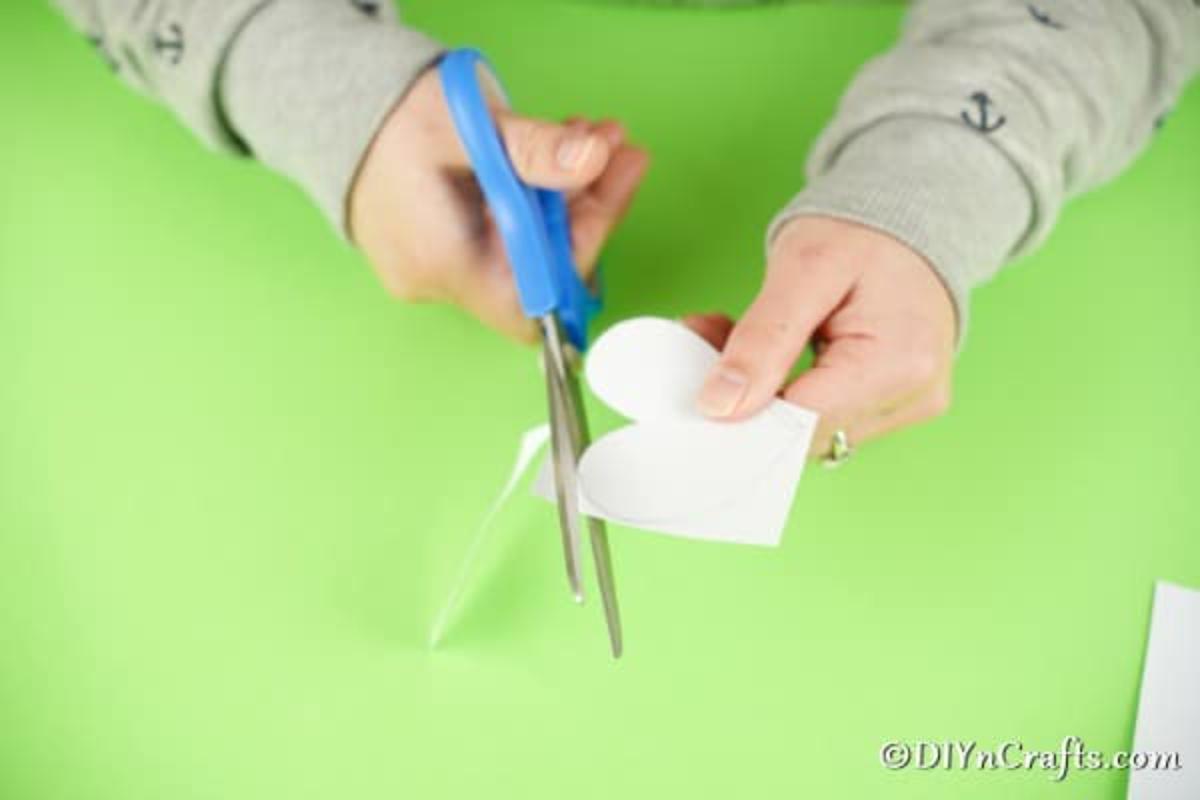
Cut out the hearts.
Glue the hearts so that one medium is on top of one large, and you have created two sets. Set these aside for later.
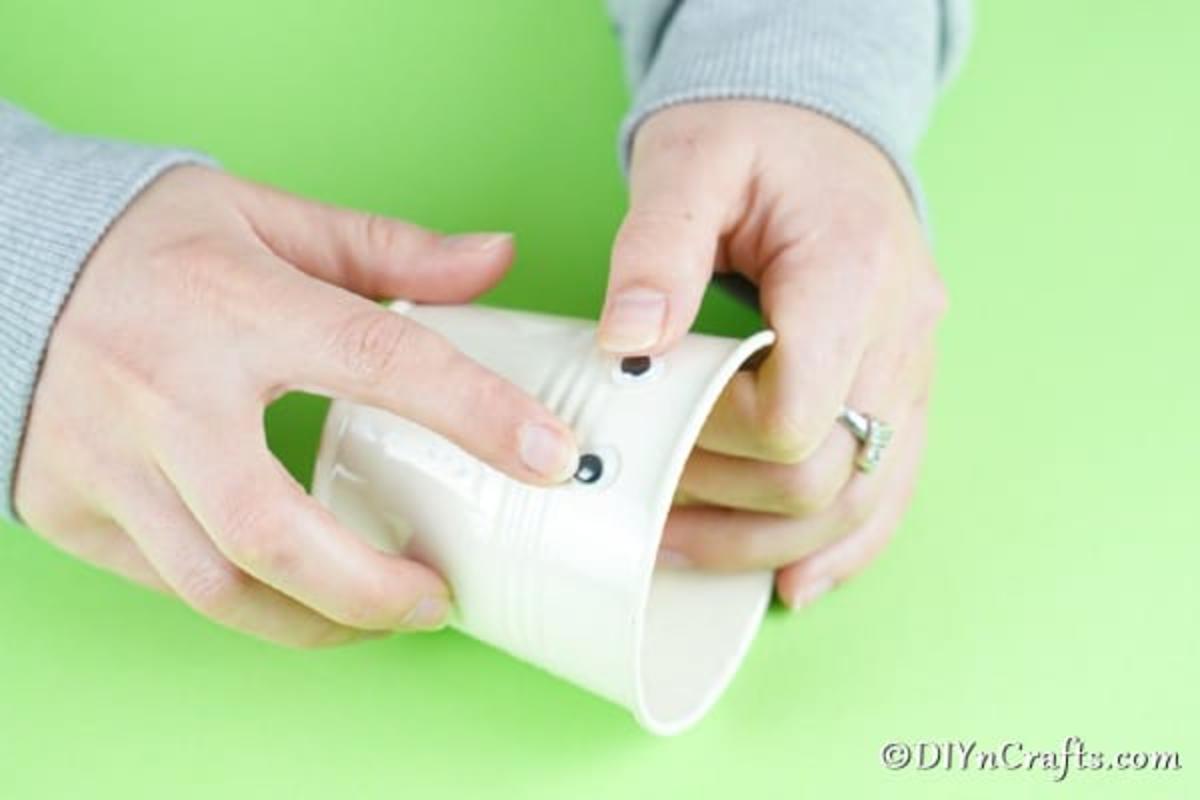
Now, you will glue the googly eyes onto the bucket toward the top.
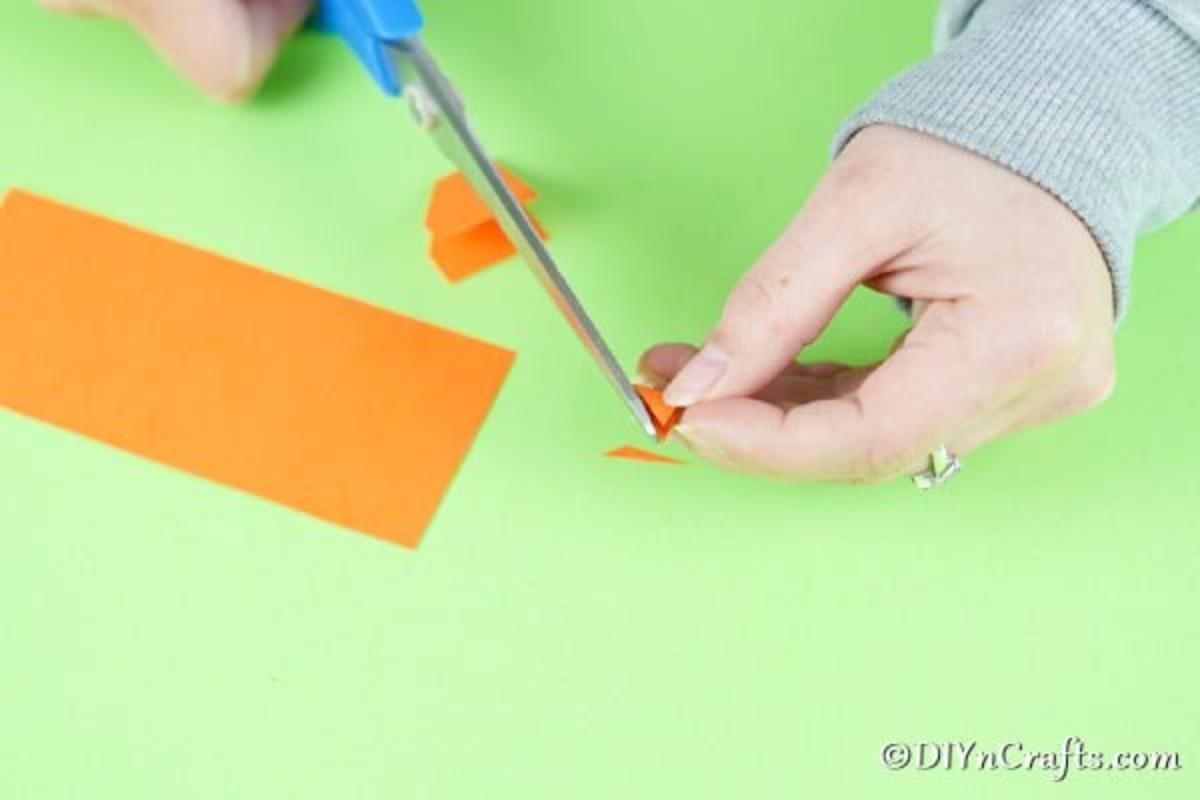
On the orange paper, you will cut out a small triangle to use as the beak.
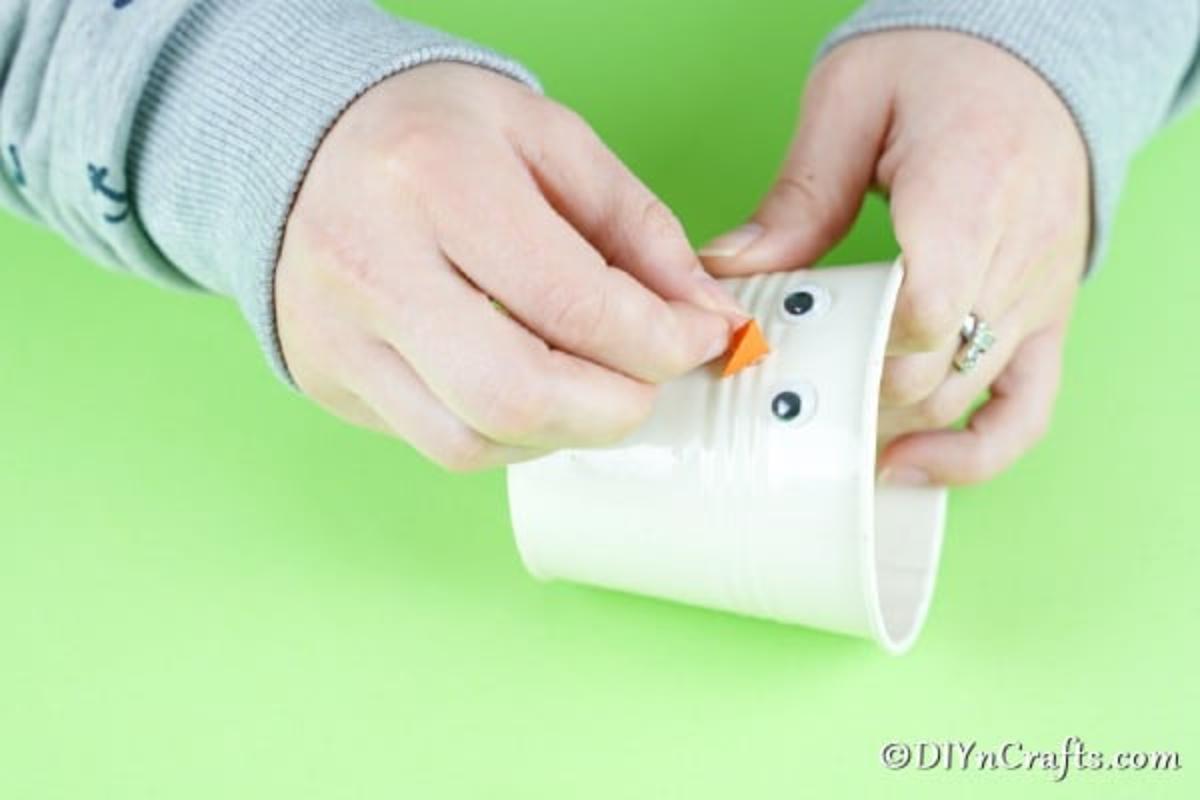
Glue the beak in place below the eyes.
Now, you will draw a small red heart and a small red wiggly shape and cut them out. These will be used as the comb and wattle on the chicken. The comb is the part on top of the rooster head that is the wiggly shape, and the comb is the red part on their neck.
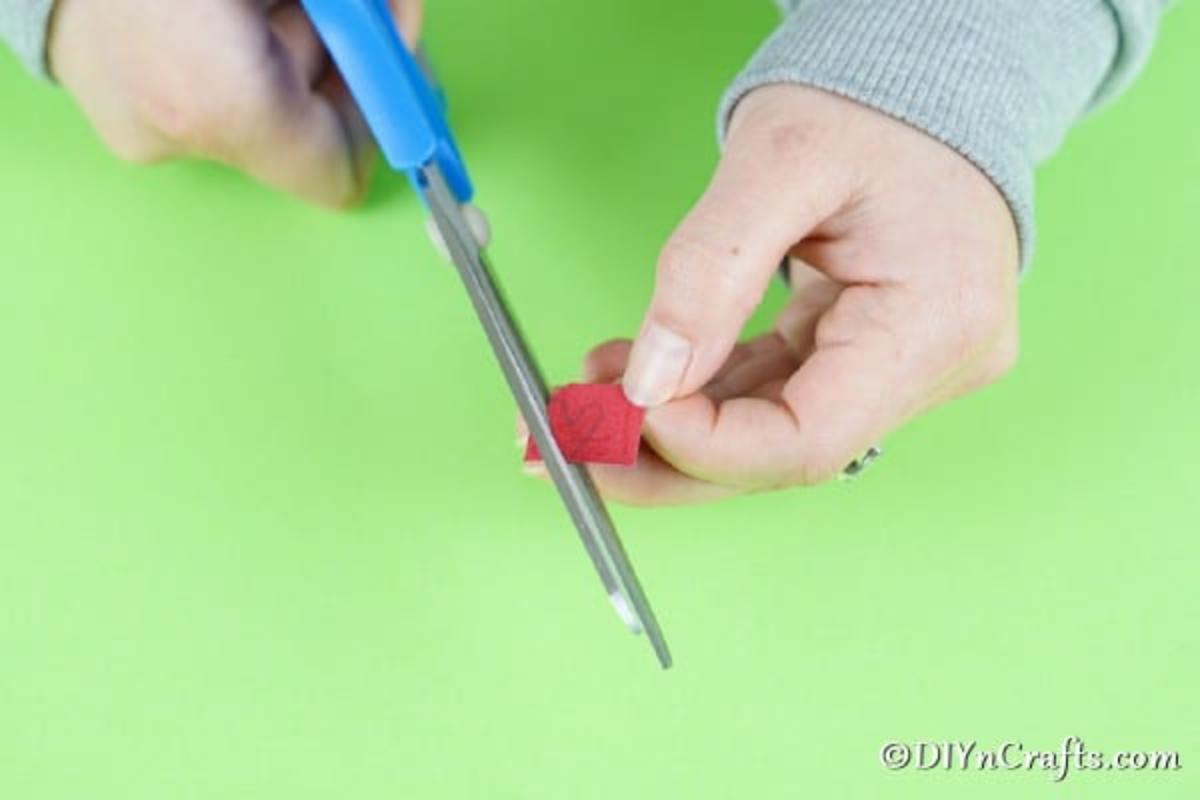
Glue the red heart upside down below the beak.
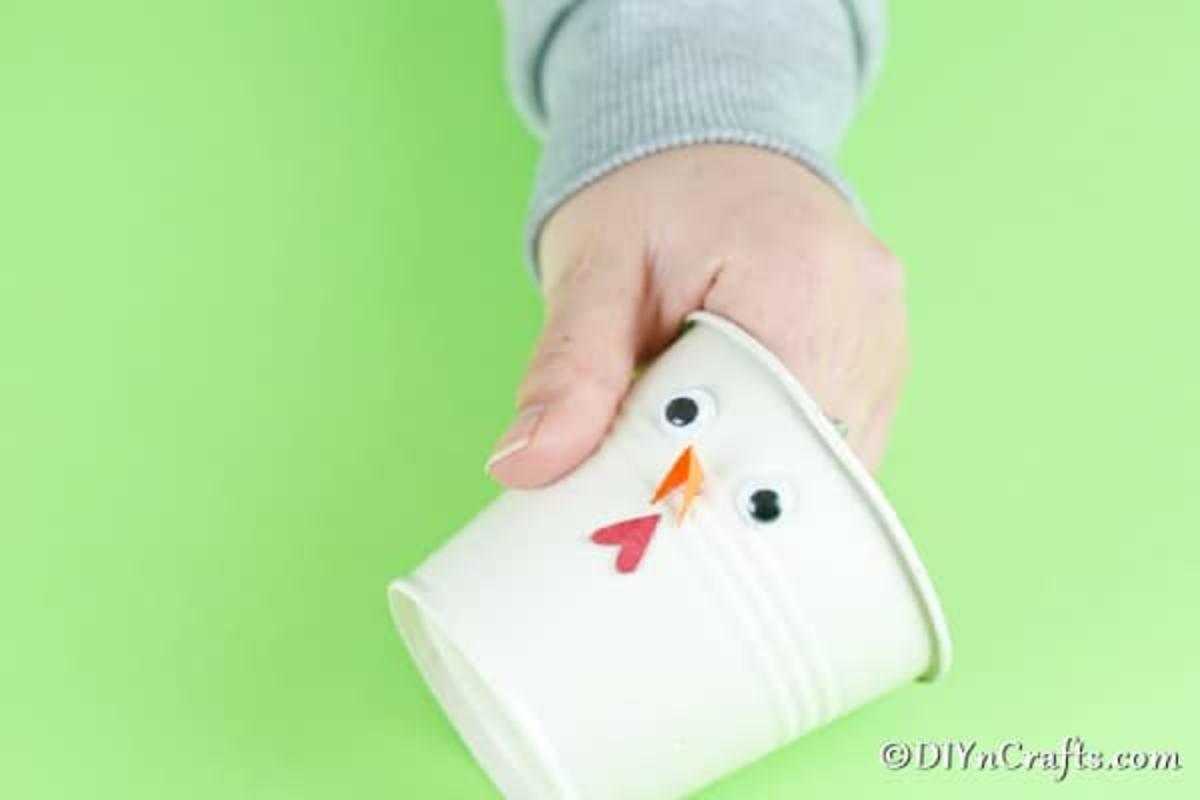
Use white or cream-colored paper to cut out 2 small circles and glue them onto the bucket beside the nose to create "cheeks".
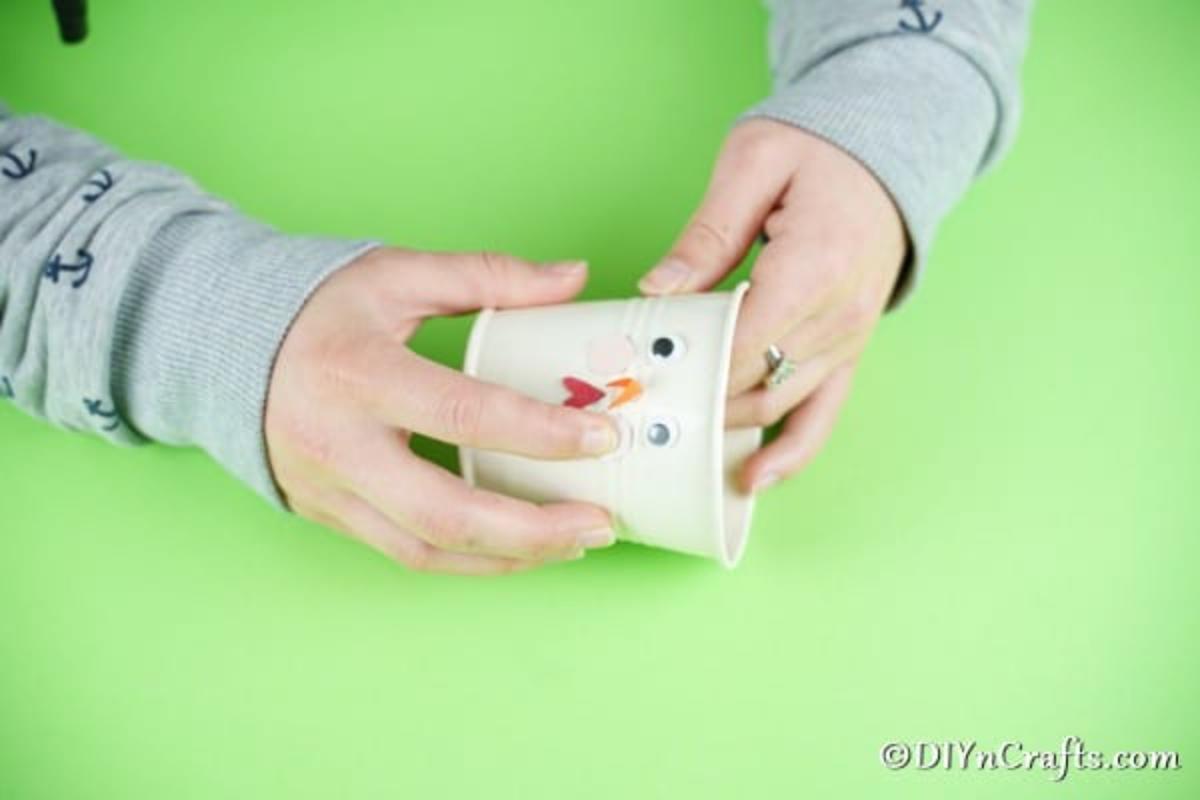
Glue those hearts you made earlier, one on each side of the bucket, at an angle so they are sideways with the points facing forward.
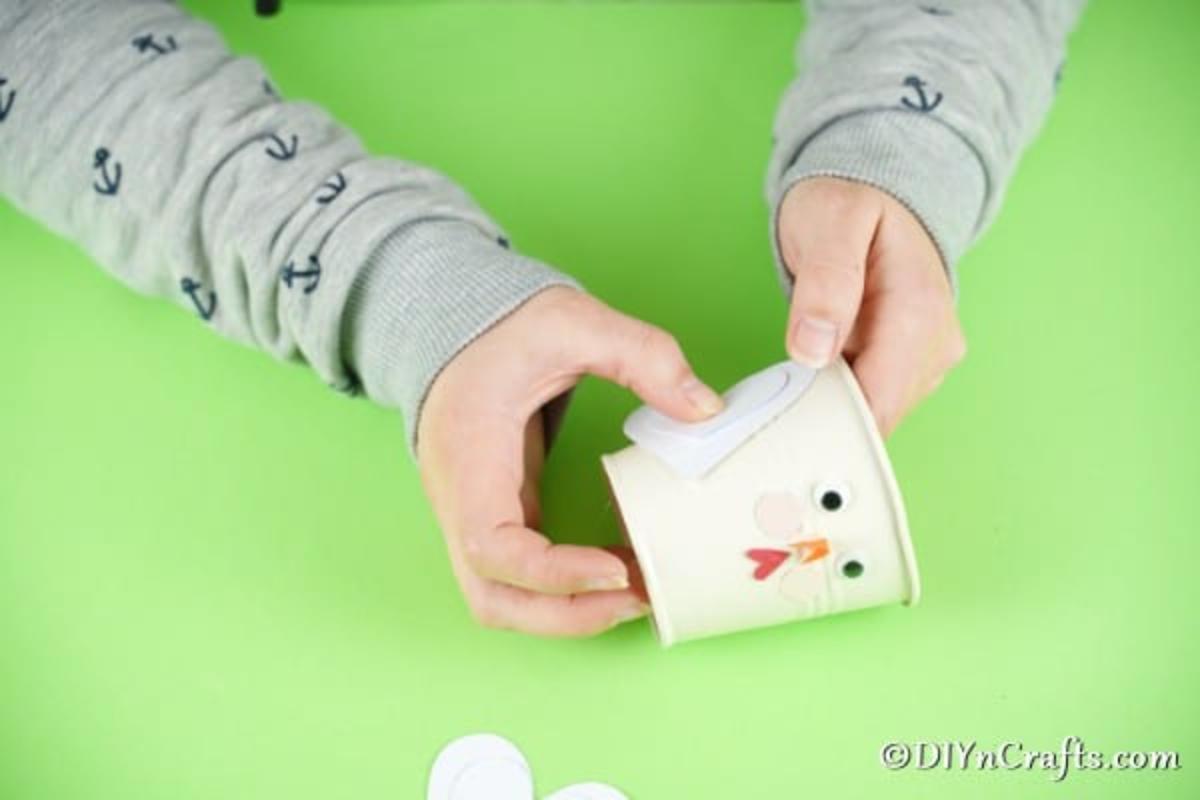
Next, you will cut a length of white paper to create a "handle" on the bucket to resemble the "head" of the chicken.
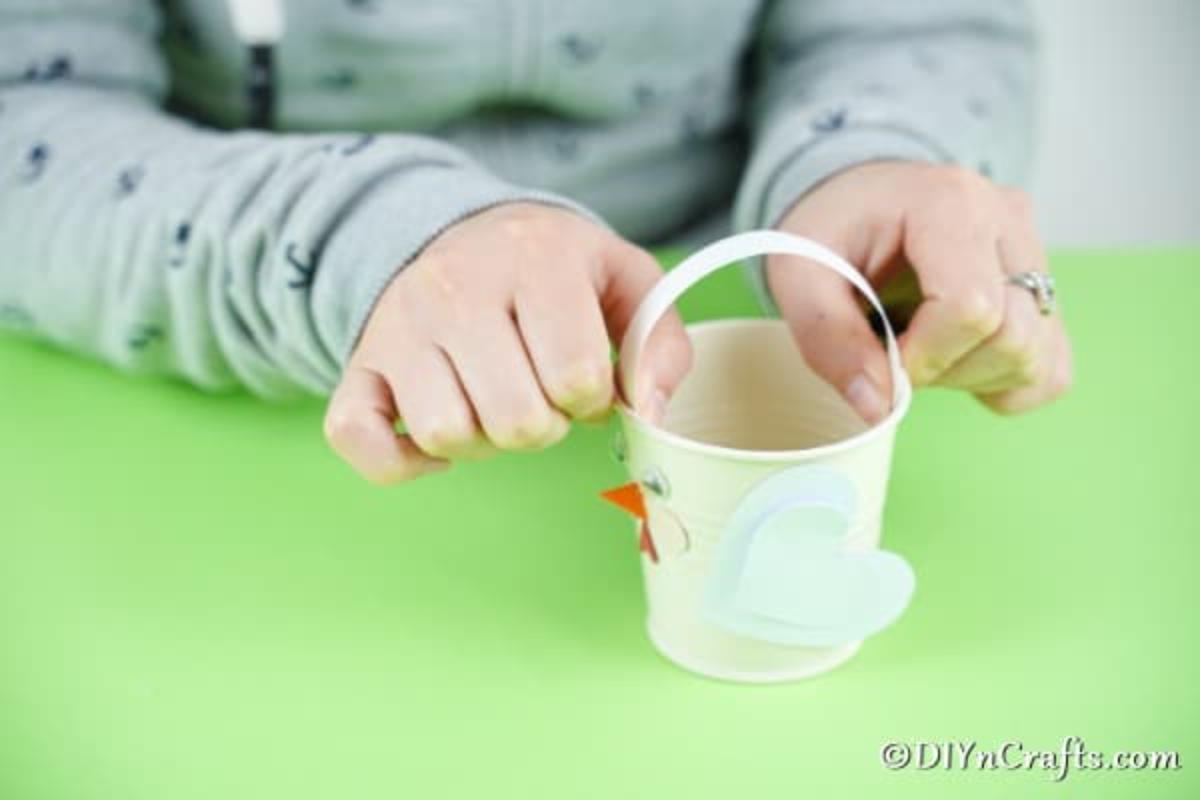
Glue this handle in place, and then glue the wiggly red shape (comb), to the middle of the handle.

Now, you can fill this with your treats!