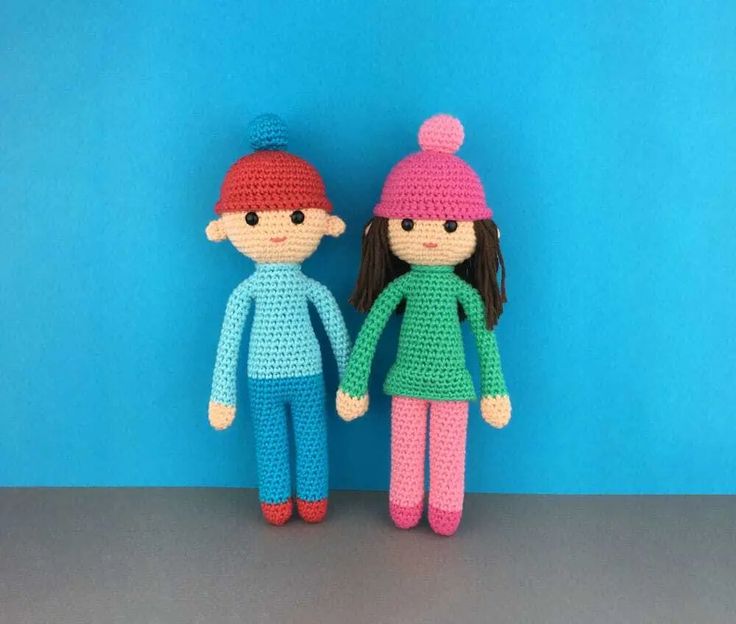
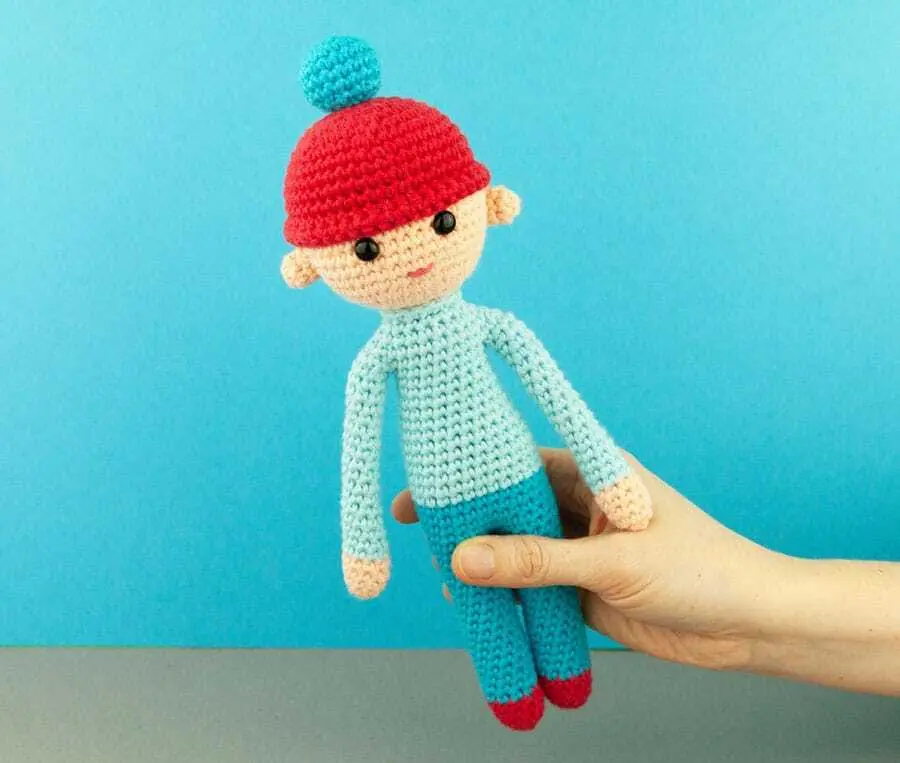
Cochet Millie & Billy Doll
Cochet Millie & Billy Dolls are more than just toys; they are companions brimming with charm and nostalgia. With their delicate features and classic outfits, these dolls bring a touch of whimsy and joy to any collection. Their intricately designed hair and detailed attire make them stand out in a sea of modern toys. Whether displayed on a shelf or enjoyed in imaginative play, Cochet Millie & Billy Dolls are sure to capture the heart of anyone who crosses paths with them.
You will need
YARN Paris drops, aran, 100% cotton, 50g balls (or yarn of your choice).
For Billy:Yarn A 12 red, 1 ball
Yarn B 10 dark turquoise, 1 ball
Yarn C 02 light turquoise, 1 ball
Yarn D 27 peach, 1 ball
Yarn E 38 raspberry, scrap
For Millie:Yarn A 06 shocking pink, 1 ball
Yarn B 33 medium pink, 1 ball
Yarn C 11 opal green, 1 ball
Yarn D 27 peach, 1 ball
Yarn E 38 raspberry, scrap
Yarn F 44 brown, 1 ball
• A smaller hook for making the hair for Millie
• A pair of 9mm safety eyes
• Polyester toy stuffing
• Stitch markers
• Embroidery needle
Abbreviations
R Round
ch Chain
dc Double crochet
sl st Slip stitch
yo Yarn over
FLO Front loops only
BLO Back loops only
st (sts) Stitch(es)
dc2tog (decrease)
Decreasing
In this pattern you can either do a regular decrease
or an invisible decrease:
Regular Insert hook into st, yo and pull through, insert hook into the next st, yo and pull through,
yo and draw through all 3 loops on hook.
Invisible Insert hook into FLO of st, insert hook into FLO
of next st, yo and pull through 2 loops on hook, yo and draw through remaining 2 loops.
The invisible decrease should make holes
less visible in the final work.
Colour change
Where it states to change colour, do it in the last stitch of the round you have just completed (unless otherwise stated).Start a dc as normal, but for the last part of the stitch (yo and draw through 2 loops), yo with the new colour ready to start the next round.
For a less visible colour change, the first stitch of the new colour should be a slip stitch (which will count as the first stitch).
Cut the yarn off of the old colour and tie the 2 ends of each colour to secure. Ends will be hidden inside the piece, so there’s no need to weave them in.
Size: about 30cm tall if using the same yarn.
Start crocheting…
ARMS Make 2
Start by making a magic ring in yarn D.R 1 ch1 (does not count as a st throughout), 5dc into ring. Pull ring tight.
R 2 2dc in each st around. (10 sts)
R 3-5 dc in each st around. Change colour to yarn C in the last st of R 5. (10sts)
R 6 dc in each st around. (10 sts)
R 7 dc2tog, 8dc. (9sts)
R 8 dc in each st around. (9sts)
Start to stuff the arm as you go.
R 9 dc2tog, 7dc. (8sts)
R 10 dc in each st around. (8sts)
R 11 dc2tog, 6dc. (7sts)
R 12-21 dc in each st around. (7sts).Finish with 1dc in the next 3sts, sl st. Fasten off leaving a long tail, about 25cm.Complete stuffing the arm nearly to the top using small pieces at a time. You may want to use the wrong end of a pencil or crochet hook to push the stuffing down.
LEGS Make 2
Make a magic ring in yarn A.R 1 ch1, 6dc into ring. Pull ring tight.
R 2 2dc in each st around. (12sts)
R 3-5 dc in each st around. Change colour to yarn B in the last st of R 5. (12sts)
R 6-22 dc in each st around. (12sts)
Finish with 1dc in the next 4sts, sl st. Fasten off leaving a long tail, about 25cm.
On the second leg don’t make the last sl st and don’t fasten off.
BODY & HEAD
Continue with the second leg. The next st will be the new start of the round.
R 1 12dc (remember to position stitch marker in first dc), ch1 (don’t make too tight), dc into first leg (insert hook in the first st after you fastened off, 11dc, dc into the back loop of the ch st. (26sts)
R 2 dc in each st around (including the front loops of the ch st). (26sts)
R 3 dc in each st around. (26sts). Secure work with a stitch marker to continue later.
At this point, if there is a hole between the legs, use an embroidery needle and
the tail left when making the first leg to sew it closed.
Stuff the legs.
R 4-6 dc in each st around. Change colour to yarn C in the last st of R 6. (26sts)
R 7-10 dc in each st around. (26sts) *if you are making Millie, make the dc’s in round 8 in the BLO (this is so you can attach the skirt later on).*7dc(the next st after these 7 will be the new start of the round).R 11 dc2tog (place st marker in this st), 11dc, dc2tog, 11dc.(24sts)
R 12 dc in each st around. (24sts)
R 13 (dc2tog, 10dc) 2 times.(22sts)
R 14 dc in each st around. (22sts)
R 15 (dc2tog, 9dc) 2 times.(20sts)
R 16 dc in each st around. (20sts)
R 17 (dc2tog, 8dc) 2 times.(18sts)
R 18 dc in each st around. (18sts)
Stuff the body but not all the way to the top to ensure it’s not in the way for the next rounds. In the next round we will be joining the arms.
R 19 1dc, dc into the first arm (insert hook in the first st after you fastened off, 6dc around the rest of the arm, insert hook back into the next st of the body, 9dc,
dc into second arm (again into the st after fastening off), 6dc around the rest of this arm, insert hook back into the next st of the body, 8dc. (32sts)
R 20 2dc, dc2tog, 1dc, dc2tog, 11dc, dc2tog, 1dc, dc2tog, 9dc. (28sts)
R 21 1dc, dc2tog, 1dc, dc2tog, 9dc, dc2tog, 1dc, dc2tog, 8dc. (24sts)Use an embroidery needle and the tail left on the arms to sew the small holes created when joining them.
R 22 (dc2tog, 1dc, dc2tog, 7dc) 2 times. (20sts).R 23 (dc2tog, 1dc, dc2tog, 5dc) 2 times. Change colour to yarn D in the last st. (16sts)
R 24 In BLO dc in each st around. (16sts).
R 25 dc in each st around. (16sts)
R 26 2dc in each of the next 14sts, 2dc. (30sts)
R 27 (2dc in next st, 4dc) 6 times. (36sts)
R 28 (2dc in next st, 5dc) 6 times. (42sts)
Stuff tops of arms and neck and stuff as you go.
R 29-34 dc in each st around. (42sts).sl st then fasten off.
To create the collar: Hold the doll the right way up with its back facing you.
R1 Using yarn C insert hook into one of the front loops left in round 23, ch1,
dc into the same st, dc into the remaining 15dc, sl st into the first dc, fasten off. Use a needle to take the 2 ends inside the doll then tie them together to secure.
Position the eyes 2 rounds down from the top of the head and about 2cm apart. Take time to ensure they are centered, fix in place.
Take a length of yarn E (about 20cm) and make a small stitch for the mouth 3 rounds below the eyes, about a cm in length. Tie the 2 ends together inside to secure.
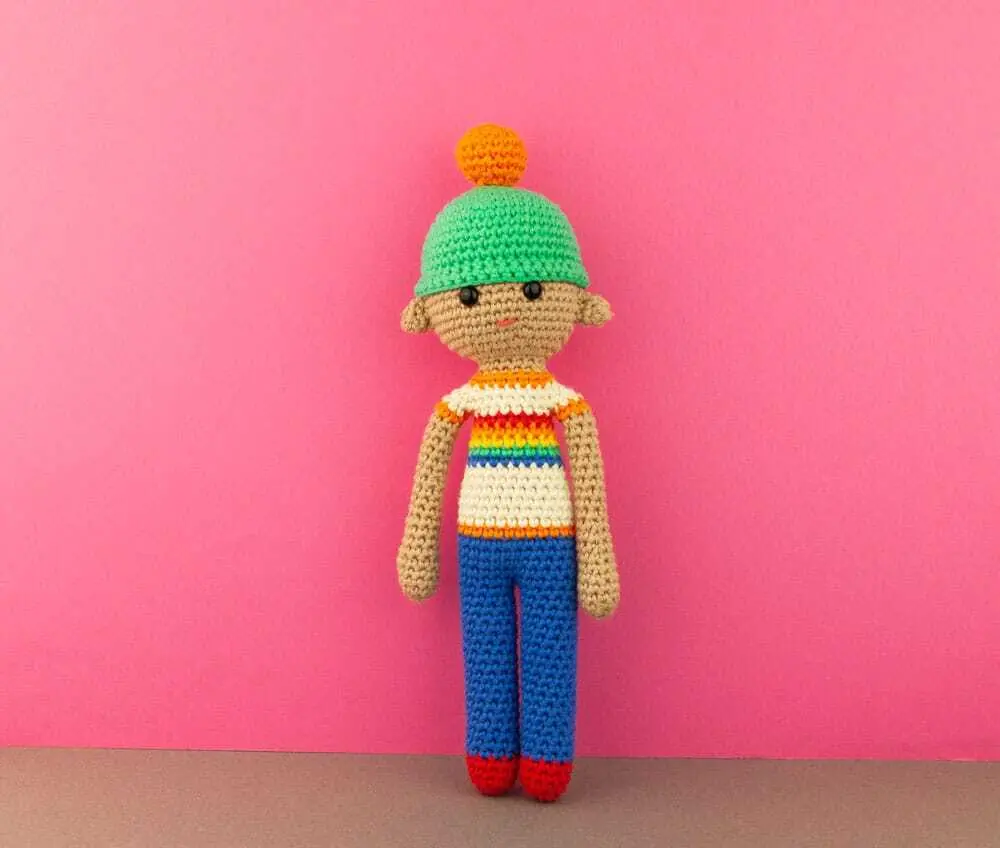
Here I’ve used colour changes to create a stipe top. I’ve made the arms all in the skin colour for a short sleeved t-shirt.
EARS Make 2
Make a magic ring in yarn D.
R 1 ch1, 6dc into ring. Pull ring tight.
R 2 dc in each st around. (6sts)
Use the end of a crochet hook to help turn the ear the right way round, if necessary.
R 3 dc in each st around. (6sts)
sl st. Fasten off leaving a long tail for sewing on, about 35cm.
Sew the ears onto the side of the head, just under the top round of the head. Secure all ends inside the doll.
HAT
Make a magic ring in yarn A.R 1 ch1, 6dc into ring. Pull ring tight.
R 2 2dc in each st around. (12sts)
R 3 (2dc in next st, 1dc) 6 times. (18sts)
R 4 (2dc in next st, 2dc) 6 times. (24sts)
R 5 (2dc in next st, 3dc) 6 times. (30sts)
R 6 (2dc in next st, 4dc) 6 times. (36sts)
R 7 (2dc in next st, 5dc) 6 times. (42sts)
R 8-11 dc in each st around. (42sts)
sl st. Fasten off.
HAT BOBBLE
Make a magic ring in yarn B.R 1 ch1, 6dc into ring. Pull ring tight.
R 2 2dc in each st around. (12sts)
R 3 (2dc in next st, 1dc) 6 times. (18sts)
R 4-6 dc in each st around. (18sts)
R 7 (dc2tog, 1dc) 6 times. (12sts)
Stuff the bobble
R 8 6dc2tog (6sts). Regular decreases may be easier here instead of invisible decreases.
sl st. Fasten off then use an embriodery needle to make large running stitches
around the stitches of the last round. Pull the yarn to close the hole.
Leave a long tail for sewing on, about 25cm, then sew onto the top of the hat.
Tie the ends of the hat and bobble together inside the hat to secure.
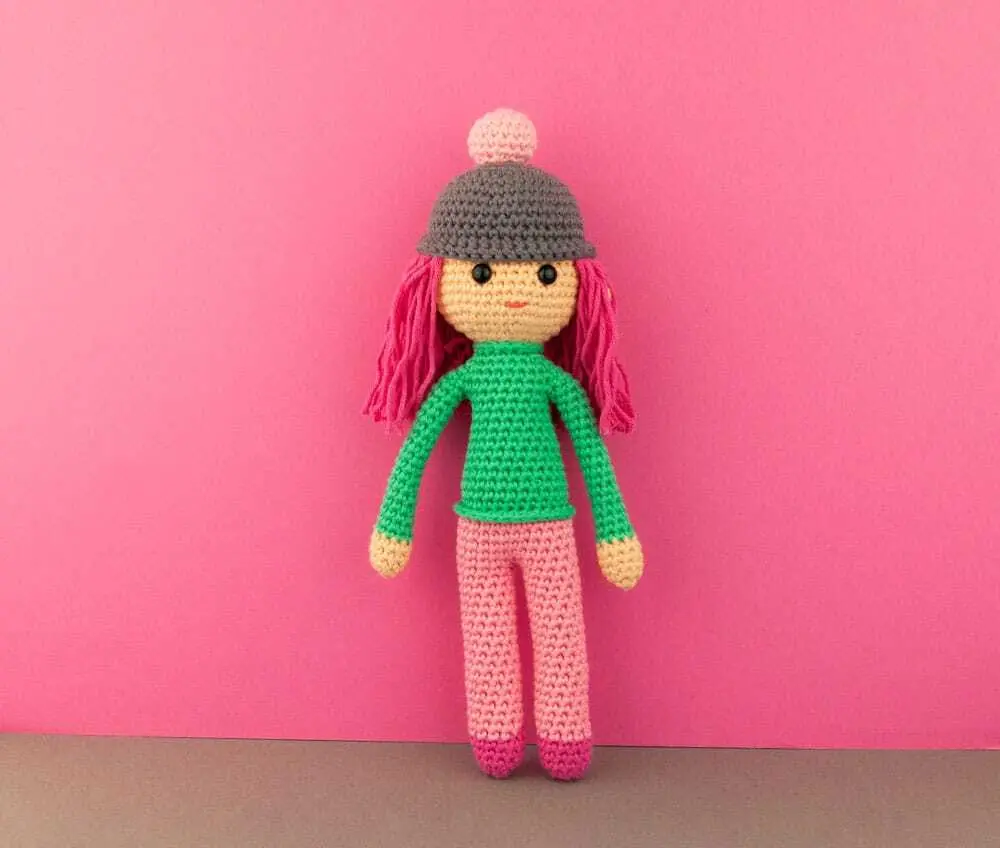
IF you are making MILLIE, add the hair at this point
Cut around 60 strands of hair of about 20cm in length in yarn F. Take a smaller hook size
and insert it underneath the posts of each stitch around the top of the head, pull through
a folded piece of yarn to create a loop. Poke through the 2 ends of the strand through
the loop and pull tight. Add hair around the top 2 rounds of the head.
Trim the hair to the desired length.

To create the glasses I used with a tapestry needle with grey yarn and used a back stitch.
JOINING THE HEAD & HATUse yarn A
R 1 Line up the edges of both the hat and head, wrong sides together. Insert hook through a st on the head and then through a st on the hat, ch1 then dc in the same st, 32dc. Secure your work with a stitch marker. Stuff the head using small pieces at a time. Take your time to create a nice shape. It will take more stuffing than you think but be careful not to overstuff.
7dc to close the hole tucking in any ends as you go. (42sts).
R 2 dc in each st around. (42sts)
sl st. Fasten off and weave in the ends.
SKIRT FOR MILLIEUse yarn C
R 1 Holding the doll upside down, insert the hook under the first FL left in round 7.
ch1 then dc in the same st, 5dc, 2dc in next st, 12dc, 2dc in next st, 6dc (28sts)
R 2 6dc, 2dc in next st, 13dc, 2dc in next st, 7dc. (30sts)
R 3 7dc, 2dc in next st, 14dc, 2dc in next st, 7dc. (32sts)
R 4 8dc, 2dc in next st, 15dc, 2dc in next st, 7dc. (34sts)
R 6 8dc, 2dc in next st, 16dc, 2dc in next st, 8dc. (36sts)
sl st. Fasten off and weave in the ends.
And voila, you are finished.