DIY Queen of Hearts Puppet
If you're looking to add some whimsy to your crafting projects, why not try making a DIY Queen of Hearts puppet? Not only will you have a fun project to work on, but you'll also end up with a delightful puppet fit for your very own Wonderland. Let your imagination run wild as you create your DIY Queen of Hearts puppet masterpiece!
- Paper cup
- Paper straws
- Wooden beads (various sizes)
- Pipe cleaners
- Apple Barrel Acrylic Paint
- Paint brush
- Felt (red and black)
- Scissors
- Golden cardstock
- Wooden skewer
- String
- Marker
- Golden bead
How To:

Step 1
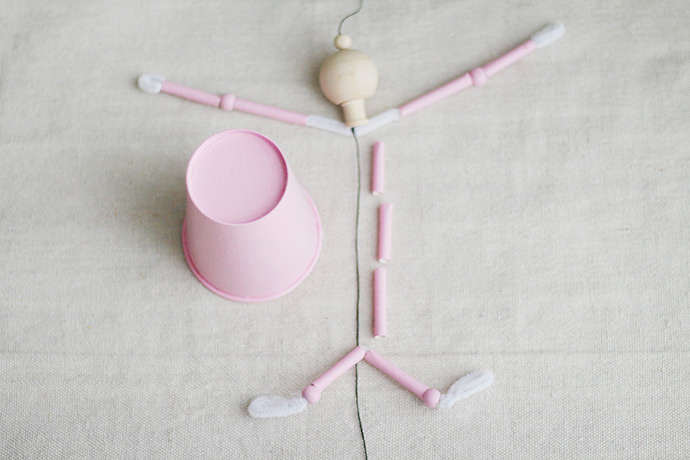
Begin by painting the straws, cup, and 4 small wooden beads with pink paint and let dry. Cut the straws into nine 1″ pieces and lay out all your pieces as shown above.
Step 2
Thread the straws and beads onto the pipe cleaners as shown above, and bend the ends into loops for feet and hands. For the head and neck, thread the beads onto the string and then tie the string to the pipe cleaner arms. Poke a hole into the top of the paper cup and thread onto the string. Then, thread three straws onto the string to form the torso (these will be mostly hidden under the cup) and then tie the string onto the pipe cleaner legs.
Step 3
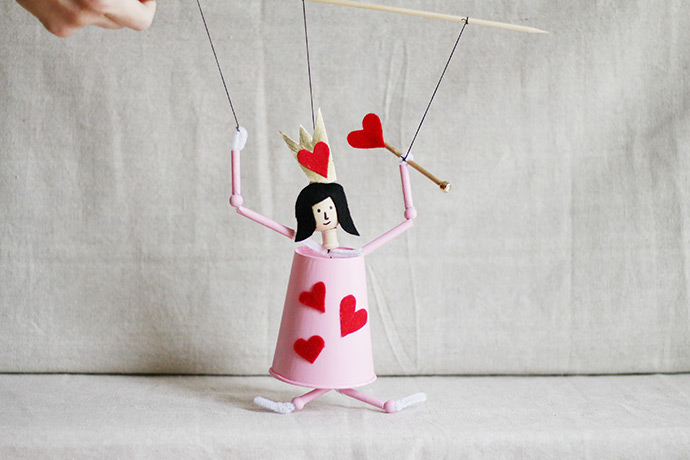
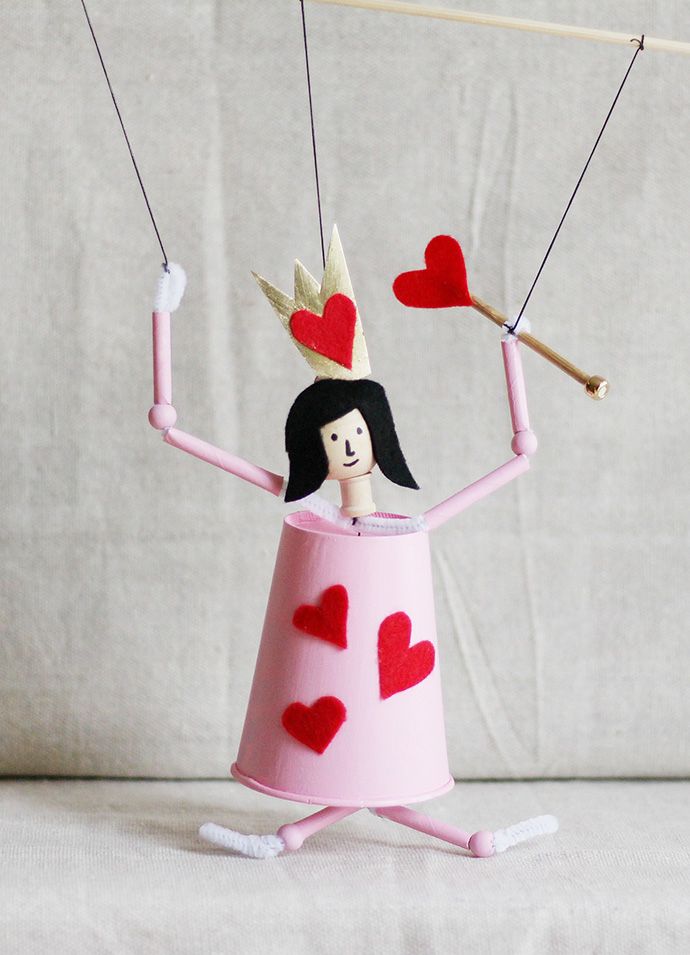
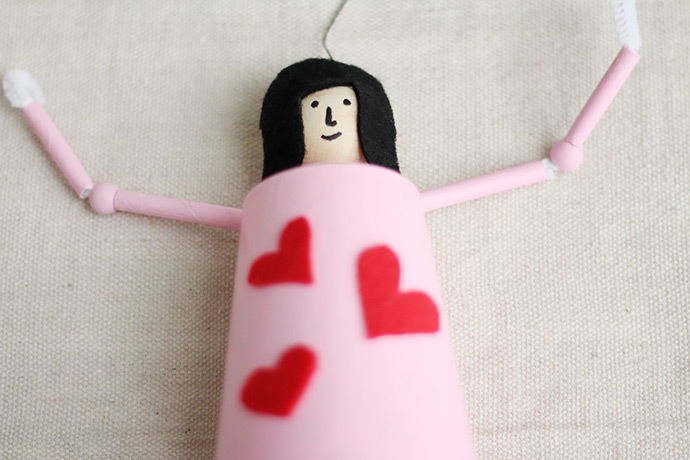
Decorate the puppet with red felt hearts on the cup and cut black felt into hair and glue onto the wooden bead. Use a black marker to draw on a face.
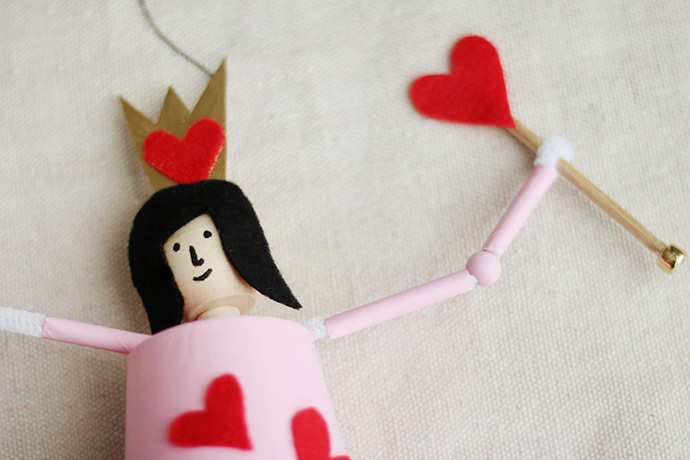
Step 4
Finally, cut a crown out of golden cardstock and add a red felt heart on top. Glue this onto the puppet’s head. For the wand, glue a golden bead onto the bottom of a piece of wooden skewer, and then cut and glue a red felt heart onto the top. Put into the pipe cleaner hand, tightening the loop to secure.
To finish, tie the string from the puppet’s head onto a wooden skewer and attach another string to each arm, and tie those to the wooden skewer as well.