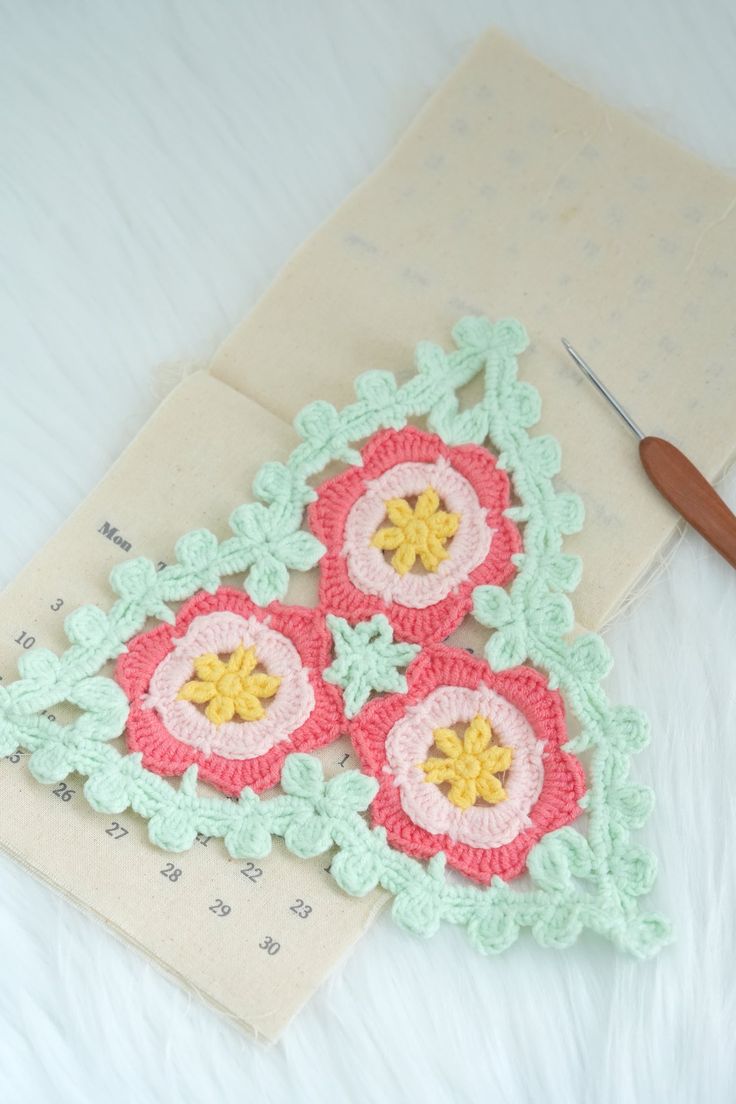
Crochet Triangle Granny Square
Crochet Triangle Granny Squares are such a charming and versatile addition to any crochet project! With their cute triangular shape, they add a whimsical touch to blankets, pillows, or even as standalone decorations. Creating these little triangles is not only fun but also a great way to experiment with different color combinations and styles. Whether you're a seasoned crocheter or just starting out, you'll love the creative possibilities these Triangle Granny Squares offer. So grab your yarn and hook, and let's make something beautiful together!
Materials Needed
- Yarn - Loopara 4ply combed cotton (Green 07, Green 12, Yellow 42 and Pink 51)
- Hook - 2.3mm
- Stitch marker
- Scissors
Step By Step Tutorial
How to Crochet a Triangle Granny Square – Step by Step
- R1: Magic ring, 6 sc
- R2: Ch 3, dc,(ch 3, 2 dc puff st) 5 times, ch 3
- R3: Change color,ch, [sc, (2 hdc, 5 dc,hdc)] 6 times
- R4:Ch, (sc, ch 5) 6 times
- R5: Change color,ch, [sc, (2 hdc, 5 dc)] 6 times
- R6: Change color, ch,(sc, ch 3, sl, ch 3) 6 times
- R7: Sc, ch 5, dc, ch 5, sc, ch 5, [(4-tr puff st) twice, ch 5, sc, ch 5, dc, ch 5, sc, ch 5, (4-tr puff st, ch 9, 4-tr puff st), ch 5, sc, ch 5, dc, ch 5, sc, ch 5] twice, (4-tr puff st) twice, ch 5, sc, ch 5, dc, ch 5, sc, ch 5, 4-tr puff st, ch 9, 4-tr puff st, ch 5, sl
- R8: CH,[sc, (4 sc)] 7 times, sc (9 sc), [sc, (4 sc)] 8 times, sc, (9 sc), [sc, (4 sc)] 8 times, sc, (9 sc), sc (4 sc), sl
- R9: [(Ch 3, 3 dc puff st, ch 3, sl), ch 4, sk 4, sl] 8 times,ch 4, sk 4, (sl,ch 3, 3 dc puff st, ch 3, sl) twice in same st, [,ch 4, sk 4, (sl,ch 3, 3 tr puff st, ch 3, sl)] 9 times, [ch 4, sk 4, (sl,ch 3, 3 dc puff st, ch 3, sl) twice in same st], [ch 4, sk 4, (sl,ch 3, 3 dc puff st, ch 3, sl)] 9 times, ch 4, sk 4, (sl,ch 3, 3 dc puff st, ch 3, sl) twice in same st, ch 4, sk 4, (sl,ch 3, 3 dc puff st, ch 3, sl), ch 4, sk 4, sl
- Weave in ends.
Notes
Crochet tips:
1. Join the second motif to the first when working the last petal. Join the third motif to the first and second when working the second to last petal.
2. Maintain consistent tension for even edges.
3. Count your stitches carefully to keep the shape triangular.
4. Use stitch markers at corner points for accuracy.
5. Experiment with color changes to create unique patterns.