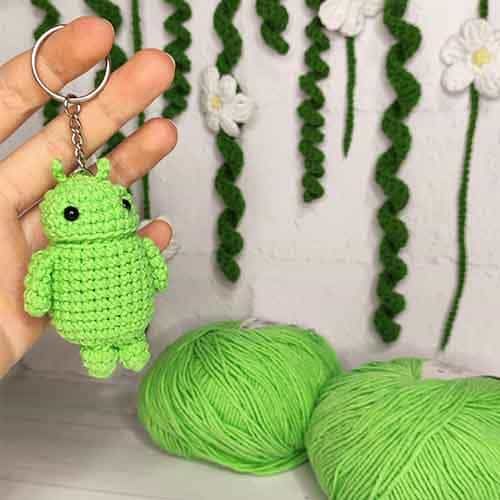
Crochet Android Keychain
If you enjoy getting crafty and love all things tech, then a Crochet Android Keychain is the perfect combination of cuteness and functionality! These adorable little keychains are not only a fun accessory to personalize your keys or bag but also a great conversation starter. Whether you choose to make one for yourself or give it as a thoughtful gift to a fellow tech enthusiast, the Crochet Android Keychain is a delightful and charming way to show off your creativity and passion for all things android. So grab your crochet hook, pick out your favorite yarn colors, and get ready to craft a tiny tech companion that will surely bring a smile to your face every time you reach for your keys.
Android Crochet Keychain Pattern
Necessary materials
• 1.9 mm hook
• Filler (holofiber)
• Stitch marker
• Eyes on a safe fastening 5 mm or beads
• Scissors
• Needle with a wide eye for sewing parts
Abbreviations
• Ch- Chain
• Slst- Slip stitch
• Sc- Single crochet
• Inc- Increase
• Dec- Decrease
Let’s start from the head first to make Android.
Head
1. 6 sc in MR = 6
2. 6 inc = 12
3. (1 sc, inc)*6 = 18
4. (2 sc, inc)*6 = 24
5-7. 24 sc (3 rnds)
8. slst, leave thread for sewing.
Body
1. 6sc in MR = 6
2. 6 inc = 12
3. (1 sc, inc)*6 = 18
4. (2 sc, inc)*6 = 24
5-12. 24 sc (8 rnds)
8. slst, cut the thread, hide inside the piece.
Arms (2 pcs)
1. 6 sc in MR = 6
2-5. 6 sc (4 rnds)
6. slst, leave thread for sewing.
Legs (2 pcs)
1. 8 sc in MR = 8
2-3. 8 sc (2 rnds)
4. slst, leave thread for sewing.
Antennae (2 pcs)
1. 3 ch, cut the thread, leaving a tail for sewing, hide the ends.
Assembly
We insert the eyes between the 5th and 6th row of the head, the distance between the eyes is 6 sc.
We fill the head and body and sew the parts together using the back half loops.
Sew on arms, legs, antennae.
Depending on the type of fastening, install a key ring at the beginning or a carabiner at the end of android.