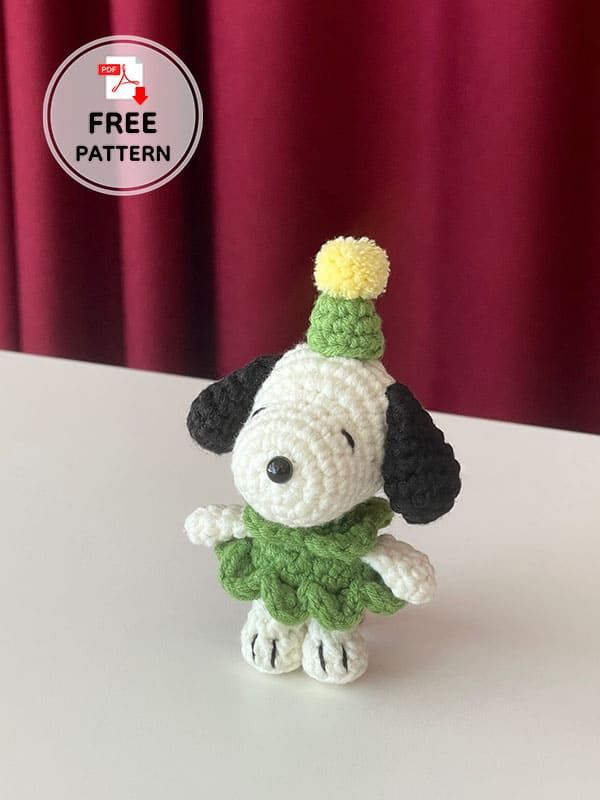
Crochet Mini Snoopy Toy
Looking to add a touch of cuteness to your collection? The Crochet Mini Snoopy Toy might just be the perfect addition! This adorable little Snoopy is hand-crocheted with love and attention to detail, making it a unique and special piece for any Snoopy fan. Its small size makes it perfect for carrying around or displaying on your desk, adding a whimsical touch to your space. Whether you're a seasoned crocheter looking for a fun project or simply a Snoopy enthusiast, this Mini Snoopy Toy is sure to bring a smile to your face with its charm and character.
Mini snoopy crochet pattern
Materials:
– 2.5 mm cotton yarn
– 2.5 mm crochet hook
– Safety eyes (6 mm)
– Stitch markers
– Yarn needle
– Sewing pins
– Stuffing
– Scissors
Abbreviations:
R: Round
MR: Magic ring
Ch: Chain
Sc: Single crochet
Inc: Increase
Dec: Decrease
Slst: Slip stitch
Dc: Double crochet
BLO: Back loop only
FO: Fasten off
Hdc: Half double crochet
The finished snoopy size is approximately 11cm in size.
Head
R1. (6) 6 sc in MR
R2. (12) 6 inc
R3. (18) (sc,inc)x6
R4-6. (18) 18 sc (3 rounds)
R7. (22) 7 sc, 4 inc, 7 sc
R8. (26) 9 sc, 4 inc, 9 sc
R9-11. (26) 26 sc (3 rounds)
R12. (24) (11sc,dec)x2
R13. (18) (2sc,dec)x6
R16. (12) (sc,dec)x6 – start stuffing.
R15. (6) 6 dec – cut the yarn and FO.
Ears
R1. (6) 6 sc in MR
R2. (12) 6 inc
R3-4. (12) 12 sc (2 rounds)
R5. (9) (2sc,dec)x3
R6. (9) 9 sc
R7. (6) (sc,dec)x3
R8. Fold in half and crochet 3 sc through both sides.
Do not stuff, leave a long tail for sewing.
Insert safety nose between R1-2 of the head.
Sew the eyes between R6-7 of the head.
Sew ears on the sides of the head between R10-12.
Legs (make 2) – body
Start with white.
R1. (5) 5 sc in MR
R2. (10) 5 inc
R3. (10) BLO 10sc
R4. (8) (3sc,dec)x2
R5. (6) (2sc,dec)x2
R6. (6) 6 sc
FO, the first leg. Second leg: 1 ch, don’t cut the yarn.
Change the color to green and continue to the body.
From R7, you need to do slst and chain 1 in each row.
R7. (14) (on the first leg) 6 sc, (on chain) 1sc, (on the second leg) 6 sc, (on chain) 1 sc
R8. (16) (6sc,inc)x2
R9. (24) (sc,inc)x8
R10. (24) BLO 24 sc – Place a stitch marker on the front loop of the first stitch
R11. (18) (2sc,dec)x6 – start stuffing.
R12. (12) (sc,dec)x6
R13. (12) BLO 12 sc – Place a stitch marker on the front loop of the last stitch.
R14. (12) 12 sc – Cut the yarn. Leave a long tail for sewing.
Ruffles
1. Start from the first stitch of R10 of the body. Attach yarn to the stitch marker location.
([sc,hdc,dc in the same st], [dc, hdc, sc in the same st], slst in next st) x8, slst to the first st.
2. Start from the last stitch of R13 of the body. Attach yarn to the stitch marker location.
([sc,hdc,dc in the same st], [dc,hdc,sc in the same st], slst in next st)x4, slst to the first st.
Arms (make 2)
R1. (6) 6 sc in MR
R2-4. (6) 6 sc (3 rounds)
R5. Fold in half and crochet 3 sc through both sides.
Stuff lightly, cut the yarn and connect it between R11-12 of the body.
Hat
R1. (6) 6 sc in MR
R2. (9) (sc,inc)x3
R3. (9) 9 sc
R4. (12) (2sc,inc)x3
Cut the yarn and leave a long tail for sewing.
Make a pompom
1. Prepare a 20 cm long yarn and wrap the new yarn around one fingers about 15-20 times.
2. After pulling the yarn out from your finger, tie it tightly with the 20 cm yarn.
3. Cut both sides of the yarn into a circle with scissors and comb it to make it more voluminios.
(the diameter is about 1.5cm)
4. Sew the finished pompom to the hat.