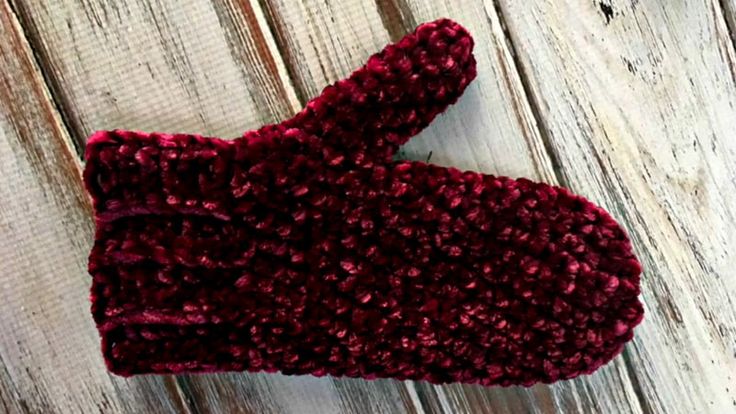
Crochet Velvet Mittens
Crochet Velvet Mittens are like little hugs for your hands! The softness of the velvet yarn combined with the intricate crochet stitches creates a cozy accessory that you'll love wearing on chilly days. Not only are they stylish and warm, but they are also a fun and rewarding project to make yourself. Whether you're a seasoned crocheter or a beginner looking for a new challenge, these mittens are sure to bring joy to your crafting endeavors. So, grab your hook and yarn, and let's create some snuggly magic for your hands!
Materials Needed & Measurements:
- Yarn: 1 skein Bernat Velvet in Burgundy Plum
- Hooks:
- US J (6.00 mm)
- US K (6.5 mm)
- Notions:
- Yarn needle
- Stitch marker
- Tape measure or ruler
Measurements
- Gauge: 12 stitches and 16 rows = 4″ in single crochet (sc)
- Finished Size: Approximately 7″ hand circumference (fits an average woman’s hand)
Abbreviations Used:
- ch: Chain
- sc: Single crochet
- st(s): Stitch(es)
- BLO: Back loop only
- sc2tog: Single crochet two stitches together (decrease)
- WS: Wrong side
Stitching Instructions for Making the Velvet Mittens Pattern:
Cuff
- Foundation: Ch 9.
- Row 1: Work sc in the 2nd ch from the hook and sc in each ch across. You will have 8 sts. Turn your work.
- Row 2: Ch 1, and working in the back loops only (BLO), sc in each st across. Turn.
- Tip: Working in BLO creates the stretchy ribbed texture for the cuff.
- Repeat Row 2 until the cuff measures 7″ when slightly stretched, ending on a WS row.
- Switch to larger hook (K, 6.5 mm). Ch 1, then turn your work to crochet along the long edge of the cuff.
- Next Row: Work 21 evenly spaced sc along the long edge of the cuff. Place a stitch marker in the first st to mark the beginning of the round.
Hand Section
- Work 3 additional rounds of sc around the cuff edge without turning or joining. Use continuous rounds.
- Tip: Keep the stitch marker in place and move it up with each round to track the start of your rounds.
Thumb Shaping
- Round 1: Work 2 sc in the first sc, sc in the next st, 2 sc in the following sc, then sc to the end of the round – 23 sts.
- Round 2: Work 2 sc in the first sc, sc in the next 3 sts, 2 sc in the following sc, then sc to the end of the round – 25 sts.
- Round 3: Work 2 sc in the first sc, sc in the next 5 sts, 2 sc in the following sc, then sc to the end of the round – 27 sts.
Main Hand Section
- Round 1: Ch 1, skip the next 7 sc (this creates the thumb opening), then sc in each remaining st around – 21 sts (including the ch-1).
- Rounds 2-14: Continue working sc evenly around in continuous rounds.
Top Shaping
- Round 1: Sc in the next st, sc2tog; repeat from * around – 14 sts.
- Tip: Use the sc2tog decrease to shape the top of the mitten.
- Round 2: Sc2tog; repeat from * around – 7 sts.
- Fasten off, leaving a long tail. Thread the tail through the remaining 7 sts, pull tightly to close the top, and secure it.
Thumb
- Join the yarn in the ch-1 space from Round 1 of the hand section.
- Round 1: Ch 1, sc in the ch-1 space and in each of the skipped 7 sts around – 8 sts. Place a stitch marker in the first st to mark the start of the round.
- Rounds 2-6: Sc evenly around in continuous rounds.
- Round 7: Sc2tog; repeat from * around – 4 sts.
- Fasten off, leaving a long tail. Thread the tail through the remaining 4 sts, pull tightly to close the thumb, and secure it.
Finishing
- Use a yarn needle to weave in all loose ends securely on the inside of the mitten.
- Sew the seam of the ribbed cuff (if not already done).
- Block lightly if desired to set the shape.
No comments
Write a comment