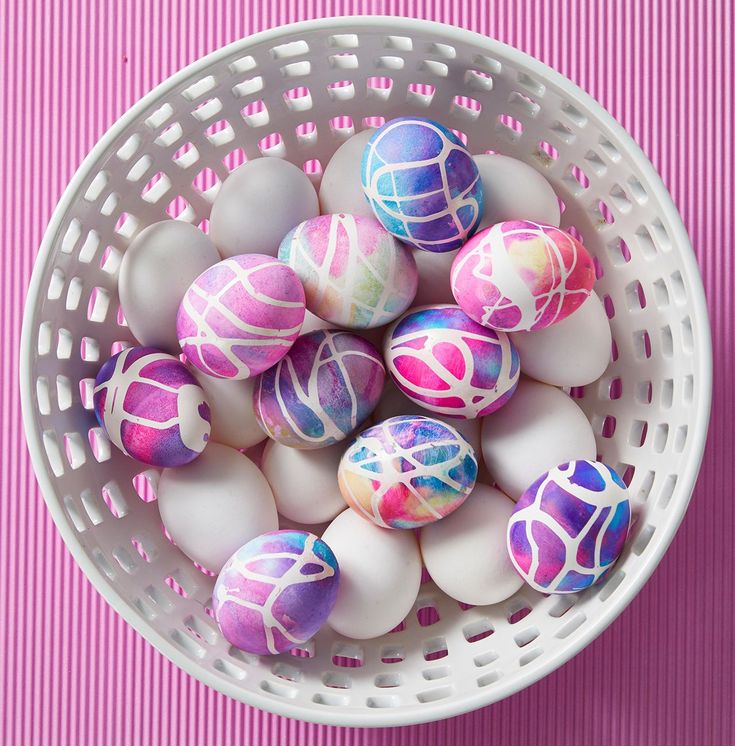
Tie-Dye Baking Soda Easter Eggs
Tie-Dye Baking Soda Easter Eggs are a delightful and creative twist on traditional egg decorating! Kids and adults alike will enjoy the fun and mess-free process of swirling the eggs in the dye mixture to create unique and eye-catching designs. These Tie-Dye Baking Soda Easter Eggs are sure to be a hit at any springtime gathering or Easter celebration, bringing a burst of color and creativity to the holiday festivities!
What You'll Need
Equipment / Tools
- Glass bowl
- Metal spoon
- Muffin tin
- Paintbrushes
- Measuring spoons
Materials
- Eggs
- Rubber cement
- Baking soda
- Water
- Rubber gloves
- Vinegar
- Food coloring
Instructions
How to Make Baking Soda Easter Eggs
Follow these easy instructions to make colorful tie-dyed baking soda Easter eggs. You should be able to decorate a dozen eggs in under an hour.
Step 1
Prepare Eggs
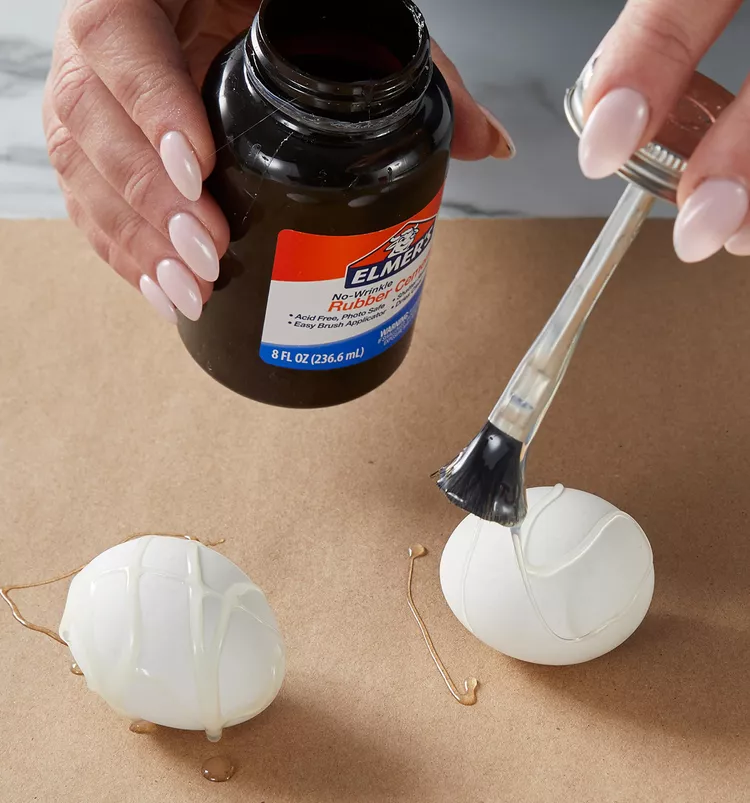
First, hard-boil eggs and set them aside to cool. When you're ready to dye them, open a jar of rubber cement and use the brush to drizzle glue onto the eggs. Once you're done dyeing the eggs, you'll be able to peel the rubber cement off to reveal a white pattern underneath the tie-dye.
Tip:
The application of rubber cement means these eggs won't be edible. If you plan to eat the eggs, skip this step and just use the baking soda and vinegar technique below.
Step 2:
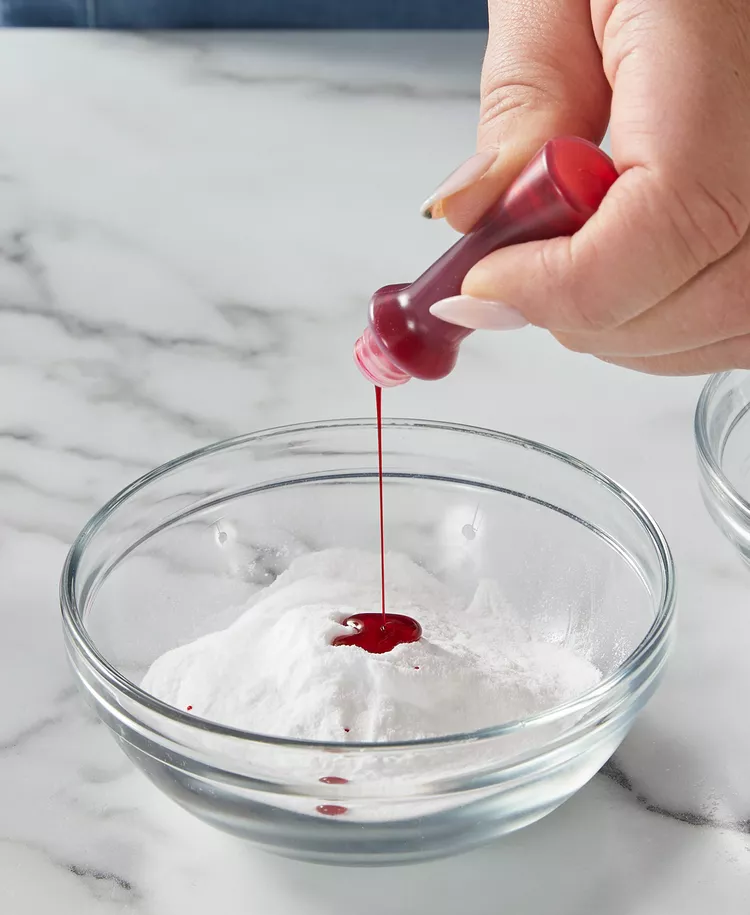
Create a Dye Mix
Use a spoon to mix ⅓ cup of baking soda with a tablespoon of water, then add 3 drops of food coloring. Stir until the mixture forms a paste-like consistency. Repeat this process to prepare as many colors of paste as you like. We used three colors on each egg (red, yellow, and blue) to achieve the tie-dye look we were going for.
Step 3:
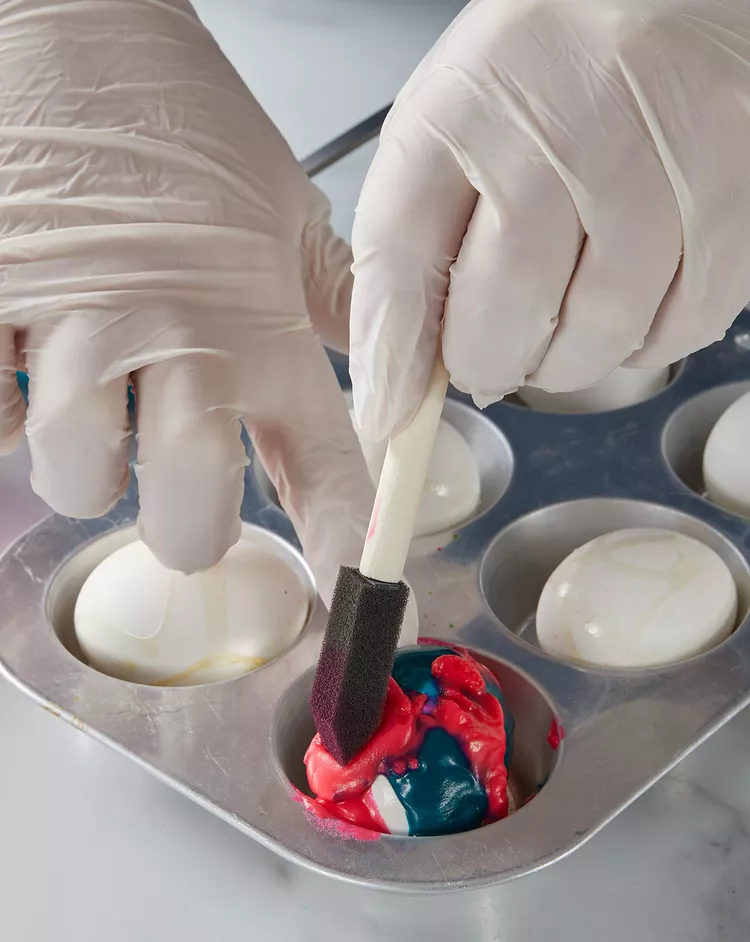
Brush Mix on Eggs
Once you've mixed your pastes, place one egg in each compartment of a metal muffin tin. Use a foam crafts paintbrush to apply multiple colors of paste onto each egg. You'll want to wear protective rubber gloves for this part. The baking soda paste will add color to each dyed egg, but you can make them even more vibrant by dropping extra gel food dye onto the eggs for concentrated bursts of color.
Step 4:
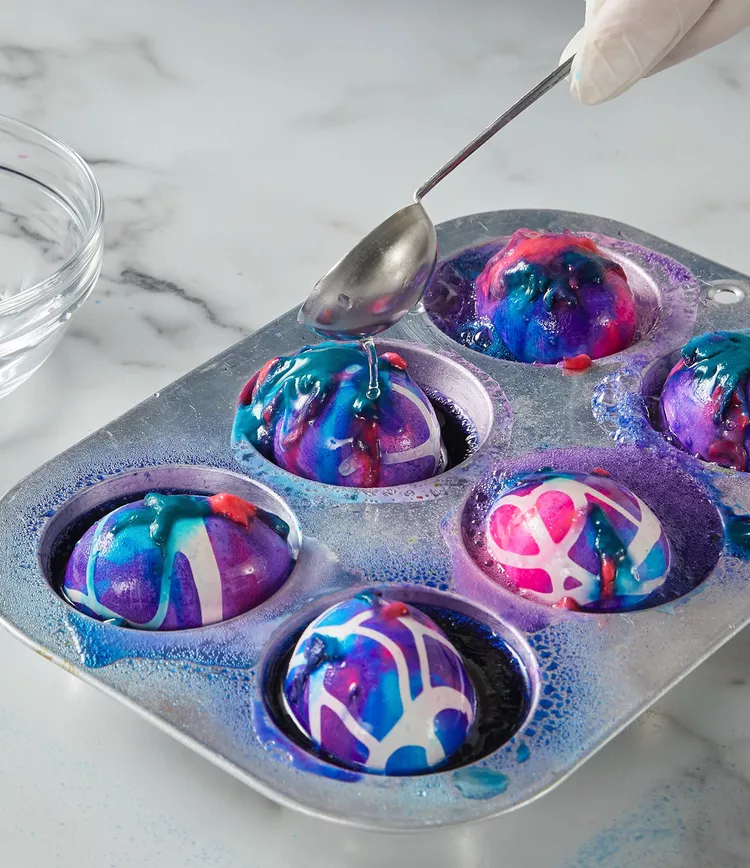
Add Vinegar
When each egg is coated in baking soda paste and food dye, it's time to make the magic happen. Use a dropper or measuring spoon to dribble small amounts of vinegar onto each egg; the reaction between the vinegar and baking soda will bubble and create the tie-dye look.
After all the baking soda has dissolved, dip each egg in water to clean it, then peel off the rubber cement to expose the white areas. Display your finished Easter egg decorations as part of a festive spring centerpiece or use them during your Easter egg hunt.