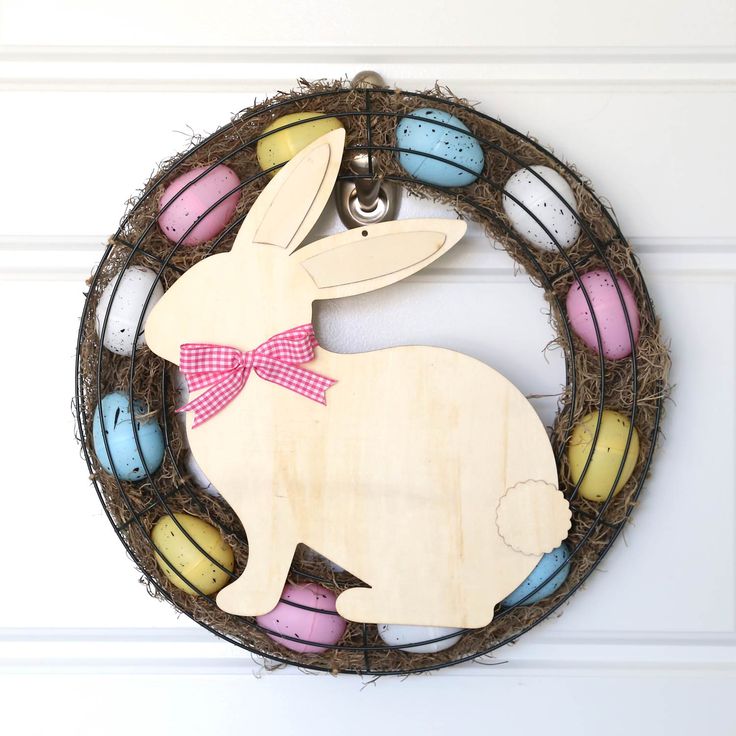
If you're looking to add a touch of Easter magic to your front door, consider a delightful Easter Bunny Wreath! This charming and whimsical decoration is sure to greet your guests with a smile and bring a festive vibe to your home. With its bunny ears, cute face, and colorful assortment of spring flowers and decorations, the Easter Bunny Wreath is a perfect way to welcome the season of new beginnings. Hanging this adorable wreath will surely spread joy and cheer to all who see it, making your home feel warm and inviting during this special time of year.
Easter Wreath Supplies
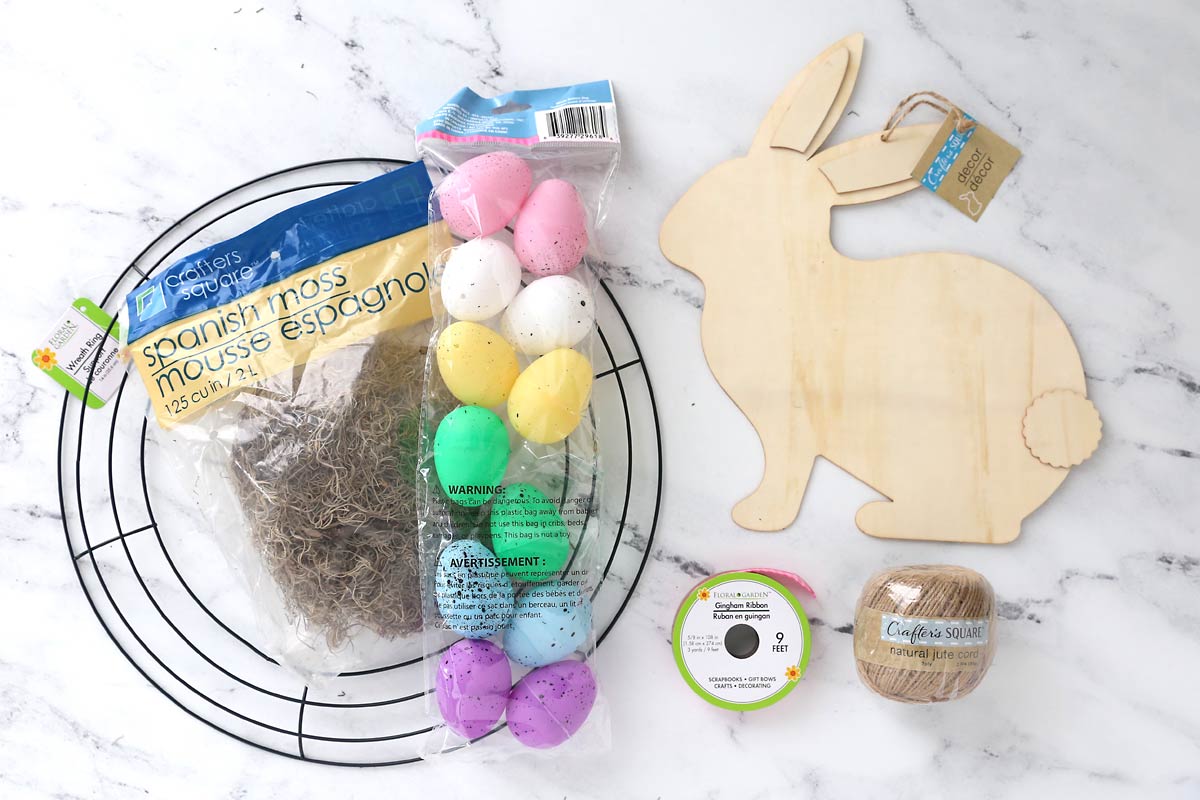
The best thing about this simple Easter wreath is that you can get all the supplies you need at your local Dollar Tree. One trip, nine total dollar tree items. Here’s what you need:
Round Wreath Forms (2): You will need 2 wreath forms because you’ll sandwich the moss and plastic Easter eggs between them.
Spanish Moss (2): You’ll need more than one bag of spanish moss, so buy 2 to ensure you have plenty. Also, be sure to buy the brown spanish moss not the green floral moss. Spanish moss holds together much better inside the wreath forms.
Speckled Easter Eggs (2): You need 12 total eggs so you can use one package if you like all the colors. I didn’t want to use the green or purple eggs, so I purchased 2 packs of easter eggs. I chose the pastel speckled eggs, but you can use plain eggs, glitter eggs, or any type you prefer. Just make sure they are standard size (about the size of a real egg) not the large size eggs.
Bunny Wood Cutout
Ribbon: I found some cute pink gingham ribbon at Dollar Tree that matched the pink eggs
Jute: You’ll use this to tie the wreath forms together. Because it’s the same color as the moss you can’t see it on the finished wreath. You could use pipe cleaners instead if you already have some that match the moss.
Optional: Hairspray can be used to help “set” the moss in place (this is what I used) OR chicken wire ribbon can be used to wrap the wreath: this is not found at Dollar Tree so I did not use it
Instructions
This craft can easily be completed in under an hour, but please be aware that working with the moss will make a mess. You’ll end up with bits of moss and dust on your work surface and likely on the floor as well, so do this craft somewhere that is easy to clean up.
Step 1
Place Moss Inside Wreath Form
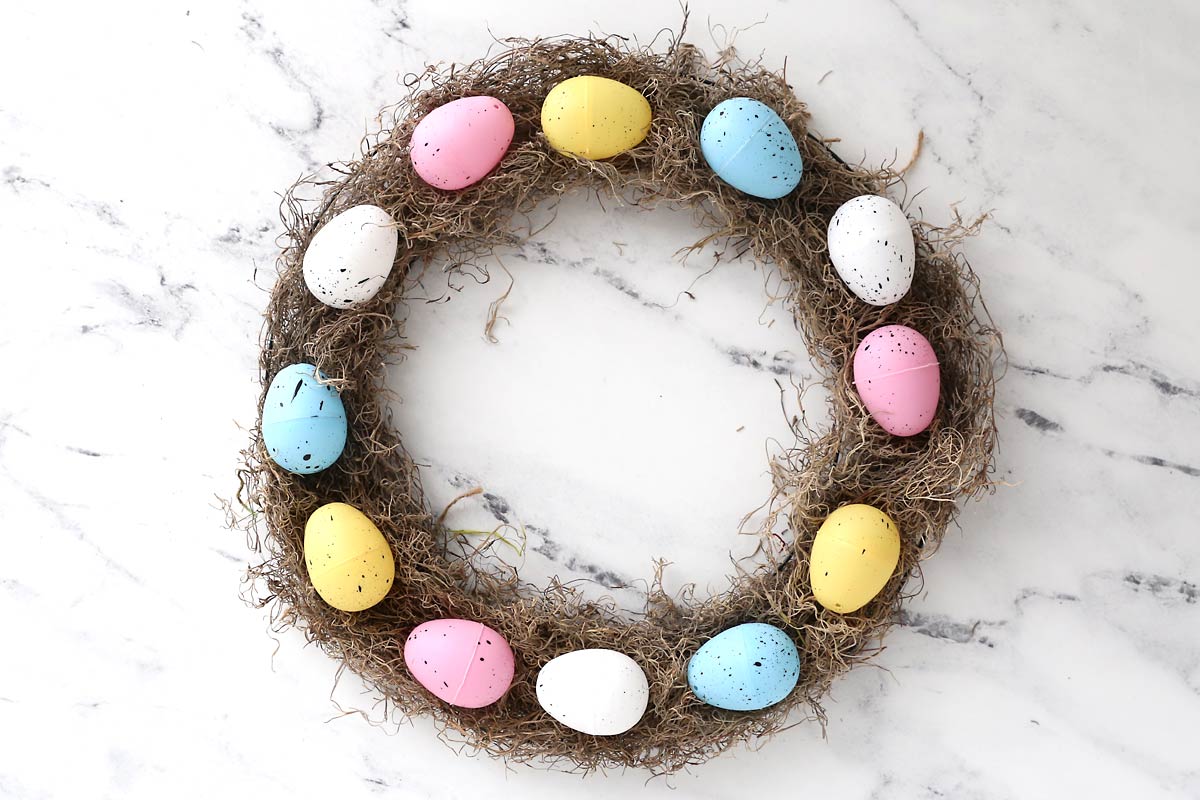
Grab the first wire wreath frame and lay it face side down on a work surface. That means that the inner and outer edges of the circle will be curved up away from the table. Then place a layer of moss inside the wreath form as you see below. I used about a bag and a half of Spanish moss for this. You want the moss layer to be thick enough that you don’t see the wreath form through it but not much thicker. Please note: As you work with the moss, do not tear it into a bunch of small pieces. Gently pull at it to try to unravel it into one long, thick piece that you can lay over the wreath form. The less you tear, the better the moss will stay together in the finished wreath.

Step 2
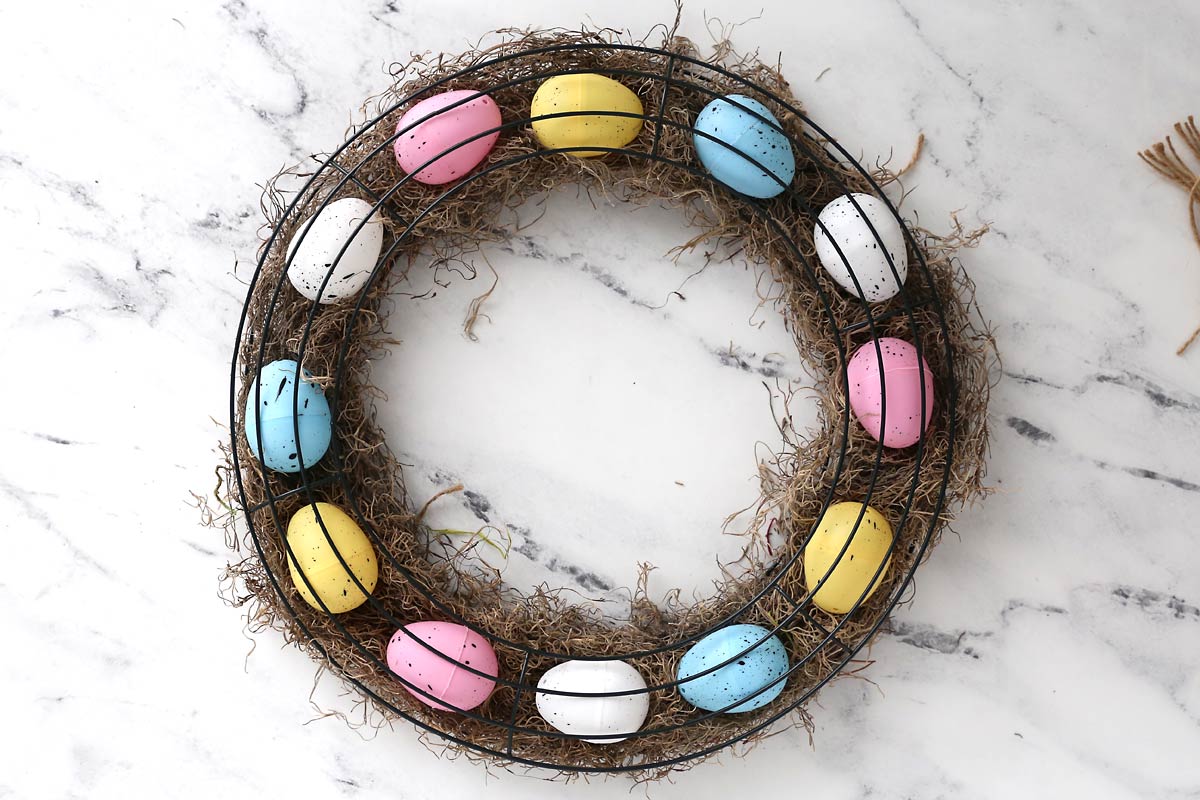
Place Eggs on Moss
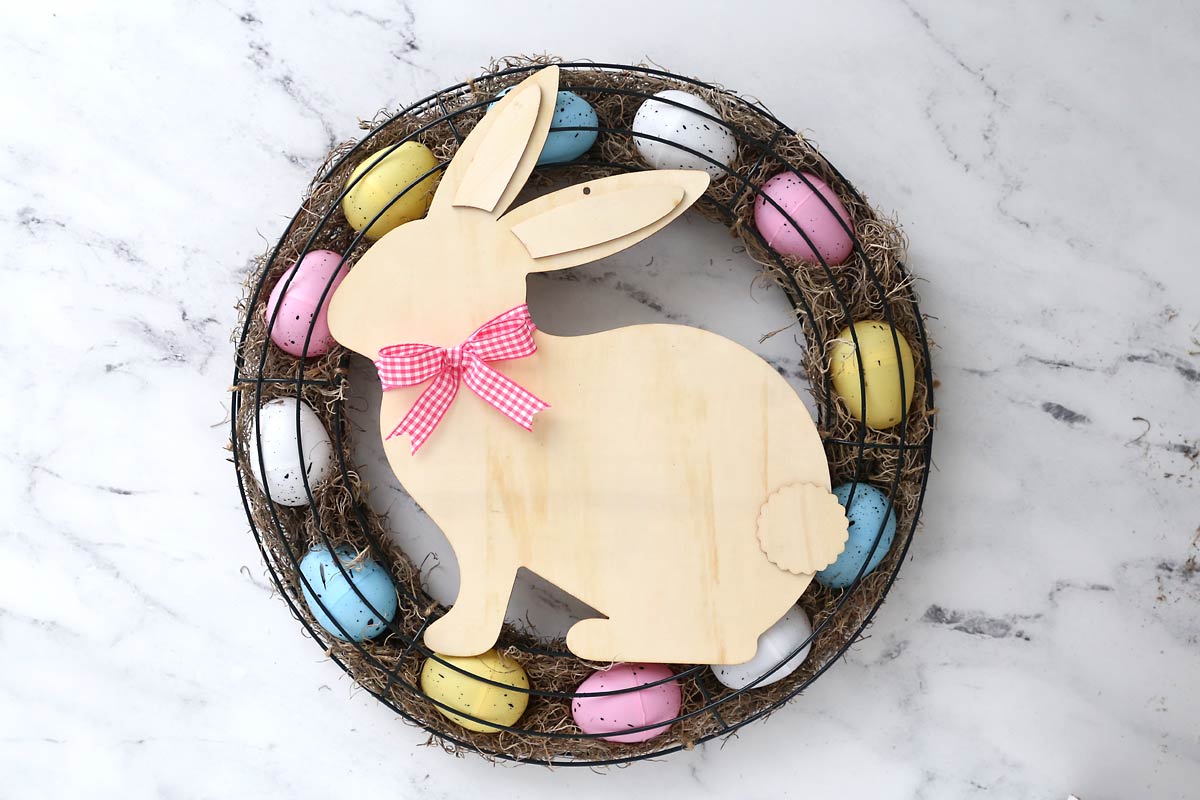
Place plastic Easter eggs over the moss as you see below. I used 12 speckled eggs and chose the colors I liked best from the package: pink, white, blue, and yellow (I did not use the green or purple eggs). Space the eggs evenly, like the numbers on a clock. Nestle the eggs down into the moss, pulling the moss apart gently where each eggs lays.
Step 3:
Attach Second Wreath Form
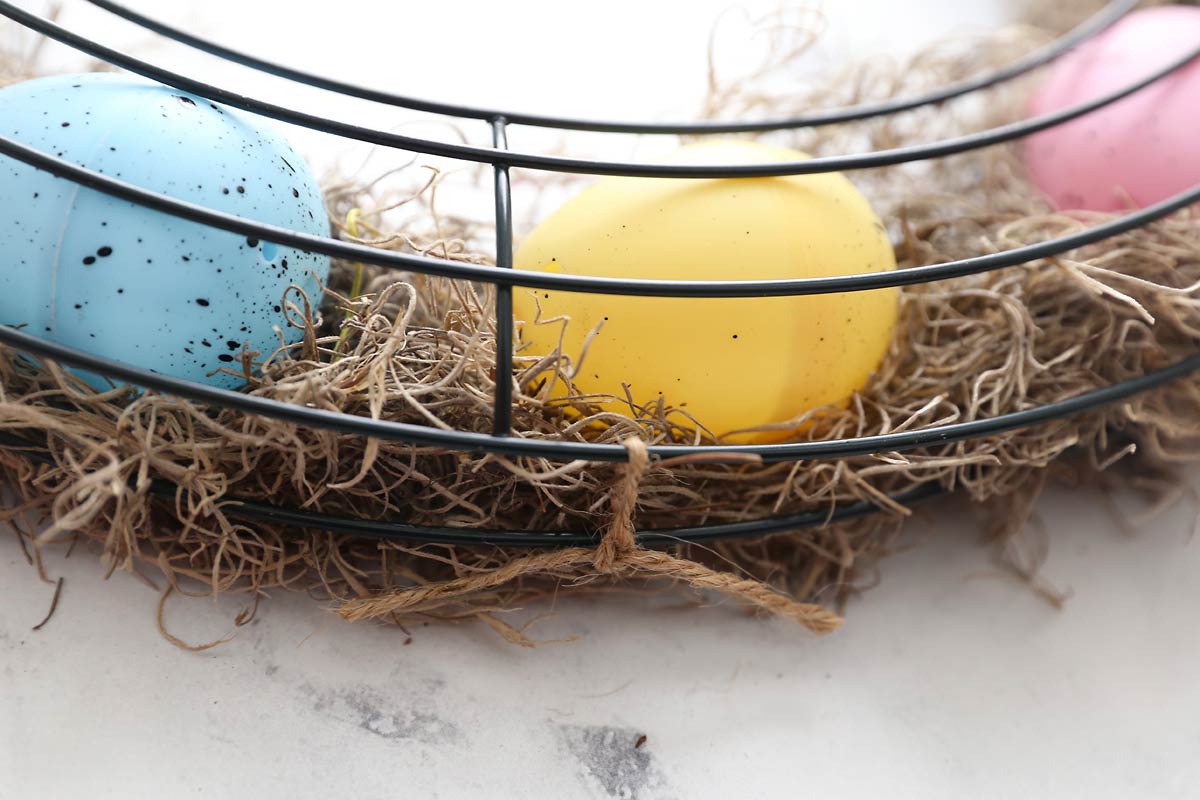
Place the second wreath form over the eggs with the wreath form curving down. Now the moss and eggs are sandwiched between two wreath forms.
Cut 12 pieces of jute, about 8 inches long. Use the jute to tie the top and bottom wreath forms together. Pull the jute tight and tie a double knot. The wreath forms will not touch each other; there will be about 3/4 inch of space between then. Tie the forms together in six places along the outside edge and 6 places along the inside edge. Pull the knots to the back of the wreath and trim excess jute.
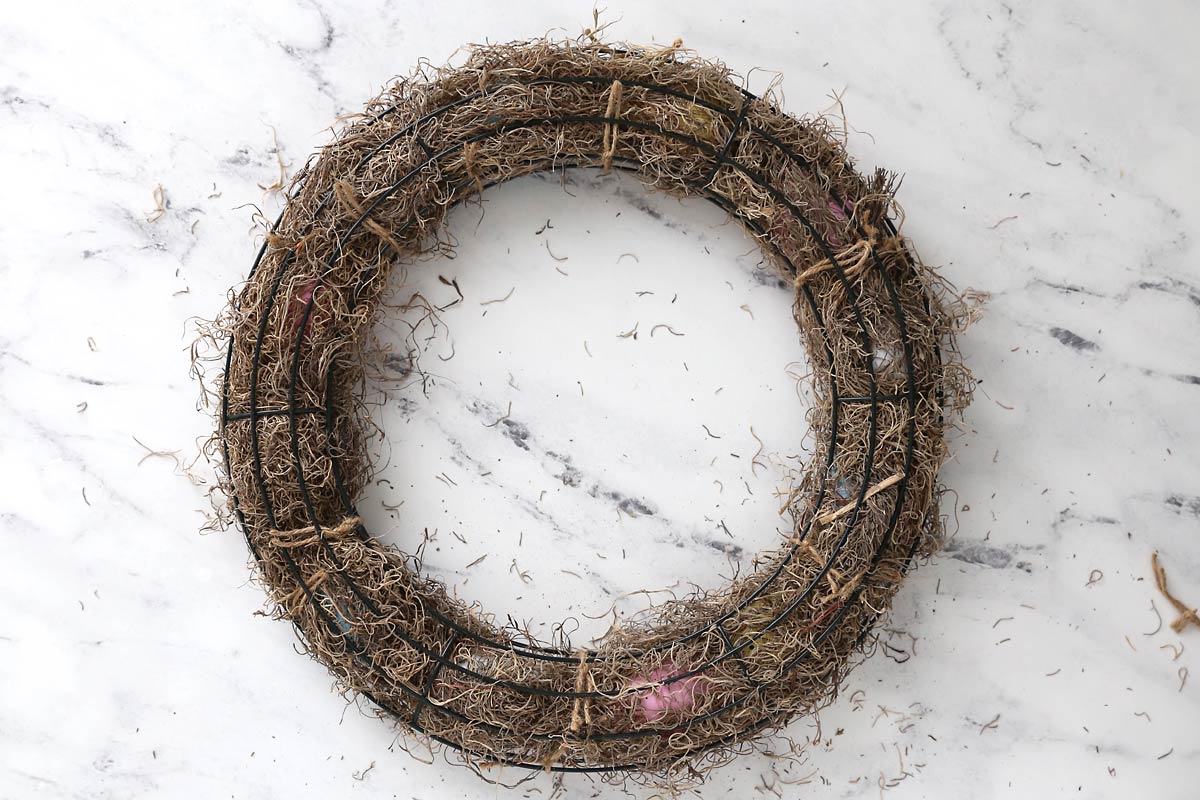
Here’s what the back of the wreath looks like at this point:
Step 4:
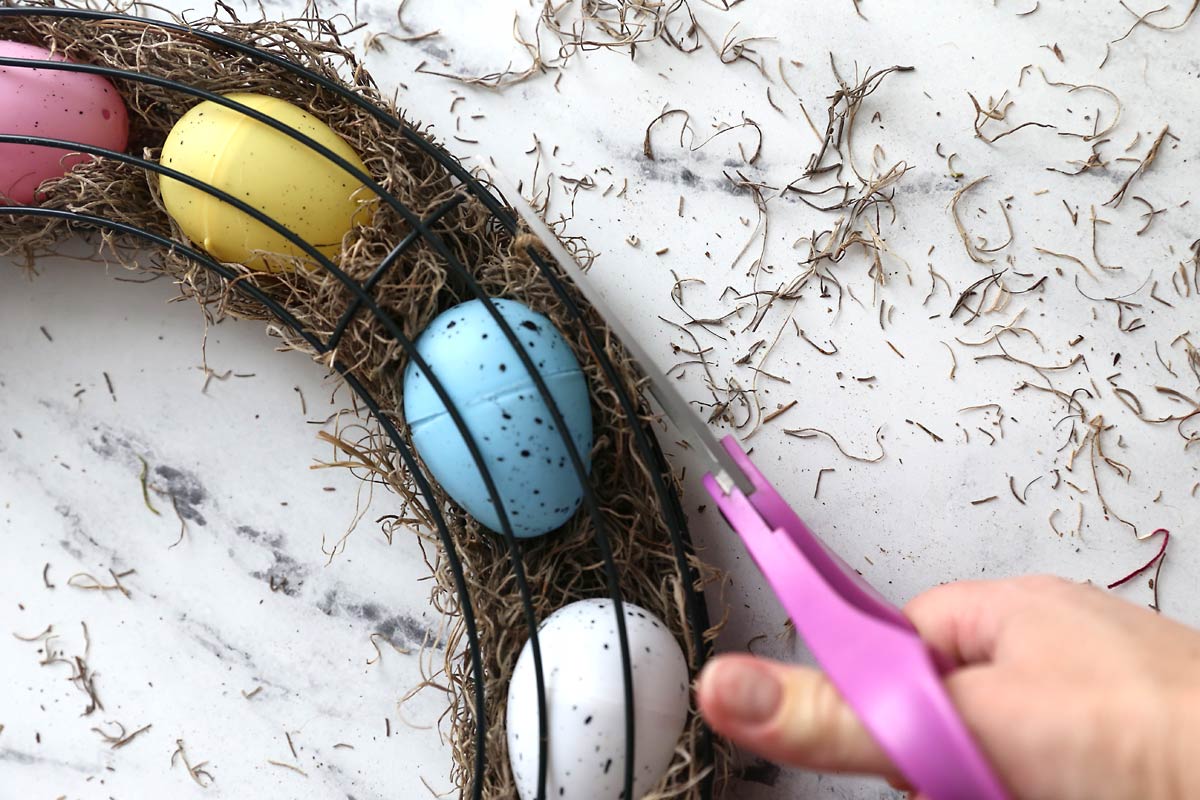
Tidy the Moss
Once the wreath forms are secured together, use your fingers to try to stuff any moss that is sticking out back into the wreath form between the eggs. After you’ve done that, use scissors to trim any remaining moss that’s sticking out.
Optional: If you are hanging the wreath inside or somewhere that is not windy, it’s probably fine as is, especially if you didn’t tear the moss much when adding it. But if you are worried about pieces of moss falling, you can use one of two methods to help secure the moss in place. The easiest way is to take the wreath outside and spray it liberally with hairspray. This helps stiffen up the moss so small pieces are less likely to escape. An alternate method is to purchase chicken wire ribbon and wrap it around the wreath.
Step 5:
Add the Bunny
Grab the wooden bunny cutout and tie the ribbon around her neck in a cute bow. Then decide where you’d like the bunny positioned on the wreath. Use plenty of hot glue to adhere the bunny to the wreath form and the Easter eggs it will touch.