Crochet Beautiful Headband
Crocheting a beautiful headband can be such a fun and rewarding project! Not only is it a great way to show off your creativity, but it also allows you to customize the headband to match your personal style. With just a few simple stitches and some colorful yarn, you can create a lovely accessory that will keep your ears cozy and stylish. Whether you're a seasoned crocheter or just starting out, making a headband is a wonderful way to relax and unleash your crafty side. So gather your materials, put on some good music, and get ready to crochet your way to a fabulous new accessory!
Materials:
#3 weight yarn of your choosing – you will need approx. 100 yards
4mm hook
Stitch markers (optional)
Scissors
Tapestry needle
Gauge:
My gauge was 12 sc wide per 2” Height is not important for this pattern. If you would like to work up a swatch:
Row 1: ch 31, sc in second ch from hook and each ch across.
Row 2: Turn, ch1, sc in first st and each st across.
Rows 3-10: Rep row 2.
Sizing:
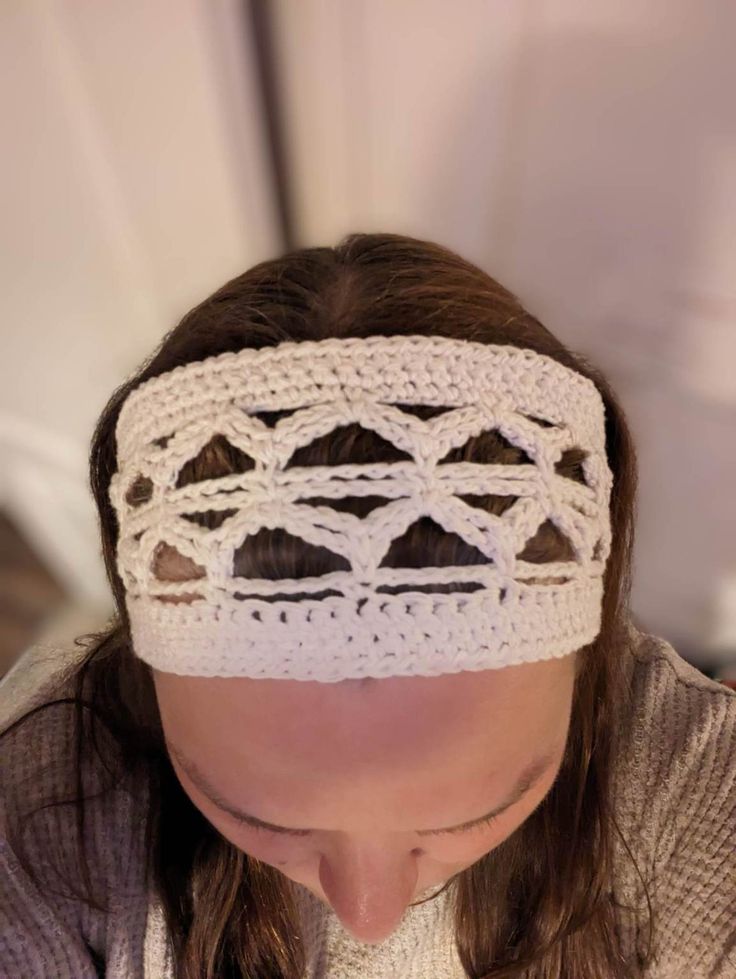
My headband is approx. 19” in circumference by 2.75” wide when completed. This pattern is written to fit an average adult head, but is really easy to adjust – see pattern notes.
Abbreviations used:
Ch(s)–chain(s)
St(s)–stitch(es)
rep–repeat
sk—skip
FSC – foundation single crochet
HDC – half double crochet
SC – single crochet
Dc – double crochet
Blo – back loop only
Sc2tog – single crochet 2 together
YO—yarn over
FO—fasten off
Other notes:
Written in US terms.
Ch1 stitches at the beginning do not count as a st unless otherwise stated.
To amend the length of the main body of the headband adjust row 1 by multiples of 6.
To adjust the circumference of the headband it may be easier to adjust the sc blo section at the end of the pattern simply by making it longer or shorter to suit your requirements.
Special stitches used in this crochet headband pattern:
Foundation Single Crochet (fsc)
I find this has a more aesthetically pleasing finish than the chain starts to projects and it gives the project more movement.
Single crochet 2 together (sc2tog)
Insert hook into first indicated stitch, YO and pull through, insert hook into next stitch, YO and pull through, YO and pull through all 3 loops on hook.
The Free Crochet Headband Pattern:
Crochet the Main Body
Row 1 – FSC 79 OR CH 80, SC in second CH from hook and each CH across. Note: Row 1 should be 15” long.
Row 2 – Ch1, sc in the first st, *ch5, sk the next 5 sts, sc in the next st* Repeat from * to * across. Turn.
Row 3 – Ch1, sc in the first st *ch7, sk the ch5 sp, sc in the next sc from the previous row* Repeat from * to * across. Turn.
Row 4 – Ch1, sc in the first st, *ch7, sk the ch7 sp, sc in the next sc from the previous row* Repeat from * to * across. Turn.
Row 5 – Ch5 (counts as a dc, ch2), *sc over the ch7 spaces over the last two rows, ch5* Repeat from * to * across until you work the sc over the last set of ch7 sps, ch2, dc in the last st. Turn. Note: you will insert your hook under the ch7 sp from row 3 and work the sc so it nips together the two ch7 spaces from rows 3 and 4.
Row 6 – Ch1, sc in the first st, ch2, sk the ch2 sp from row 5, sc in the next st, *ch5, sk the ch5 sp, sc in the next st* Repeat from * to * until you reach the final ch2sp. Sk the final ch2 sp in row 5, ch2, sc in the third ch of the ch5 at the beginning of row 5. Turn.
Row 7 – Ch6 (counts as a dc, ch3),sk the ch2sp, sc in the next st*ch7,sk the ch5 sp,sc in the next st* Repeat from * to * until you have worked a sc into the last st before the ch2 sp from row 6, ch3, dc in the last st. Turn.
Row 8 – Ch1, sc in the first st, ch3, sk the ch3 sp from row 7, sc in the next st, *ch7, sk the ch7 sp from row 7, sc in the next st*. Repeat from * to * until you reach the last ch3 sp from row 7. Ch3, sc in the third ch of the turning chain from row 7. Turn.
Row 9 – Ch1, sc in the first st, sk the ch3 sp, *ch5, sc over the ch7 sp’s from rows 7 and 8* Repeat from * to *, sc in the last st. Turn. Note: you will work the sc over rows 7 and 8 as you did at row 5!
Row 10 – Ch1, sc in the first st, *5 sc in the ch5 sp, sc in next st* Rep from * to * across. Turn. Do not FO.
Edging the Main Body of Your Headband
Round 1 – Ch1, sc in each st across until you have 1 st remaining. Work 3sc in last stitch. Use a stitch marker to mark the second of these 3sc stitches.
Turn your work 90 degrees so you are working down the side of your headband. Sc evenly down the side (I worked 1 sc in each row but 2sc in the row that started with a ch3 or ended with a dc) until you have 1 st remaining. Work 3sc in last stitch. Use a stitch marker to mark the second of these 3sc stitches.
Turn your work 90 degrees so you are along the bottom of your headband. Work 1 sc in each st along until you have 1 st remaining on that side. Work 3sc in last stitch. Use a stitch marker to mark the second of these 3sc stitches.
Turn your work 90 degrees so you are working up the final side of your headband. Sc evenly up the side (I worked 1 sc in each row but 2sc in the row that started with a ch3 or ended with a dc) until you reach the stitch that you first worked into on this round. Work another 2sc in this st. Slip stitch to join.
Round 2 – Ch1, work 1 hdc in the first and each st until you reach the stitch marker. Work 3hdc in this st. *Turn your work 90 degrees. work 1 hdc in the first and each st until you reach the stitch marker. Work 3hdc in this st. * Rep from * to * 2 more times. Slip stitch to join, do not FO.
Now we will start to narrow each end of your headband ready for the ribbed fastening.
Row 1 – Turn, sc2tog over the first 2 sts, sc in each st across until you have 2 sts remaining, sc2tog across the last 2 sts.
Rows 2-5: Rep row 1 until you have 5 (or 6) sts in the row. FO and weave in ends. Note: this section will add approx. 1” to the width of your headband at each end, so it will measure approx. 17.25” wide in total.
Join yarn to the corner of the opposite side and repeat rows 1-5 above. Do not FO.
Row 6 – Turn, ch1, sc blo in each st across (5 or 6 sts)
Row 7 – Rep row 6 until your ribbed section is 2.25” long (or as long as desired). Do not FO.
As mentioned above, it is personal preference whether you would like to block your headband before sewing the ends of the sc blo section together. I did not block my version.
Sew or slip stitch the end of your ribbed section to the 5 or 6 sts at the opposite end, making sure not to twist your project when doing so. FO and weave in ends.
No comments
Write a comment