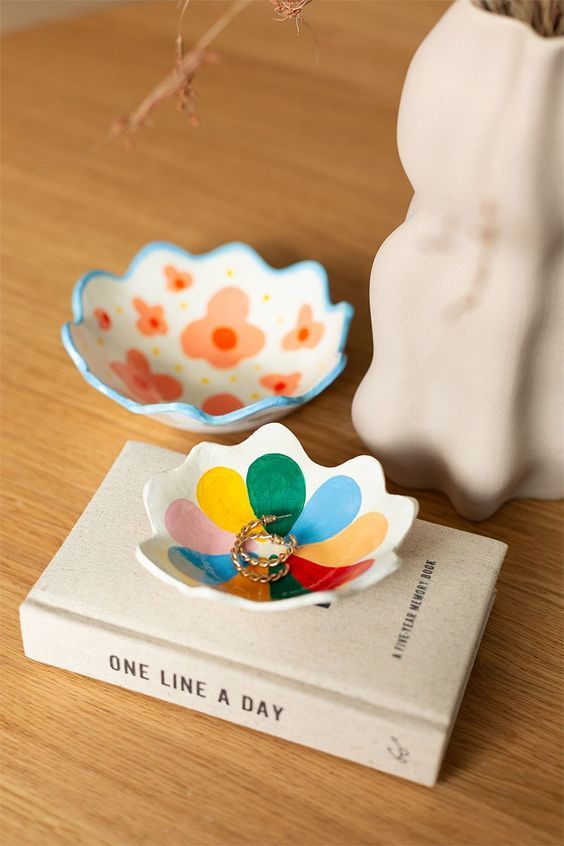
DIY Air Dry Clay Wavy Painted Bowl
Creating a DIY Air Dry Clay Wavy Painted Bowl is a fantastic way to let your creativity shine! With just a few simple steps and supplies, you can make a unique and stylish bowl that reflects your personal style. Whether you opt for a bold and vibrant look or a subtle and chic design, this project is a great way to add a personal touch to your home decor. Have fun crafting and enjoy the process of making something truly special!
Materials:
- Air dry clay
- roller
- Craft knife
- Round bottom bowls
- Cling film
- Sand paper
- Acrylic paint
- Paint brushes
- Clear varnish (optional)
Cut off about 250g (1/4 block) of air dry clay and roll into a rough circle. I used a small side plate to cut a circle from the clay. Remove the excess clay and cut a wavy line around the outer edge with the craft knife. To make it easier to shape into a bowl cut out a triangular wedge which is about 1/6th of the circle.
Use water to smooth over the wavy edges and any cracks in to clay surface.
Lay the clay over the upturned bowl and overlay the edges to create a rounded shape. Cut off the overlapping clay and gently blend together using lots of water.
Leave the bowl to dry for several hours then turn upside down and remove the bowl and clingfilm. Blend the join on the inside of the bowl together with water and leave to dry until the clay is set.
Using a fine grit sand paper smooth over the edges and surface of the bowl.
Now your bowl is ready to paint. You can draw out your design or just wing it like I did. Paint 2 – 3 layers of each colour to give to bowl a bold, finished look. When the paint is dry you can seal with a clear varnish. I used this one. Wait for the varnish to fully dry and your bowl is done!
