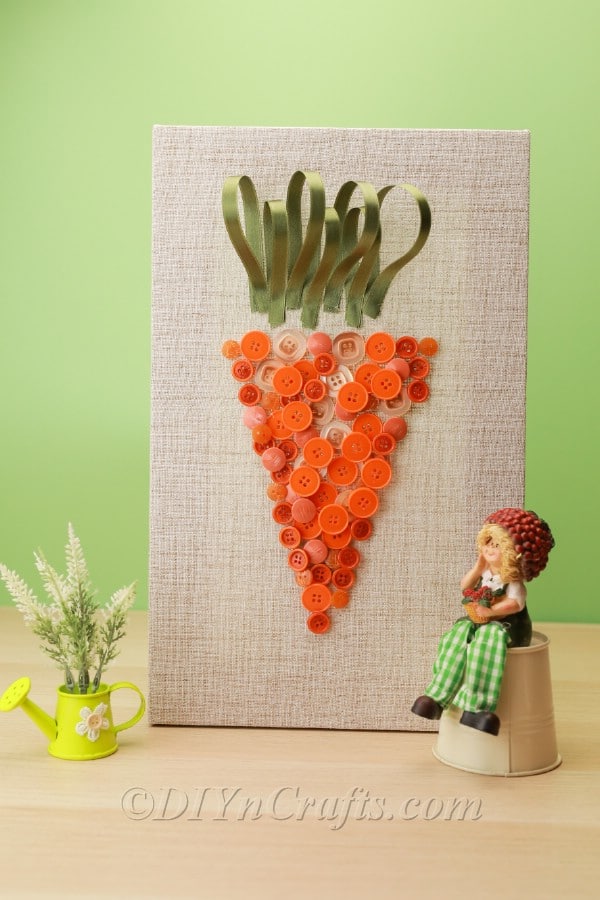
Easter Carrot Wall Art Out of Buttons
Looking to add a touch of springtime charm to your home? Why not create Easter Carrot Wall Art Out of Buttons! This delightful DIY project combines the joy of crafting with the whimsy of Easter. By arranging orange and green buttons in the shape of a carrot and framing it, you can easily bring a pop of color and cheer to any room. Not only is it a fun and creative way to celebrate the season, but it also makes for a unique and personalized piece of decor that is sure to spark joy in anyone who sees it. So grab your buttons, unleash your imagination, and let's get crafting!

Materials

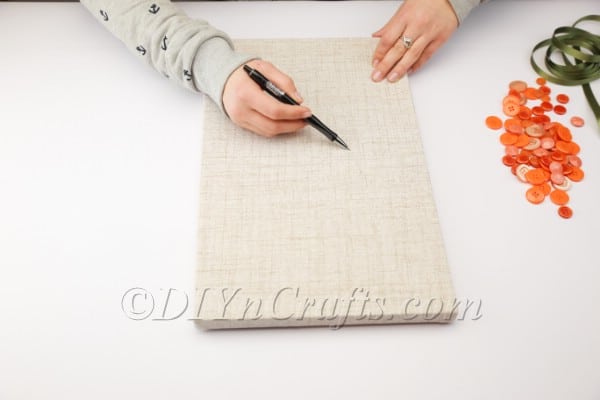
- Use a pen or a pencil to sketch the outlines of your carrot on the canvas. You do not need to worry about the lines being visible, because you are going to cover them up. So even if you make a mistake, it is all right.
- Remember, carrots are not perfect triangles in real life, so you do not need to worry about precision either. I chose to go with an orderly-looking triangle, because I wanted a stylized effect. But you could also go for a more realistic carrot shape if you preferred.
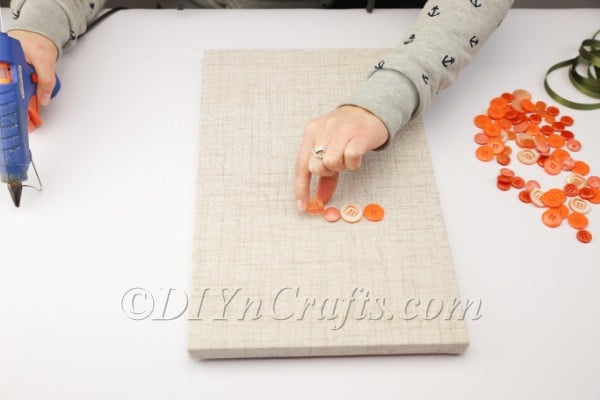
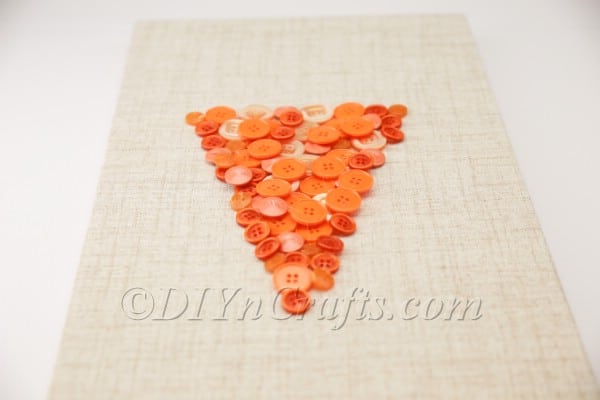
- Once you have sketched the shape of the carrot on the canvas, you are ready to proceed to the main step in this project. This is simply to glue on all of the buttons to fill the carrot shape in, making sure to cover the guidelines you drew.
- Just as you have full freedom to select buttons that appeal to you, you also have full freedom with how you wish to distribute them across the canvas. I chose to distribute the different colors, sizes and shapes of buttons as evenly as I could across the canvas in order to achieve a balanced effect.But there are other approaches you can take which would also be cool. You could for example try to create an ombre effect by making a gradient from light to dark.


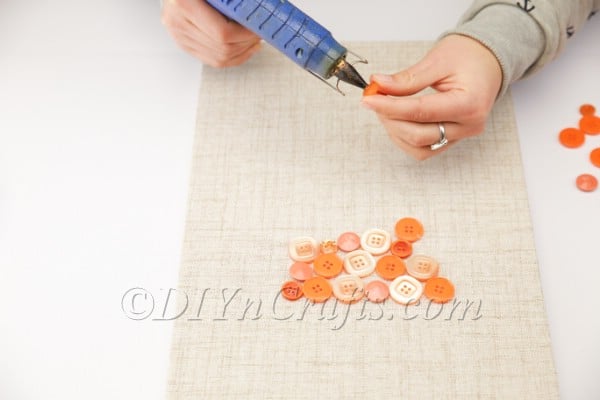

Once you have finished initially filling in the outlines of the carrot shape, you are going to want to make sure that the shape is as full as possible. You do not want a lot of gaps where the canvas shows through. To take care of that, you can layer on some more buttons over thin areas, overlapping them where necessary. Doing this will also provide more texture and depth to the piece.
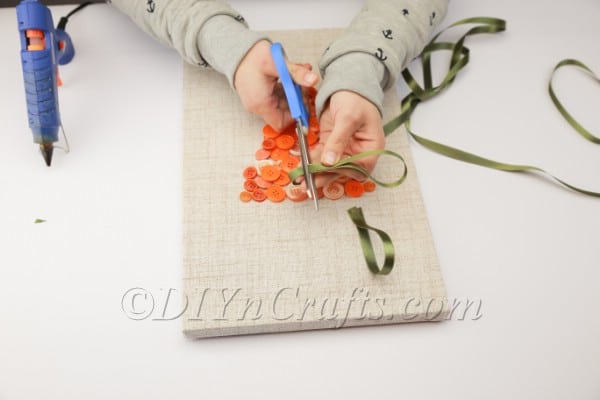
- Once you have completed the steps with the buttons, get a green ribbon and cut it into a number of small pieces which are either identical in length, or relatively close in length (which you go with should be based on your aesthetic preferences).
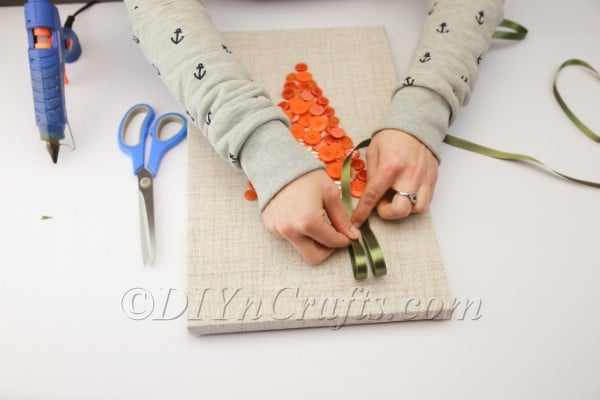
- Create loops out of each of these pieces of ribbon, and hot glue them onto the canvas at the top of the carrot. You do not need to tie any knots; just use the glue to create the loops as you attach them to the canvas directly.
Once you finish this step, your Easter carrot DIY artwork will be complete and ready to display. You can hang it on a wall, or prop it up on a table or desk with some other Easter decor.