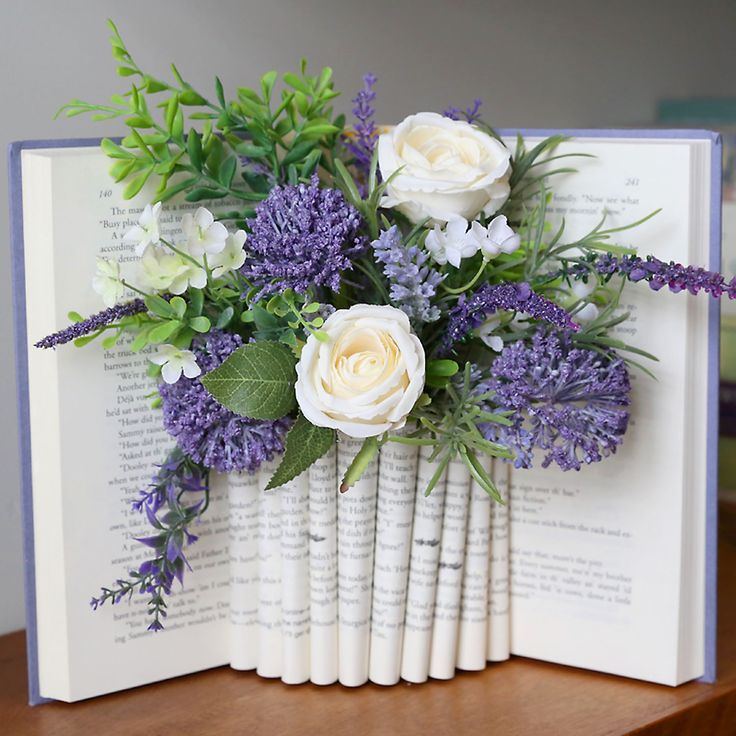
If you're looking to add a touch of creativity to your home decor, why not try making a DIY folded book vase? This craft is not only a fun and unique way to repurpose old books but also makes for a stunning decorative piece. To create your very own folded book vase, all you need is an old book, some patience, and a bit of creativity. Once you've folded your book pages into a lovely vase shape, you can add some artificial flowers or greenery to complete the look. It's a fun project that will surely bring a smile to your face every time you see it displayed in your home.
Supplies
Here’s what you need to make a folded book page vase:
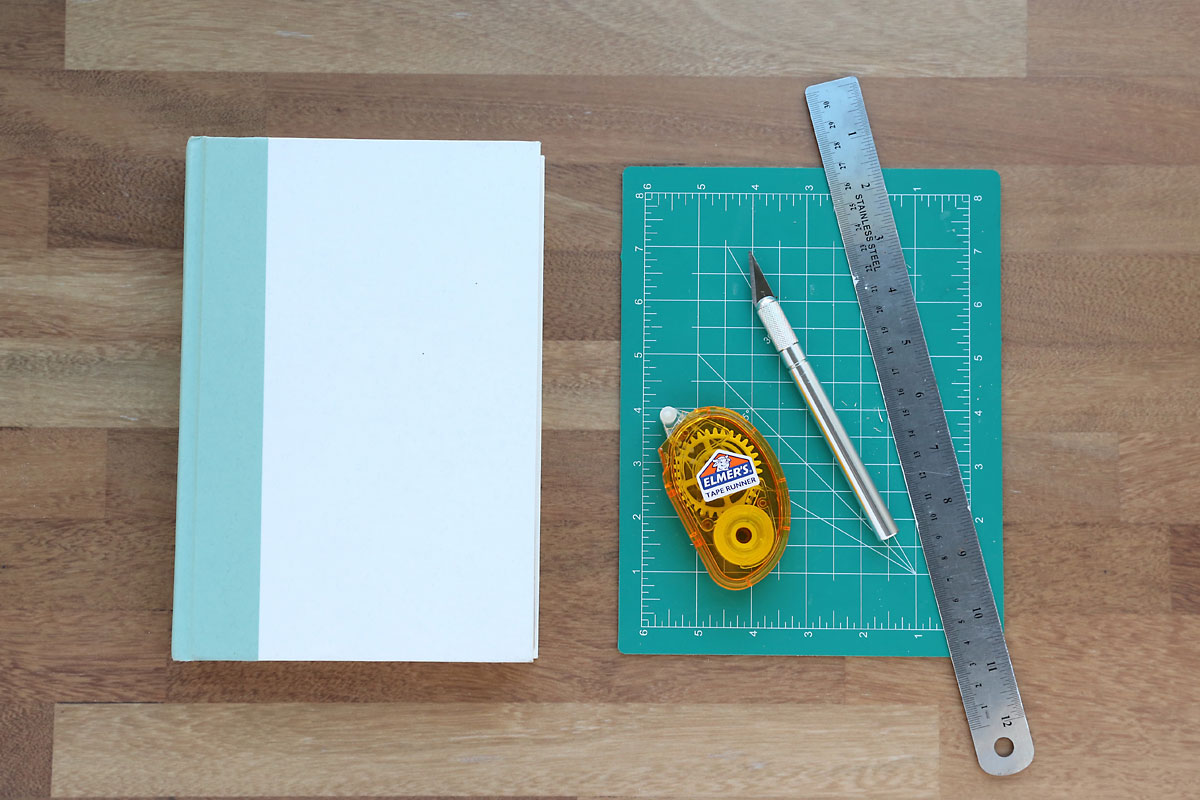
Hardback Book: The book I used is 9 inches tall and nearly 400 pages long. Thicker books work better, so shoot for at least 300 pages. Thrift stores and dollar stores are great places to find inexpensive hardback books that no one else wants. If you have a specific color scheme in mind, try to find a book with a cover that matches.
Exacto Knife or Scissors
Ruler
Tape Runner or other adhesive (optional but recommended)
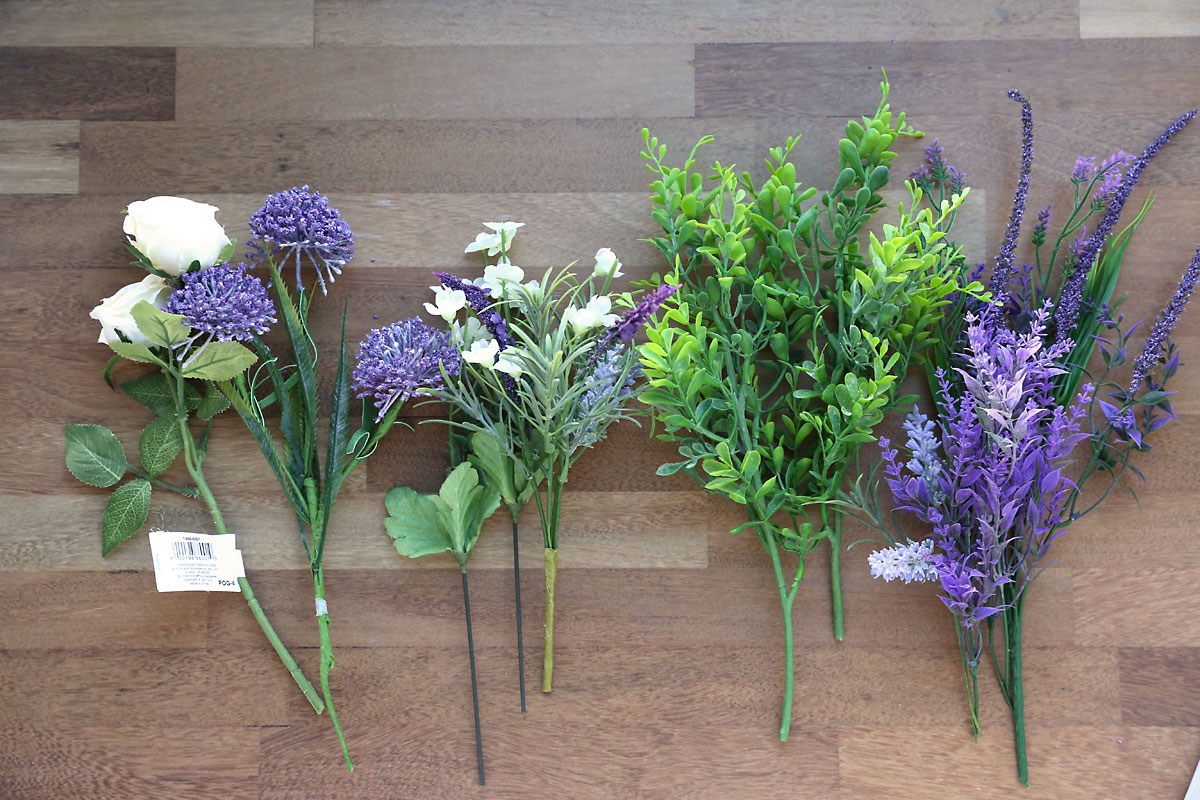
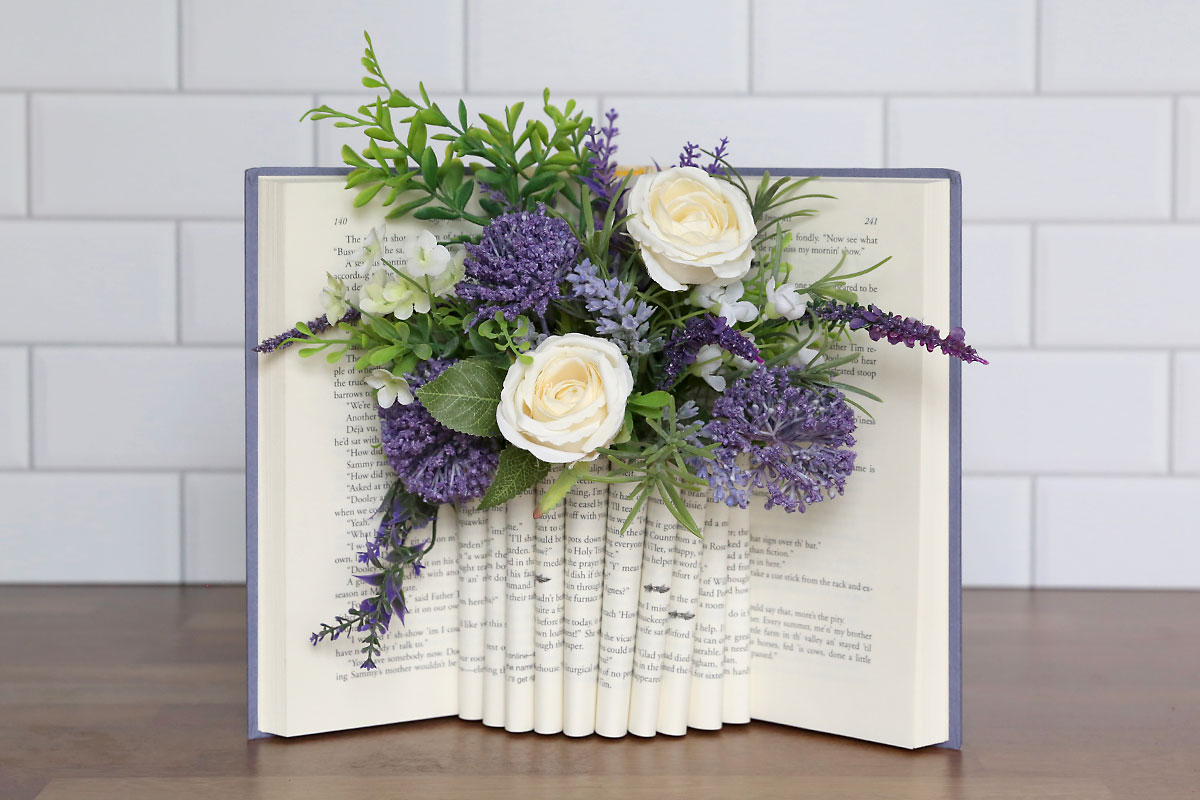
Faux Florals
You will also need faux florals to fill your book vase. If you are using a standard size hardback like I did, you’ll want to look for small florals that won’t overwhelm the book. The flowers I used are about 2 inches across. Get a mix of flowers, greenery, and other colored items like leaves or berries to add interest. I got small floral picks from Jo-Ann. You can also find small floral picks at Walmart, Dollar Tree, and Hobby Lobby. It can be a good idea to take your book with you when you go shopping for florals – that way you can compare the bunch of florals you are buying to your book to see if they are about the right size. You can see the flowers I used below (I did not end up using all of them).
How to turn a book into a Vase
Prep the Book
Start by finding the center of the book and opening it wide to crease the spine. Then repeat the process in ten page intervals for fifty pages to the right and left of the center. This will help the book stay open.
Cut the center pages
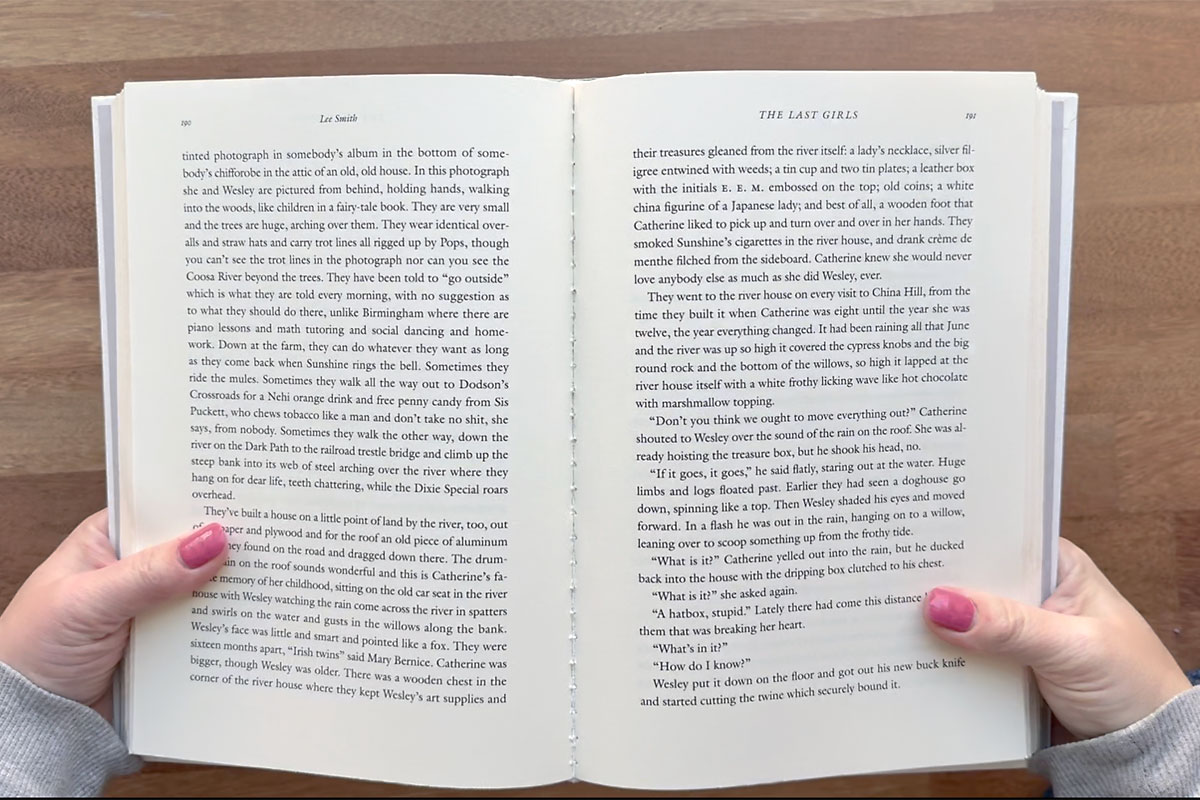
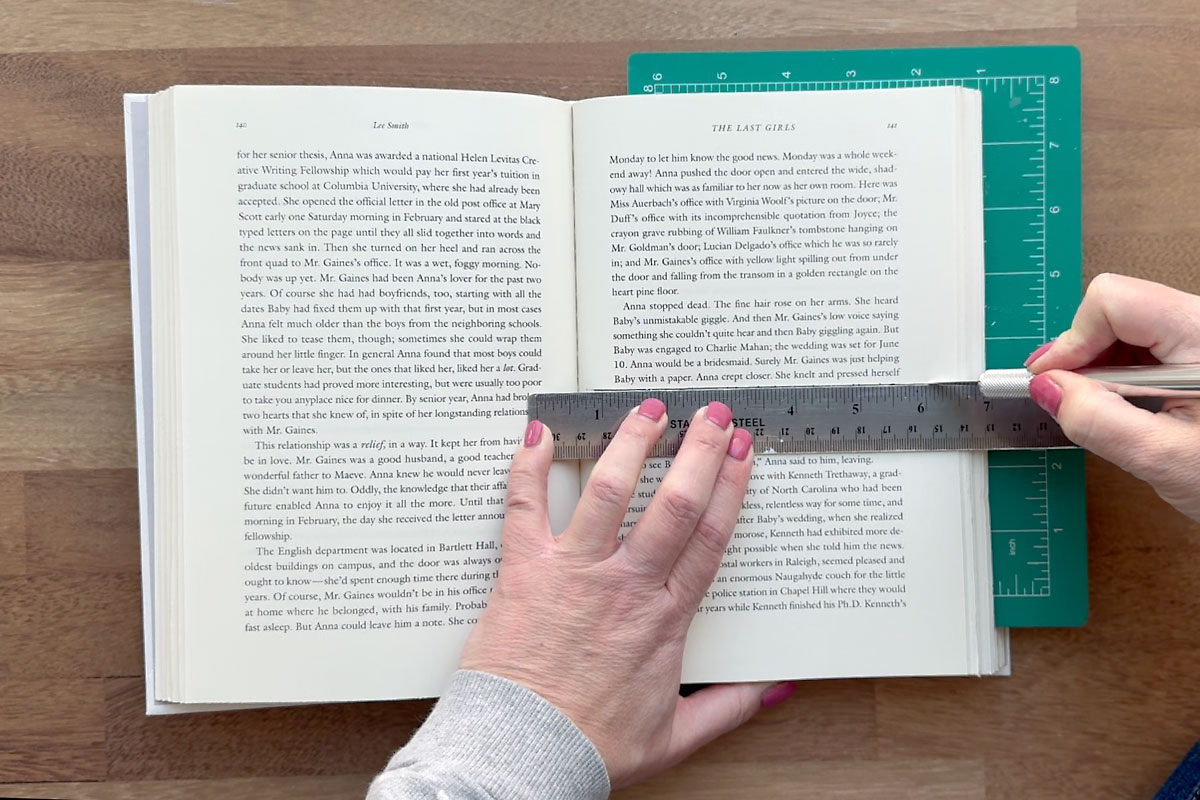
Starting from the center of the book, grab 50 pages to the right of center and 50 pages to the left of center. This is the 100 page chunk that you will use to create the vase. Please note I am talking about numbered pages here – so if the center of your book is page 190, you’ll use pages 140-240 to create the vase (that’s 100 numbered pages but only 50 actual sheets of paper). Starting at the beginning of the chunk, measure halfway up the book and use an exacto knife or scissors to cut through a couple pages at a time.
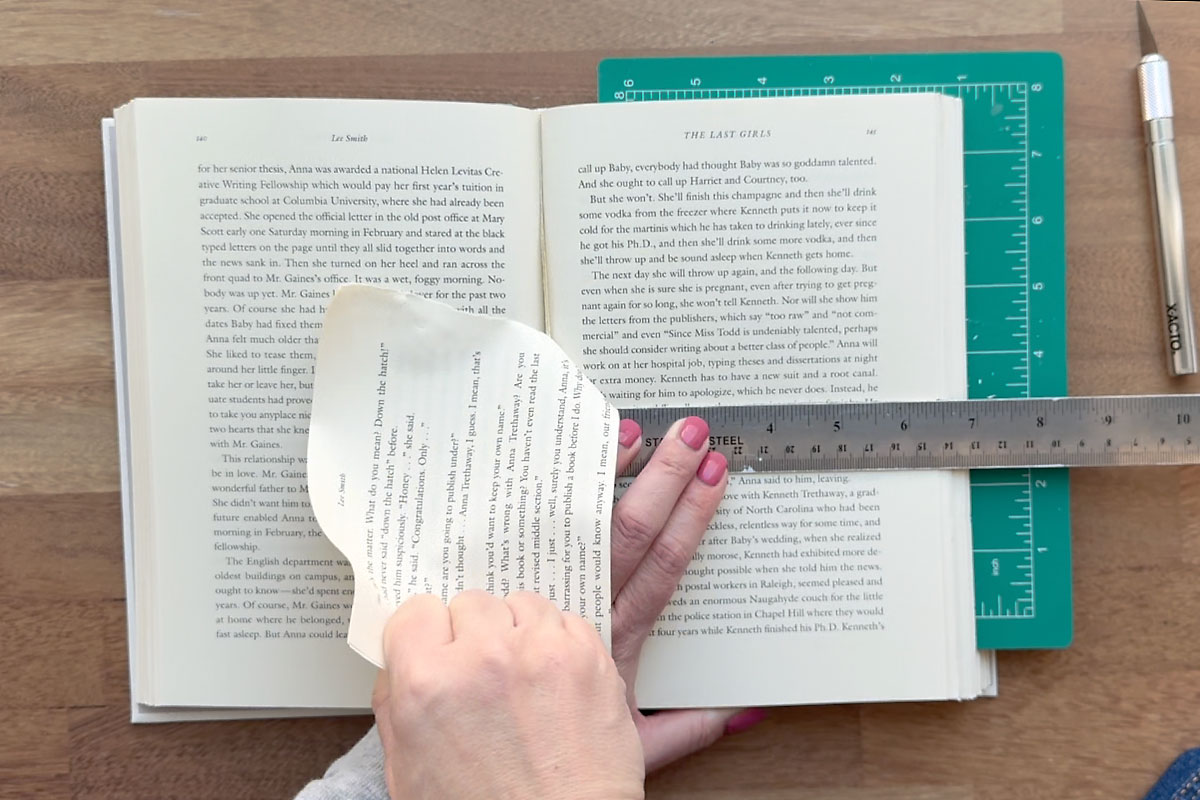
Once you’ve cut through a few pages, rip the top half of the pages out of the book. Repeat the process until the top half of all 100 pages (50 sheets of paper) have been removed.
Fold pages toward the center
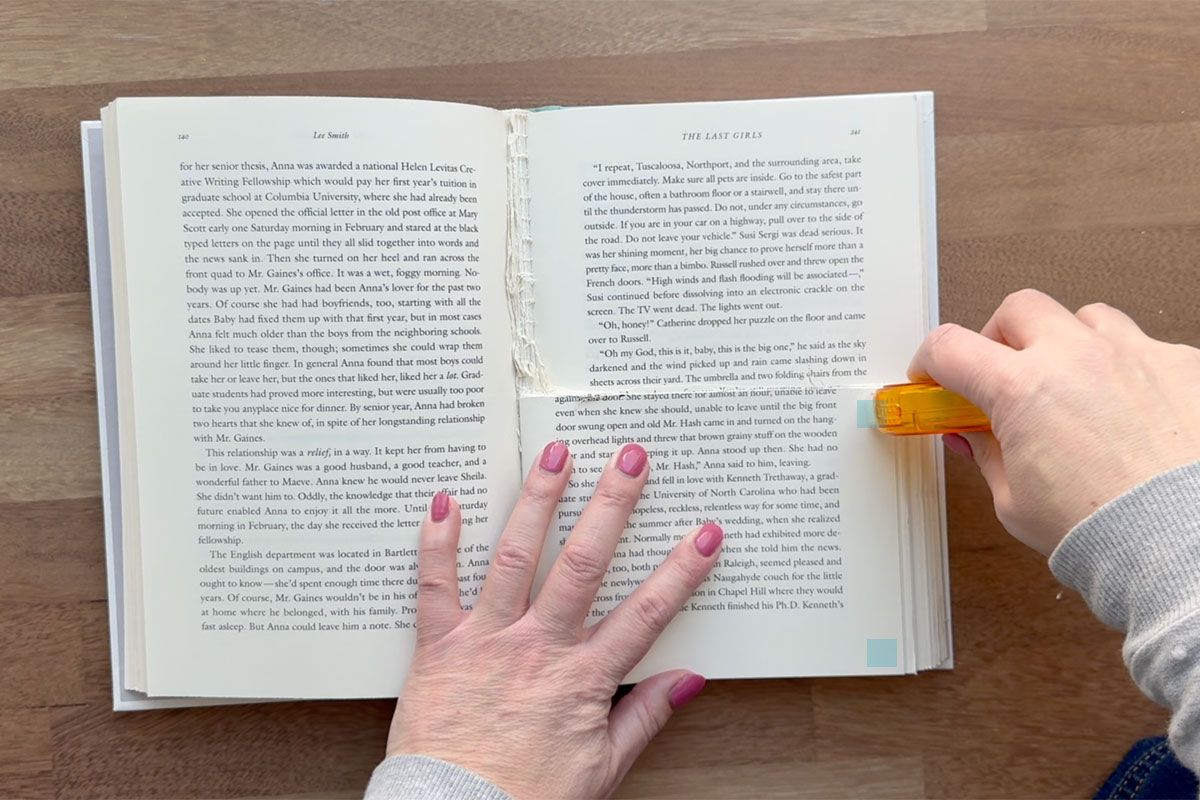
Place a little bit of adhesive on the top and bottom right corners of the first half page, as shown below. Adhesive is optional – the pages will stayed rolled without it – but makes the finished project more secure.
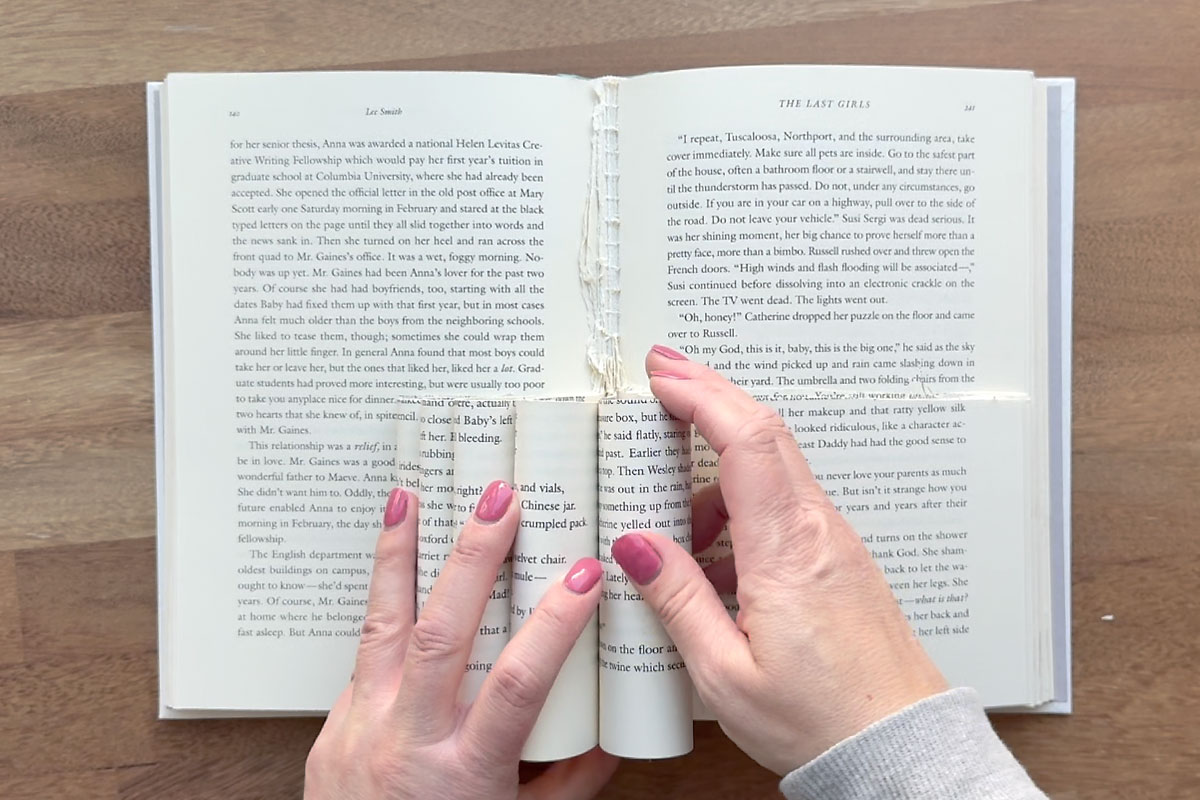
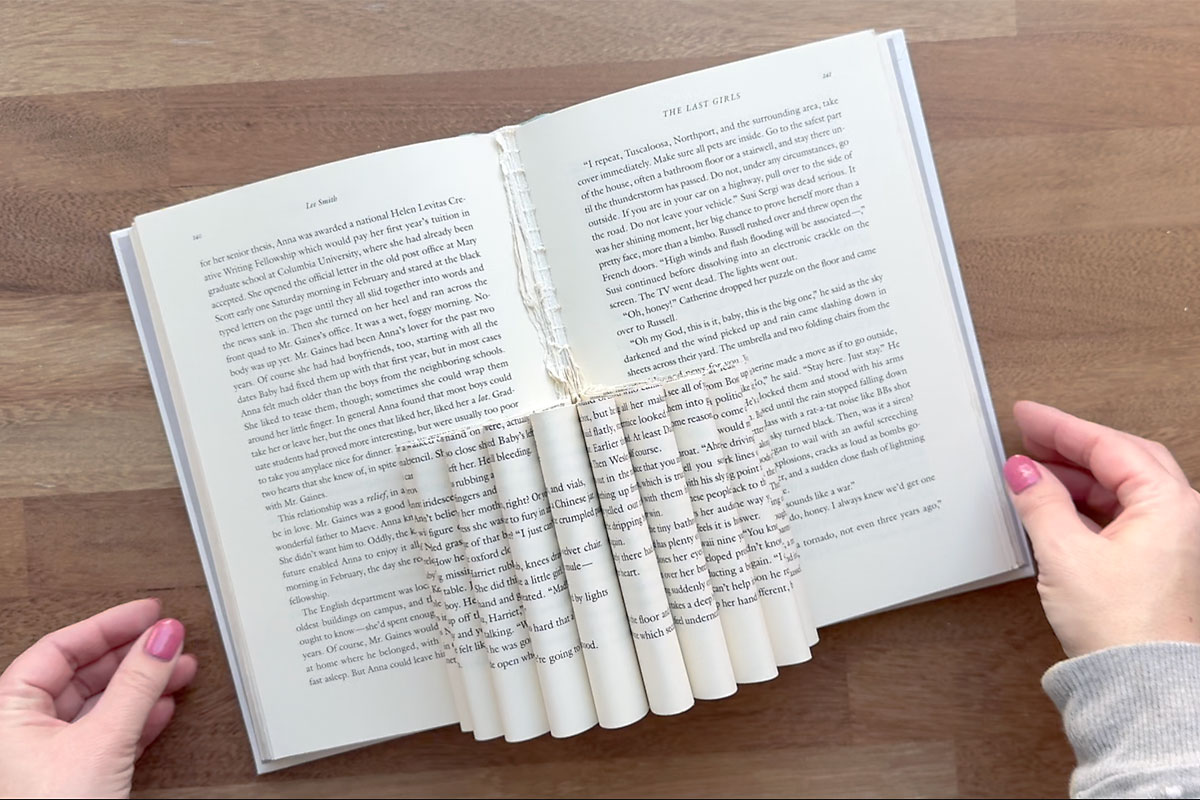
Count five half pages (including the one you just added adhesive to) and hold them as one page. Fold them to the right WITHOUT CREASING, rolling the outer edge of the pages in toward the spine of the book, and tuck them in.
Repeat the process: adding adhesive to the top page, counting five pages, and folding it to the right without creasing, bringing the edges to the spine of the book. You are creating the rolled edge of the “vase” portion of the book. You’ll have enough half pages for 10 sections.
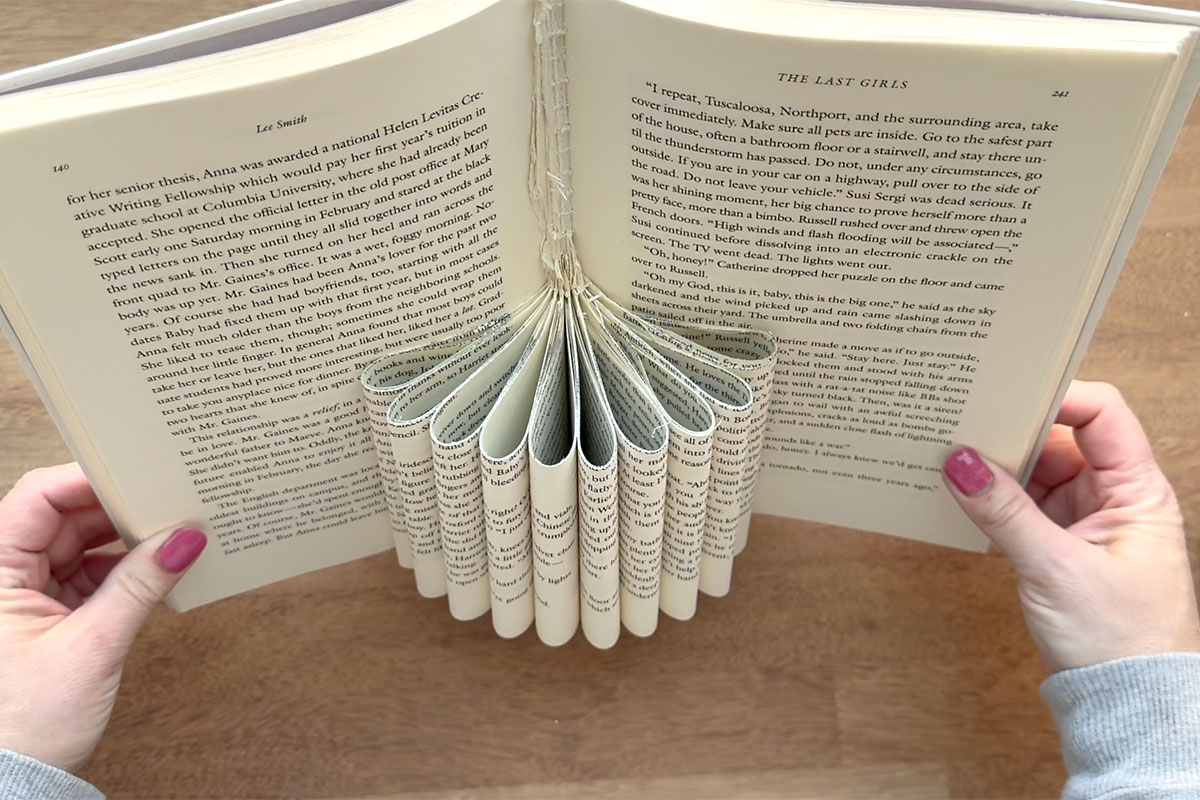
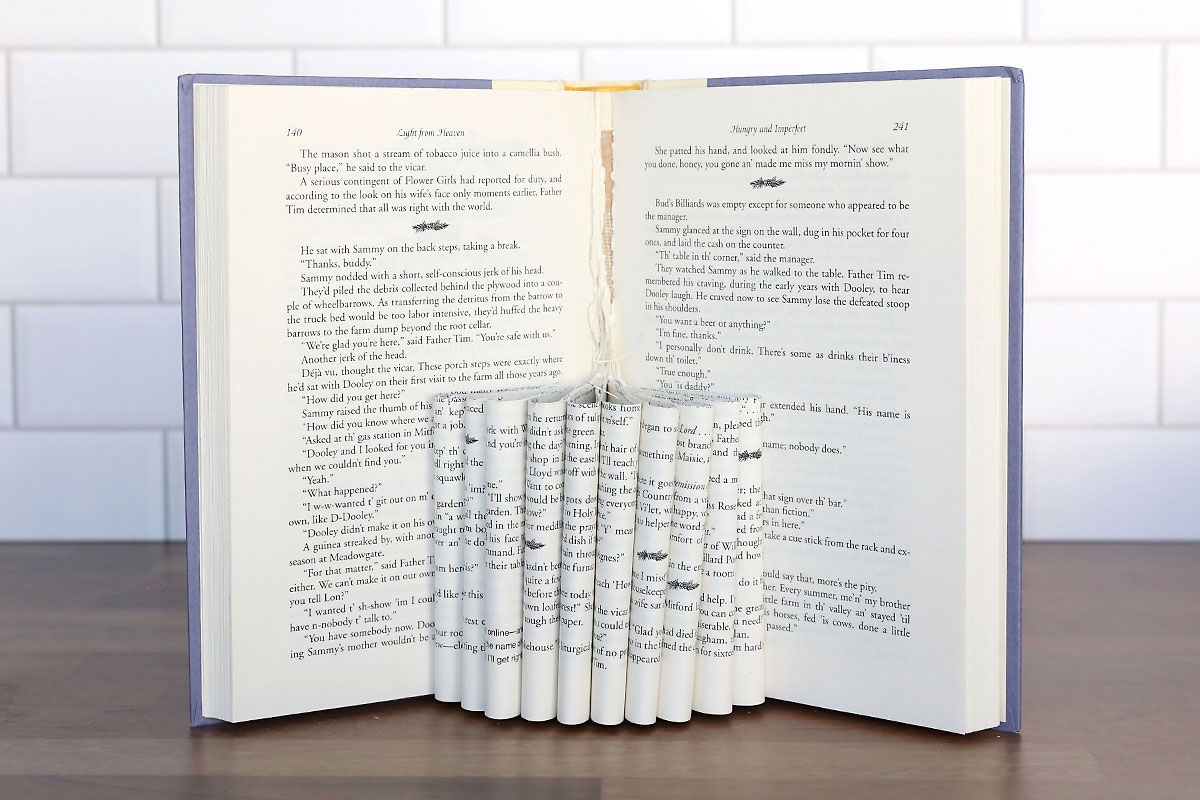
This is what it will look like when you have folded/rolled all the half pages of the book:
Add Florals
At this point the book will stay open and stand up on it’s own.
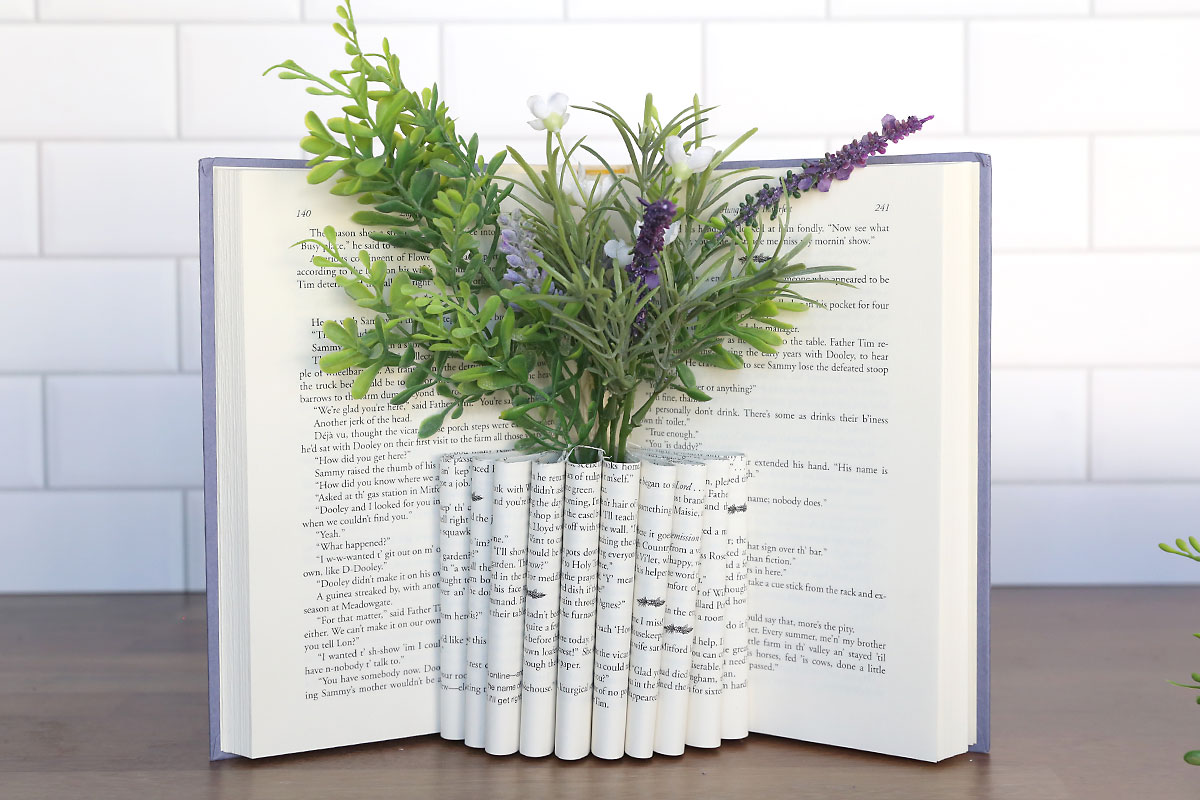
You can start adding faux florals and greenery, placing stems down inside the rolls of paper. Cut the stems if they are too long.
Continue adding florals until you like the arrangement, then your book vase is ready to display. I found that the florals stay put without any glue, which is nice because that means you can change them out for different seasons if you like.