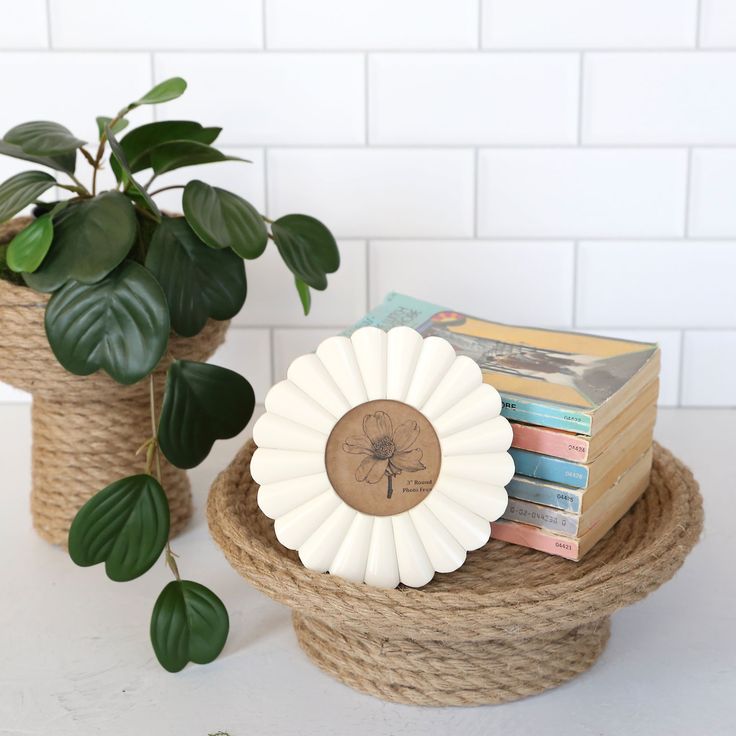
Looking to add a touch of charm to your living space? DIY home decor rope trays are a fun and easy way to elevate your decor with a touch of rustic elegance. By simply coiling rope into a tray shape and securing it with a glue gun, you can create a unique and stylish piece that is both practical and eye-catching. These trays are versatile, perfect for organizing small items on a coffee table, serving snacks to guests, or even holding candles for a cozy ambiance. So grab your crafting supplies and get ready to impress with your handmade rope trays!
Supplies
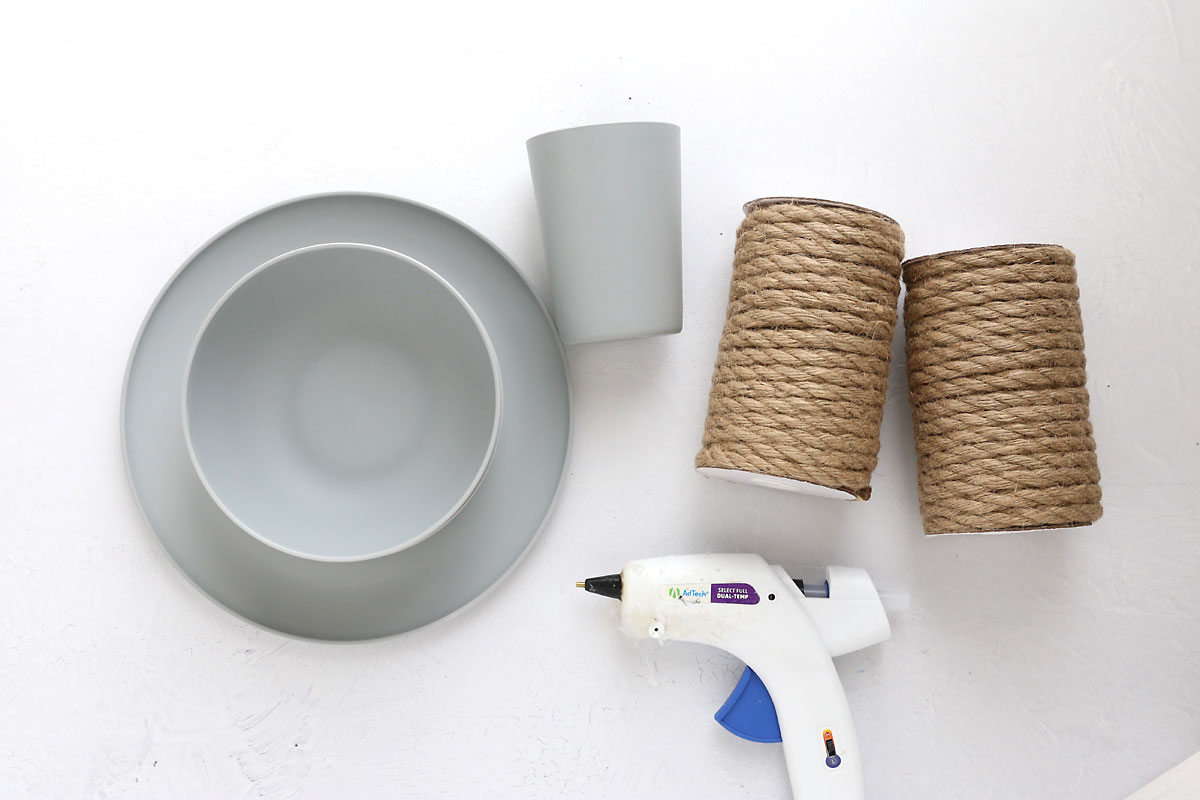
Here’s what you’ll need to make these rope home decor trays:
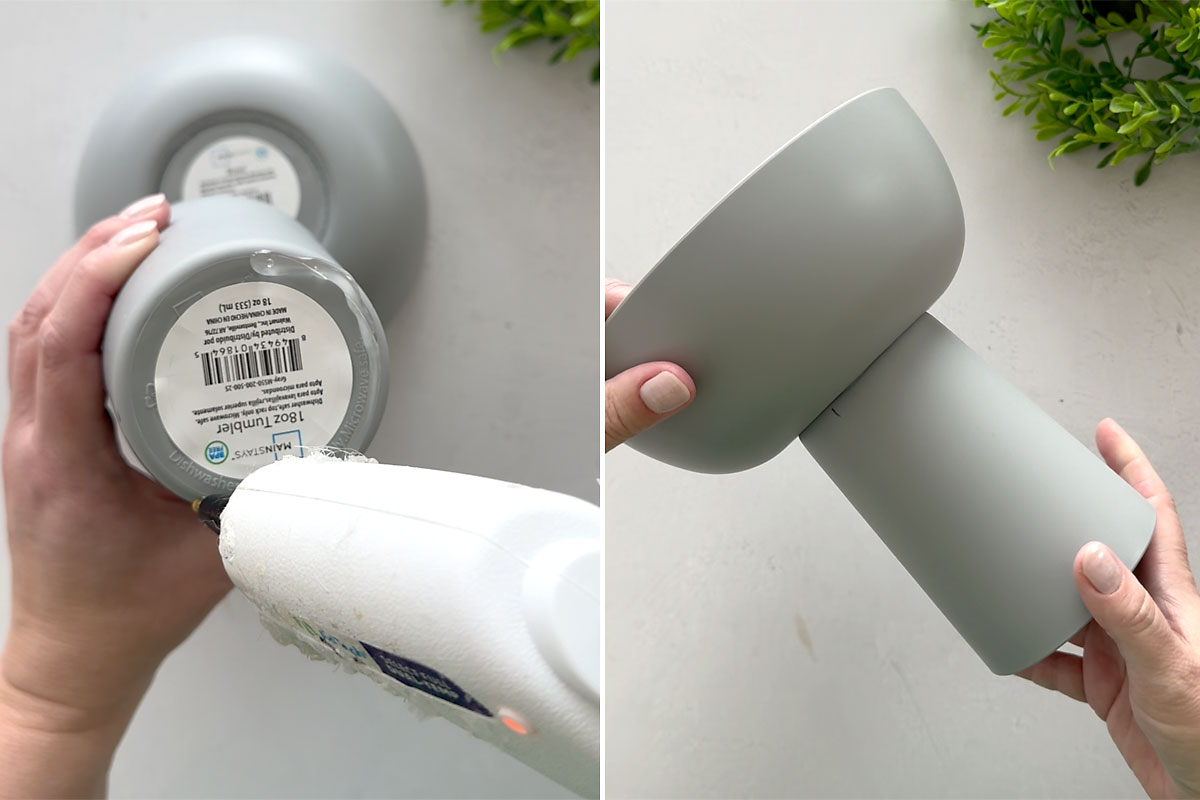
Plastic dishes: I used lightweight, reusable plastic dishes from Walmart that are only fifty cents each. They are nice and sturdy while also being thin and lightweight. I used a cup and bowl to make a small planter, and a bowl and plate to make a tray. You can use whatever combination of dishes you like. Mainstays Plastic Cereal Bowl Mainstays Classic 18 oz Tumbler Mainstays Round Plastic Plate
Jute rope: I used this 8mm jute rope from Amazon. It took 100 ft of rope (so two spools) to cover both pieces that I made.
Hote glue gun and hot glue: You’ll want a high temp hot glue gun, and this project takes a fair bit of hot glue so make sure you have extra sticks handy.
Tip:
How Much Rope Will I need?
How much rope you will need depends on the size of the dishes you are using and the size of the rope. I used 8mm jute rope and made one piece using a plate and bowl and another piece using a bowl and cup. I was able to cover both pieces with 100ft of rope (I did this twice and 100ft was enough both times). If you use different dishes or if you squish the rope together very tightly you may need more rope.
Instructions:
How to Make a Jute Rope Tray
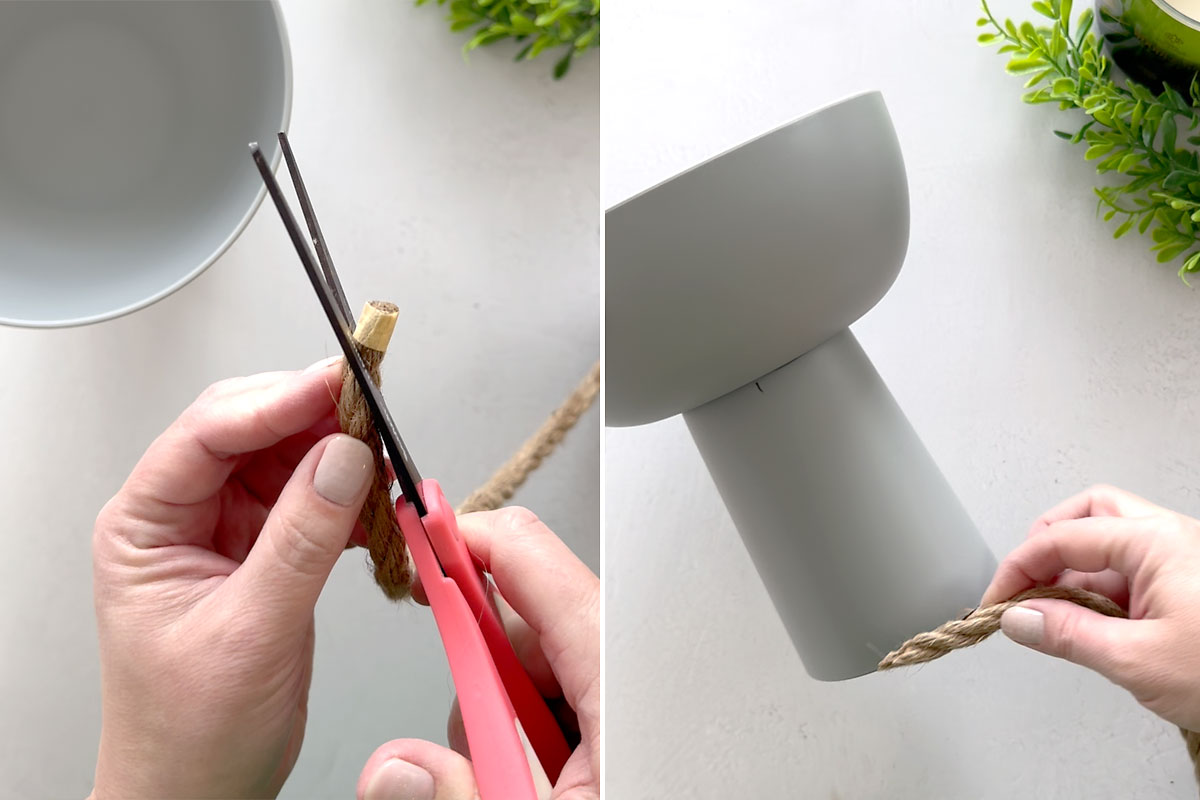
Glue Dishes together
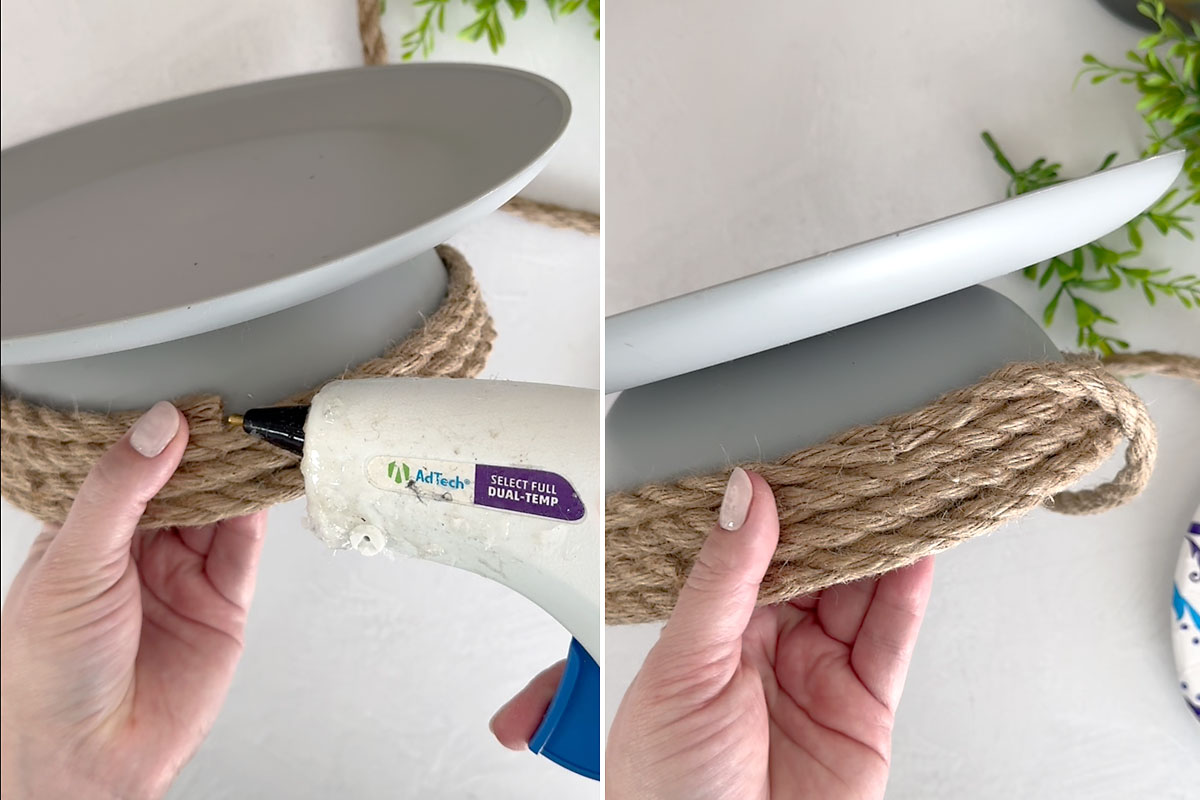
The first step is to glue the dishes together in whatever configuration you like. Use plenty of hot glue for this step, and make sure that you are centering the two pieces. I used a bowl on top of an inverted cup (as shown below for the planter) and a plate on top of an inverted bowl (for the tray).
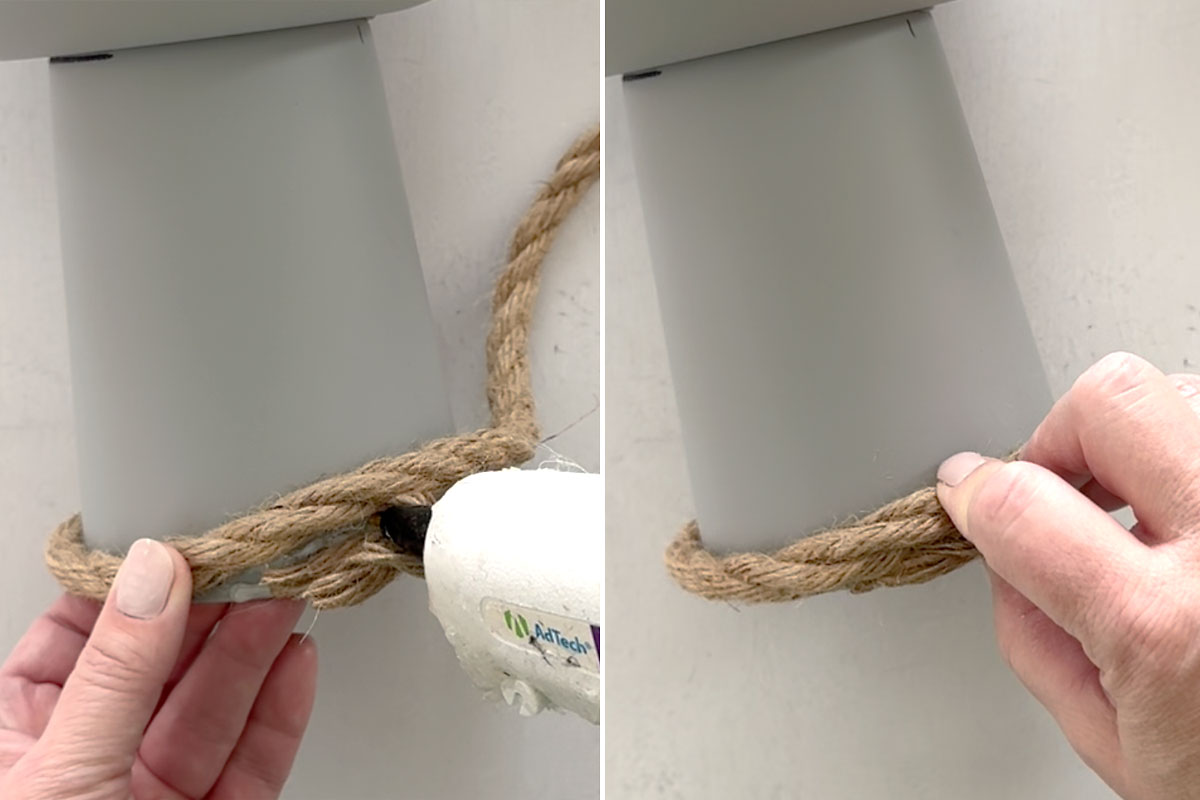
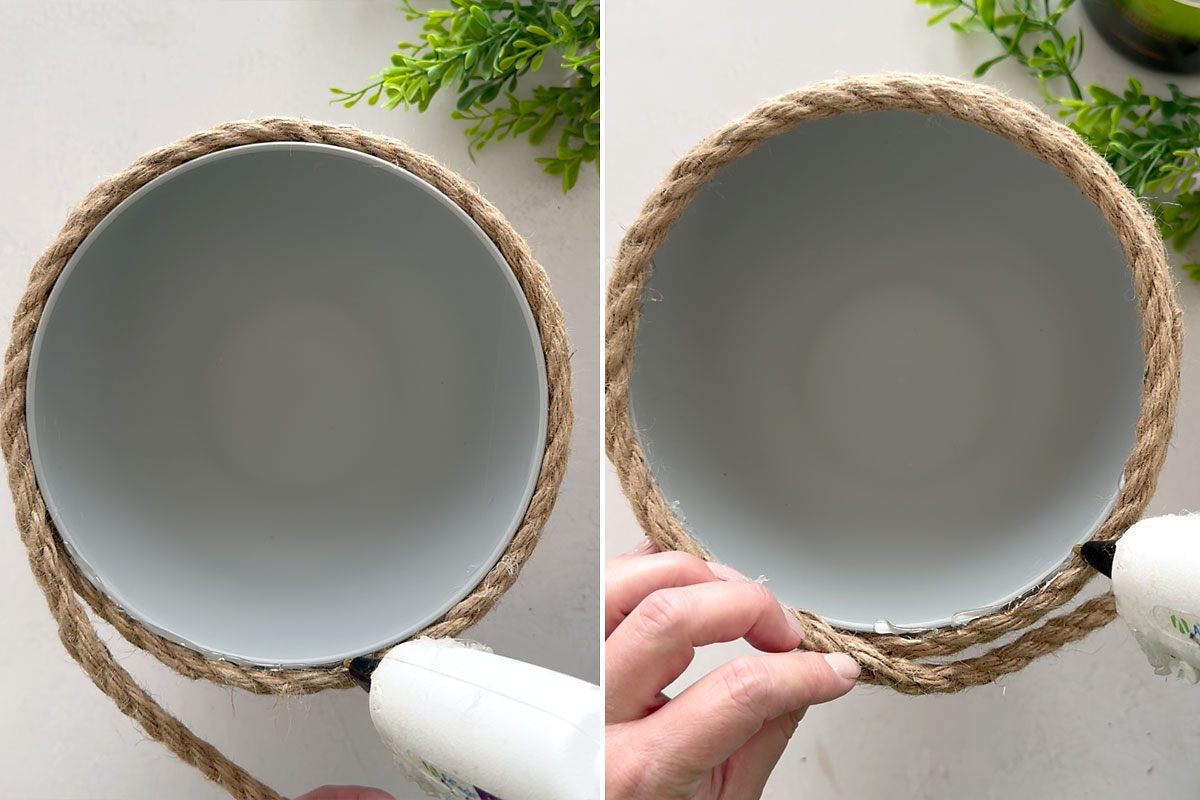
Begin attaching the rope
You’ll start gluing the rope on at the bottom of your piece. Cut the end of the rope at an angle, then glue the first inch of the rope along the bottom edge of the cup. Hold the rope against the cup for a few seconds to let the glue cool and adhered. Add a short line of hot glue to the right and then press the rope against it to start wrapping the rope around the bottom edge of the cup.
When you get all the way around the cup, cover the place where the rope starts. Then continue gluing rope to the cup, around and around, working your way up.
Continue adding Rope
Continue gluing on the rope, adding a line of hot glue and then pressing the rope down to adhere. You’ll keep wrapping and gluing the rope around and around, working your way up the cup as you can see below.
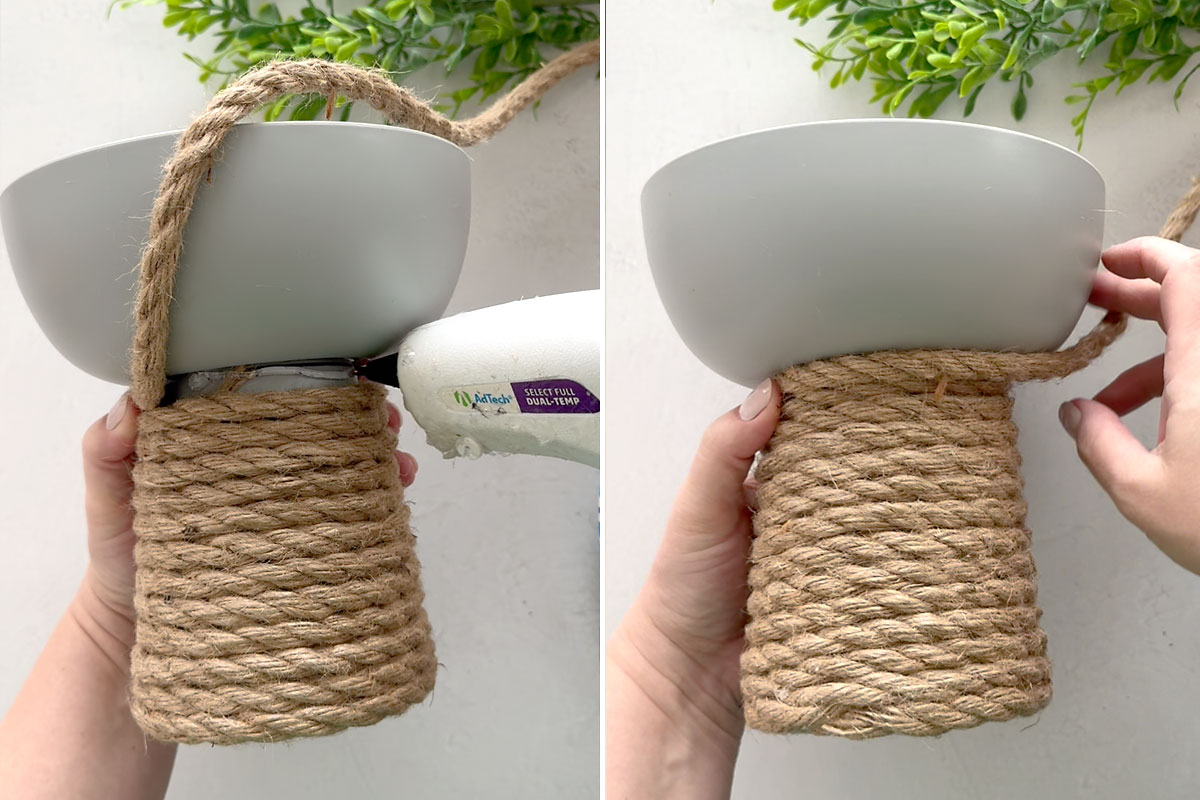
Once you get to the bowl portion of the piece, just continue the same process. It may be helpful to flip the piece upside down at this point to make it easier to continue gluing.

Keep going until the entire outside of the bowl is covered. At this point, glue the rope along the top edge of the bowl. Then continue adding rope, covering the inside of the bowl as well.
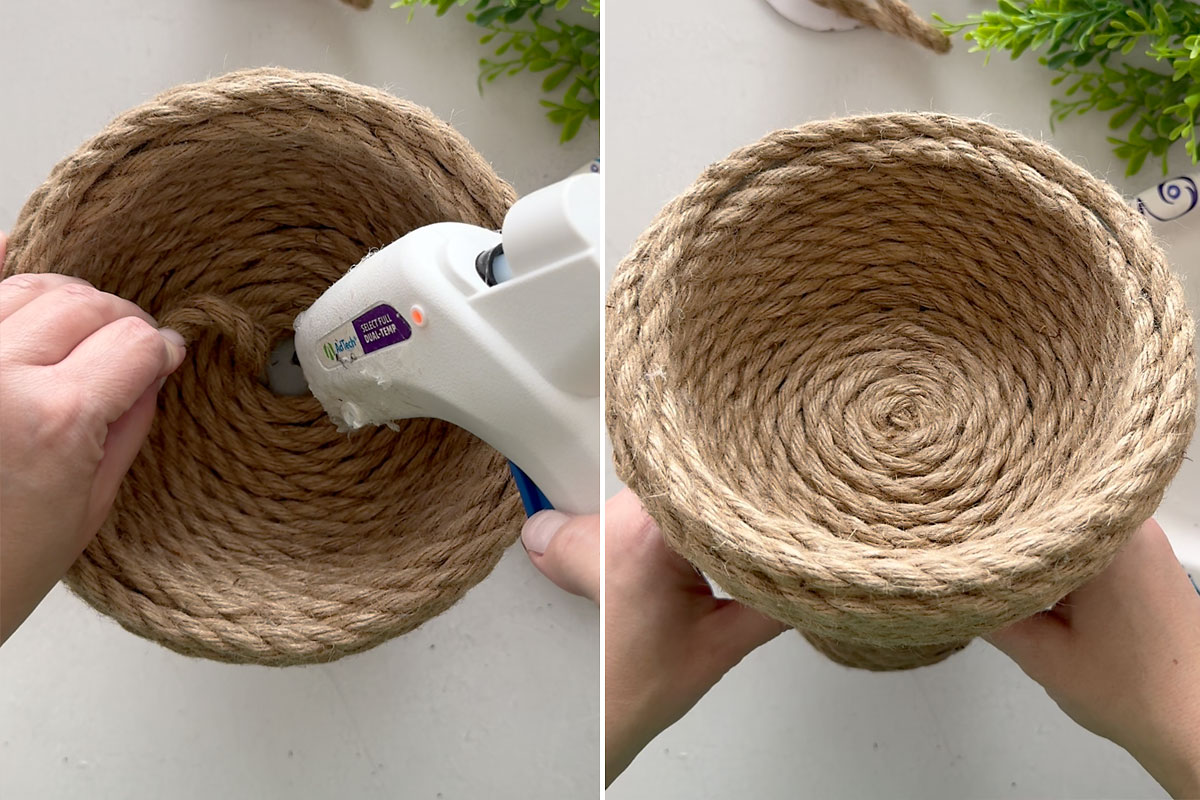
Finish
Continue gluing on rope until you have a circle about the size of a quarter left. Without adding glue, twist the rope into the circle and mark how much you’ll need, then trim the rope at that point.
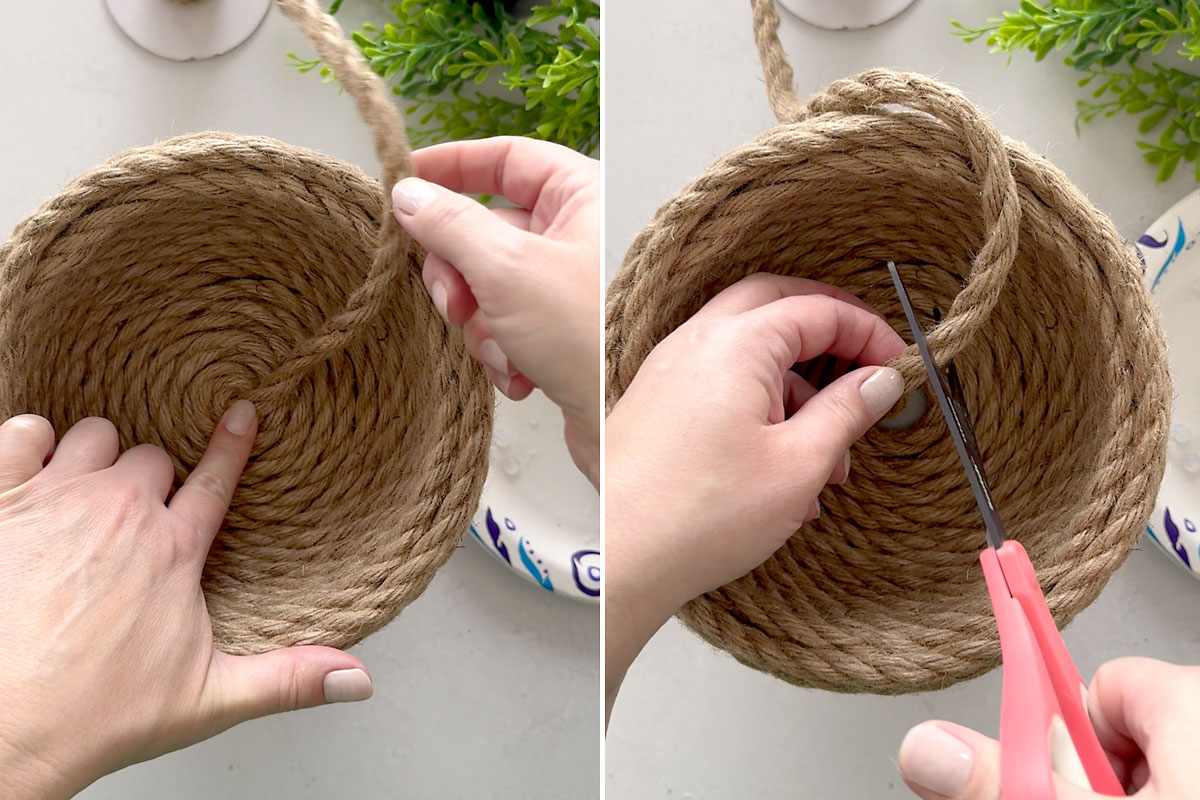
Add plenty of hot glue inside the circle, then press the remaining bit of rope inside it. Take care not to burn your fingers on this step – you may want to use something else like the end of a pen to push the rope down here. At this point the piece is complete.
How to Add New Rope
When you need to start a new spool of rope, just trim the end of the rope you are using nice and clean, and glue it down completely. Trim the beginning of the new rope as well. Add hot glue on the end of the first rope and along the bowl, then attach the new rope. Continue wrapping; you won’t be able to tell once the piece is finished where you’ve started new rope.