DIY Beaded Vase
If you're looking to add a touch of charm to your home decor, why not try making a DIY beaded vase? It's a fun and creative project that allows you to personalize your space with a unique twist. Whether you prefer a simple geometric pattern or a more intricate floral motif, the options are endless. Not only will you have a one-of-a-kind piece to showcase in your home, but you'll also have a great conversation starter for when guests come over. So grab your supplies and have fun jazzing up your space with a DIY beaded vase!
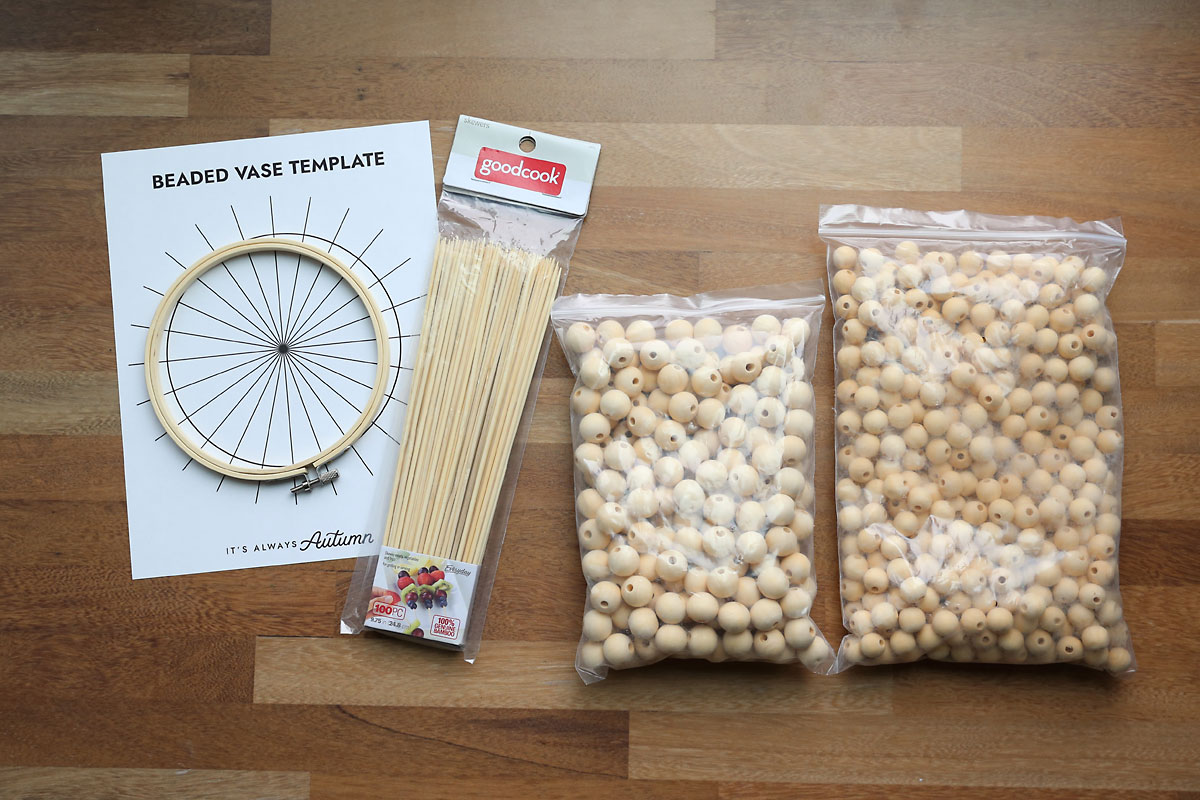
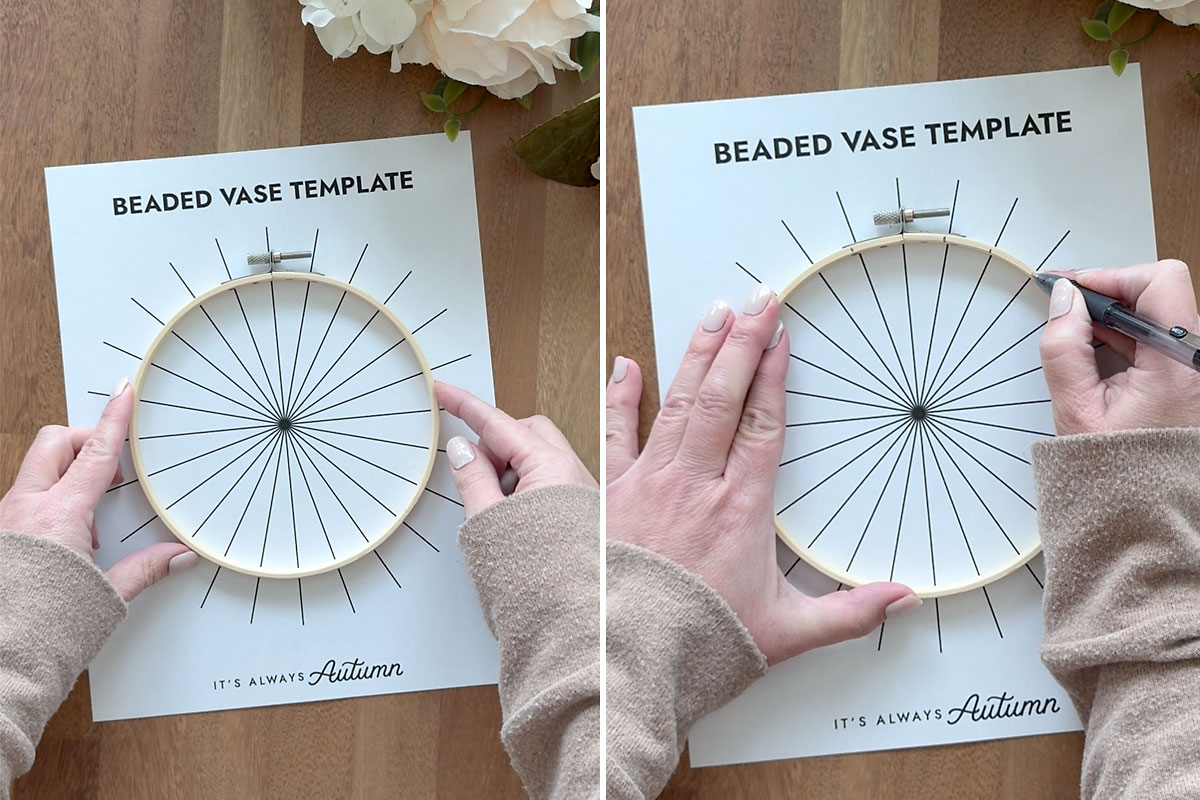
Supplies

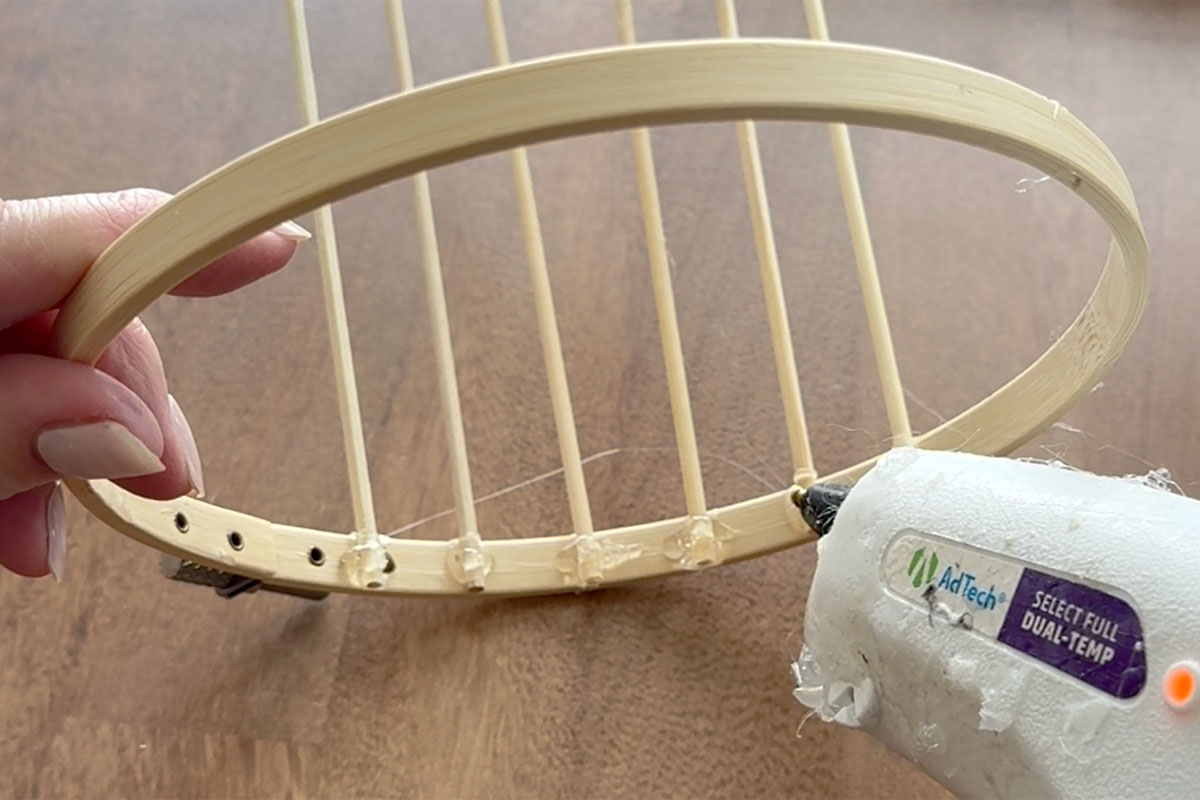
After you’ve attached about six skewers, stop for a moment and add more hot glue over the skewers you’ve already attached to make sure they are super secure.
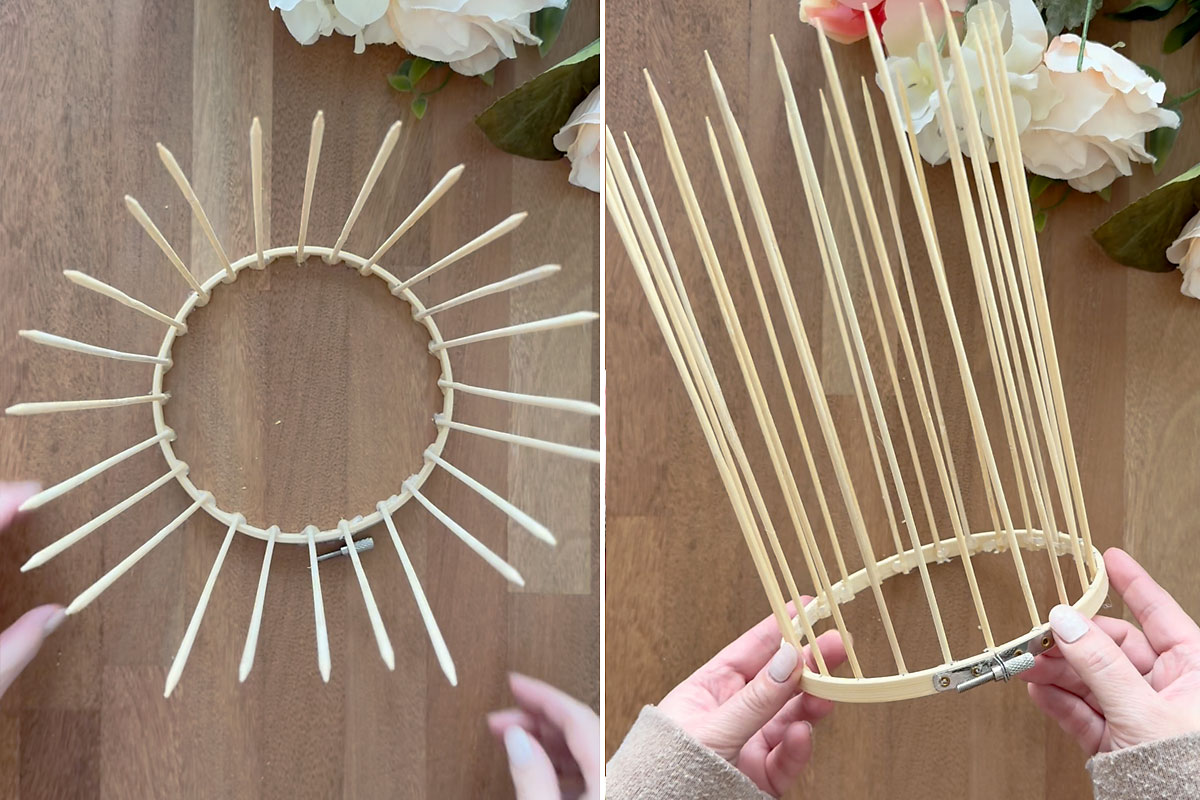
Continue adding skewers until you’ve gone all the way around the hoop (you will use 24 skewers). The photos below show what the vase looks like at this point from the top (L) and from the side (R).
Now it’s time to start adding beads. Alternate adding a 16mm bead and a 20mm bead, working your way around the hoop. For the second row, you’ll put a 20mm bead on top of each 16mm bead, and vice versa.
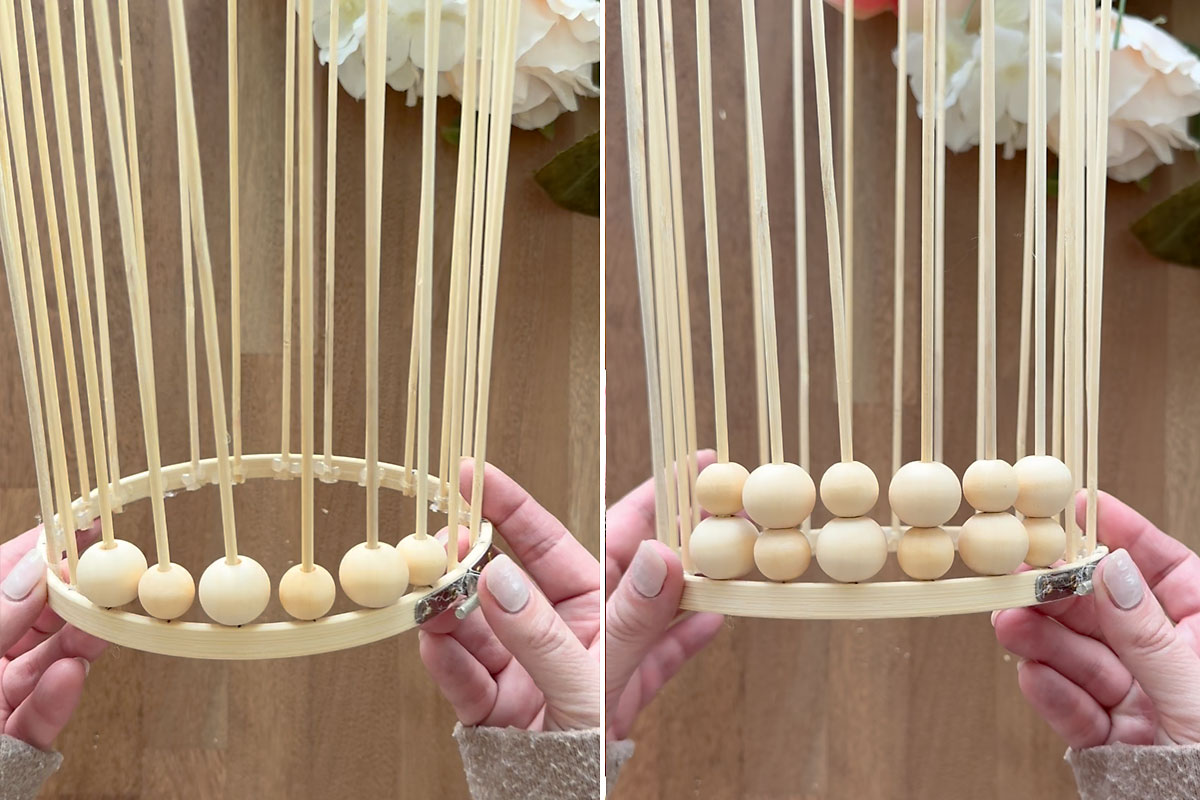
Continue until the beads are high enough to cover whatever vase you plan to use inside the beaded vase. I made mine tall enough to cover a quart size mason jar by using ten beads on each skewer (five of each size). You can make your vase taller or shorter, but use an even number of beads on each skewer to make sure the bead stacks are the same height. Once you’ve added all the beads, use snips or sharp scissors to cut off each skewer about 3/8 inch above the top of the beads.
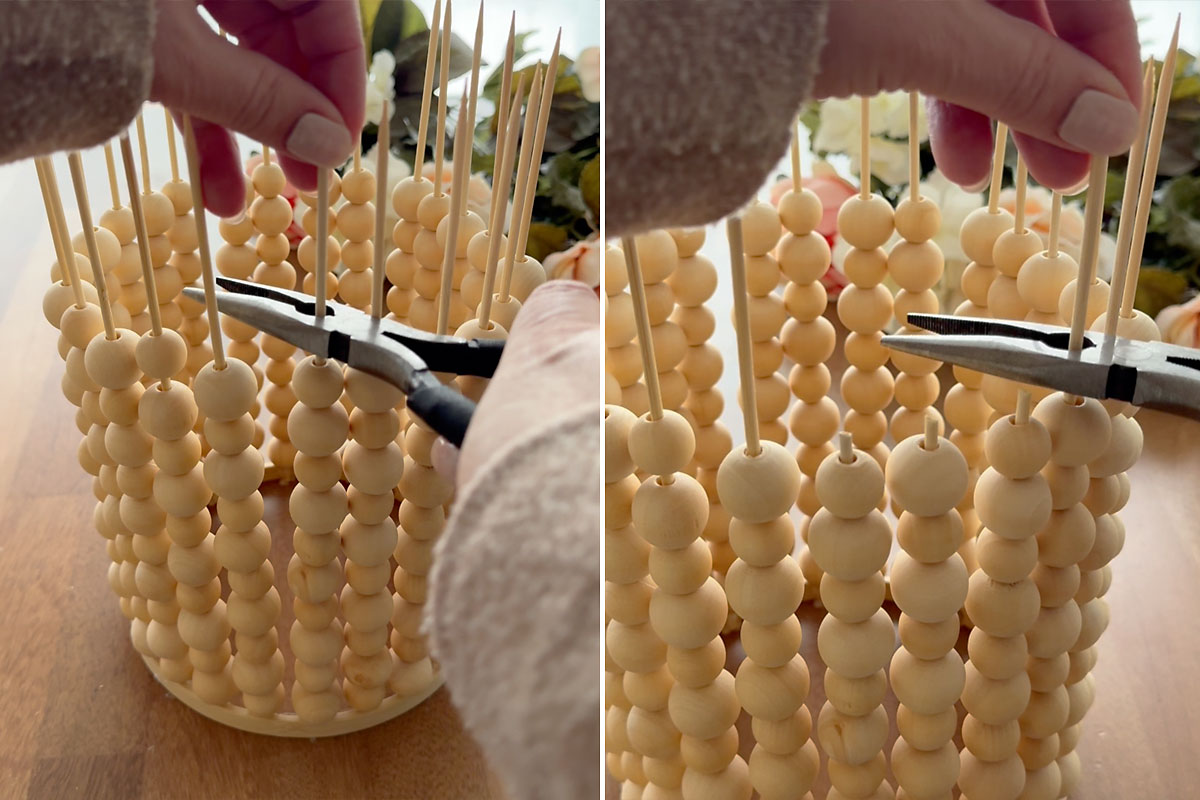
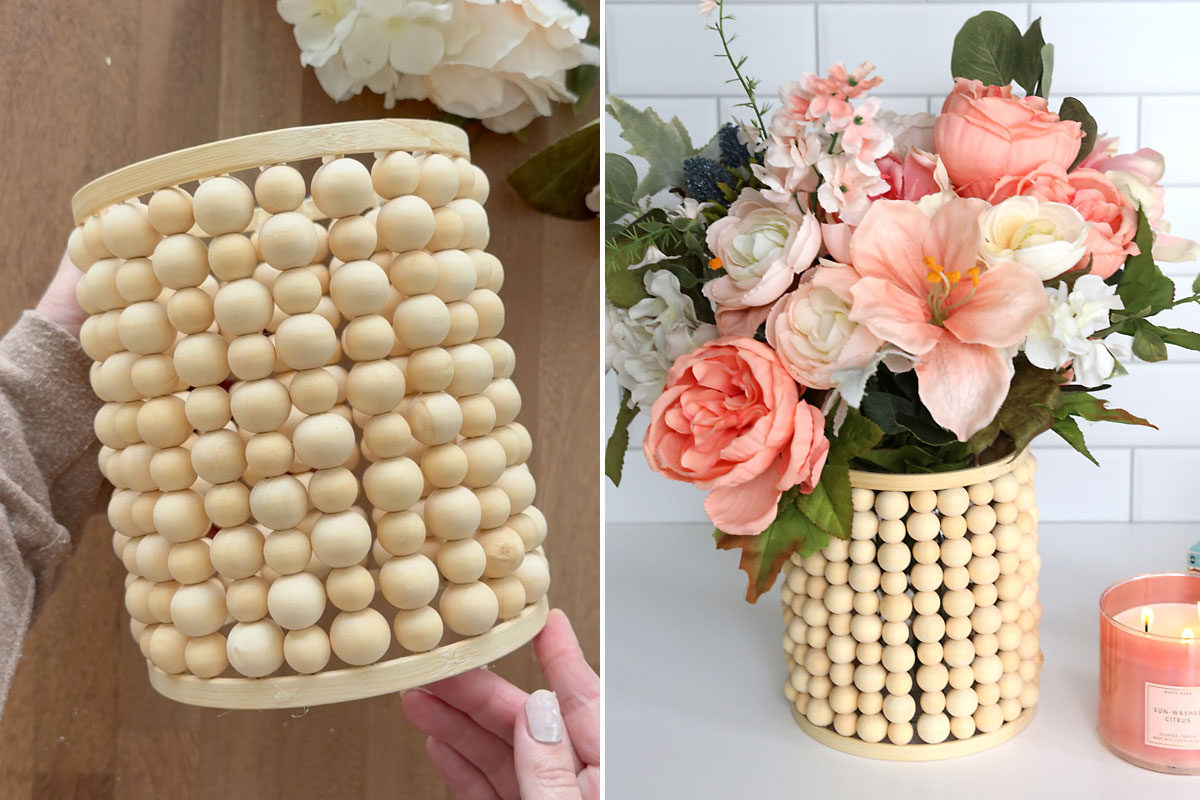
Grab the inner hoop that you set aside. Gently hold the beaded skewers and place the inner hoop over them, making sure all of the skewers go inside the hoop. This is pretty hard to do by yourself so enlist the help of another person. Push the hoop down so it sits right on top of the beads. Check to make sure none of the skewers extend above the hoop; if they do you’ll want to cut them a little shorter. Add hot glue inside the inner hoop where each skewer hits it. Don’t use too much glue – if you do it will drip down and be visible – just enough to secure each skewer.
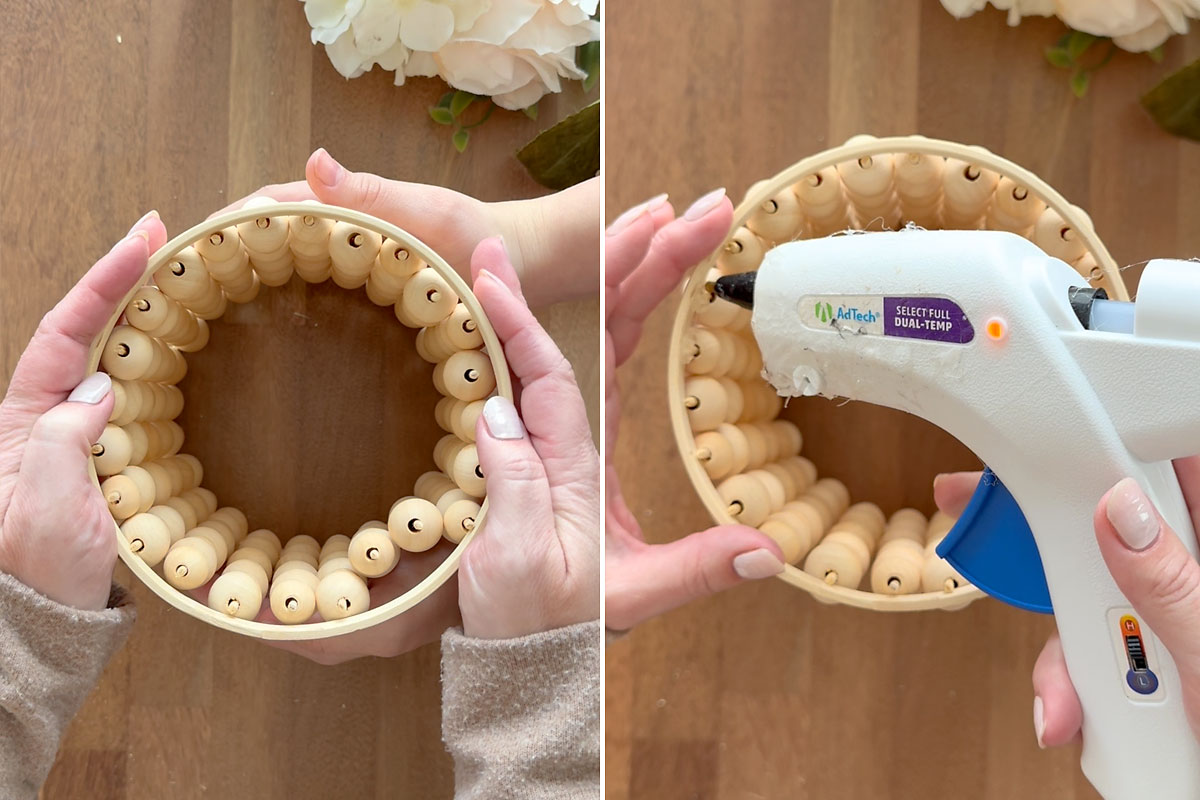
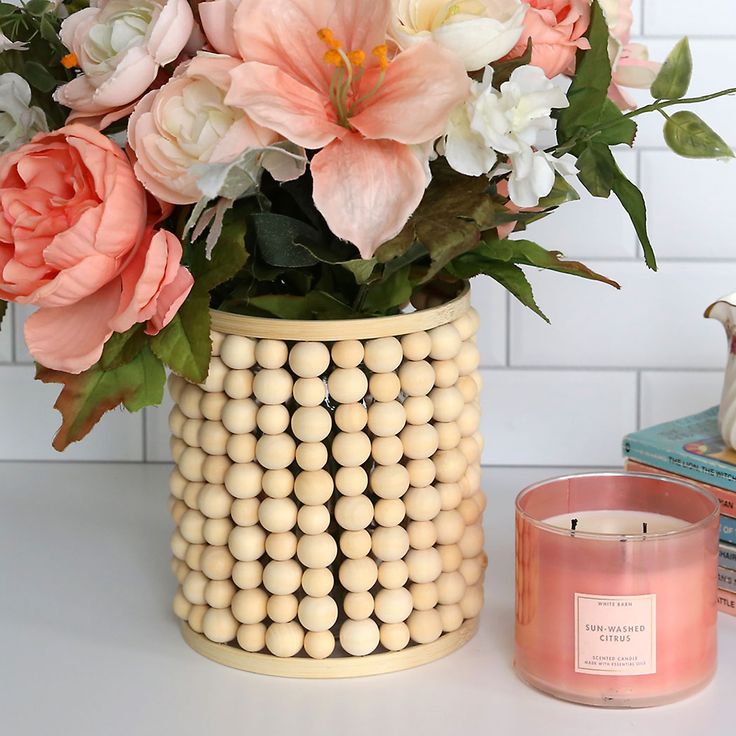
Allow the hot glue to cool and harden and your beaded vase is ready to display! I placed a wide mouth quart jar inside the beaded vase then added a faux flower arrangement. Working with faux flowers is nice here because you can bend the stems if desired. However because you are using a mason jar inside the beaded vase you can also display real flowers! I think this vase looks best for displaying flowers that fall over the edges a bit as opposed to ones that just stick straight up.