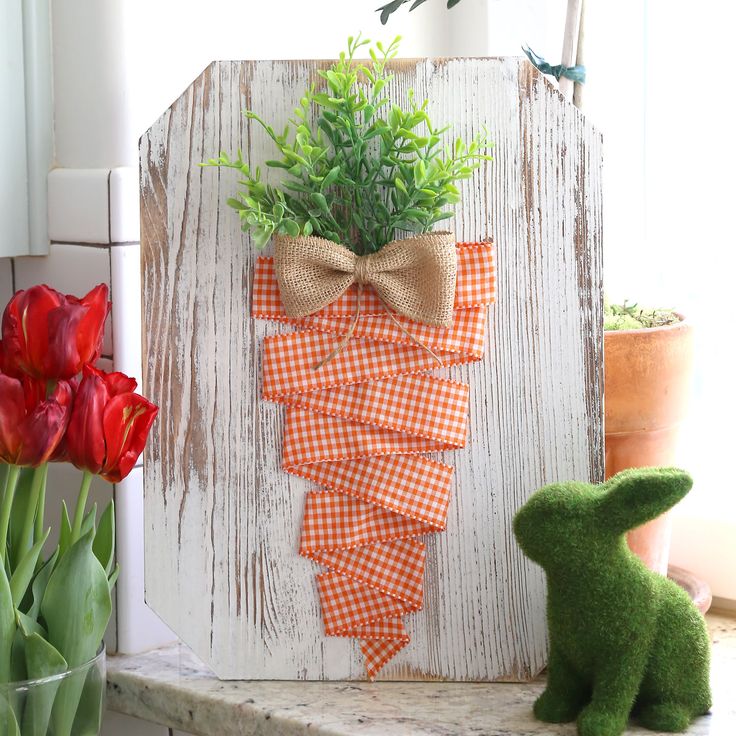
Get ready to spice up your creative side with DIY Carrot Ribbon Art! Whether you're looking to add a pop of color to your home or impress your guests with an elegant touch, this crafty carrot art is sure to bring a smile to your face. So, grab those materials and let your imagination run wild - it's time to get crafty in the home!
Supplies
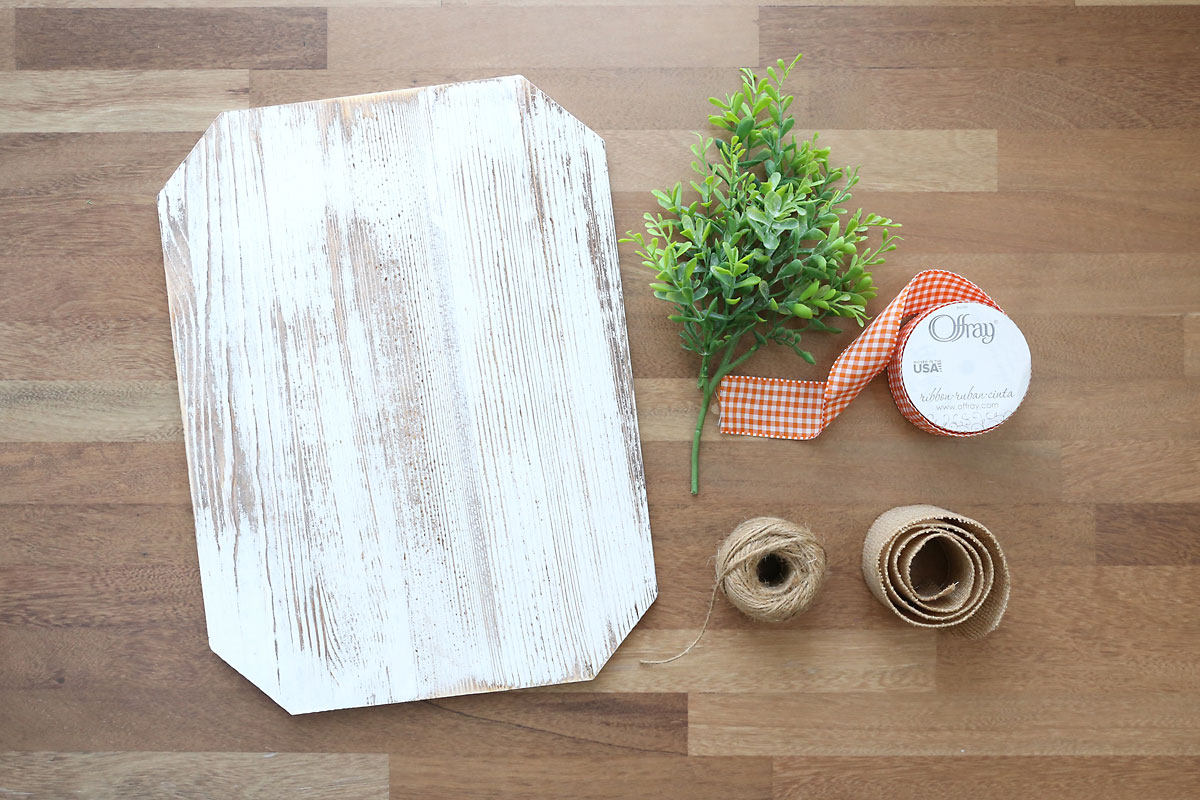
Here’s what you’ll need to make this carrot ribbon art:
Wood Board/Sign: You can use any size board you like. The one I used is a whitewashed wood plank sign from Walmart that measures 12×16 inches.
Orange Gingham Ribbon: I used 1.5 inch wide ribbon that was not wired, but wired ribbon will work too.
Boxwood Floral Pick: or other greenery that resembles carrot tops.
Burlap Ribbon and Twine: to make a bow – you could use the orange ribbon to make a bow if you prefer.
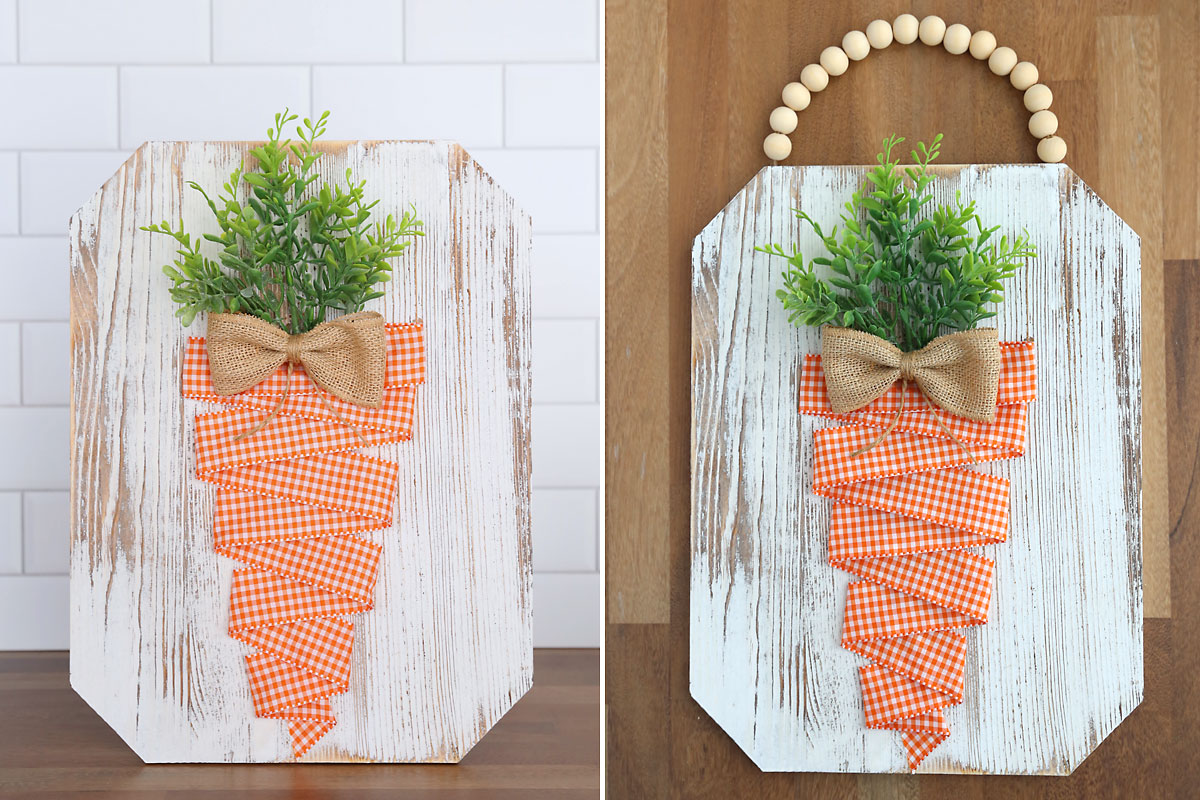
If you want to create a beaded hanging loop, you will also need small wood beads and a few small pieces of felt.
How to Make Carrot Ribbon Art
Plan out the Carrot
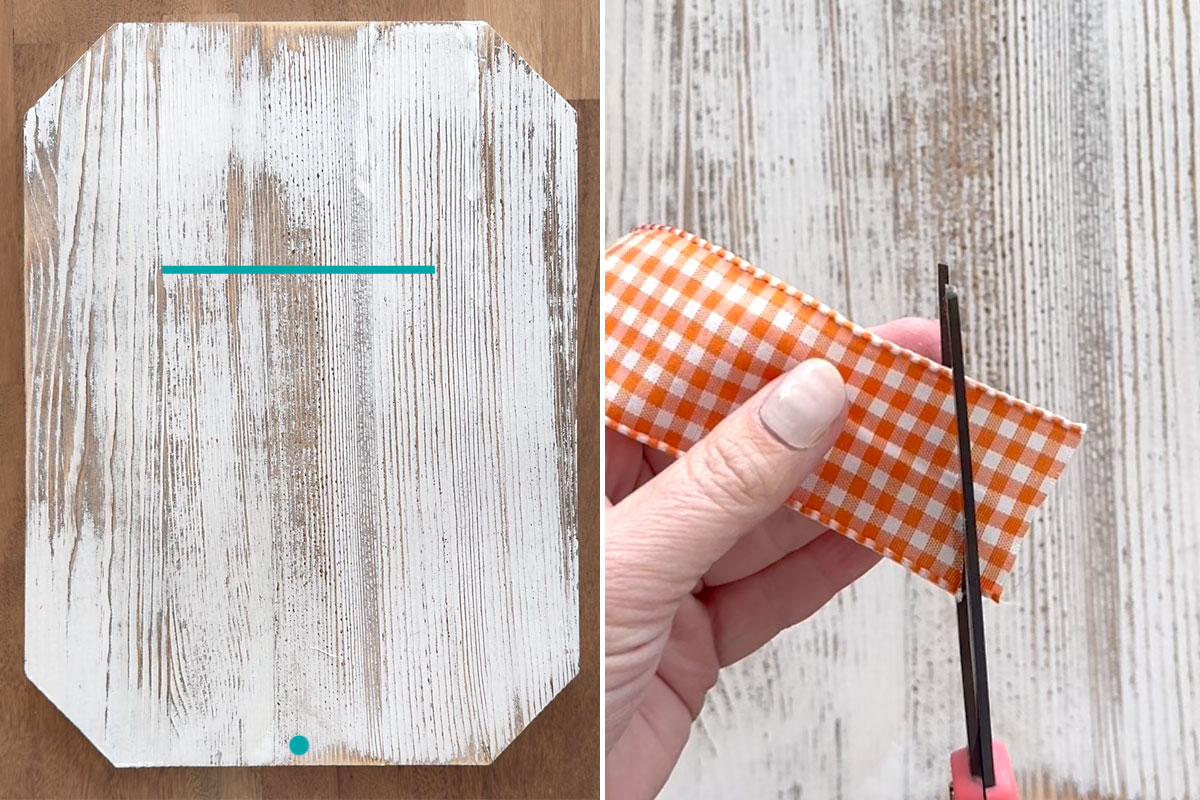
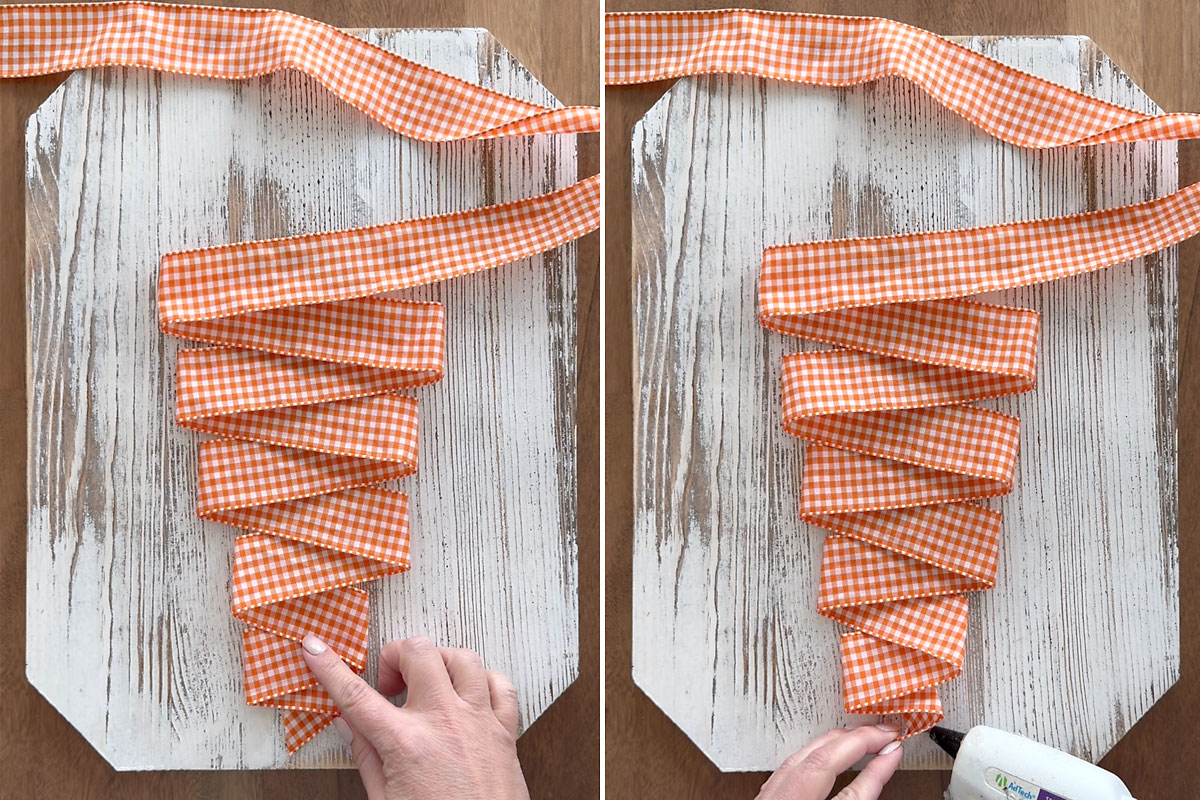
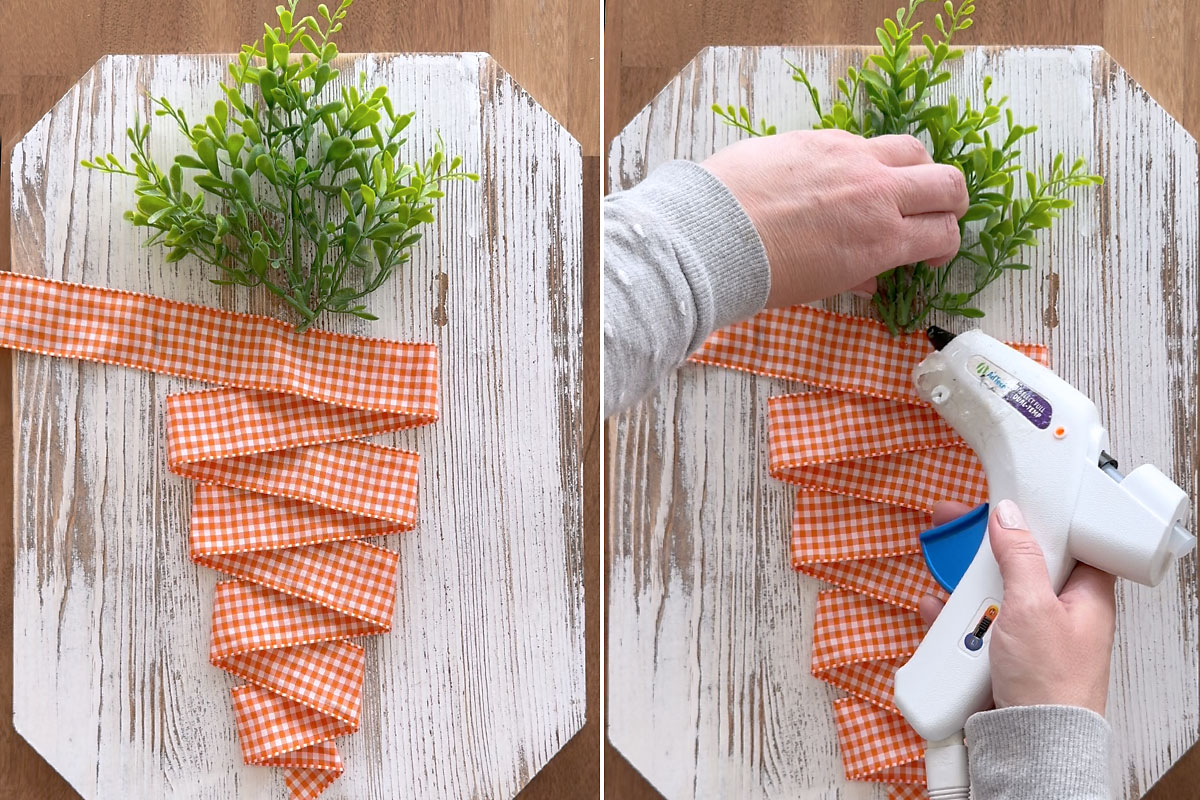
Place the wood board down in front of you and visualize the carrot shape. Measure about a third of the way down the board; this is where the top of your carrot will be. You can make a light pencil mark here if you like. Also, near the bottom edge of the board, make a light pencil mark at the center halfway point. Then grab your ribbon and cut the end of it at a 45 degree angle.
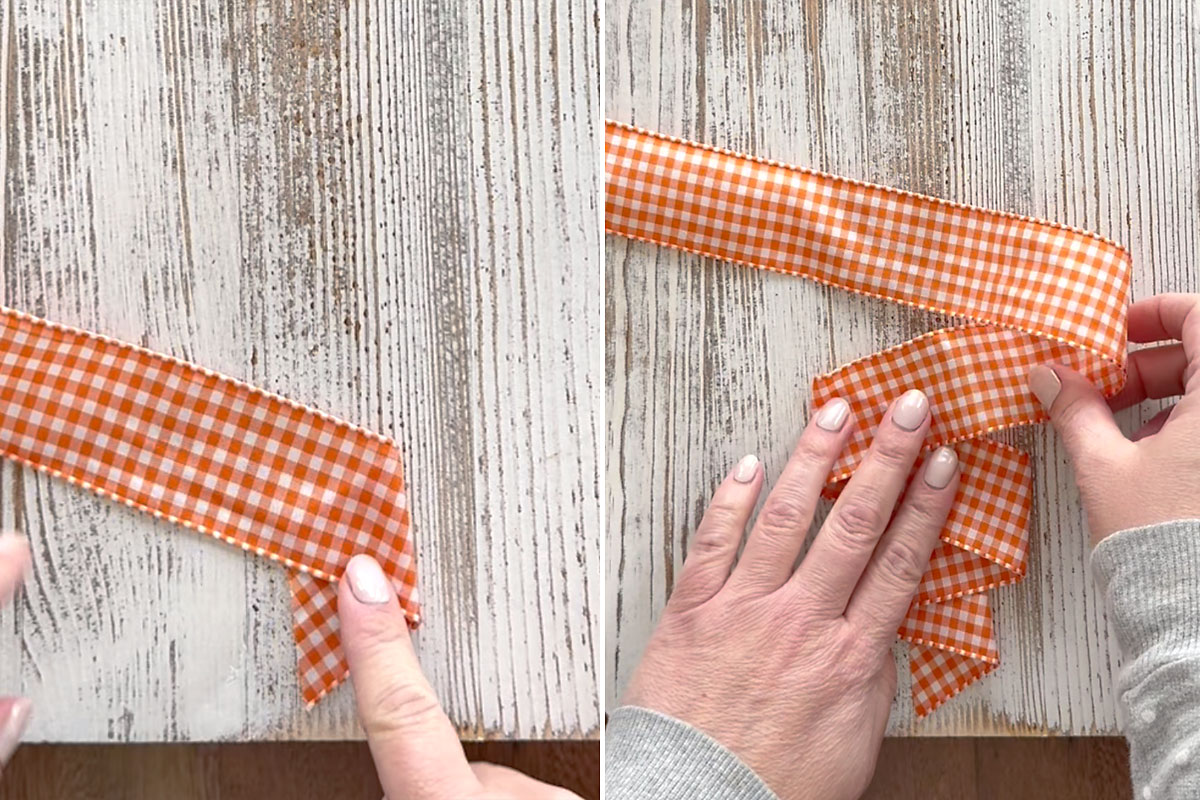
Place the cut edge of the ribbon over the center mark at the bottom of the board, with the edge going up and down and the ribbon extending diagonally upward to the right as shown below. Fold the ribbon back over itself after about an inch. Bring the ribbon upward and to the left, then fold it back over toward the right. Repeat this folding process to create a carrot shape. Note you are not gluing anything down yet, just laying out the ribbon to see how you like it. You can use little pieces of tape to keep the ribbon in place temporarily if you’d like.
Glue Down the Ribbon
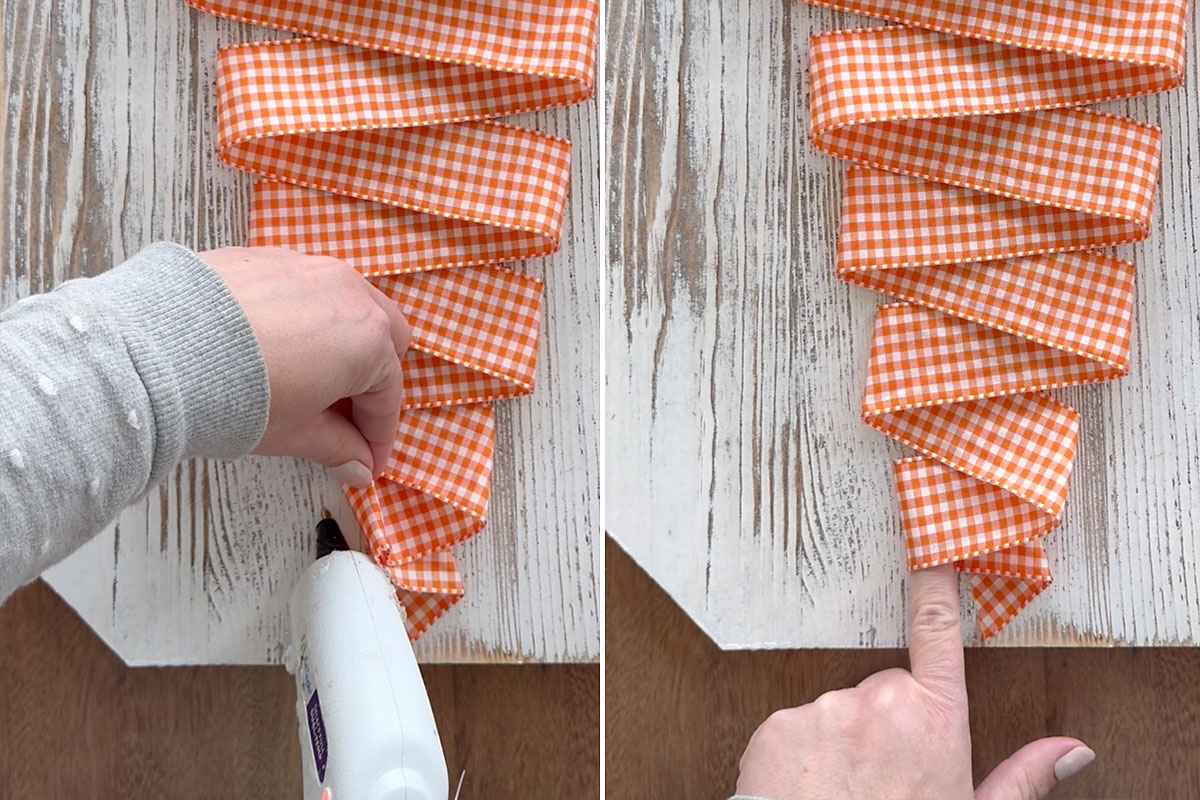
Stop folding ribbon once you’ve gotten just above the pencil mark you made before (one third of the way down from the top). At this point, take a minute to adjust the ribbon if needed until you like the shape. Leave a little slack in each ribbon fold so the ribbon is not flat against the board – this gives the finished carrot a little texture. Once you like how it looks, you are ready to start gluing. Lift the very bottom of the ribbon and place a dab of hot glue under it, then press the ribbon down on the glue (you don’t need much glue!), taking care not to burn yourself.
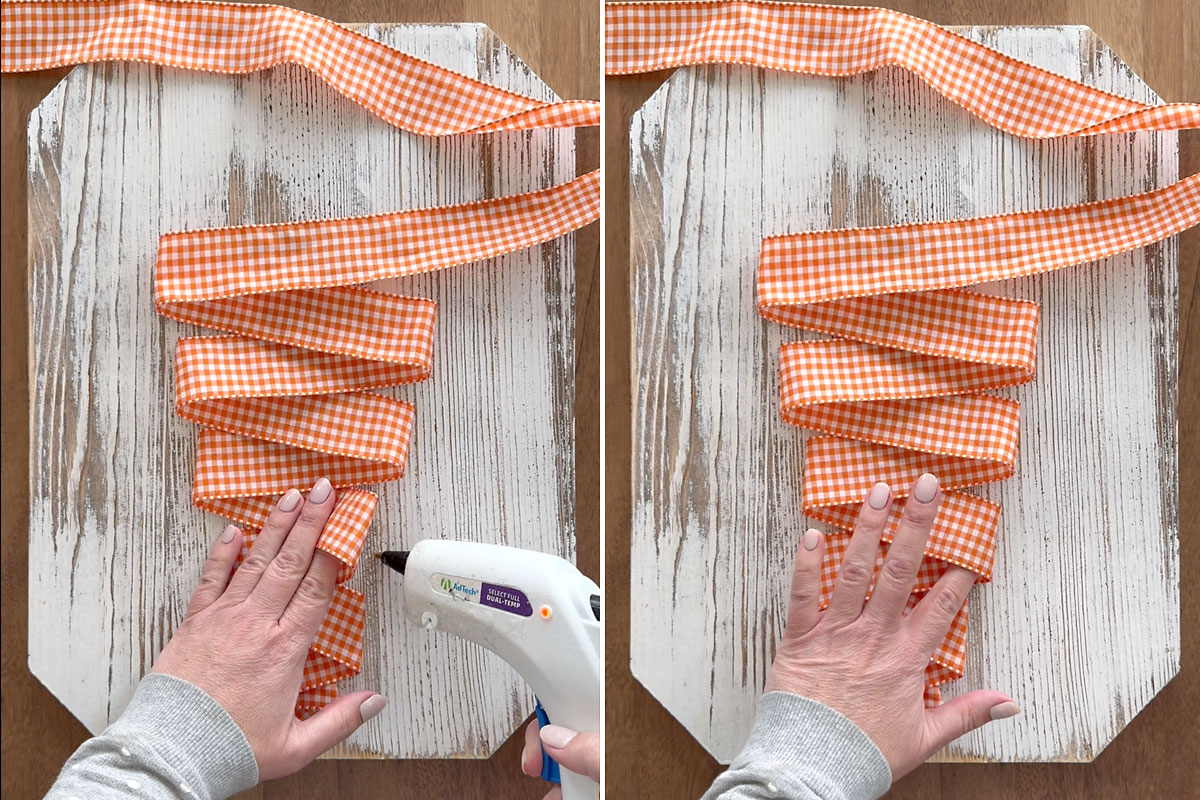
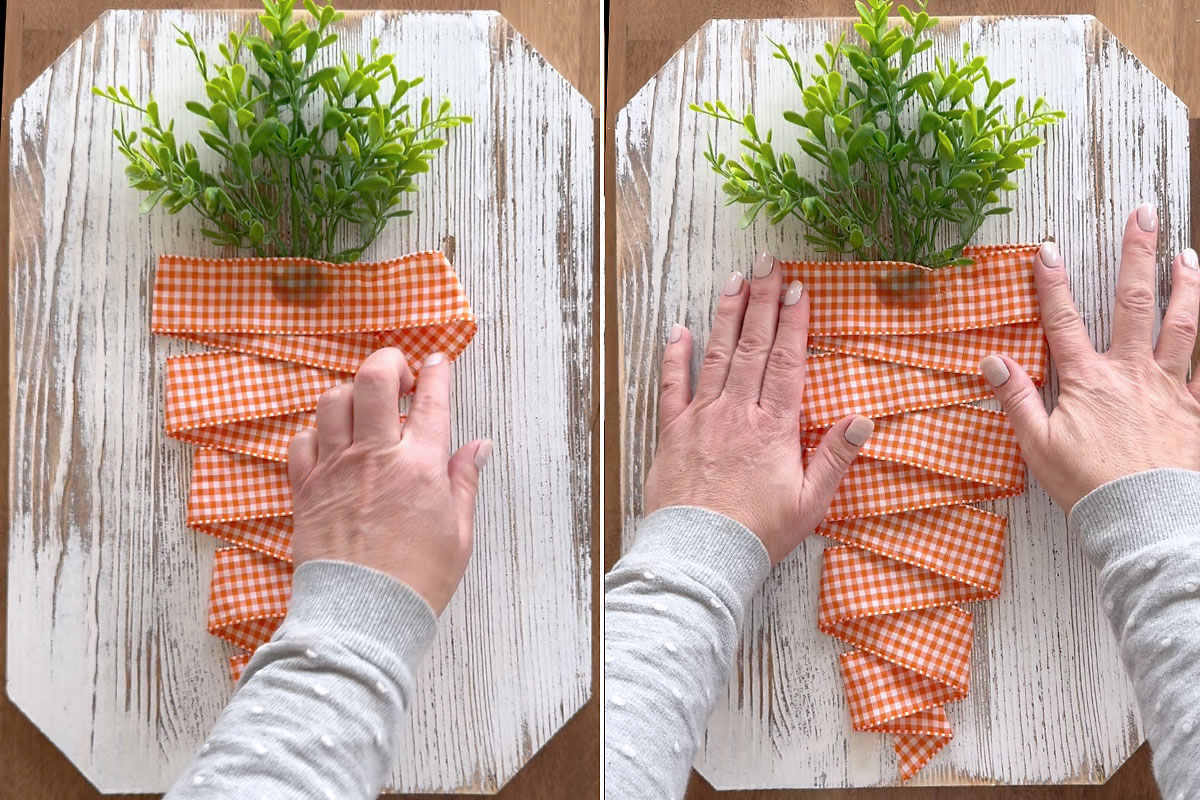
Lift up the first fold and place a small line of glue underneath it, then push the ribbon back down, pressing just the bottom layer or ribbon to the glue. Continue working your way up the carrot, lifting one fold at a time and gluing it down.
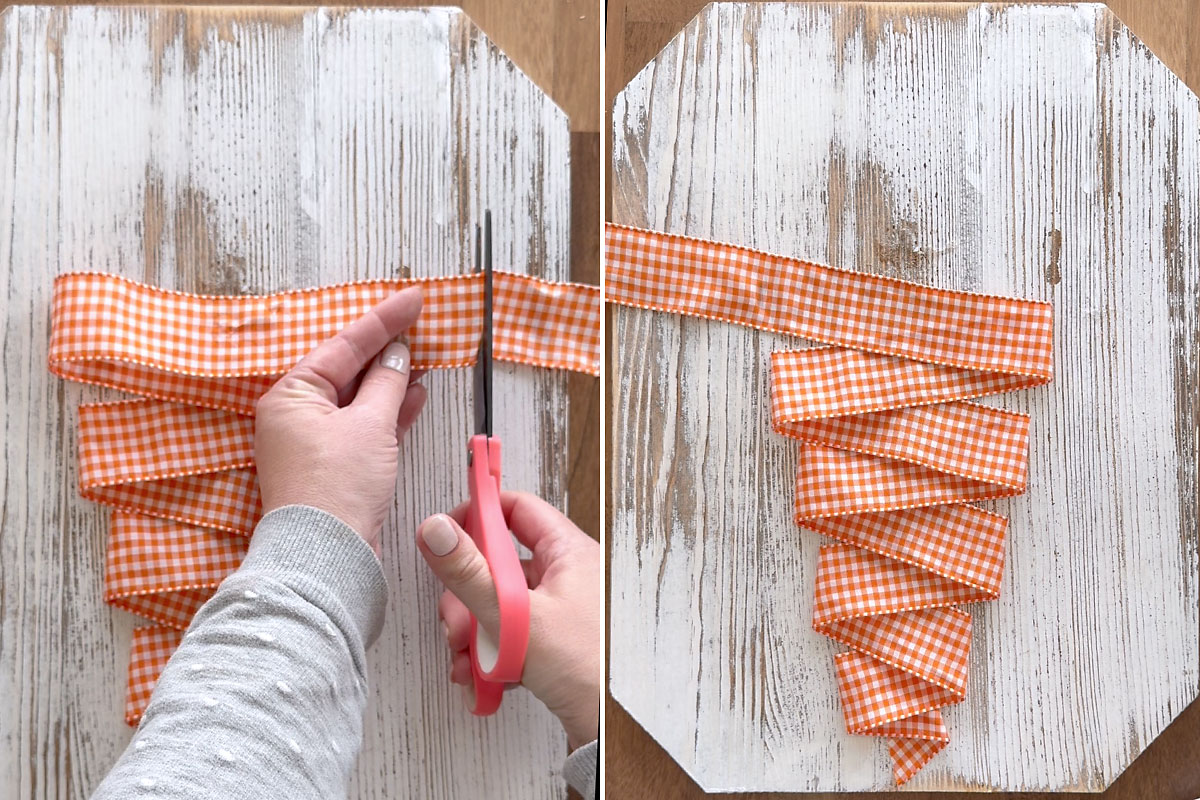
Continuing gluing the ribbon under each fold until you get to the top. Then trim the extra ribbon a couple of inches past where the carrot will end, and open that last fold back up. So in my photos below I trimmed the extra ribbon when the top ribbon was pointing right, then opened that ribbon back up so it points left.
Add the Greenery
Trim the stems off your greenery and place it right at the top of the ribbon. Use plenty of hot glue to attach the greenery to the board.
Then immediately fold the last bit of ribbon back to the right, covering the bottom of the greenery and pressing it into the hot glue to secure. Tuck the extra inch or two of ribbon under, then glue the last fold down.
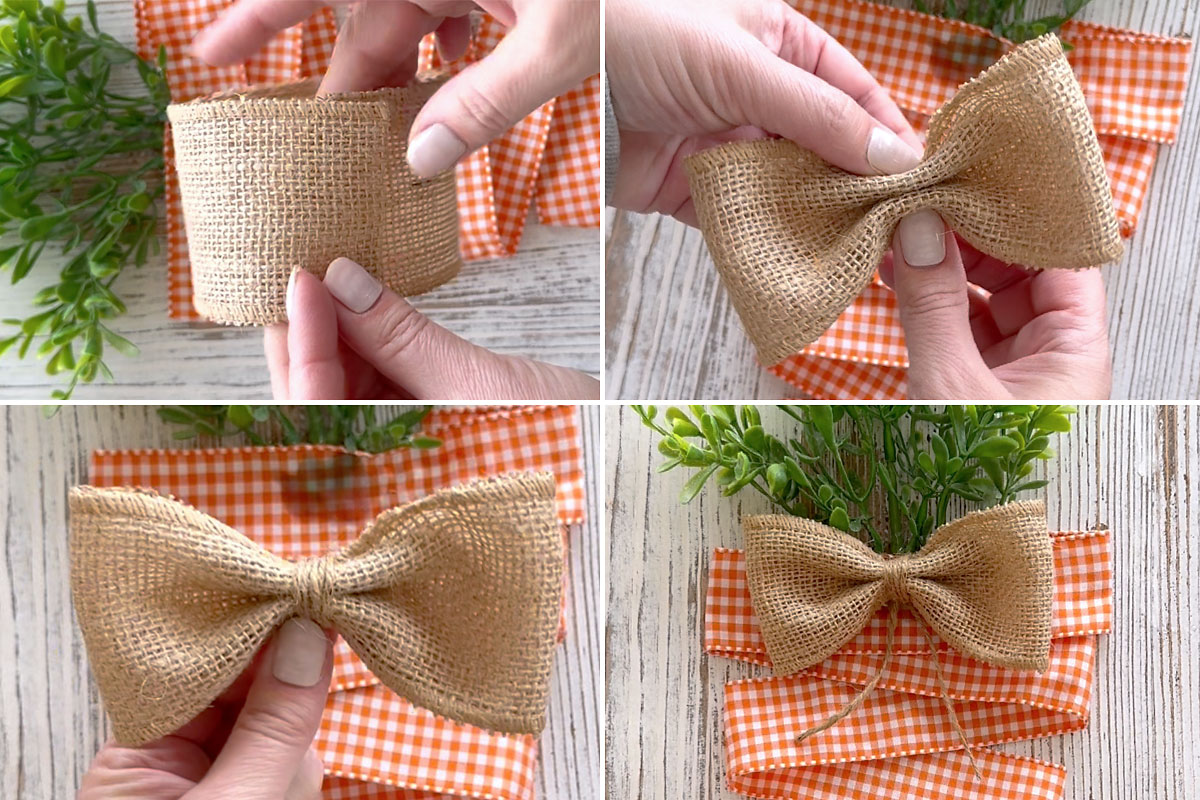
Finish with a Bow
The last step is to cover the area where the greenery is glued on with a bow. You can use a bow tied from the orange ribbon, or you can create a bow like I did: cut a piece of burlap ribbon twice as wide as you want the bow to be, form it into a ring and slightly overlap the ends. Then pinch it together in the middle, and wrap twine around the middle, tying to secure. Trim the twine and then glue the bow where the ribbon and greenery meet.
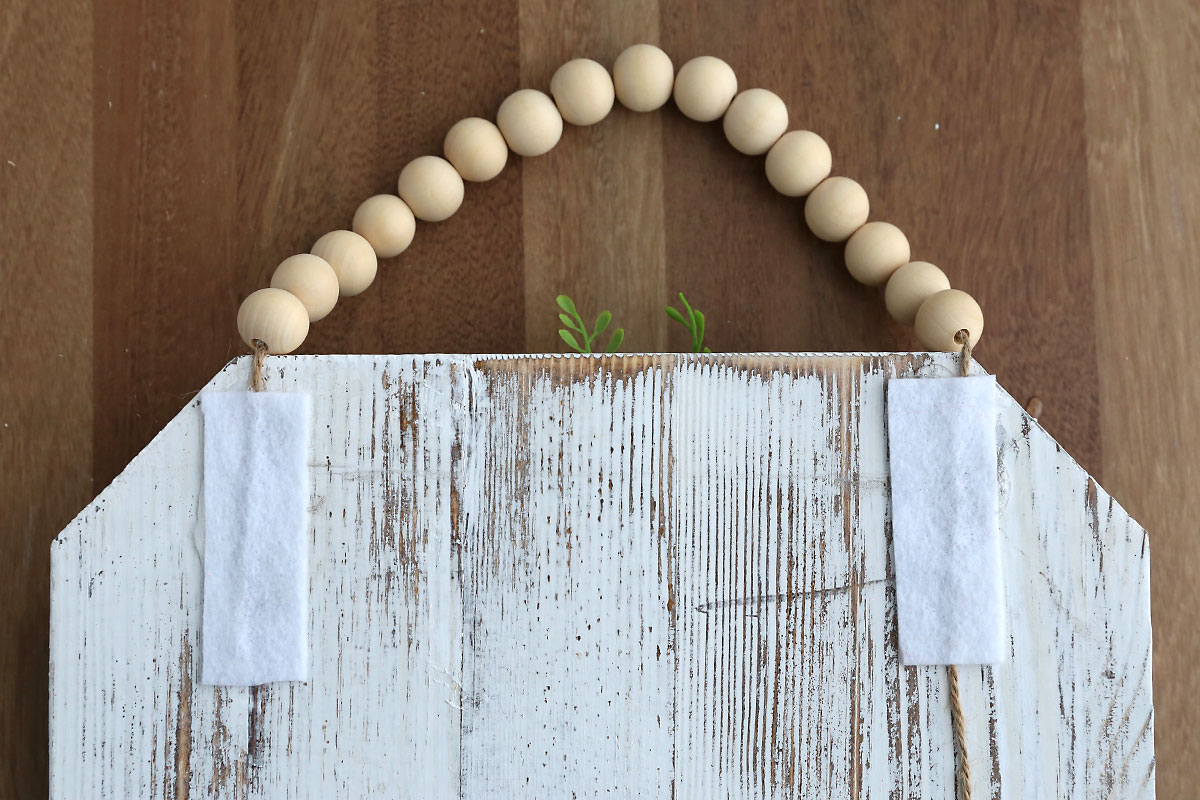
Optional: Add a Hanging Loop
If you’d like to add a beaded hanging loop, follow these steps: Cut two rectangles of white felt and a length of twine. Flip the board over and place one end of the twine down on the top corner of the board, making sure the twine extends down a few inches. Place a generous amount of hot glue over the twine and immediately press one of the rectangles of felt over the glue. Press down until cool and secure. Then thread the beads onto the twine, making the hanger as long as you like (use an even number of beads). Bring the twine back down to the other corner of the board and glue it in the same way, using plenty of hot glue and pressing the felt over it.