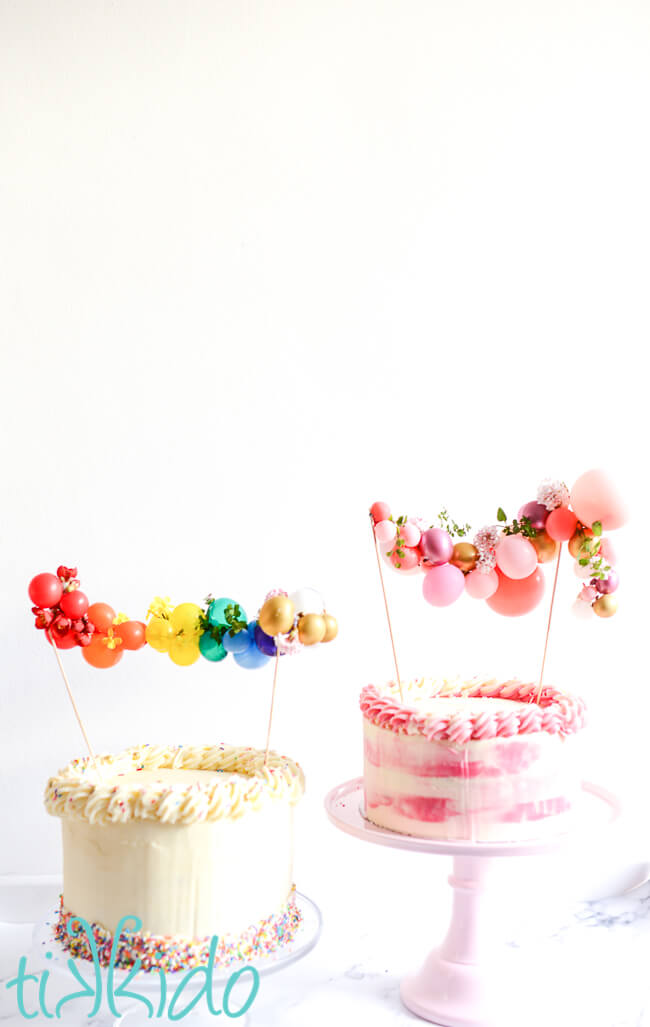
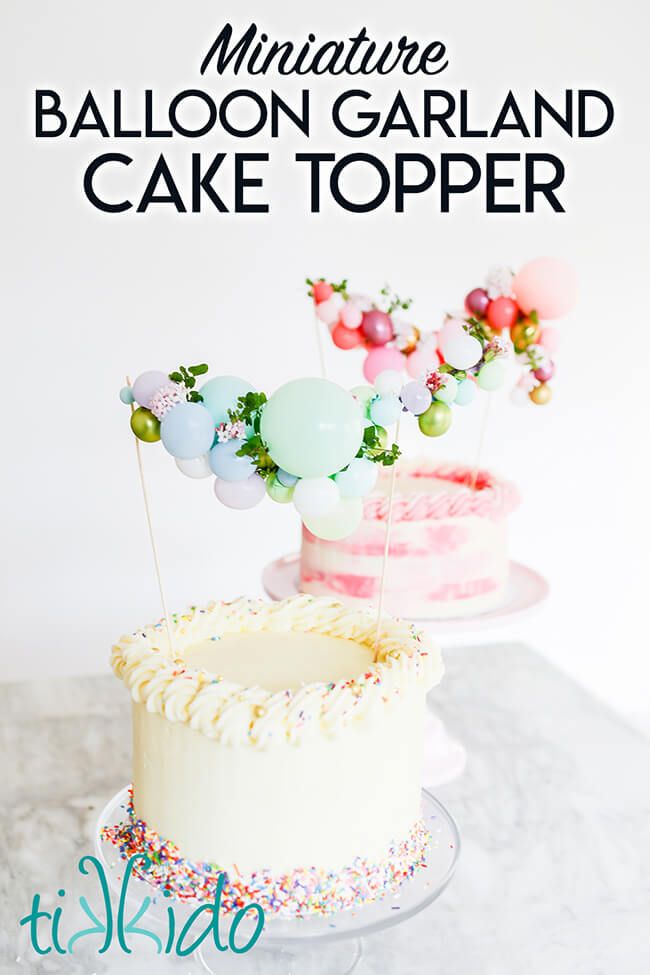
Balloon garland cake toppers are a delightful and whimsical way to add extra charm to any special occasion cake. These cheerful decorations feature a variety of colorful balloons arranged in a beautiful garland that can instantly elevate the look of your cake. Whether you're celebrating a birthday, anniversary, or any other event, a balloon garland cake topper is sure to bring a smile to everyone's face. You can easily customize the colors and designs to match your party theme, making it a fun and festive addition to your dessert table. So, go ahead and jazz up your cakes with a balloon garland cake topper for a touch of playful elegance!
Mini Balloon Garland Cake Topper Materials
5" balloons (two or three)
Balloon twisting balloons (also called 260 balloons). You'll need about six.
18" length of wire
balloon pump
two food-safe wooden skewers
Small flowers and greenery (or tiny artificial flowers and greenery), optional
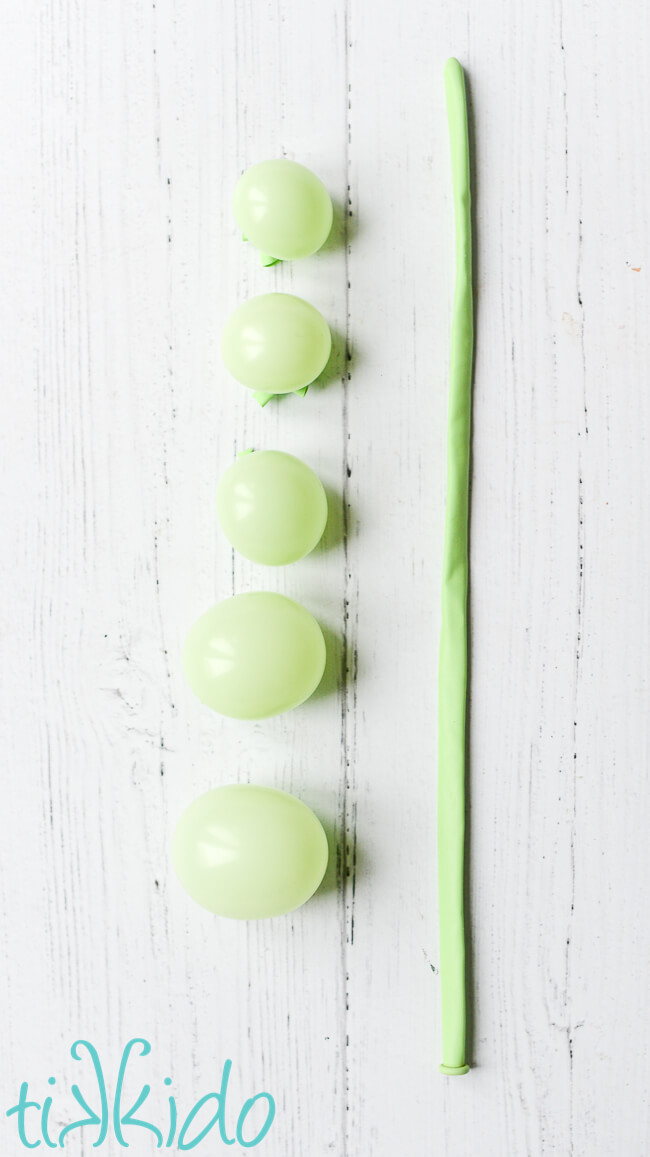
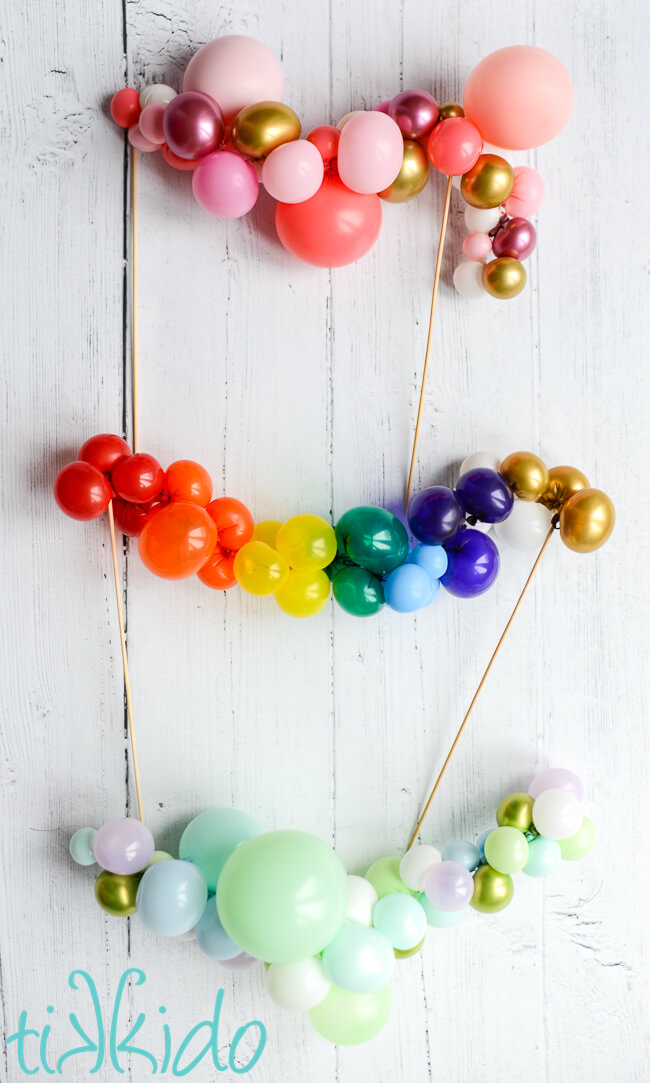
I consistently got six mini balloons out of each twisting balloon, and I used about 30 miniature balloons for each balloon garland cake topper. So you only need five or six of the long balloons to make this project.
I mostly used regular Qualatex brand twisting balloons (an excellent, reliable brand), but I also bought some metallic 260s and absolutely loved how those looked mixed in with the regular balloons.
Miniature Balloon Garland Instructions
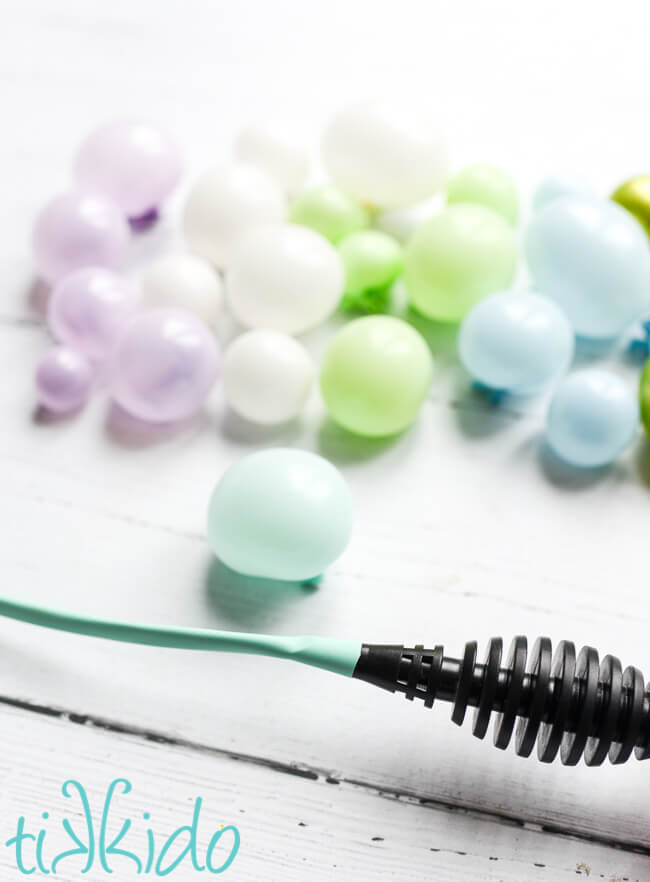
Stretch the 260 balloon before inflating. Use a balloon pump to inflate the balloon. Again, I go to the pros at Qualatex for balloon pumps--they make a high quality product. It's so much nicer than using flimsy, super-cheap pumps.
You need a balloon pump for two reasons:
First, 260s are REALLY REALLY hard to blow up with your mouth!
Second, they're impossible to blow up with your mouth after you've cut off the rolled end of the balloon. But as you can see in the photo above, you can insert the nozzle of the pump in the trimmed balloon and inflate it again easily to create more mini balloons.
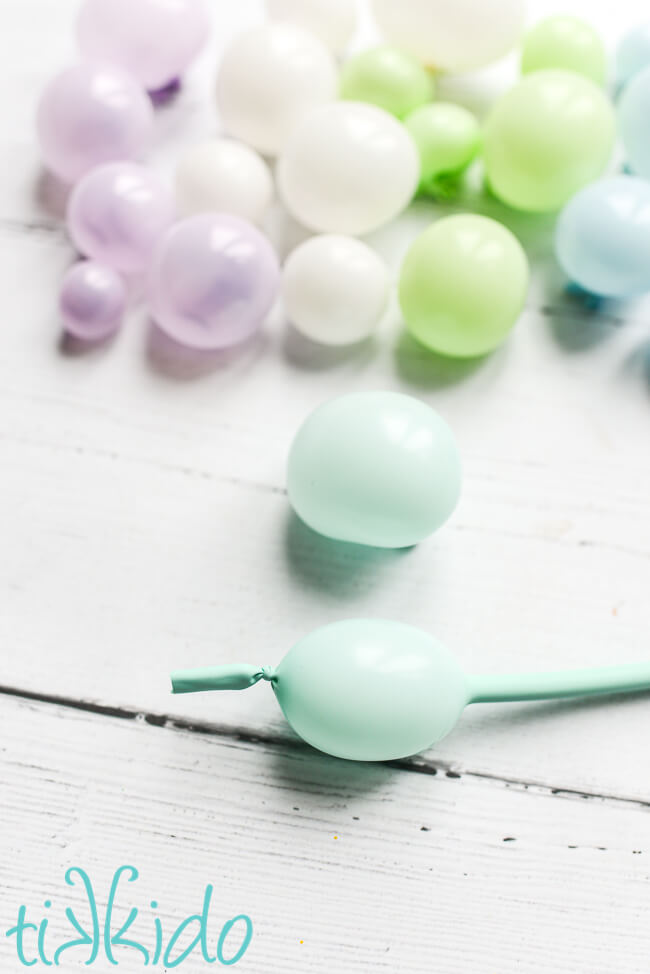
Inflate just a small amount of the balloon. Let out any excess air until you have a bubble the size of the miniature balloon you want. Tie off the open end, leaving yourself about an inch of excess balloon at the tied end.

Pull the two tails of the balloon together, and tie in a double knot. Cut off excess. That's all there is to it! Teeny tiny balloons! Vary the balloon size, making some a little bit larger, some smaller, to create texture and interest in the finished balloon garland. Just like you would making the big kind.
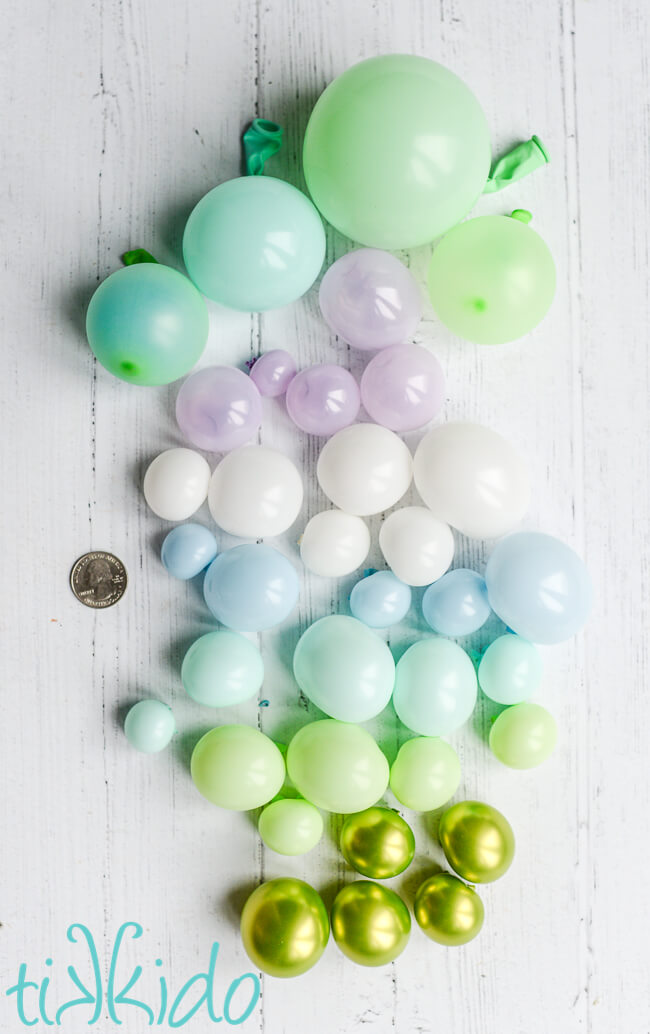
The largest balloons--the ones that mimic the look of those big, round 36" balloons in the regular balloon garlands--are just normal 5" balloons. Only inflate the 5" balloons about halfway, and squeeze all the air to the end of the balloon so the color will look right, and tie off. Trim off most of the neck of the balloon.
If you want a more pastel version of a 5" balloon, you can put colored balloons inside white balloons and blow them up together. A balloon pump is essential if you're doing this. And even with a balloon pump, this technique did not work with the narrow 260 balloons--I could not get the doubled up ones to inflate at all. But with 5" and larger balloons, it's a great way to create extra visual interest and color variation in a balloon garland.
Assembling the Miniature Balloon Garland Cake Topper
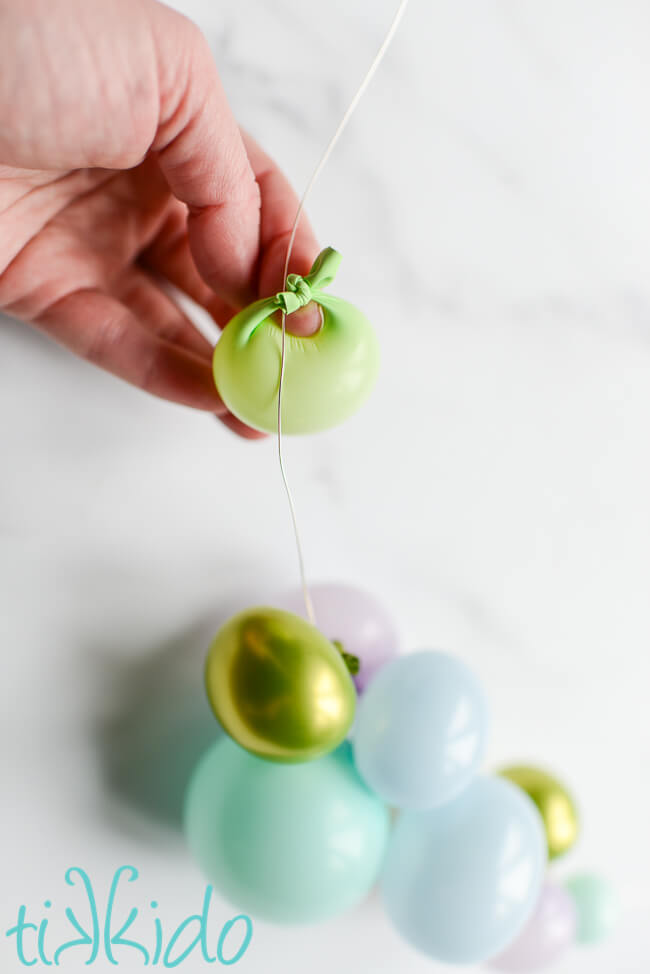
Standard balloon garlands are typically made with either a balloon strip ( also called balloon tape--a plastic strip with holes in it specifically made for making balloon garlands) or fishing line. But for this project, wire was the perfect choice.
You don't need a particularly thick gauged wire for this craft project; I used 24 gauge silver colored craft wire. I also experimented with floral wire, and it worked beautifully (and is less expensive than a lot of other craft wires).
To make the mini balloon garland, simply slide the tiny balloons on the wire. As you can see in the photo above, the way I made the smaller balloons makes it incredibly easy to string the balloons on the wire! To attach the largest balloons (the ones made with the 5" balloons), I just poked the wire through the tail of the balloon. You could also wrap the wire around the knot of the balloon a few times; that would help with the positioning of the balloons later.
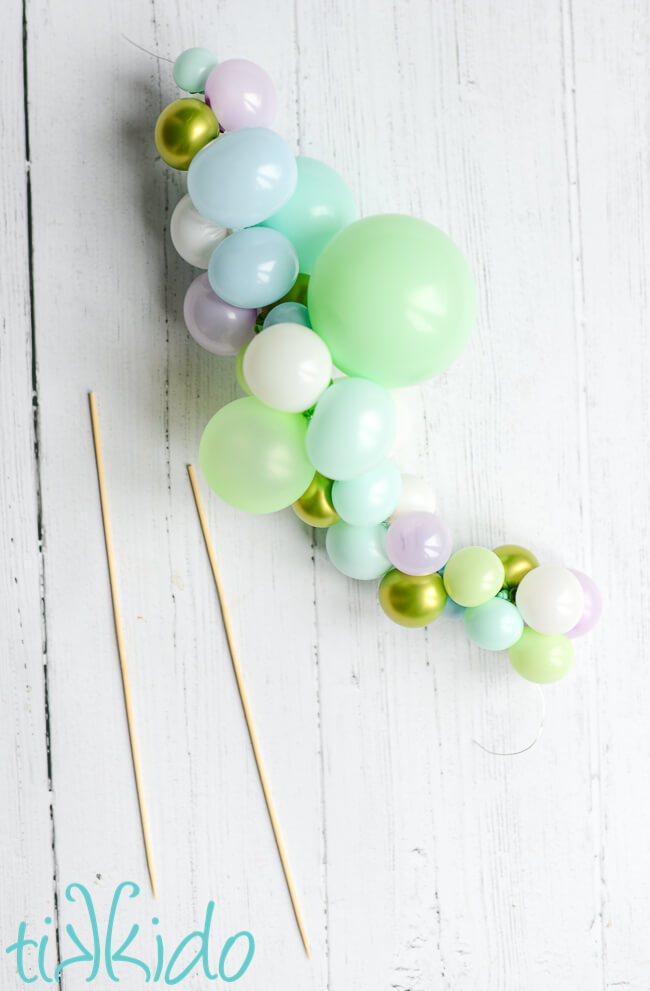
Wrap the remaining wire around the ends of two wooden dowels. I used a 12-inch skewer for this project because I had them on hand already and I knew they were food safe. You could also use pretty paper straws.
You can also attach the wooden skewer in the middle of the garland, like I did with the pink and blue/green versions. You can just wrap the wire around the stick a couple times, or attach it with a low temperature glue gun.
Can I Make a Balloon Garland Cake Topper the Day Before?
Yes, absolutely! In fact, in this photo, the pink balloon garland was four days old, the rainbow balloon garland was five days old, and the blue/green mini balloon garland was brand new. The balloons do start to oxidize a bit (get more cloudy) and lose a bit of air, but with these balloons and this technique, you can definitely make your cake topper a day or two in advance. Obviously, if you're going to add fresh flowers and greenery, add those right before the event.
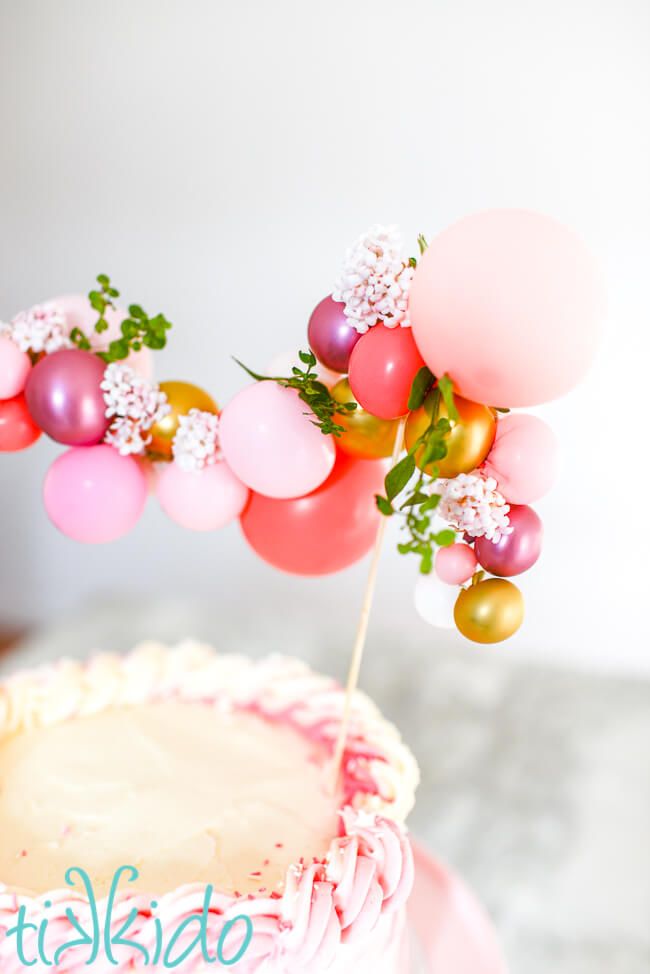
How to Add Flowers to a Balloon Garland DIY Cake Topper
Take your cake topper to the next level by adding greenery! I absolutely love the look of gorgeous big balloon garlands when they include flowers--it looks so elegant! So I went in my backyard with a pair of clippers and picked any tiny flowers I found. The "vine" is actually oregano from my herb garden!
You can just carefully place the flowers, nestling the stems between balloons, but that's a little precarious. A low temperature glue gun turned out to be the perfect solution to tack the flowers in place. Yes, you can hot glue things to balloons without popping them if you use a low temperature glue gun!
You can also use artificial flowers. Try looking for miniature silk flowers designed for card-making, scrapbooking, or doll houses to get the right scale.