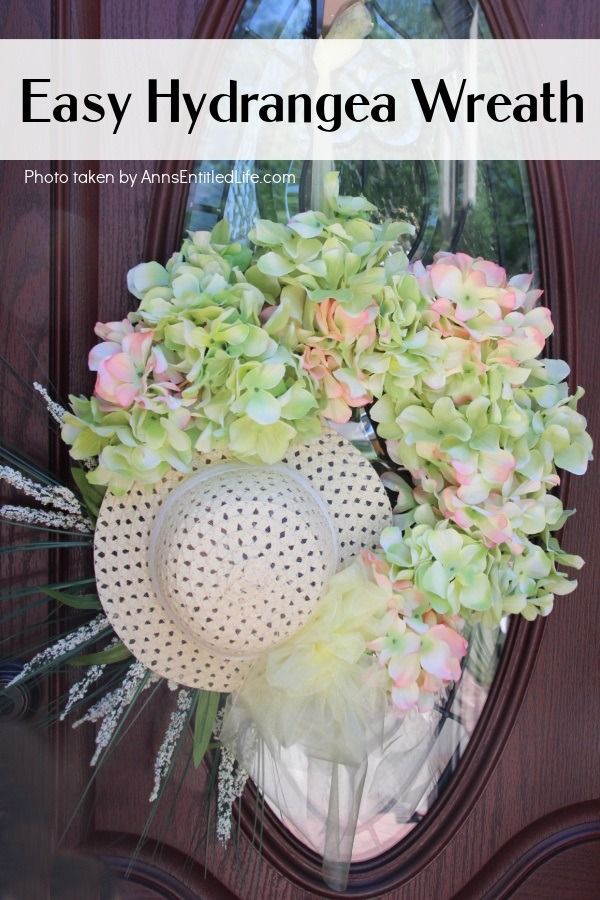
DIY Hydrangea Wreath
Have you ever considered making a DIY Hydrangea Wreath? It's such a fun and creative project that can bring a touch of elegance to your home decor! Feel free to get creative and add some greenery or other embellishments to make it your own! Hang it on your front door or use it as a charming centerpiece for a special occasion. Happy crafting!
Materials
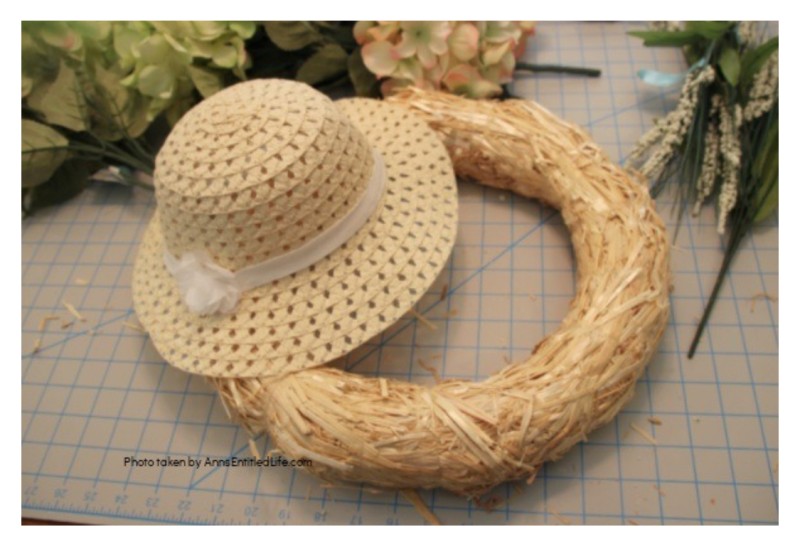
Straw Wreath
Hydrangea Flowers Bunches (enough to cover the wreath size you purchased)
Sprizbush Flowers (springs)
Hat
Tulle (4½' x 15' was used)
Tools
Scissors
Hot Glue
Glue Gun
Wire Cutters
Instructions
Cover your flat surface work area against burns.
Free your straw wreath from its plastic prison. Remove all tags from the flowers and hat.
Place your hat against the straw wreath and hot glue in place.
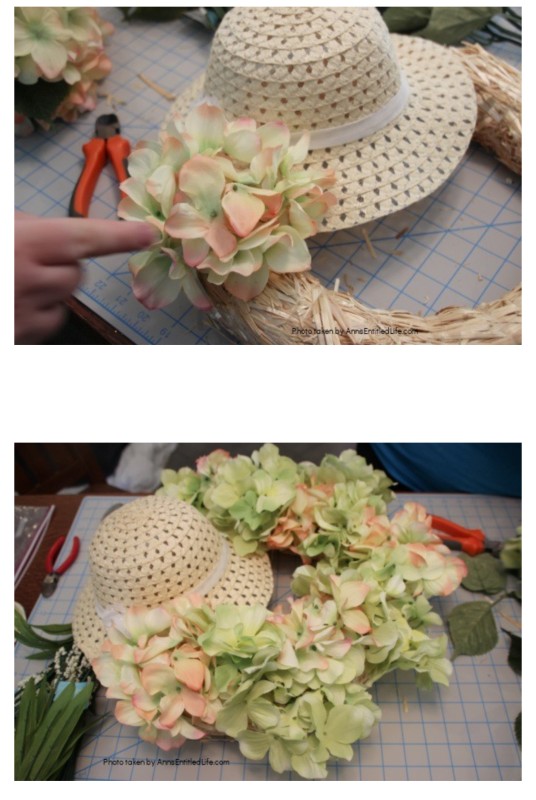
Clip the hydrangea flowers from the bush. Leaves are optional.
Insert the hydrangea stems into the straw wreath. Once you like the placement, remove and place a dot of hot glue at the end of the stem and reinsert. Hold until glue dries (only a few seconds). Continue until the entire wreath is covered.
Tie a bow onto the hat. The same gauzy material is being used for the hanger in this craft. If you decided to switch to a stiffer hanger or eliminate it completely, that is fine.
Add a few sprigs of long flowers behind the hat. Take a look at how it looks from the front before hot gluing in place. It is easy to make adjustments before gluing. The springs make this wreath a lot larger, as well as make it more balanced. If you choose not to use them, make a larger bow and have it face outward.
Give the wreath a jiggle to make certain everything is hot glued in place.
Hang as desired.
No comments
Write a comment