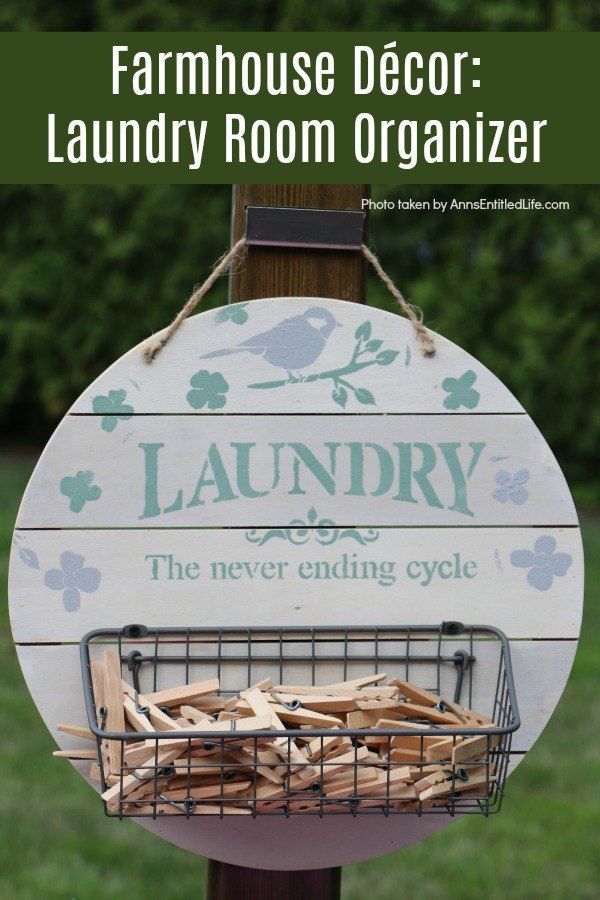
DIY Laundry Room Organizer
Creating your DIY laundry room organizer can be a fun and rewarding project! It's a great way to add your personal touch to the space while keeping everything organized and easily accessible. You can customize it to fit your specific needs, whether it's adding extra shelves for storage or hooks for hanging items. Not only will it help declutter your laundry room but also make doing laundry a more enjoyable task. So go ahead, grab your tools, and get creative with your very own DIY laundry room organizer!
Materials
Vinegar
Jar(s)
Steel Wool
Stencils
Basket
Hanging Tray
White Paint
Water (for whitewash)
Paint (for stencils)
Tools
Cup (or jar)
Foam Paint Brushes
Dabbers
Instructions
24 hours before making this craft, prepare a vinegar solution. In a small jar, fill ¾ of the way to the top with vinegar and insert a steel wool pad. Allow to sit for 24 hours uncovered.
Create a whitewash-like paint: simply add a little bit of white paint and water to a jar with a lid. Shake vigorously to combine. You want the whitewash-like paint to be the consistency of cream.
Cover your work surface against any spills.
Using a foam brush, paint on some of the whitewash-like paint onto the tray (do not wipe this one). Continue until the entire body of tray is completely whitewashed.
While the whitewash is still wet (do not allow to dry), "paint" your tray with the vinegar solution. Note: some of the paint will come off on your foam brush.
Allow to dry.
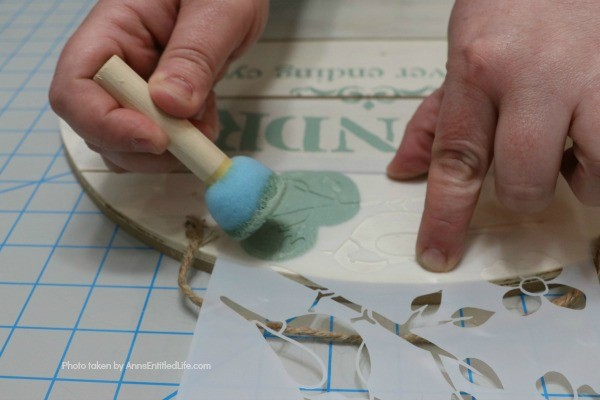
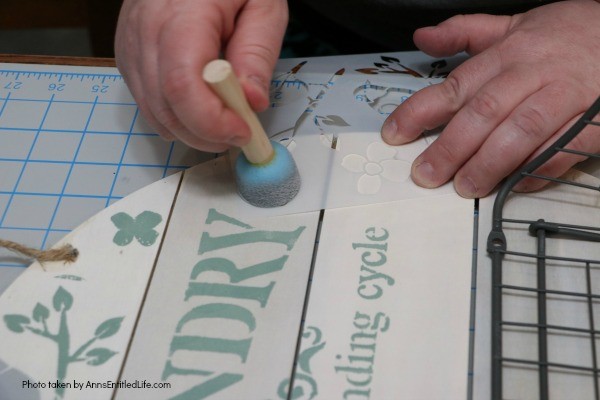
Lay out stencil. Make sure it is straight. Tack down the stencil with tape if you like.
Green Shadow was used to paint the laundry stencil. This paint dries darker. Using a dabber brush, paint the stencil sign,
Lift straight up to remove.
Allow to dry completely.
Paint the bird stencil - blue, grey, green, you choose! On this project, dovetail grey was used.
Lift straight up to remove.
Allow to dry completely.
Wash the stencils using soap and water so you can use them for a future project.
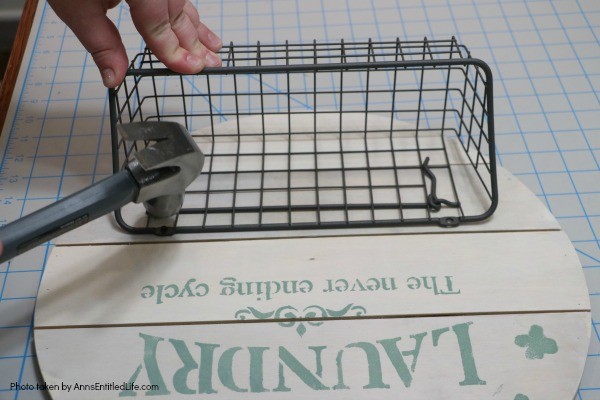
Once the tray is completely dry, attach the basket. Be careful your screws or nails do not go through the wood to the other side (and be careful your work surface isn't marred underneath). If they do come through, either dremel the excess off, or use a putty to prevent scratches from the longer nail or screw.
Hang as desired.
No comments
Write a comment