Creating a DIY Floral Painted Wood Circle Wreath is a fun and rewarding project to add a touch of charm to your home decor! This project allows you to unleash your creativity and personalize your space with a unique piece of art that brings joy and a touch of nature indoors. So, grab your supplies and let your imagination blossom as you bring this lovely wreath to life!
Supplies for Floral Painted Wood Circle Wreath
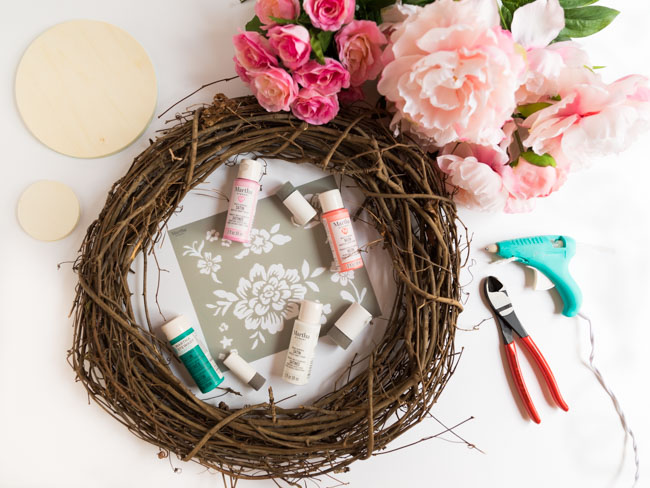
Martha Stewart Crafts® Adhesive Laser-Cut Layering Stencils
Martha Stewart Family Friendly Multi-Surface Satin Acrylic Craft Paint
Foam pouncers
18″ grapevine wreath
3″ wood circles
6″ wood circles
Artificial peonies
Pink artificial roses
Faux eucalyptus greenery
Mini paper banners
Martha Stewart Adhesive Laser-Cut Stencils, Elegant Script
How to Make a Painted Wood Slice Wreath
Step 1: Paint the wood discs white
To make the wreath I used a mix of 6″ wood circles and 3″ wood circles. I started by painting each of the wood circles with a coat of white acrylic craft paint.

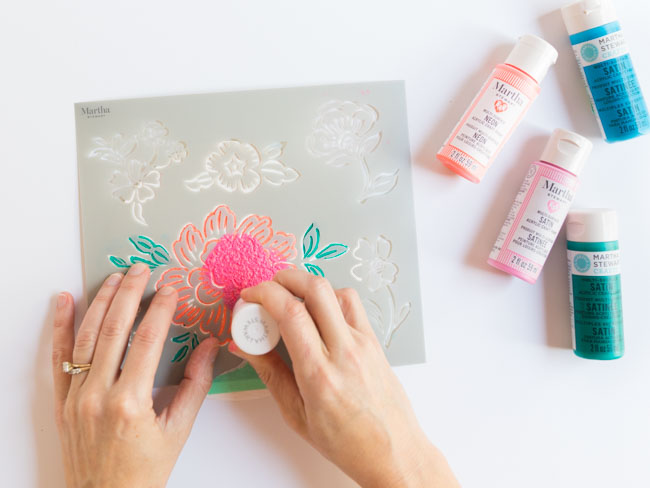
Step 2: Stencil a floral design onto the wood discs
To create the floral designs, I used these Martha Stewart Crafts® Adhesive Laser-Cut Layering Stencils and a foam pouncer. You can use a piece of tape to secure the stencil in place and prevent it from moving around.
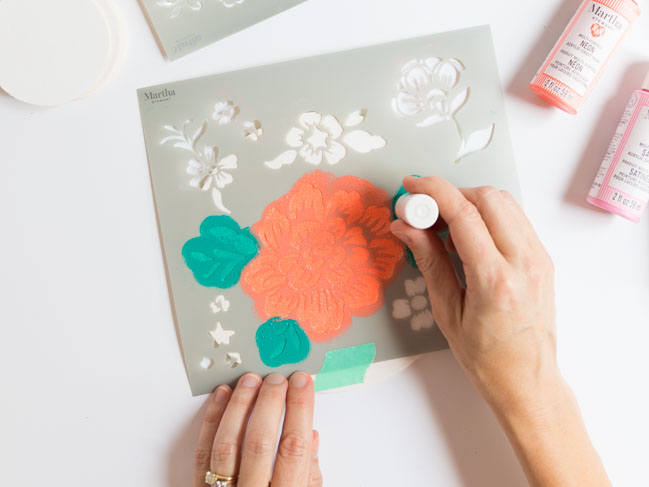
The layering stencils require two steps. First you stencil on the base color and let it dry. Wash off you stencil immediately after use to keep it working great.
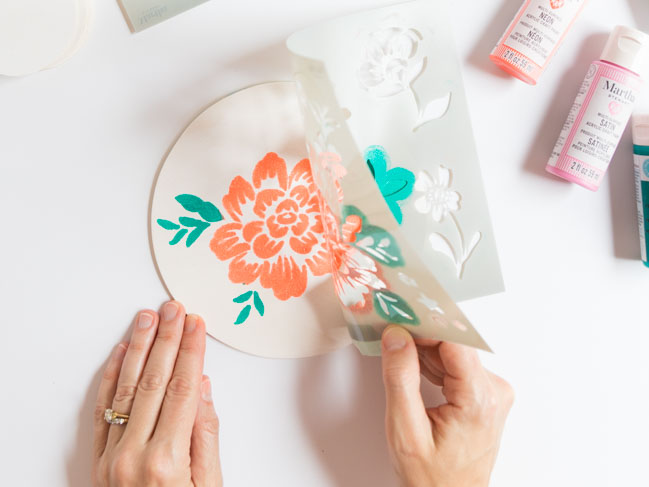
Step 3: Add the second layering stencil to the design
This is where the magic happens. When you overlay the second stencil and add a new set of colors on top of the existing design, it creates a beautiful flower that almost looks hand painted.
I love the added dimension that the layering creates!
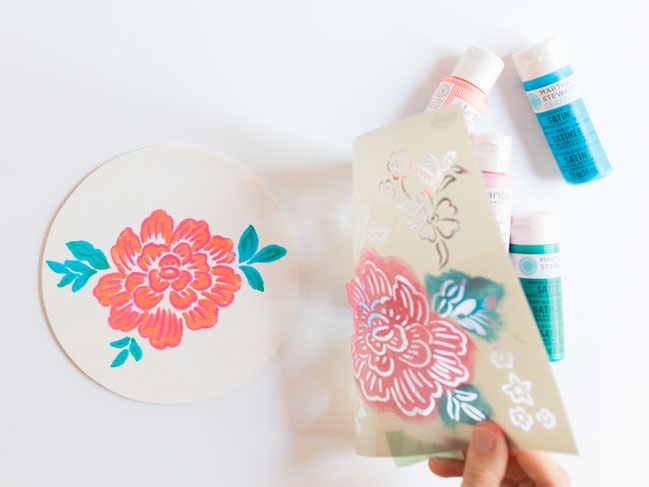
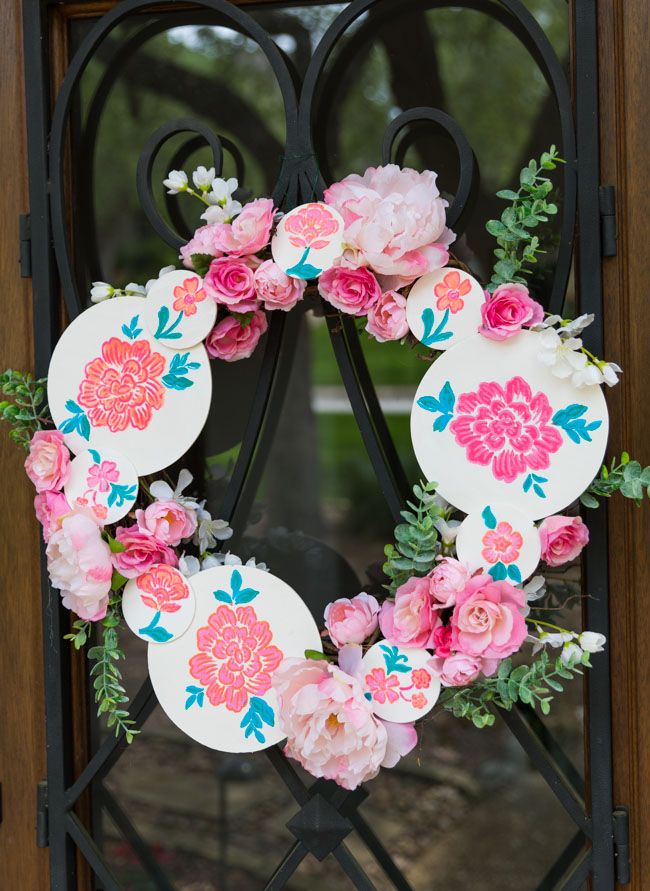
Continue stenciling a variety of floral designs on the two sizes of wood circles. I used three large 6″ wood circles and seven small 3″ circles for my wreath.
Step 4: Glue wood slices to a grapevine wreath
Position the wood circles around an 18″ grapevine wreath. Once you have the look you want, glue them in place with an ample amount of hot glue on the back.
Step 5: Fill in gaps with artificial flowers
I used a variety of artificial pink flowers to fill in the gaps between the wood slices. To make a lush wreath, I incorporated a mix of artificial peonies, pink roses and some faux eucalyptus greenery.
Use a pair of wire cutters to cut the flowers from their stems, leaving about an inch of the stem intact to press into the wreath. Secure in place with a dab of hot glue at the base of the flower.