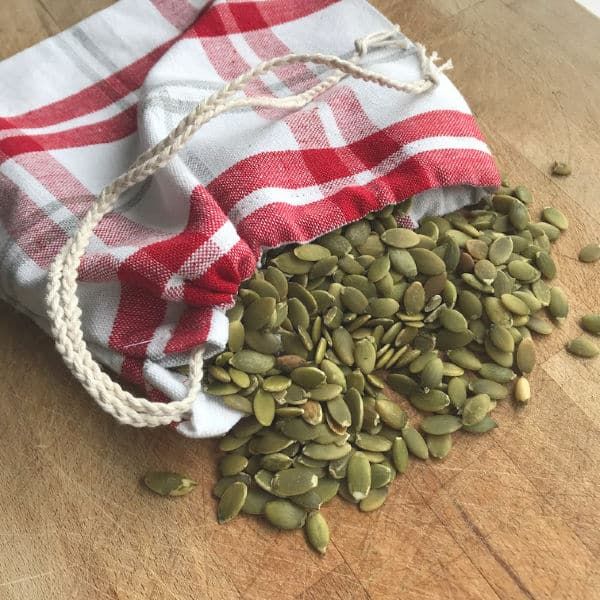
Drawstring Bag from a Tea Towel
Creating a drawstring bag from a tea towel is a fun and creative DIY project that can add a personal touch to your accessories. With just a few simple steps, you can transform a humble tea towel into a unique and stylish bag that you can use for carrying around your essentials. The best part is that you can tailor the design to suit your taste and preferences, making it a one-of-a-kind accessory that reflects your personality. So grab your tea towel, get your crafty juices flowing, and let's turn something ordinary into something extraordinary!
How to Sew A Drawstring Bag from a Tea Towel
The first thing is first - you need to start with a tea towel that is 100% cotton. The bag will be holding food and you want it to be easy to clean, dry and made of natural fibres. Speaking of easy to clean, be sure to wash the tea towels before sewing them into bags. Pre-washing the fabric will allow the fabric to shrink, if it needs to. Once the tea towels are dry, you will want to iron them so you are working with a smooth piece of fabric.
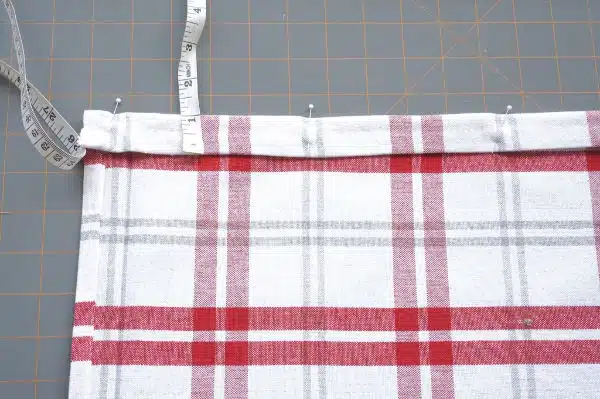
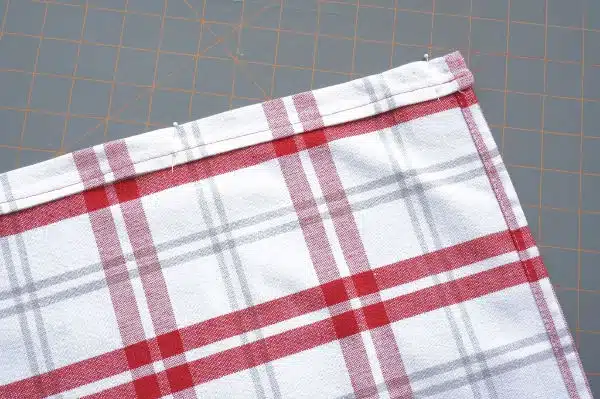
Place the fabric down on a flat surface, with the wrong side facing up. Begin pinning a 1 inch fold along the longest side of the tea towel. This is the channel where the drawstring will go. Sew the channel closed, along the edge. Use a simple straight stitch. Once the pocket is sewn, press the edge down.
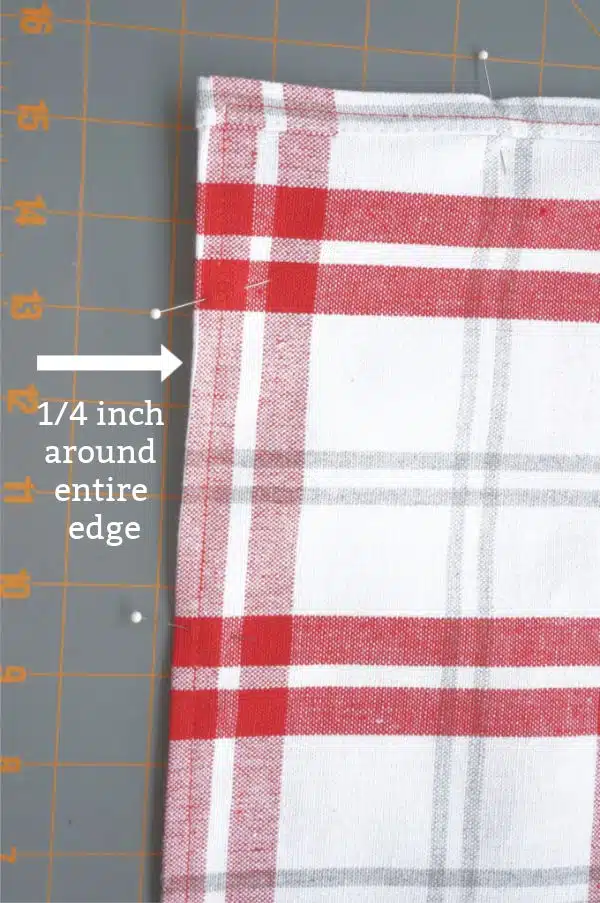
Now that the drawstring channel is sewn, it's time to make the bag. Fold the fabric, with right sides together, in half. The drawstring channel will be at the top. Pin the open sides together. Sew ¼ inch seam allowance all the way around the open sides of the bag.
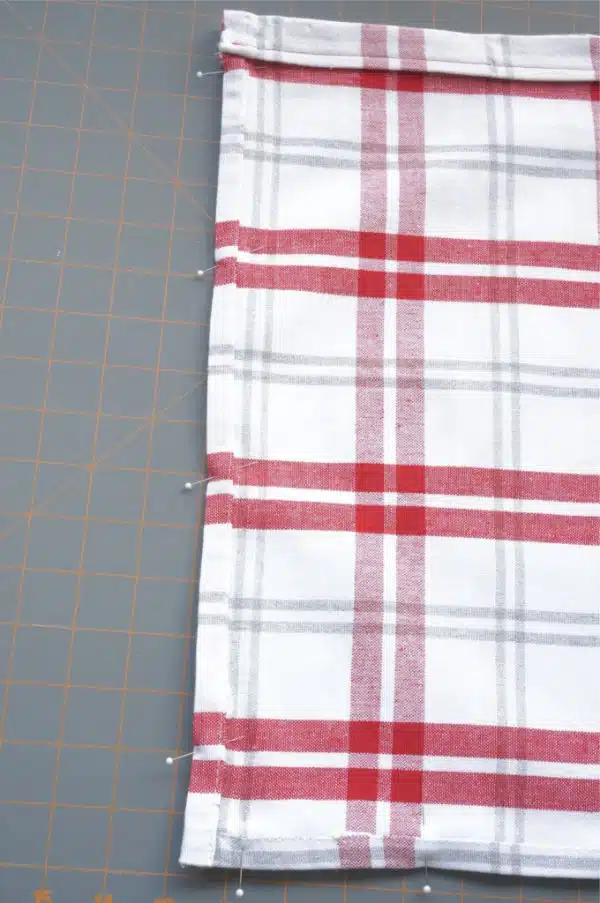
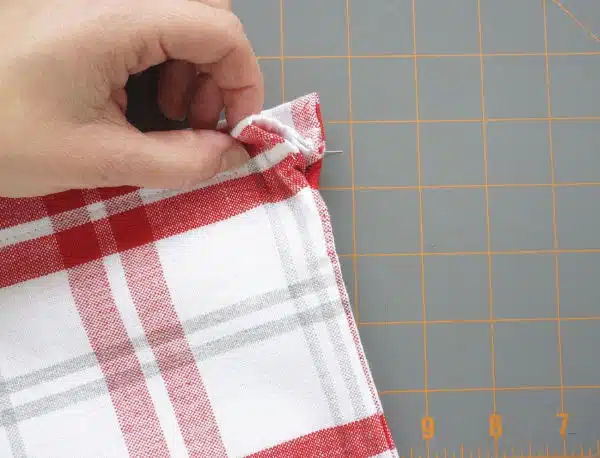
Don't sew the drawstring channel closed! Stop sewing 1 inch below the drawstring channel. You will see why you need to stop here when you turn the bag the right way around.
Once the sides are sewn, it's time to flip the bag right way around. Make sure the opening where the drawstring will go, is facing out. Iron the bag to flatten any kinks. The bag is done and now it's time for the drawstring.
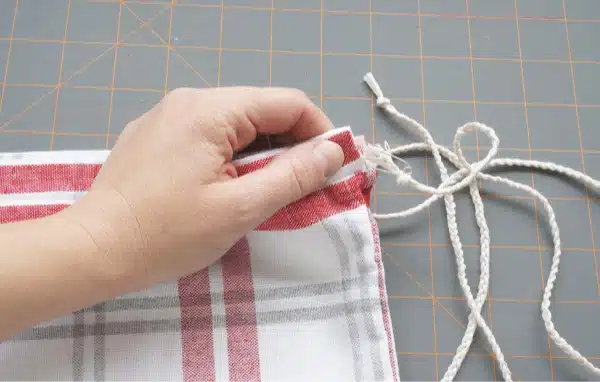
Use a piece of cording, a shoe lace or piece of ribbon. I opted to make my own cording, by braiding together three pieces of kitchen twine. I love my kitchen twine, but a single strand wasn't quite strong enough, thus I braided it together. You will need a piece that stretches a few inches beyond the end of the opening. Knot the end of the cording.
Now it's time to feed the cording into the channel. To do this simply slip the safety pin into a knot, at the end of the cording. Then push the safety pin through the channel.
It will bring the cording with it. Feed it all the way around to the exit. Remove the safety pin and you are done.