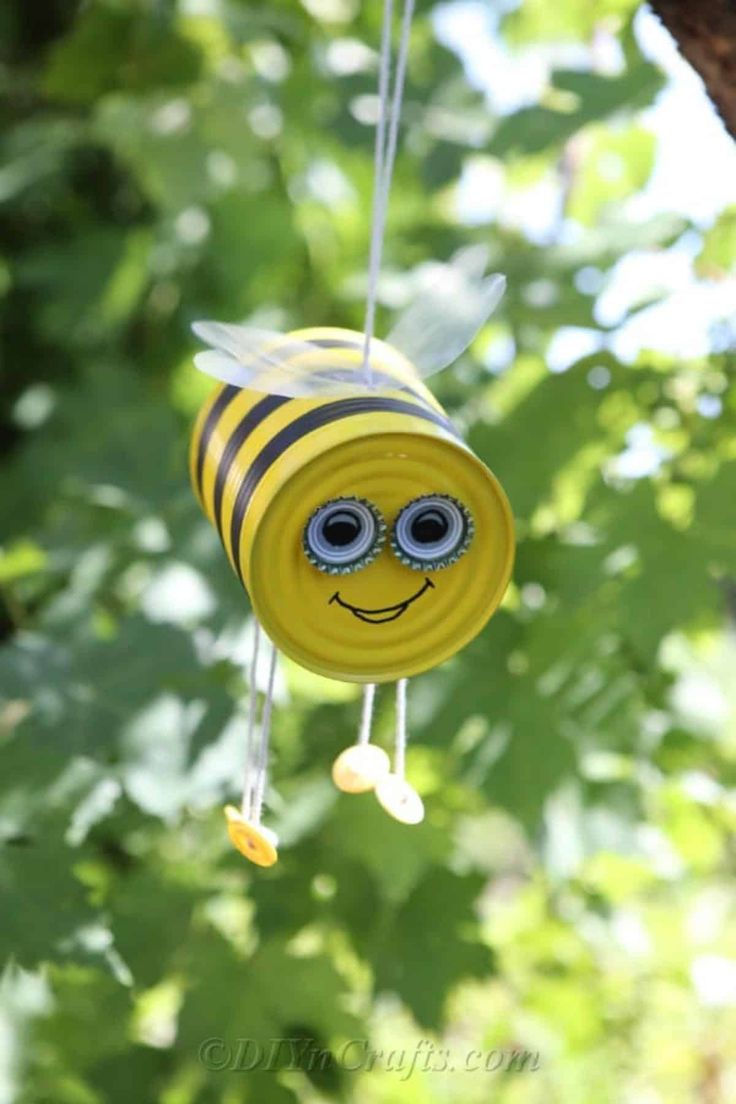
DIY Hanging Bee
If you're looking to give your garden a buzz of charm, creating a DIY hanging bee is a fantastic idea! Not only will your hanging bee add a touch of whimsy to your garden, but it will also create a welcoming environment for our pollinator friends. So, grab your supplies, get creative, and let's bee-utify your garden together!
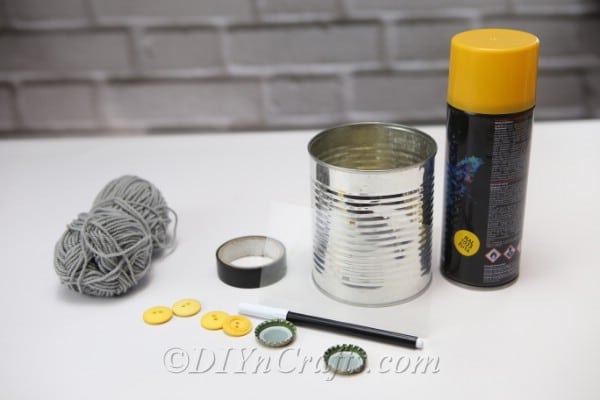
Materials
Tin Can
4 Yellow Buttons
Yellow Spray Paint
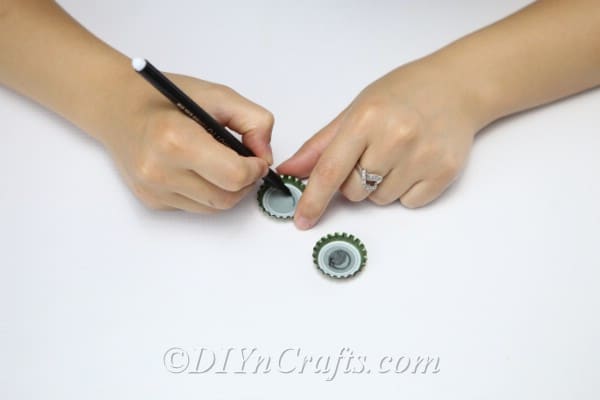
2 Bottle Caps
Black Sticky Tape (electrical tape is perfect)
Thread (for hanging)
Piece of plastic (for making wings)
Black Marker
Tools
Scissors
Hot Glue Gun
Instructions
To begin, you will want to prepare all of your supplies so they are easy to find when needed.
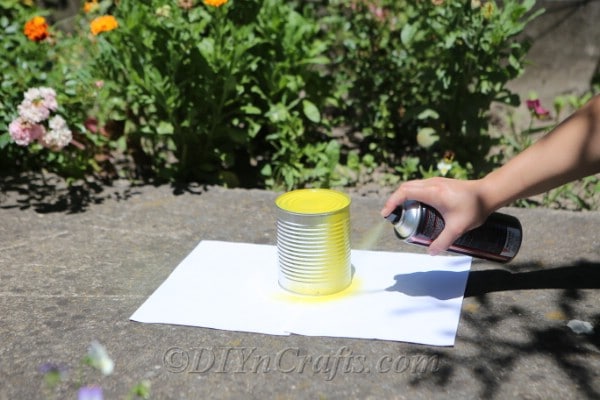
You will begin by cleaning and drying your can.
Next, you'll spray or paint the can until it is a nice yellow color. If using spray paint, make sure to do this outside or in a well-ventilated area. Let the can dry completely before moving to the next steps. This usually takes 1-2 hours.
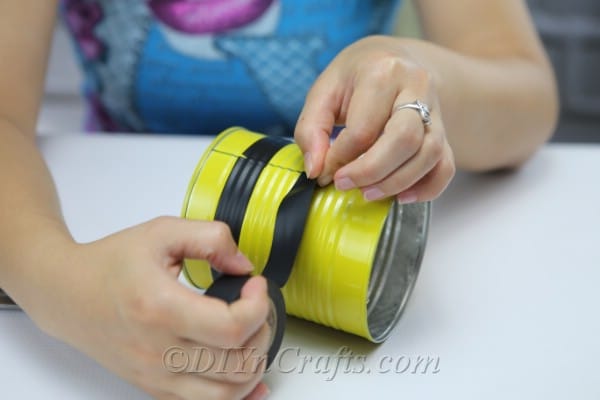
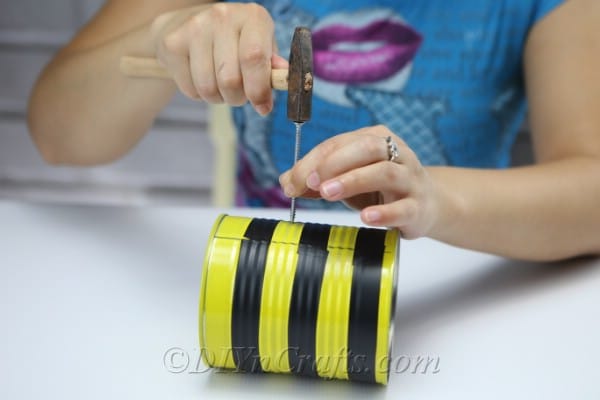
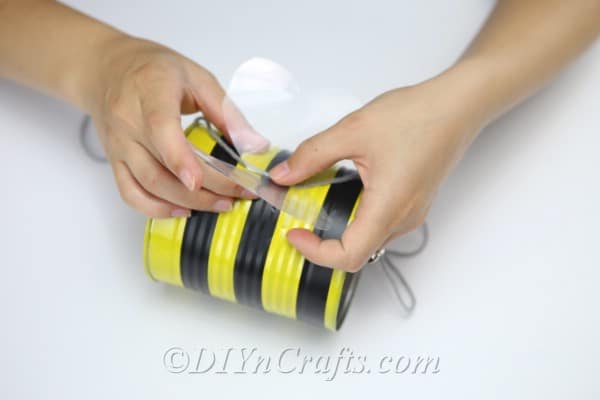
Once the can has dried, you will use the black tape to create stripes by securing around the can. If needed, use hot glue for extra strength. At least 2 but potentially 3 stripes will fit on your can depending upon size.
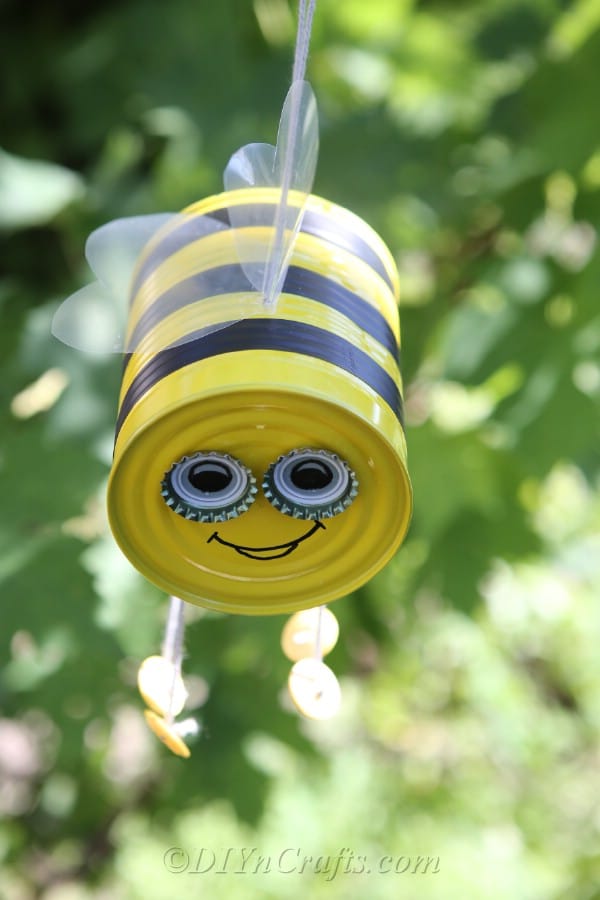
For the bee face, use the marker to create a smile you like. Next, you'll glue draw eyes on the bottle caps and then secure them to the front former bottom) of the can with glue.
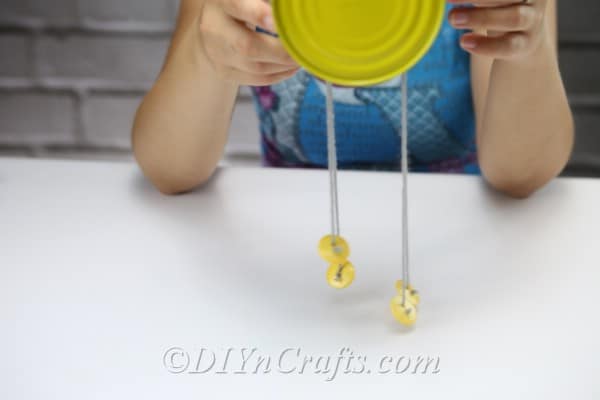
Use a hammer and screw/nail to create holes on the sides of the can for threading the "legs" through. 2 on each side will be needed.
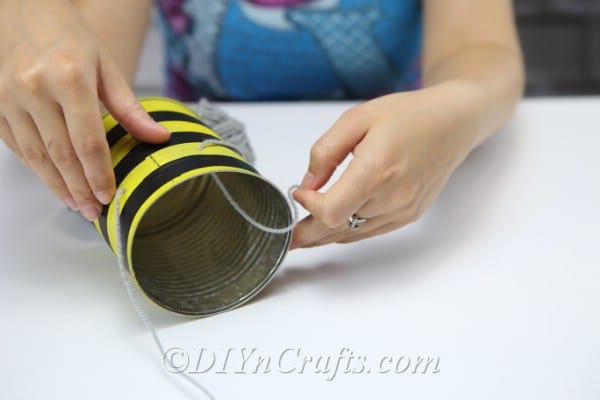
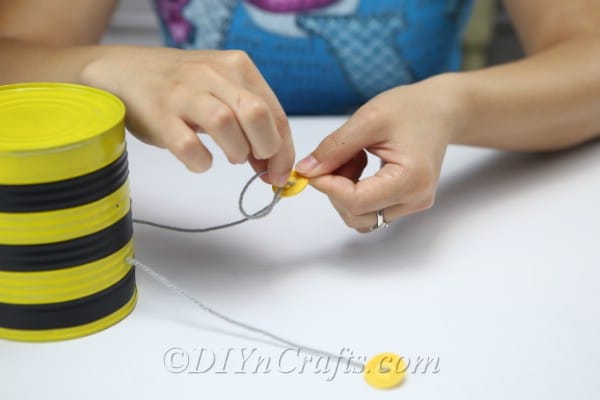
Thread your buttons through preferred twine or thread, then into the prepared holes on the sides of the can and tie a knot to keep them in place. You can also add a layer of glue on the inside over the knot if desired.
Your final steps are to use the piece of clear plastic and cut it into wings to glue on top of the bee craft, then tie a thread to the top for hanging the bee from a tree.
Note: You can punch another hole in the top of the can to string a hanging thread through, or can glue beneath the wings.
No comments
Write a comment