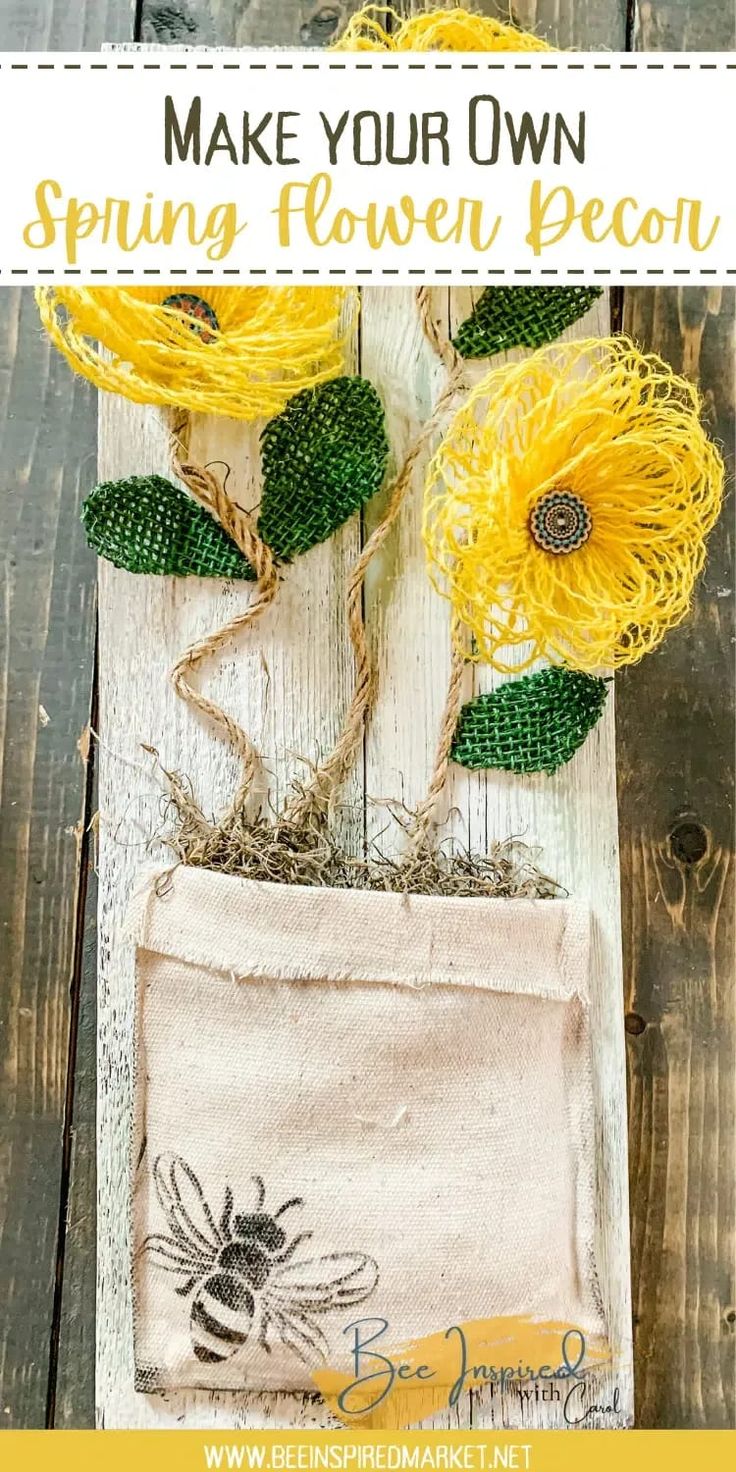
DIY Spring Flowers
Spring is the perfect time to bring some DIY magic into your home with beautiful spring flowers. Whether you're arranging them in a vase or creating a stunning floral wreath, working with vibrant blooms is a delightful way to embrace the season. Let your creativity bloom as you mix and match different colors and varieties to create a unique arrangement that brings a touch of springtime cheer into your space.
SUPPLIES NEEDED TO MAKE YOUR SPRING FLOWER DECOR
Barn wood or scrap wood
Burlap Ribbon – yellow and green
Vintage Buttons
Waverly Paint: Celery & Plaster
Paint Sticks
20 Gauge Wire
Canvas Drop Cloth
Faux moss
Jute wire
Chip or paint brushes
Hot glue
Baby Wipes
Puppy Pads
STEPS:
1 – Grab your 2 pieces of barn wood. I am going to teach you the Wet Distressed look. Feel free to keep the rustic look if you prefer. First, add a layer of Plaster color paint with your brush directly on the wood. It will be a rough brush. Apply 2 coats of paints. Tip* You can leave them natural if you like and that rustic look fits your style better.
2 – Use a heat gun to speed up the drying process.
3 – With your Celery paint, add a thin layer lightly brushed over to add some dimension. Remember your white paint must be dry. Dry your boards again completely.
4 – To complete the wet distress look, grab your baby wipe and rub along parts of your wood to bring back some of the wood so it is showing through. It is basically removing some of the paint to give a new texture. Tip* If you want to have a little more of a distressed look, use a sanding block instead.
5 – To brace your 2 pieces of wood together, use a paint stick on the back of your boards. Use heavy-duty scissors to cut your paint sticks to fit the size of your boards. Cut to make 3 brace parts.
6 – Hot glue those braces on the back to secure your 2 boards together. Set aside.
7 – Now let’s get to work on that burlap ribbon. There are three easy steps to this 1, 2, 3 Flower making process that I will briefly share to begin. First, pull out strings. 2nd, fold in half and glue. 3rd, roll it. More detailed description in the next few steps, but I just wanted to prep you for what should be running through your mind as you craft.
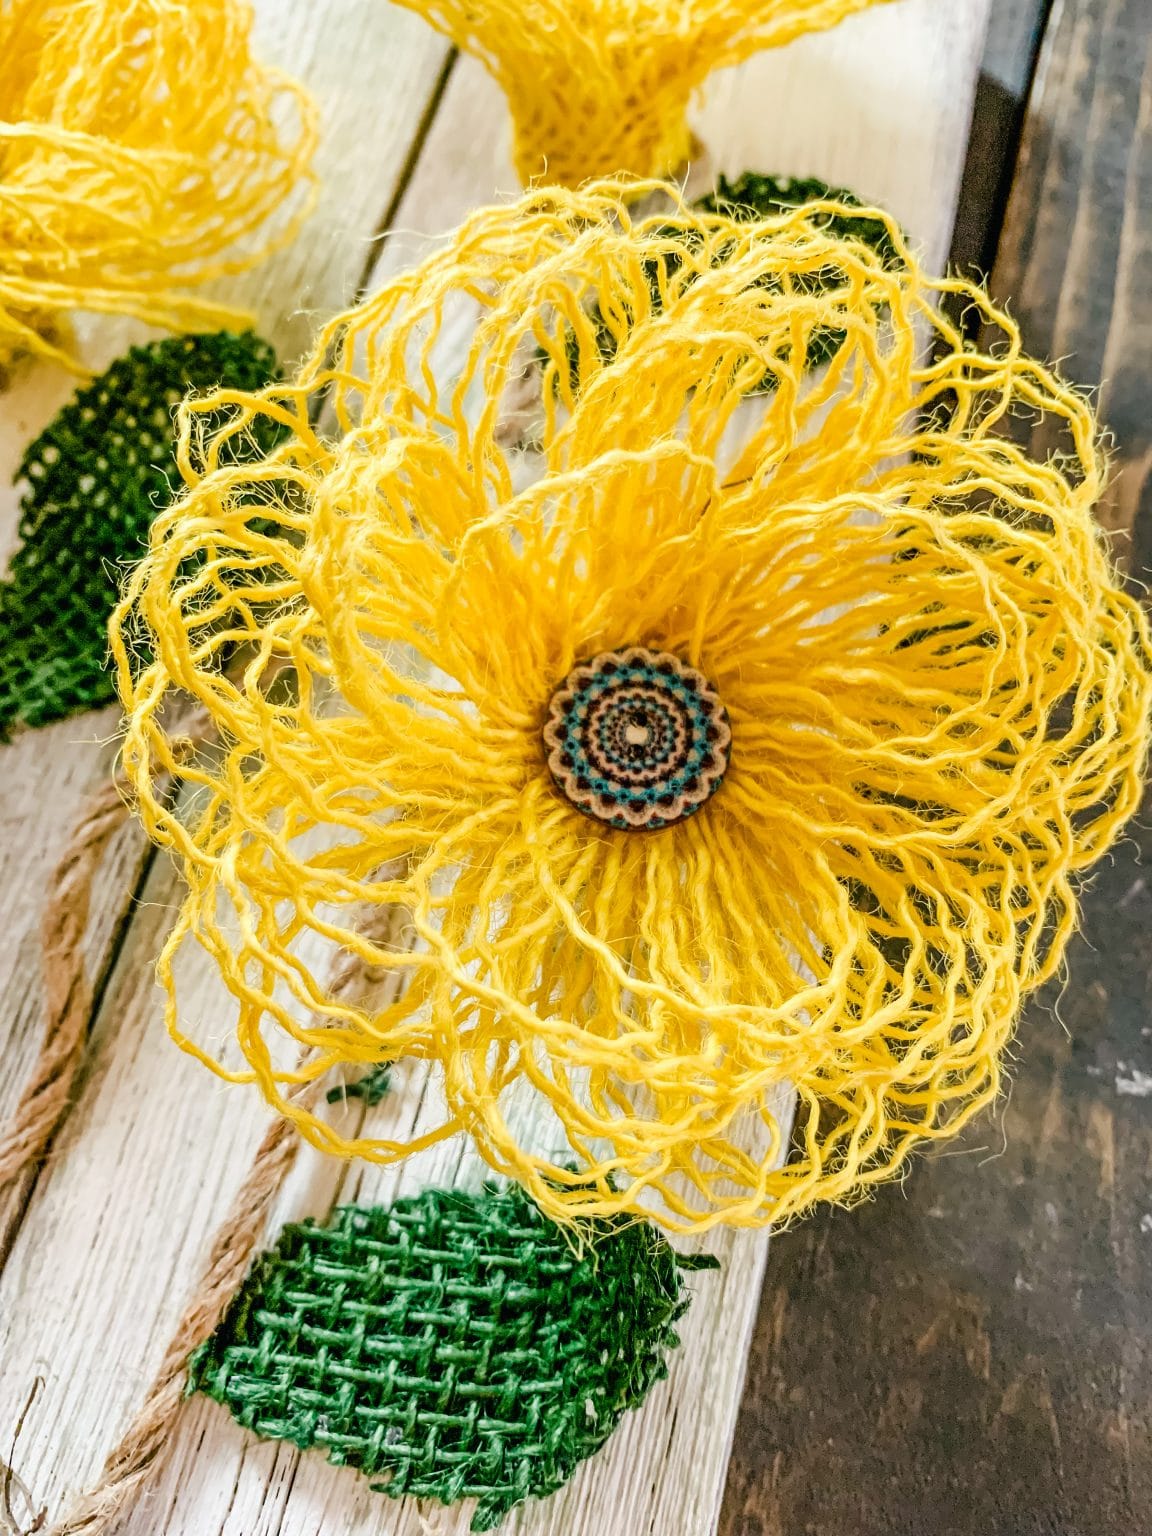
8 – (Step 1) With your burlap ribbon, yellow & green, cut out a 12-15” piece. On the edges of your burlap, you will see the “teeth.” In between you will see the “bands/strings” that are holding them together and you will carefully pull those out. Save those pieces. Tip* Angle your burlap, grab onto 1 band at a time, and pull up and out. Be sure to leave edges on both the top and bottom as you pull.
9 – Don’t worry if it isn’t perfect. You can trim off sections that are yucky. You will have a thin section on top and on the bottom of your burlap where you did not remove the inner bands/strings.
10 – (Step 2) Hot glue on top of your burlap and fold it in half, so it rests right on top of each other.
11 – (Step 3) From one edge, hot glue a tiny section as you roll your burlap to begin forming your burlap flower. Be sure to roll it tightly, and add hot glue as you go.
12 – If you have any crazy-looking stings sticking out, cut them off.
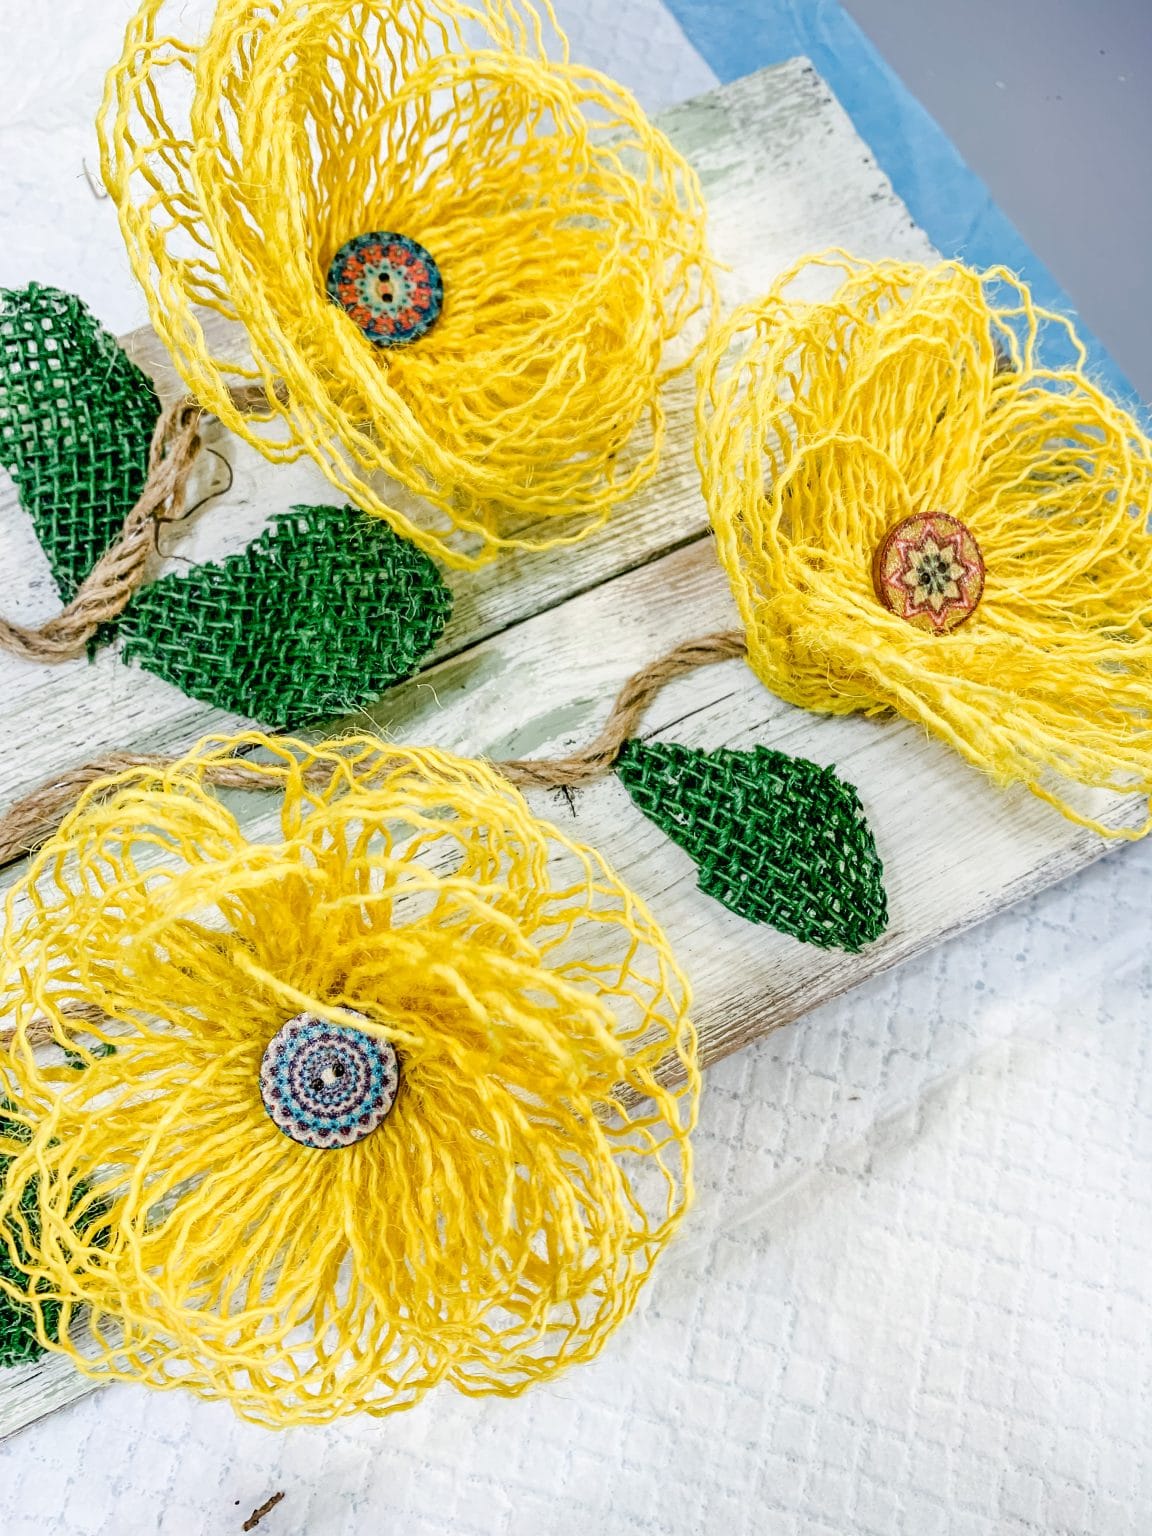
13 – Next, look at your flower and determine where it wants to naturally break. Softly push it down and then add your vintage button with a bit of hot glue in the center of your 1, 2, 3 Flower. Tip* Add any sort of embellishment you want in the center. Be creative.
14 – Repeat for as many flowers as you want to add to your sign. I made 5 to start, but only used 3.
15 – Next let’s make the leaves. Grab your 20 Gauge craft wire. Cut off pieces for as many leaves as you want to add to your sign. I didn’t measure, but I’d say roughly 8”. Then cut off some of your green burlap ribbons. You will need 2 squares for each burlap leaf you wish to make.
16 – Lay your burlap square down flat. Take 1 piece of wire and shape it into a leaf, twisting the ends together to stay tight. Next, add a little hot glue on your wire and place it down onto your burlap square holding in place.
17 – Then place the other burlap square on top with a bit of hot glue to sandwich it together. Hold together as the glue dries, carefully. Then cut off excess to show the leaf shape. Repeat for as many leaves you wish to make for your DIY Spring Flower Decor. Set aside.
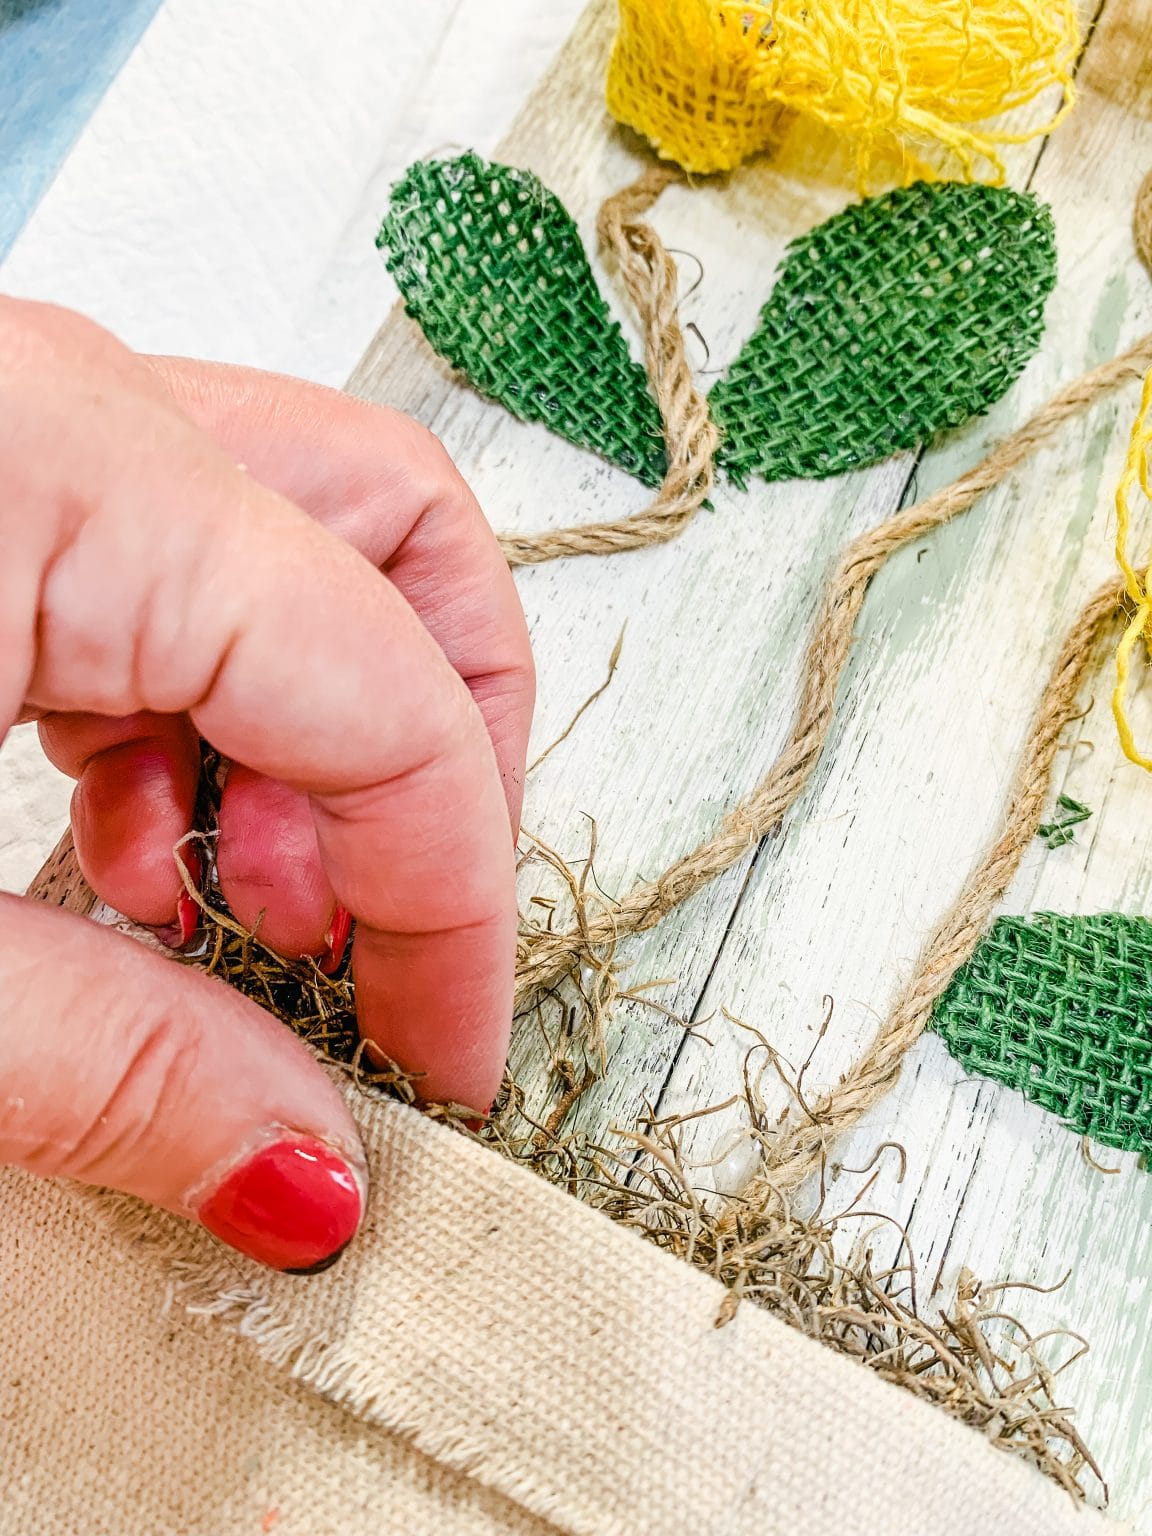
18 – Grab a section of your canvas drop cloth. (Not much needed.) Using hot glue, create a pocket by folding over 3 edges, leaving an opening up top. Once happy, then fold over the top-notch to give the appearance of the frayed pocket look on your sign. Tip* You could even stamp a cute little word on your pocket. Maybe, “Fresh Flowers,” “Farm Fresh. ” or, “Spring”. I decided to stencil a bee.
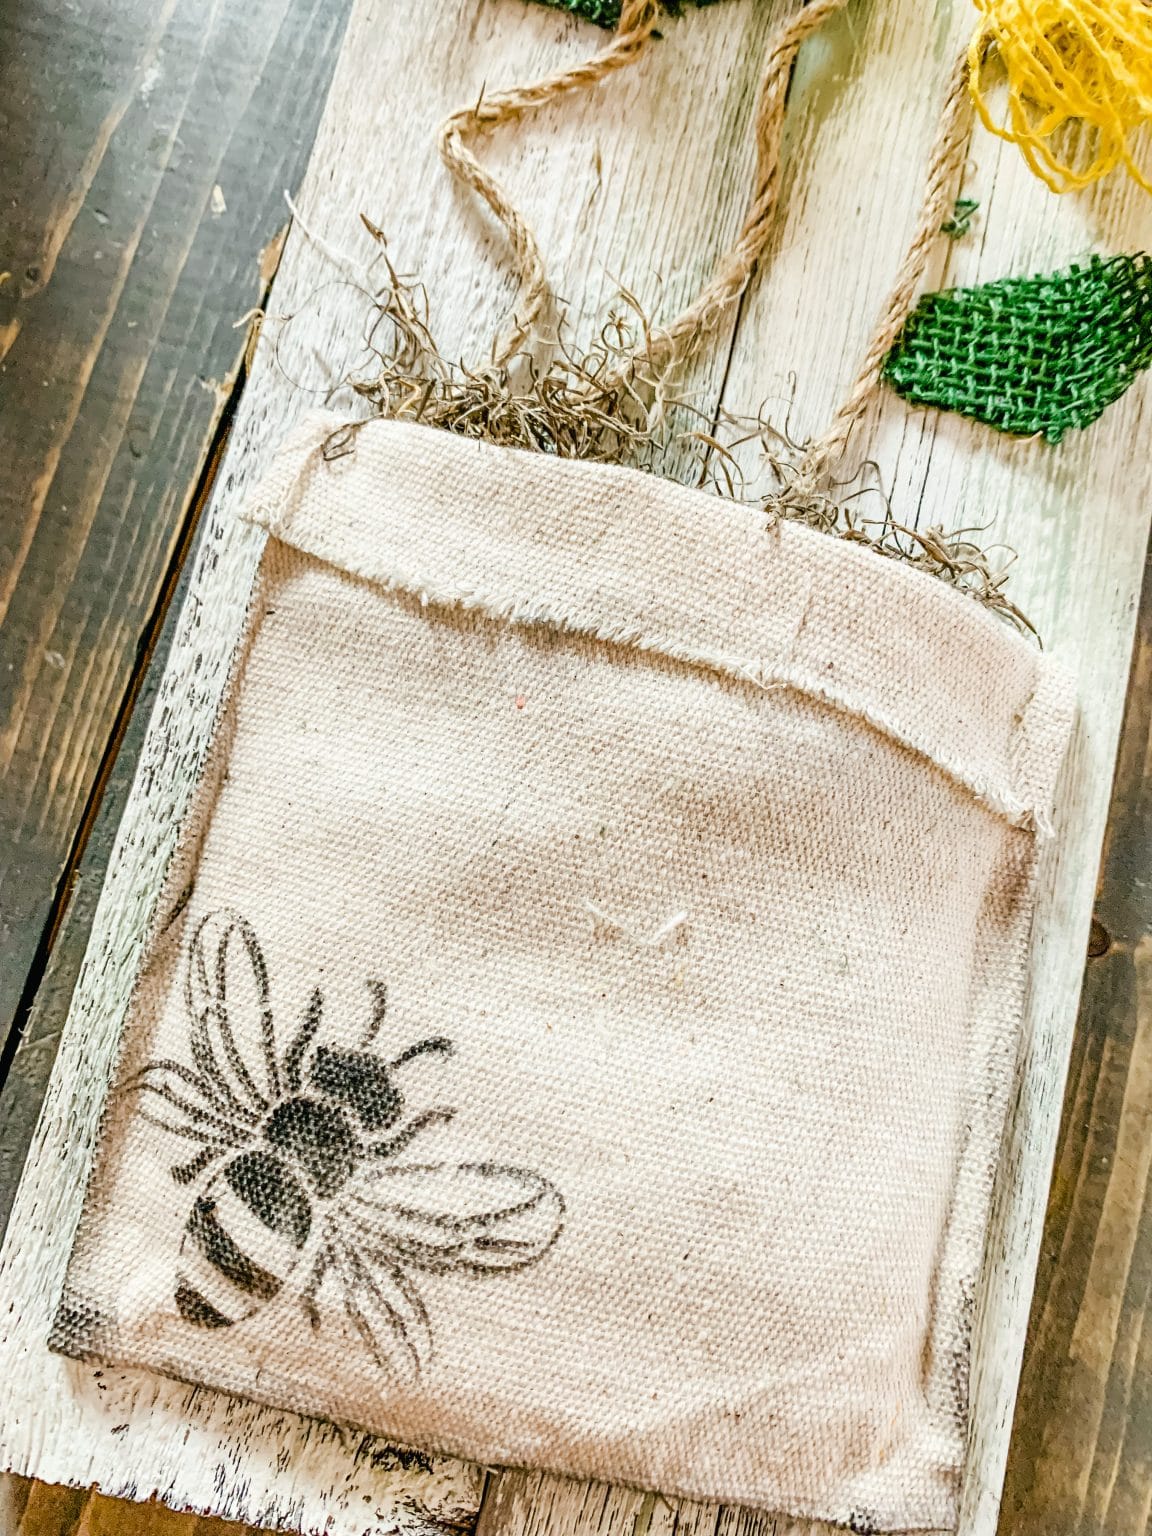
19 – Bring the board back and add your pocket to the bottom of your sign by hot-gluing it in place. Remember you want to have a full pocket effect so allow for some movement as you glue.
20 – Once glued in place, add some faux moss to your pocket filling it up, slowly poking down in there. Allow some to stick out and add extra cuteness!
21 – To add some stems to our sign, we will use some wired jute. Create a visual representation on your board before hot gluing anything down. Play with placement and determine the lengths of stems and where your cute flowers will look best. Tip* Use floral wire, rafia, or even the strings from the burlap you just pulled out if you don’t have the wired jute.
22 – With your cut-off pieces of wire jute, position on your board poking out from your canvas pocket. Be sure that it is shoved down into your moss to help it stay secure. Cut, trim, and manipulate where needed. Tip* Add squiggles to your stem or keep them straight. Whatever you decide, just have fun with it.
23 – Add a dab of hot glue here and there on your stems. Hold down to secure.
24 – Add some hot glue to the centers of your 1, 2, 3 Flowers so they rest beautifully on your board.
25 – Add your bendy green leaves accenting the flowers to your board with hot glue.
26 – Now the hard part… where in the world to place this adorable sign because it is just so dang cute you will want to see it in every room of your house.
No comments
Write a comment