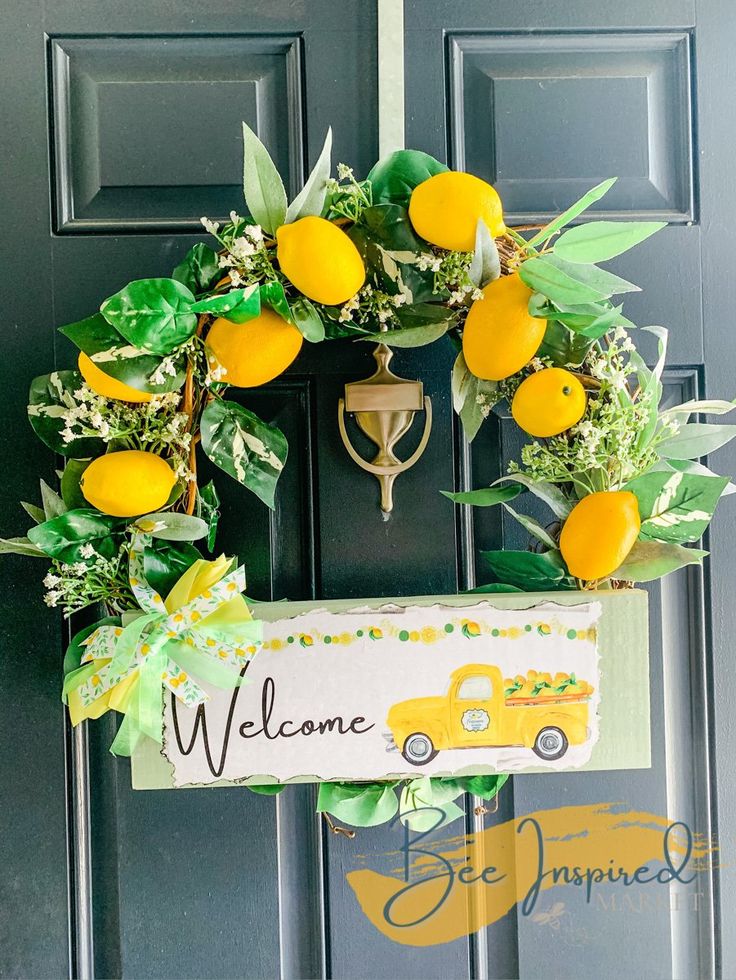
Creating a DIY lemon wreath is not only a fun and creative way to add a touch of freshness to your home decor but also a delightful project to work on. Whether you hang it on your front door to welcome guests with a cheerful vibe or use it as a centerpiece for a springtime celebration, this DIY lemon wreath is sure to brighten up any space with its sunny and inviting presence. So, gather your supplies, put on your favorite playlist, and let your crafting skills shine as you create your very own lemon-inspired masterpiece!
SUPPLIES NEEDED:
Scrap Wooden board
Sanding block 240 grit
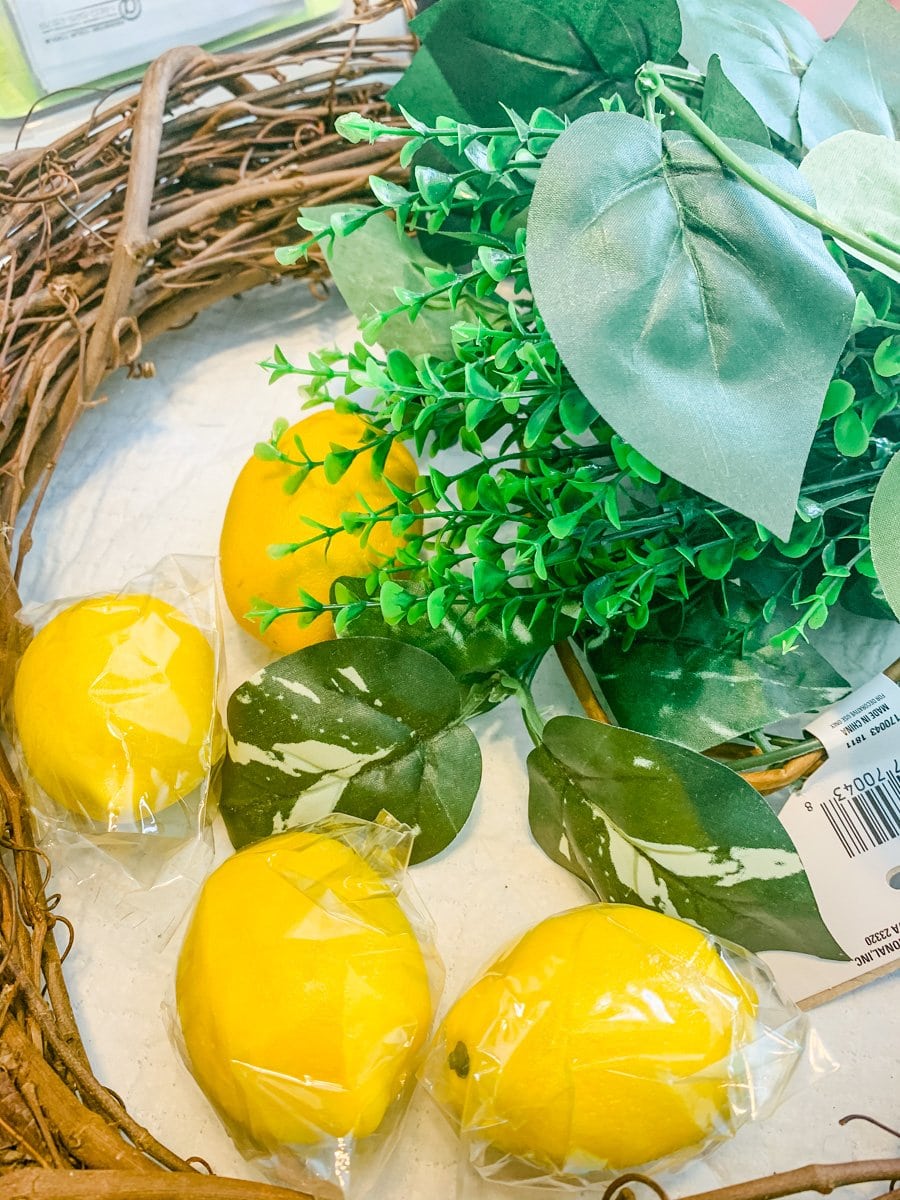
Grapevine wreath – 18”
Waverly Paint – color Celery
Paintbrushes
“Welcome” PRINT
Black ink pad
Mod Podge
Waverly Paint – color Celery
Garland (Dollar Tree)
Greenery bundles (Leftover craft pieces)
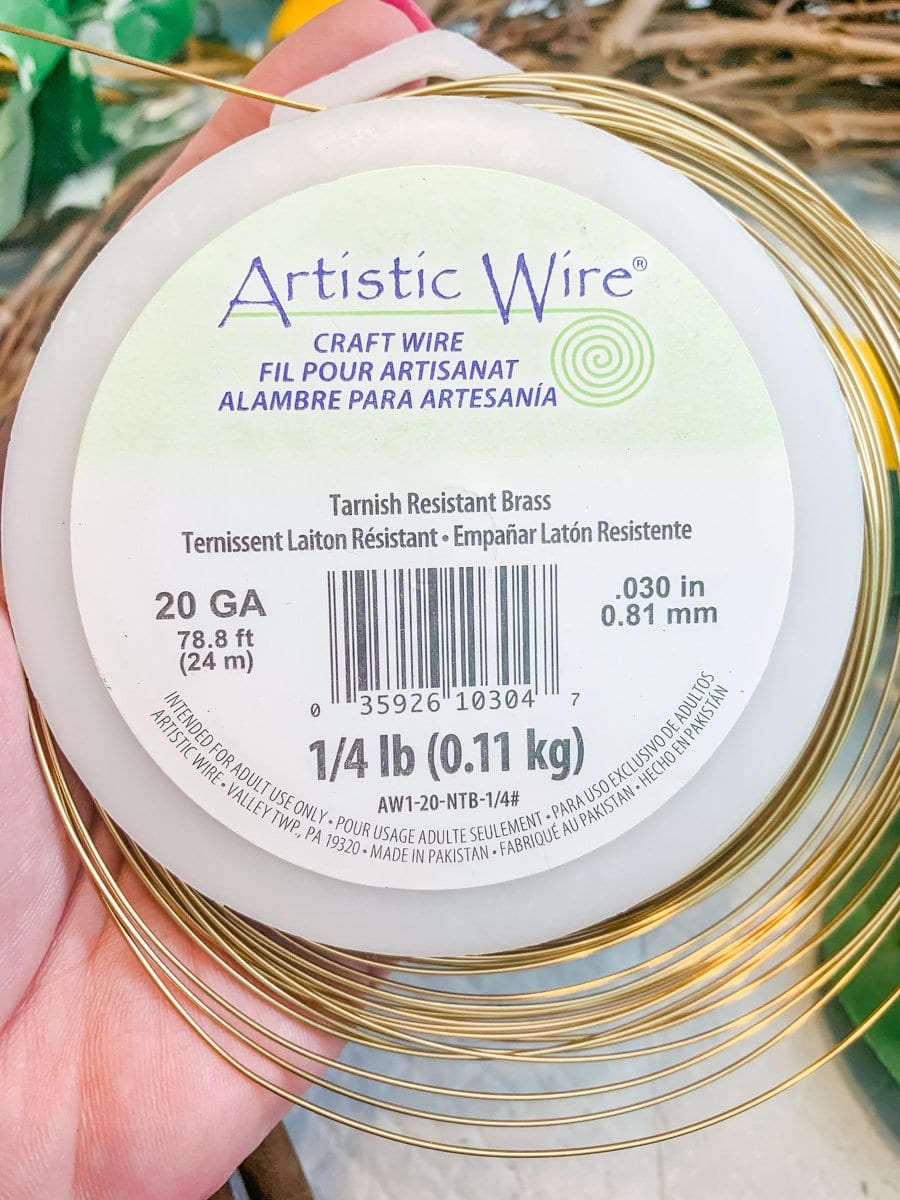
20 Gauge wire
Pipe Cleaners
Staple gun
E6000
Fake Lemons
Yellow, green, and lemon ribbons
How to make a lemon wreath
1 – Grab your wooden scrap board and begin to sand it down with your sanding block, just to smooth out the surfaces.
2 – Wipe down your wooden board to remove the debris with a paper towel.
3 – Grab your Waverly Paint, color Celery, and a good paintbrush. Cover your board completely with your paint. Don’t forget the sides!
4 – Use a heat gun to speed up the drying process.
5 – Grab your “Welcome” PRINT that you printed on regular computer paper, and play with placement on your board to make sure it is in the center. Trim the top and bottom edges of the paper.
6 – If you don’t like a blunt edge on your paper printable, try out this trick. With a bit of water on a paintbrush, soften the side edges of the paper so the edges are slightly damp. Carefully pull on your paper to give it a fun, jagged edge, instead of that straight cut. Complete jagged edge effect on top and bottom of printable, if you like that look.
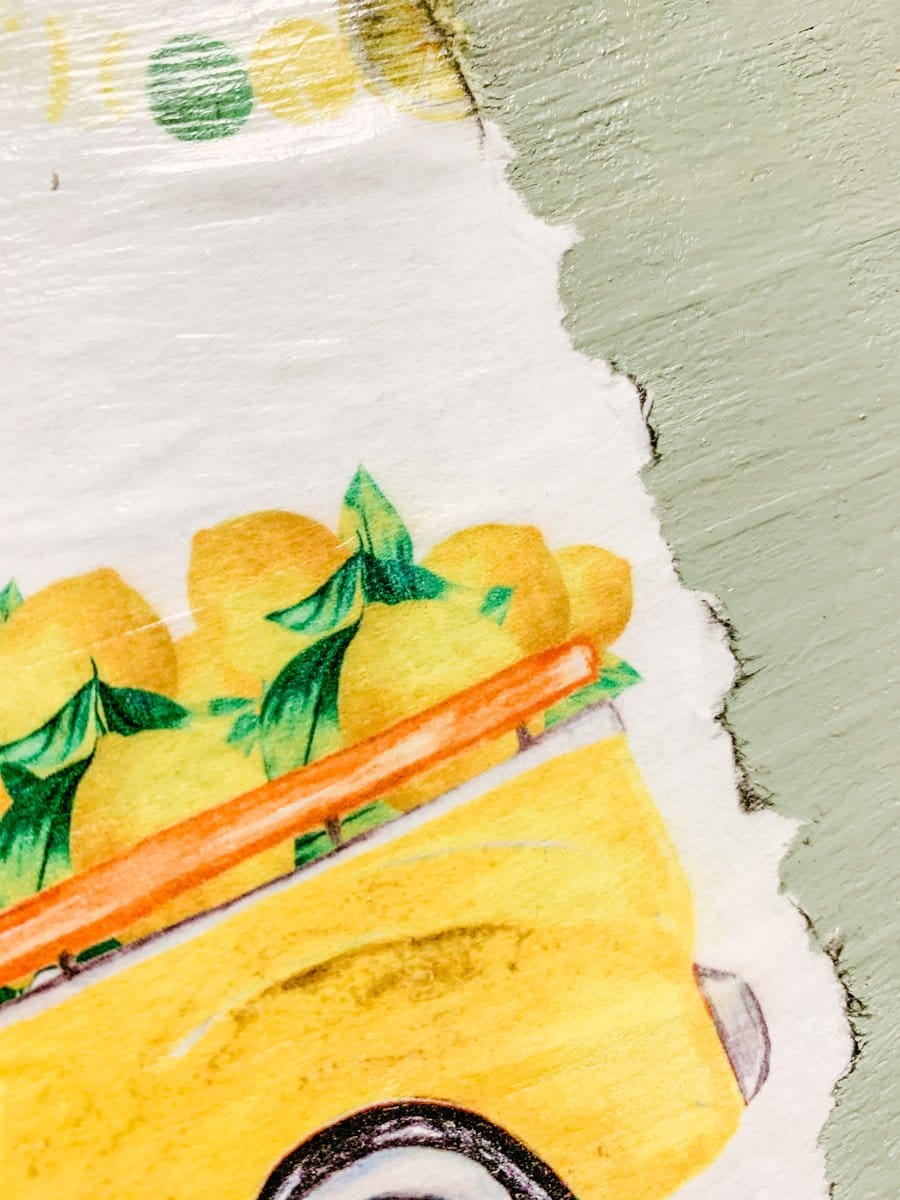
7 – With your black ink pad, rub it along the edges of your paper to dirty up the sides of your printable.
8 – Paint Mod Podge on the back of your printable with a thin layer, then place it on your board, where you like.
9 – With a clean, dry brush, rub it along your printable to smooth out any air bubbles or creases.
10 – Use a heat gun to speed up the drying up process, if by chance your ink is not dry, and the Mod Podge underneath your printable.
11 – Now apply a top coat with Mod Podge – matte finish, lightly brushing it on your sign. This will seal your sign so it can be outside. Dry with a heat gun to speed up the process and set aside.
12 – Grab your grapevine, mini garlands of different colors and textures, baby’s breath, eucalyptus, boxwood, etc., and/or leftover greenery bundles. Tip* Look through your craft stash and be creative with what you use.
13 – Weave your garlands into your grapevine by tucking into the guts all around. You can’t do it wrong, so just play with it.
14 – Play with your greenery bundles and add them where you think they look best. Use different colors and textures to make it pop. Don’t forget you will be adding your sign, so leave the room!
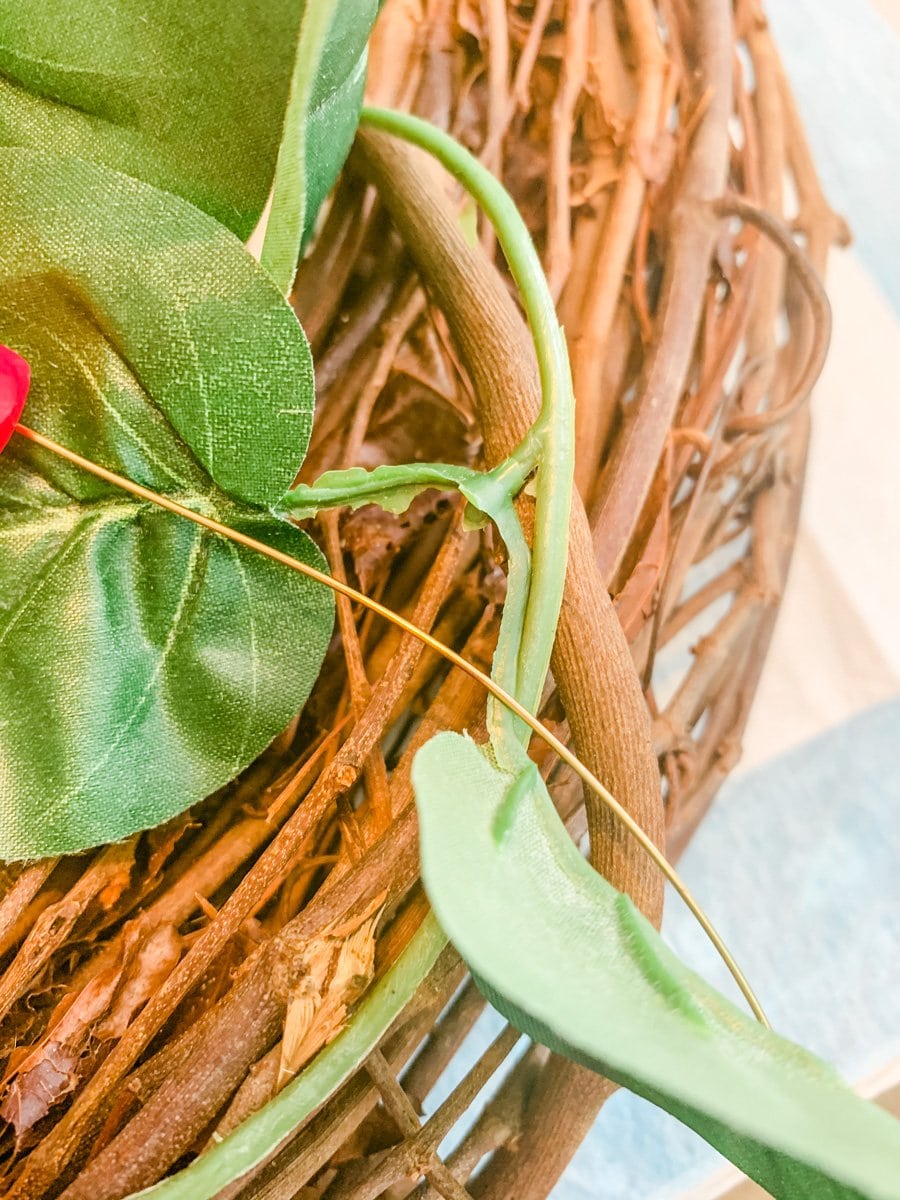
15 – Use your 20 gauge wire to hold your greenery in place throughout your grapevine. Twist it to keep it secure. Trim excess with wire cutters. Repeat in several spots.
16 – Place your grapevine to the side.
17 – To prep, your sign, grab 2 pipe cleaners and a staple gun. Fold 1 pipe cleaner in half, and staple it to the back on 1 side. Make a crisscross shape with your staple gun on each side. Repeat on the other side. We will use these to attach to your grapevine.

18 – Bring your grapevine wreath back over, and add some baby’s breath (or any of your craft greenery stash) and with hot glue/E6000 on the end of the stem, and jam into your grapevine to keep it secure. Repeat in a few spots throughout your wreath.
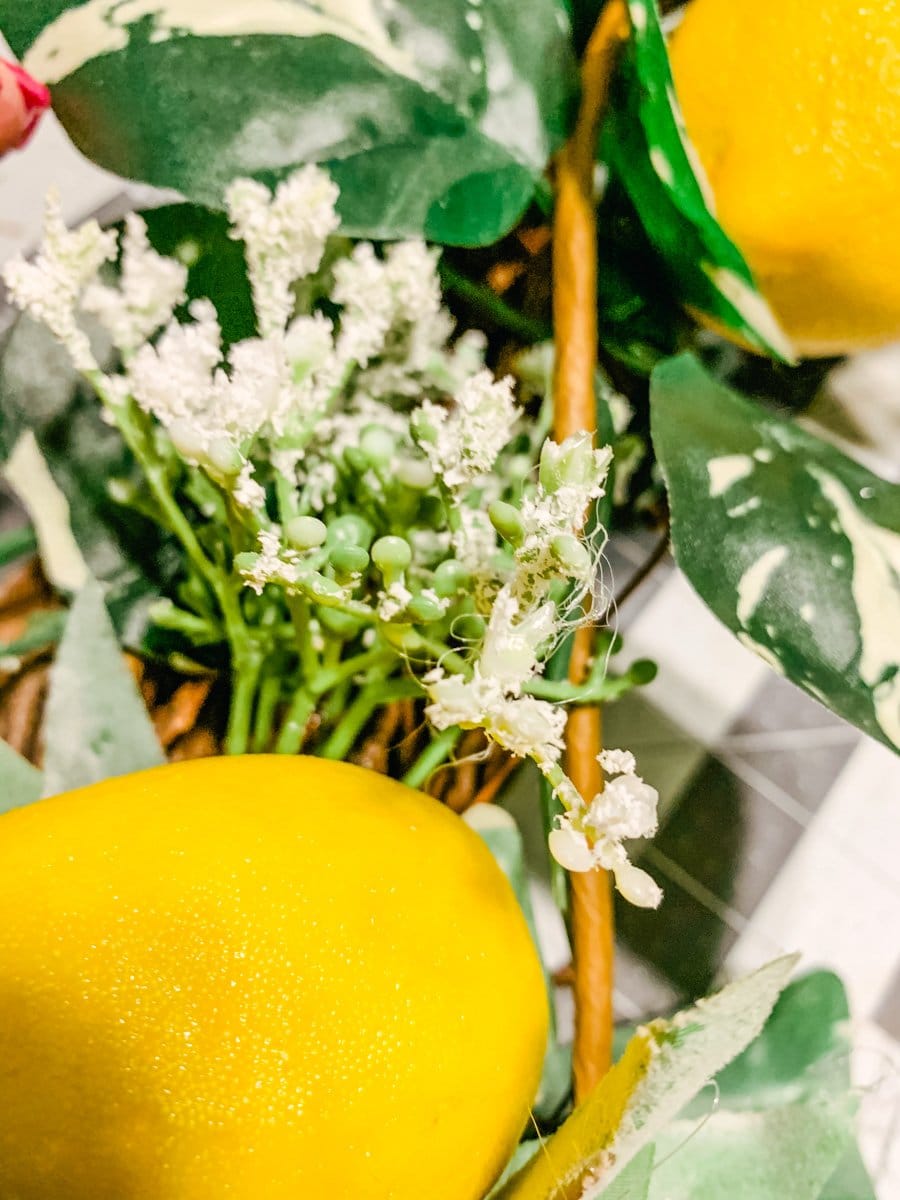
19 – Add lemons next, by dropping a dab of hot glue and E6000 directly onto the side of your lemon, being sure it is resting on a stem or something to have it sit against. Place where you want and hold in place for a bit. Repeat with several lemons on your wreath.

20 – Grab your sign and attach it with pipe cleaners to your grapevine wreath, by twisting to secure it in place.
21 – With yellow, green, and lemon ribbon, cut off 4-5” sections. Grabbing random ribbons, place in an “X” to build your bow. With any color ribbon, tie them together in the center. Play with ribbon tails, trim if needed, and fan out.
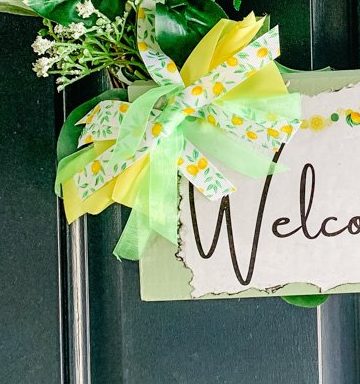
22 – Hot glue and E6000 in the center of the bow and place in the corner of your sign.