DIY Pearl Hair Pins
Looking to add a touch of elegance to your hairdo? DIY pearl hair pins are a fun and stylish way to elevate your look! All you need are some basic hairpins and faux pearls. You'll be amazed at how such a simple DIY project can make a big difference in your hairstyle. Have fun getting crafty and experimenting with different pearl placements to showcase your personal style!

- 2 bobby pins
- 12-14 inches of thin wire
- 12-14 pearls, depending on size – I’ve used 5mm pearls
- Tools: pliers are nice, but not necessary
Gather your materials. I like to cut my wire into 7 inches pieces. I find it’s easier to work with shorter pieces of wire.
Loop the wire through the end of the hair pin and bend it so that it makes a little hook on the end. The shorter end should be just about 5mm.
Twist the two ends together to combine and secure them. (This is where it is helpful to use pliers if you have them.) I find about three twists is enough to hold the two wire pieces securely together.
String 1 pearl onto the wire and pull it through until it reaches the end of the bobby pin. While holding the pearl on top of the bobby pin, wrap the wire between the 2 prongs on the hair pin.
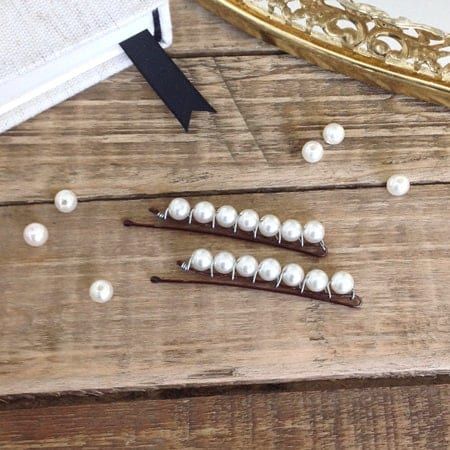
Then continue adding pearls, wrapping the wire tightly between the prongs of the bobby pin after each pearl. To finish hair pin, wrap the wire around the end of the hair pin 3-4 times and trim off any extra wire.
With this simple wire wrapping technique you can get creative and add any types of beads to decorate your bobby pins!
