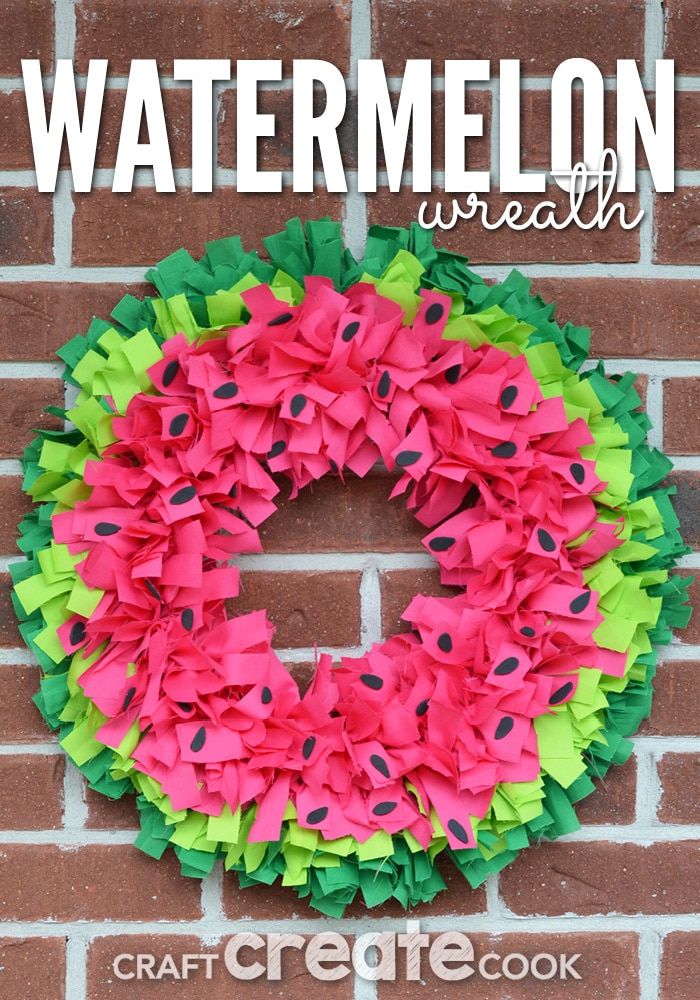
DIY Watermelon Wreath
Creating a DIY watermelon wreath is a fun and crafty way to bring a touch of summer into your home! Hang it on your front door or use it as a cheerful decoration for a summer party! This project is sure to bring smiles and a splash of fun to your living space. Happy crafting!
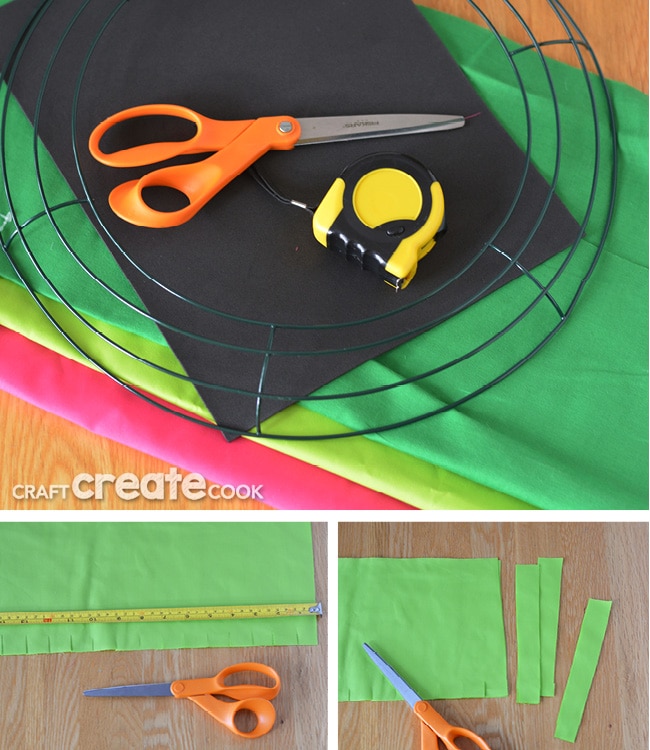
Since this is an easy wreath, there's no need to press any of the wrinkles or cut anything straight. In fact, the more random the better -- your wreath will have more character! I left my fabric folded in half and cut it 7" wide. I then placed my tape measure on top of my 7" x 22" piece of fabric and cut at 1" intervals. I removed my tape measure and cut the fabric into 1" x 7" strips. Once you've cut all colors like this, you can begin to tie them onto the frame.
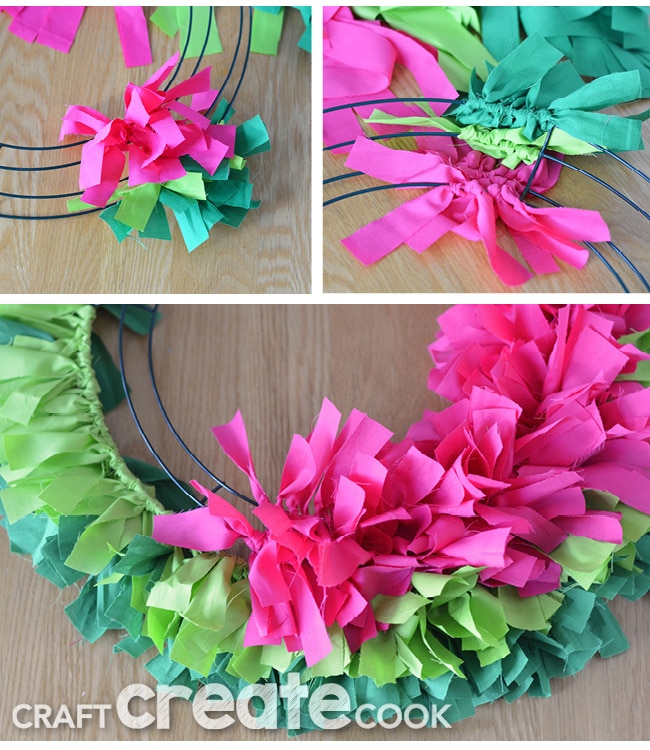
My wire frame had four wires, The outer most wire had dark green, the one next to that had the lime green and the middle two wires had the pink. Just tie a tight knot, and push the pieces together so they fill the frame. At first it won't look that great, but as you get going and begin to fluff and pull the fabric, it will begin to take shape. There's no right or wrong way to tie them, just one knot. You can do each color at a time, or work in sections tying all three colors, it doesn't really matter!
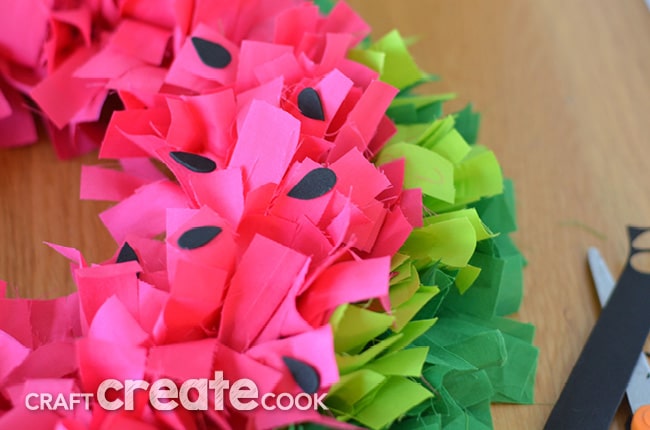
When you're finished and in L-O-V-E, use your black felt sheet to cut out small seeds. I cut about 2, 8" x ½" strips and cut seed shapes. Affix the seeds to the wreath using hot or tacky glue. And you're done! Hang as you wish!