DIY 4th of July Painted Burlap Banner
Looking to add a festive touch to your 4th of July decorations? Why not try making a DIY 4th of July Painted Burlap Banner! This fun and easy project involves cutting burlap into flag shapes, painting them with red, white, and blue stripes, and stringing them together to create a charming patriotic banner. It's a great way to add a personal touch to your Independence Day decor while having fun crafting at the same time. So grab your paintbrushes and burlap, and get ready to show off your creative spirit this Fourth of July!
MATERIALS
Burlap
Scissors
Red, White & Blue Acrylic Paint
Painters Tape
Sponge Brush
Pencil
Twine
Hot Glue Gun
Blue Ribbon

INSTRUCTIONS
Step 1: Cut burlap into your flag shape of choice. They also sell burlap banner kits, that are precut, at most craft stores. Measure out how long you’d like your banner and determine how many flags you’ll need.
Step 2: Tape stripes down half the burlap flags using painters tape.

Step 3: Paint the tapes off flags with red paint, dabbing with a sponge brush. Allow to dry before peeling off the tape.
Step 4: Paint the other half of the burlap flags with blue acrylic paint, covering the entire flag. Allow to dry.

Step 5: Using the eraser part of a pencil, dip it into white paint and stamp polka dots onto the blue flags.
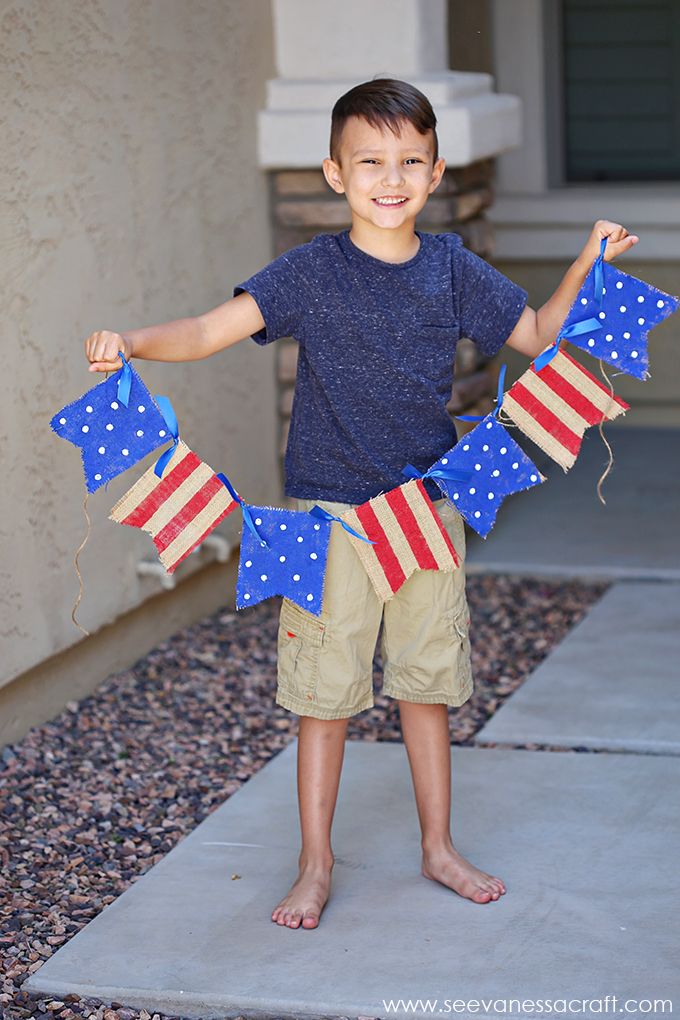
Step 6: Hot glue a piece of twine to the back of the flags and tie a piece of ribbon in between the flags, as shown in the photo below.

Step 7: Hang and display your new patriotic banner!
