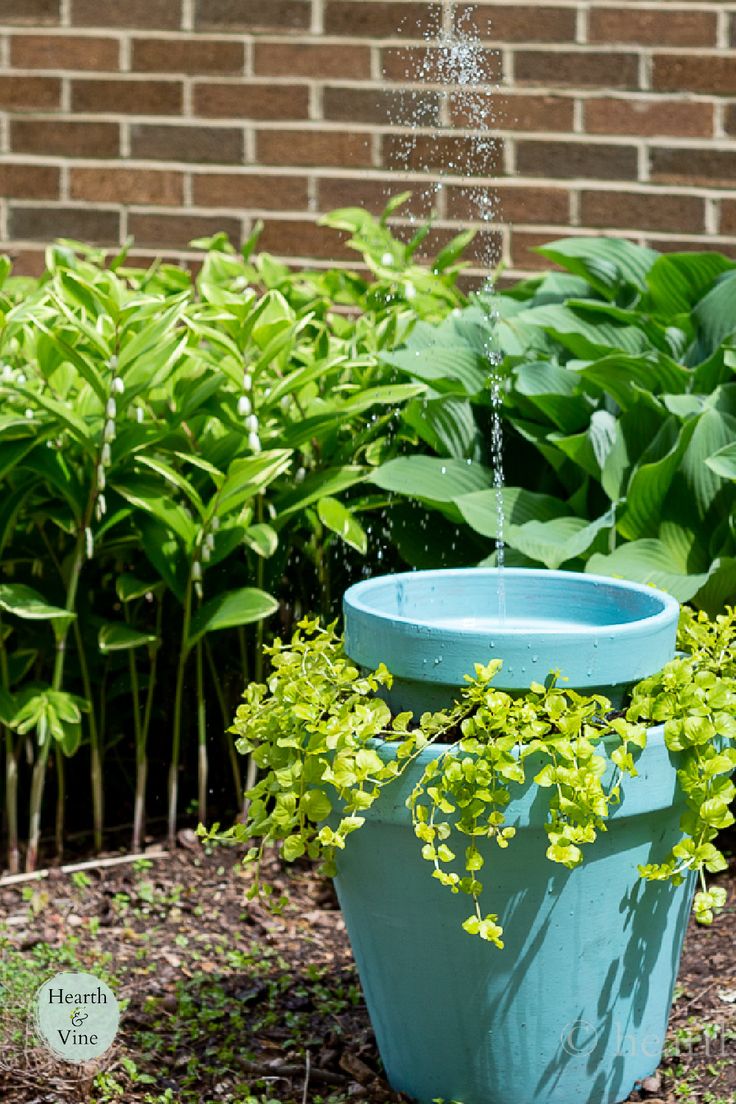
DIY Solar Water Fountain
Creating your very own DIY solar water fountain can be a fun and rewarding project for any outdoor space. With just a few simple materials and a little creativity, you can design a charming water feature that runs on clean, renewable energy from the sun. Imagine the soothing sounds of trickling water, attracting birds and adding a tranquil ambiance to your garden. Plus, using solar power means no extra electricity costs or cables to worry about. So, gather your supplies, let your imagination flow, and get ready to enjoy your personal oasis in no time!
Equipment
Paintbrush
Craft knife
Materials
large clay pot - 14-in W x 12-in H
small clay pot - 10.63-in W x 7.48-in H
plastic pot for height - 1 gal nursery pot or other
craft paints
potting soil
plants
tealight metal holder & glue, or tape
foam sealant
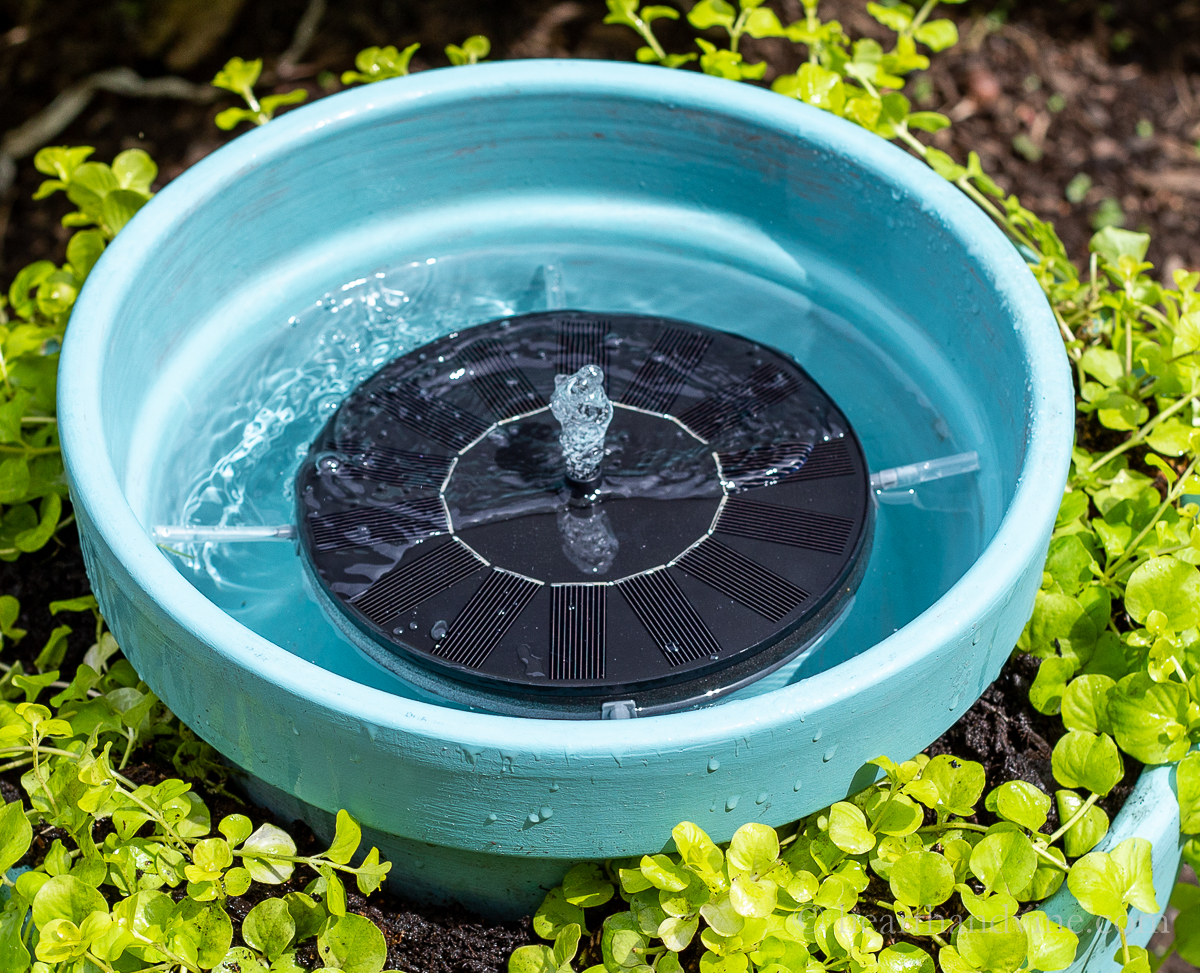
solar fountain insert
Instructions
Paint the smaller pot inside and out.
Paint the outside of the larger pot and just a little on the inside as the plants will cover the rest.
Cover the hole of the small pot with glue and a smashed tealight metal container or some other item on the inside.
Flip over the pot and fill the hole with foam sealant.
Once dry (usually 12 hours) cut off excess foam with a craft knife.
Place a large plastic pot upside down in the large container.
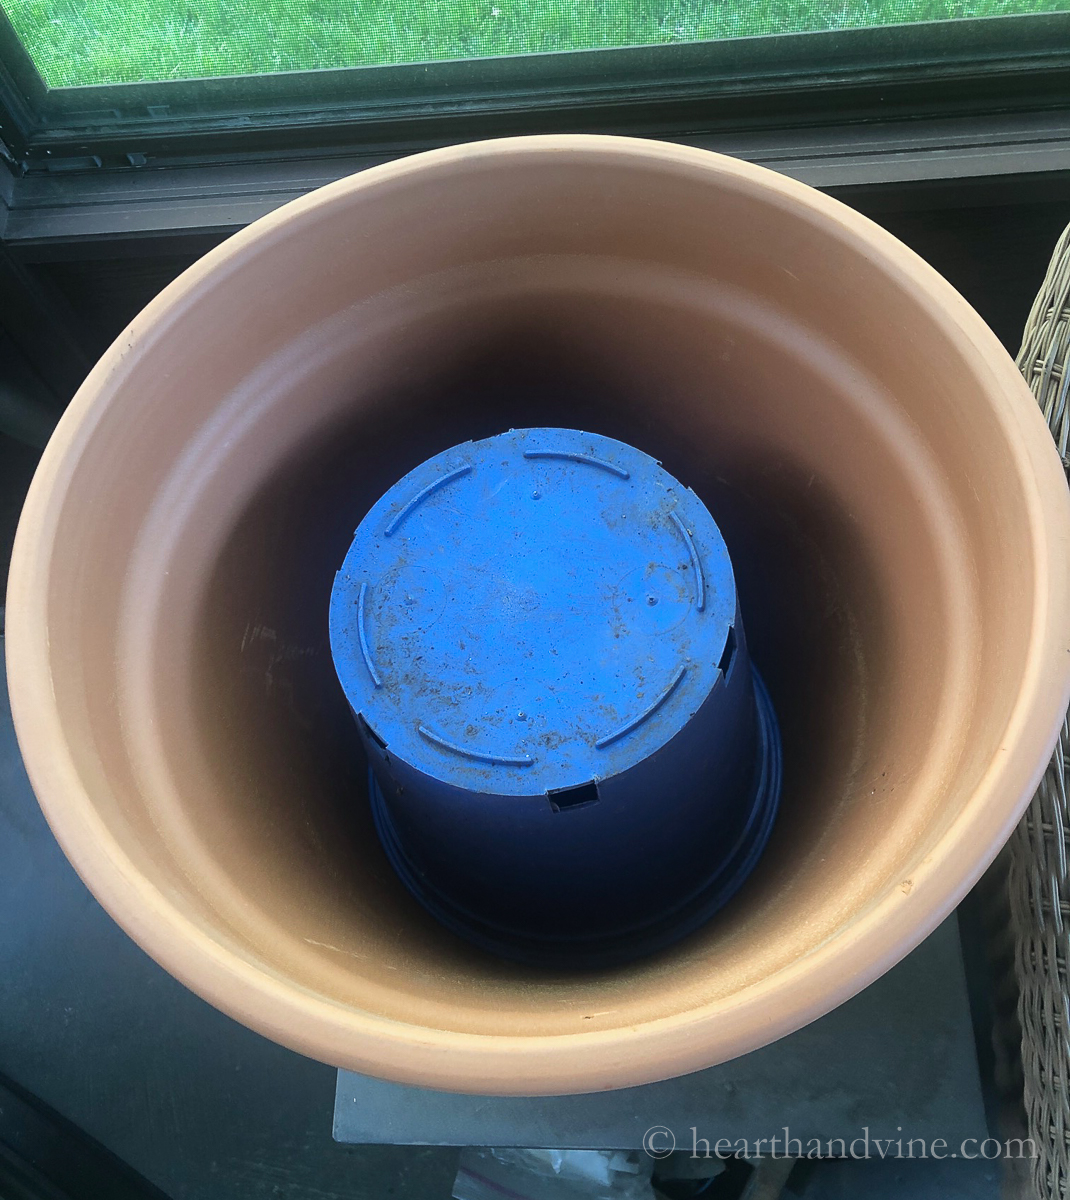
Add soil all around the plastic pot.
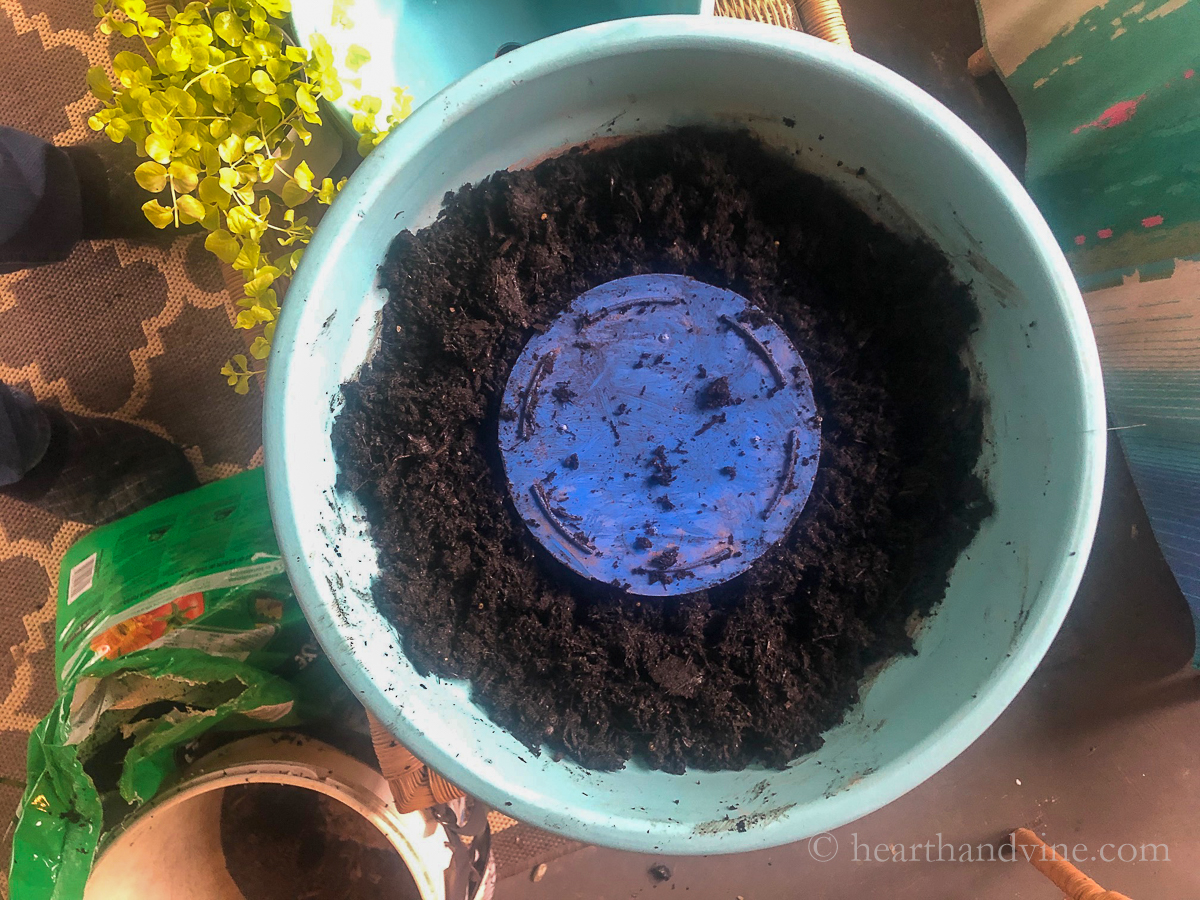
Set the smaller pot on top and plant flowers around the two pots.
Fill the top pot with water and add a solar fountain insert.
Set anywhere that gets light and enjoy.
You can use an outdoor sealant or poly spray to protect the paint finish or just let it wear naturally.
Trailing flowers like million bells, alyssum and lobelia are other good candidates for the planter.
No comments
Write a comment