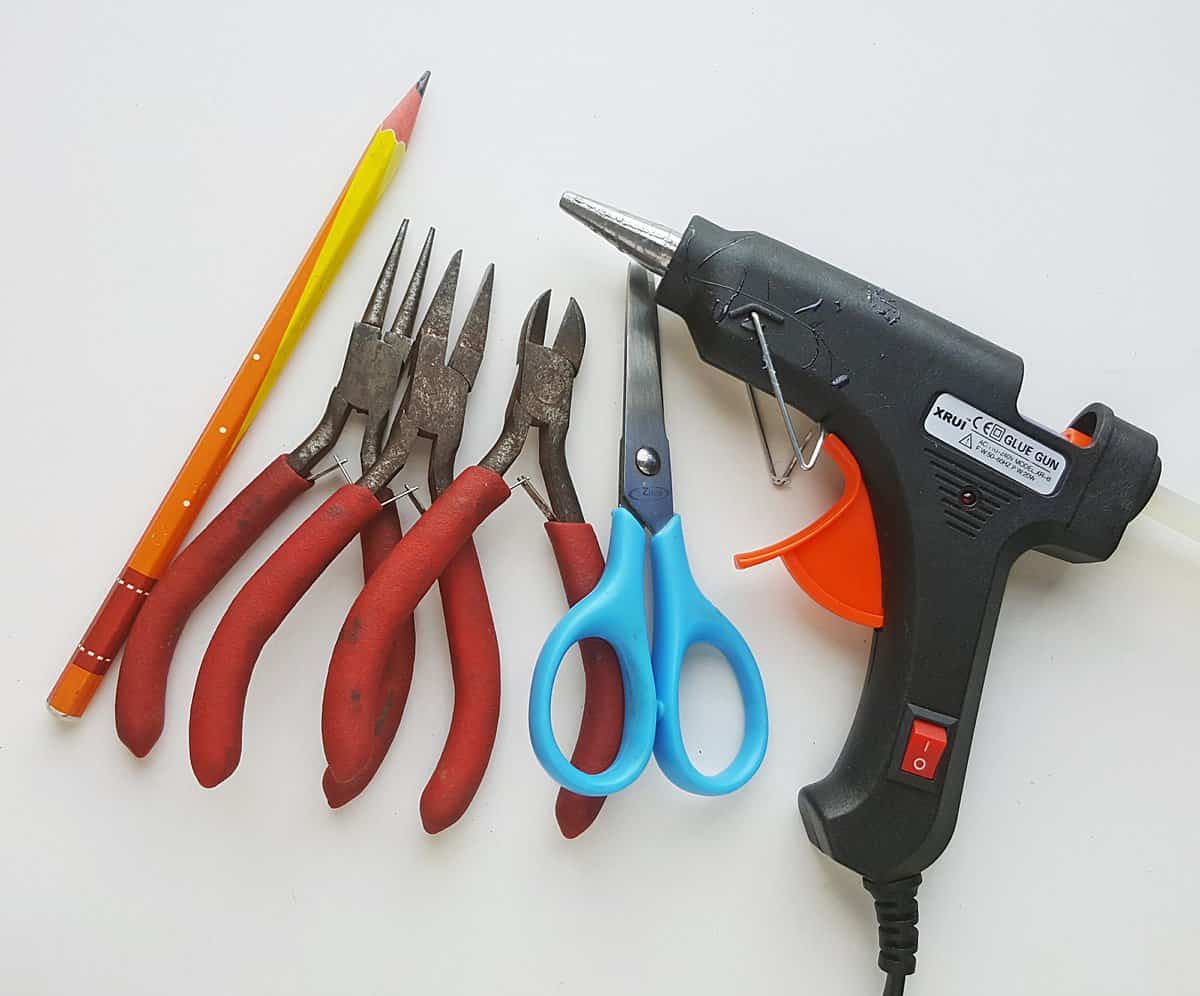
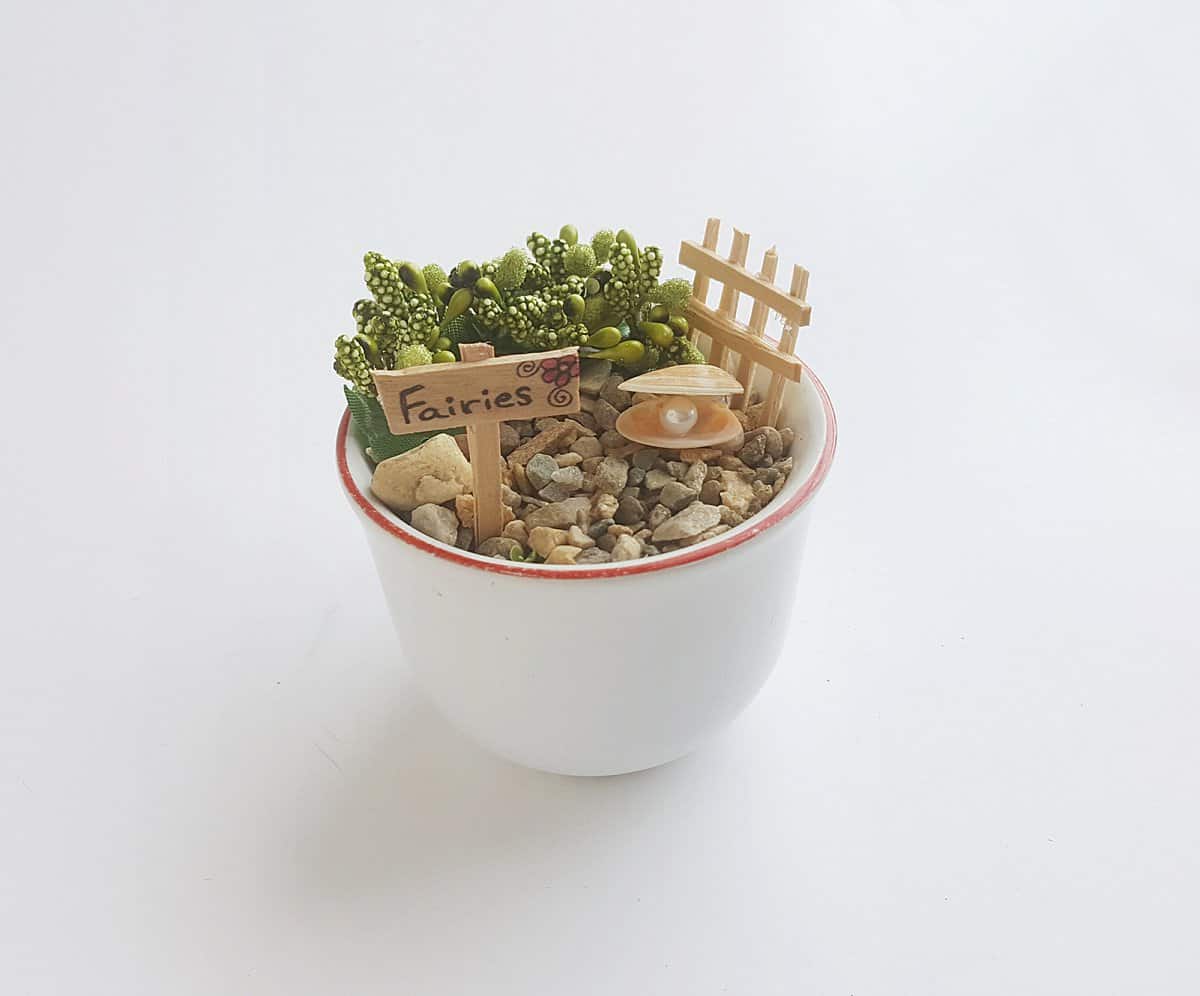
DIY Fairy Garden in a Teacup
Creating a DIY fairy garden in a teacup is a delightful and charming project that can bring a touch of magic to any space. To start, choose a cute teacup or small container and fill it with potting soil. Next, add small plants like succulents or moss, creating a miniature landscape. Don't forget to personalize your fairy garden with tiny decorations like pebbles, miniature furniture, and even a mini fairy figurine. This whimsical creation is not only fun to make but also adds a whimsical touch to your home or garden. So, let your imagination soar and enjoy the enchanting world of your very own fairy garden in a teacup!

DIY Fairy Garden in a Teacup
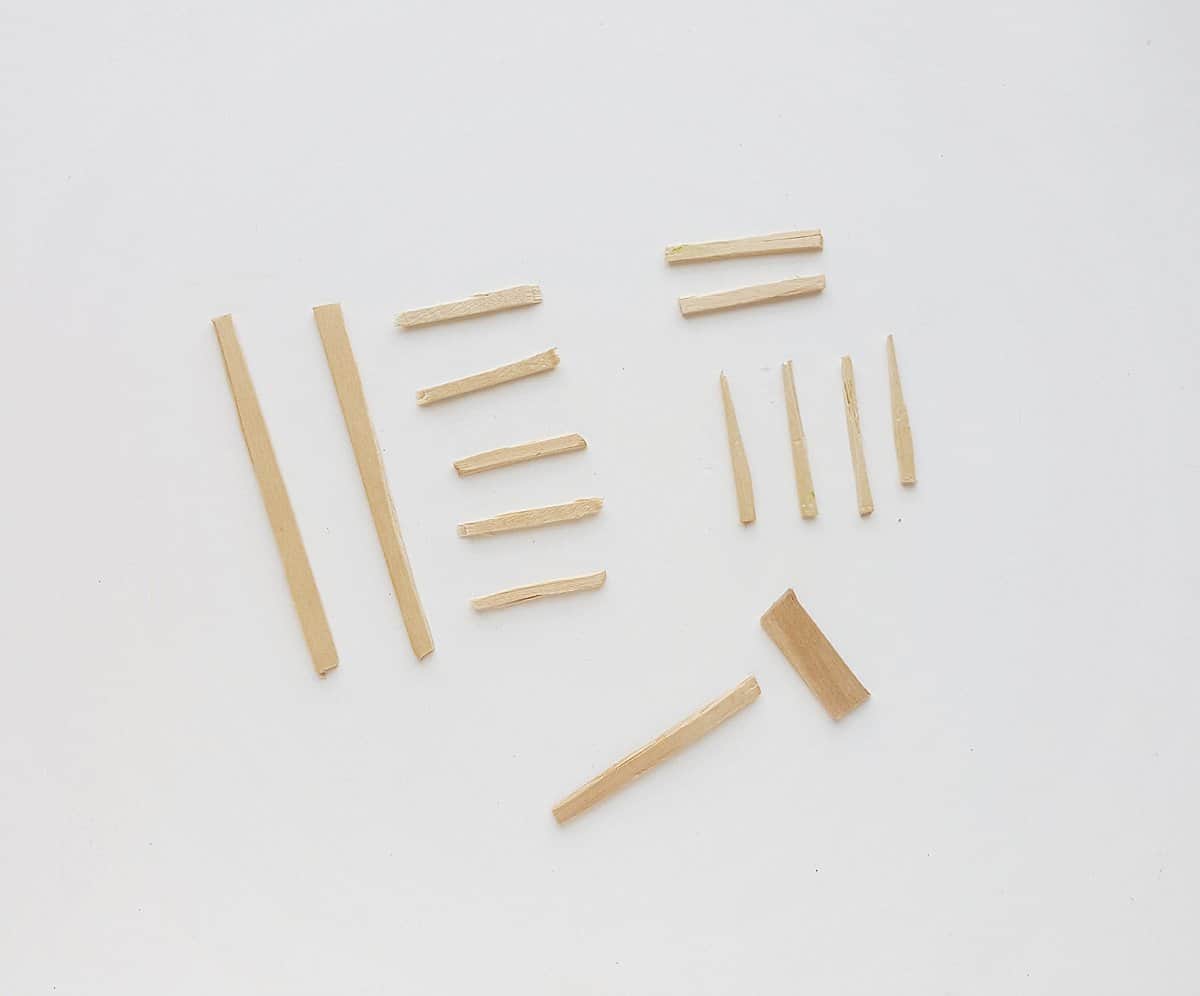
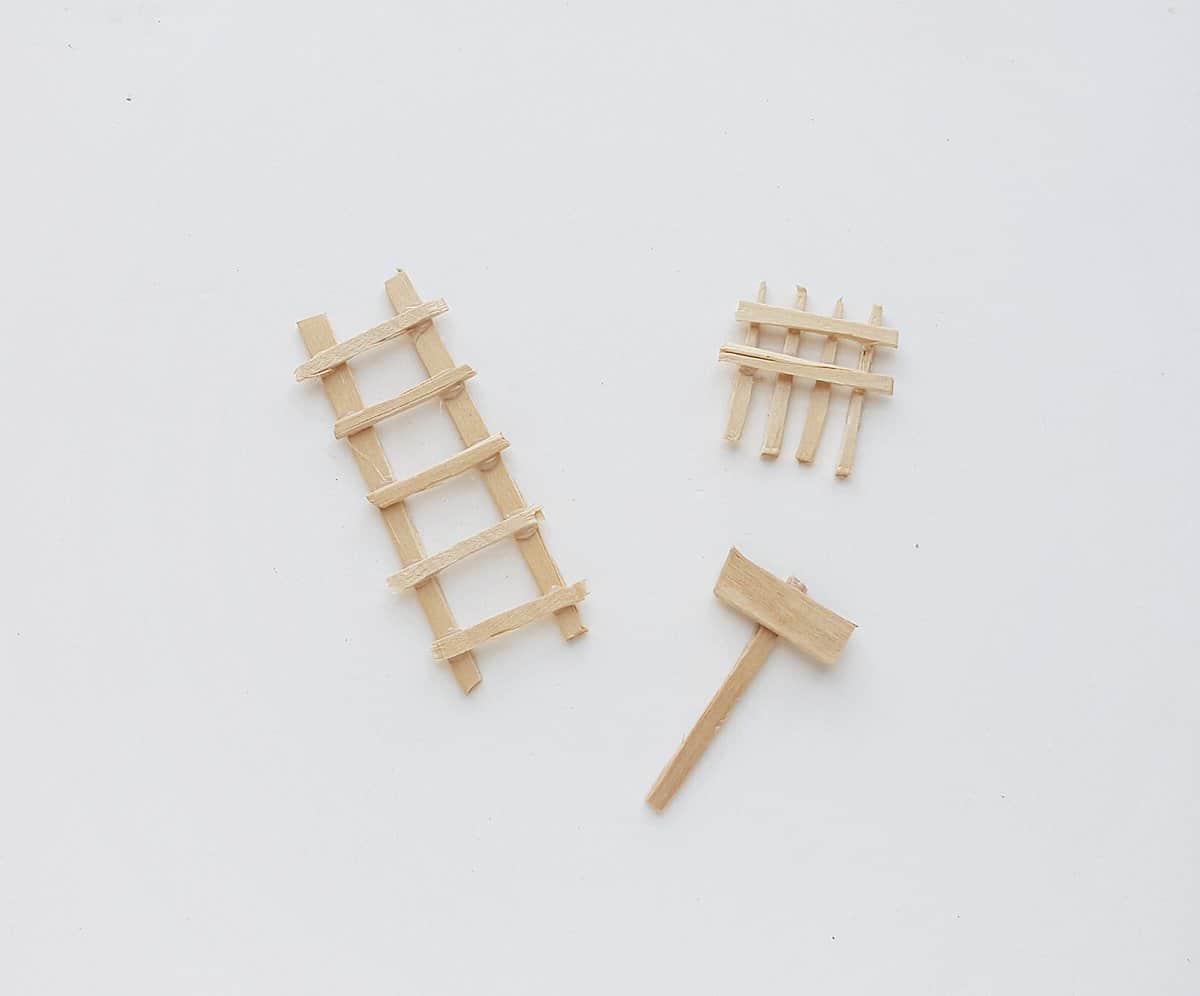
Glue the sticks together to create a ladder, fence, and sign.
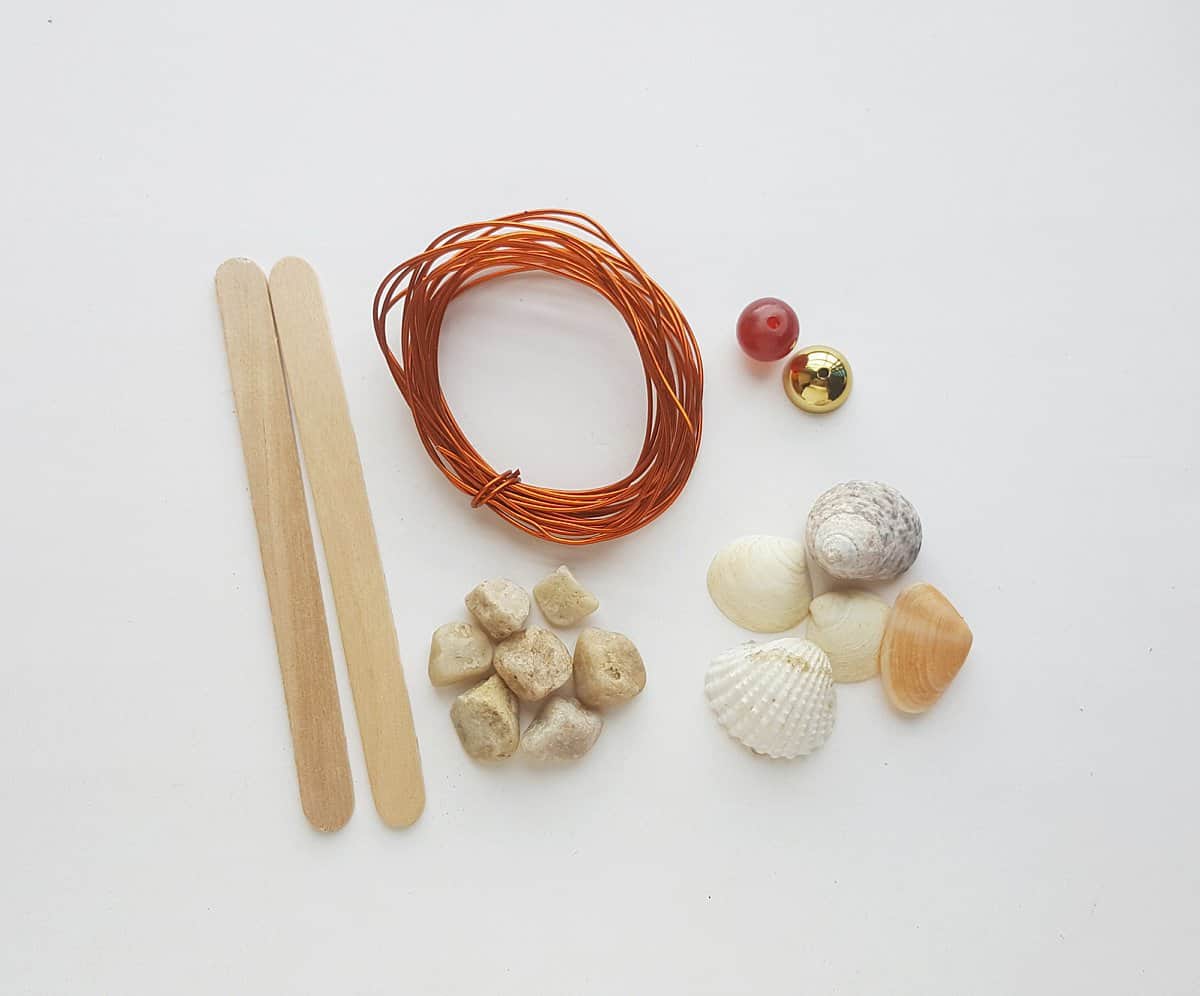
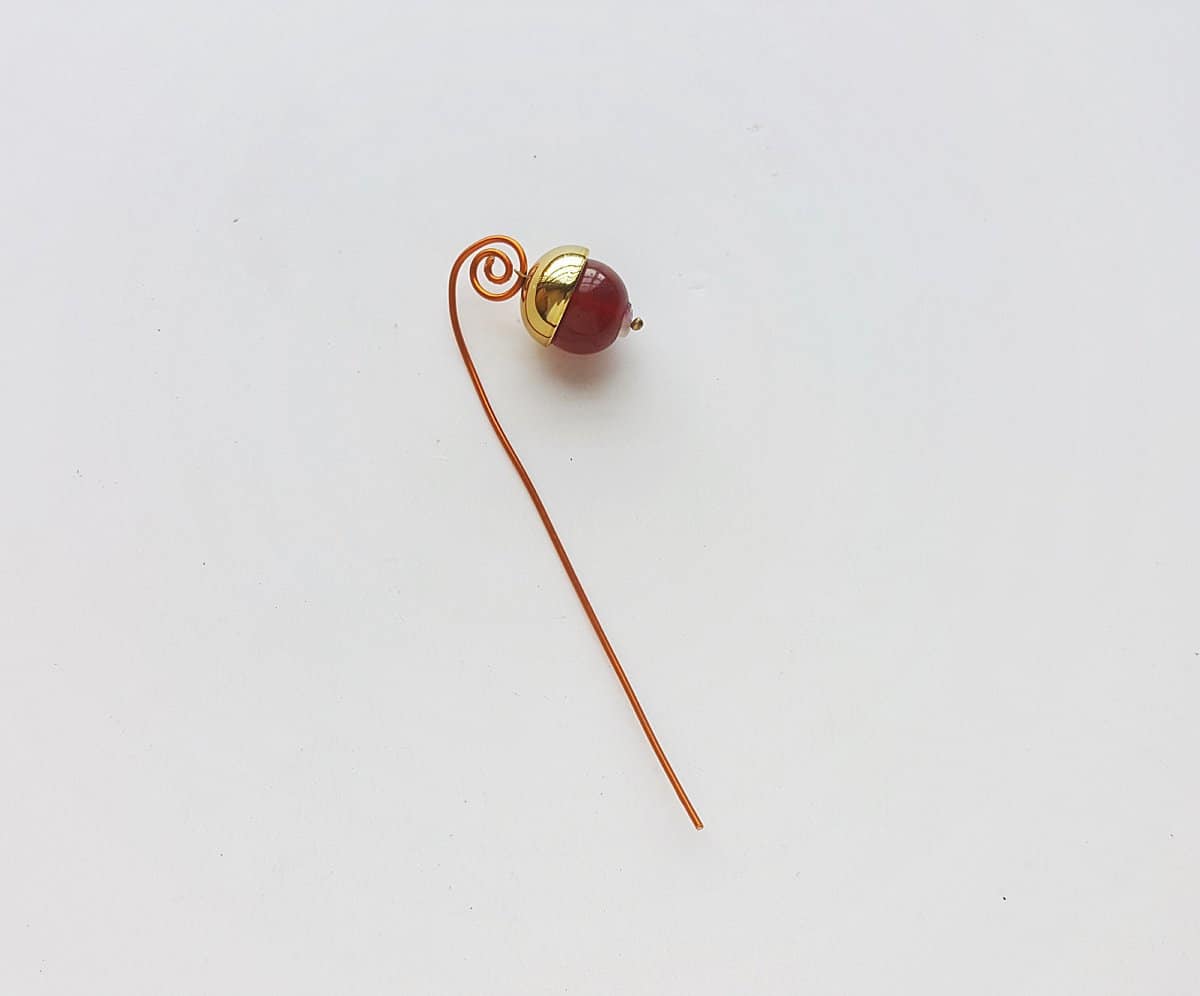
Cut out a piece of craft wire and create a twirl pattern on one end but keep the other end straight.
Place the bead cap on top of the bead, on the side with the wire loop. Insert the bead’s loop into the twirled part of the craft wire staff you made in the last step.
Fill the teacup with soil mix and then cover the top with small stones or rocks.

Add the plants to the cup by gently pushing the root into the soil mix. Or if you have a black thumb like me, you can choose to use fake plants.
Place the fence, sign and a few decorative shells in the teacup for decoration.
Place mini lamp post by gently pushing its bottom end into the soil. Decorate the garden as you wish.
Place the teacup on it’s saucer and place the ladder leaning up to the fairy garden.

Enjoy your adorable DIY fairy garden in a teacup!