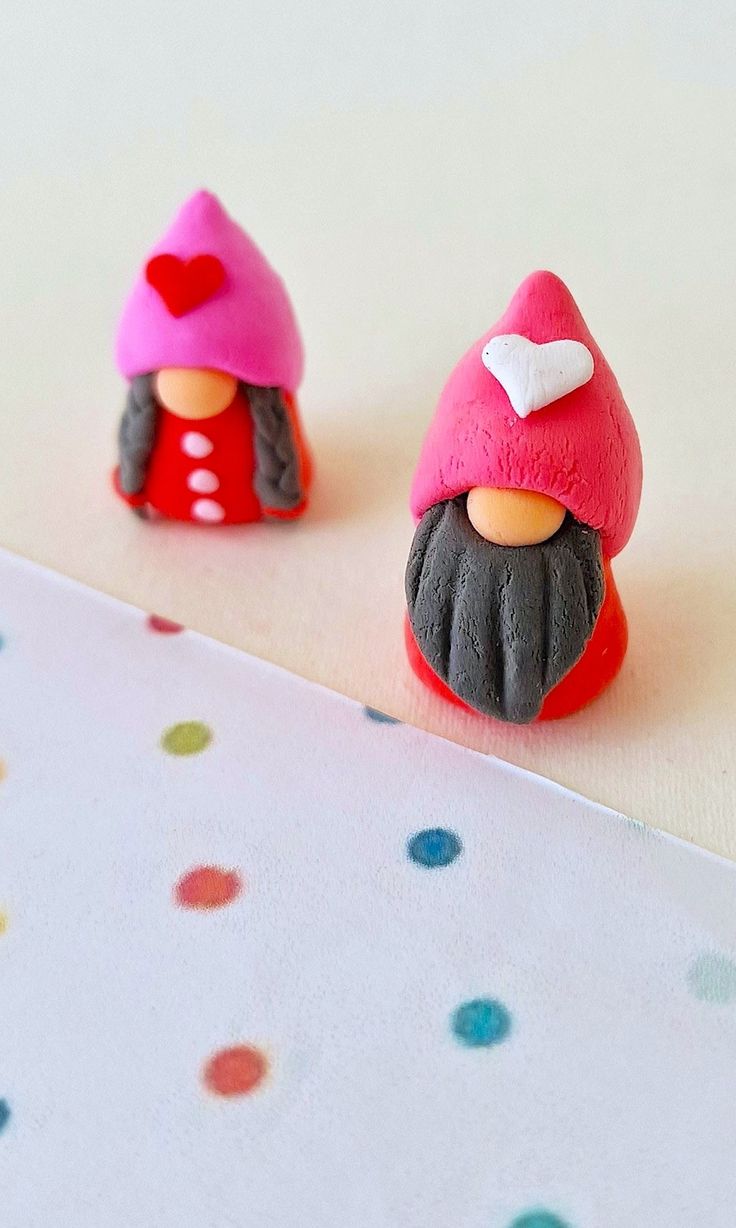
Creating your own DIY clay gnome can be a delightful and rewarding experience! Start by shaping the clay into a cute little gnome figure, making sure to add all the intricate details that give these whimsical creatures their charm. Get creative with different colors and textures to personalize your gnome and bring it to life. Whether you're a seasoned crafter or new to working with clay, this project is sure to spark joy and add a touch of magic to your home decor. So grab your clay and let your imagination run wild as you craft your very own adorable clay gnome!
Supplies
Air dry clay or foam clay (we suggest getting a multi-color pack so that you have colors to choose from)
Clay tools
Directions
Step 1
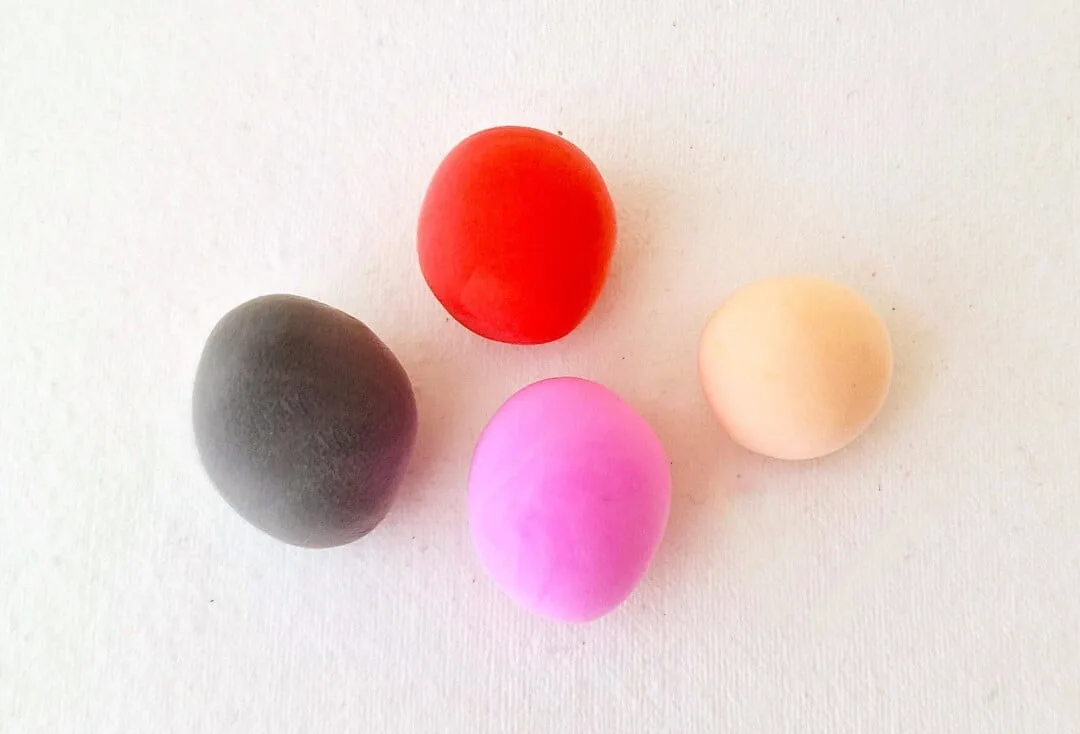
You will need 4 different colored clays for this craft:
Nose
Hat
Dress or shirt
Hair or beard
Hearts and buttons (can be any of the shades above or different ones)
Take pieces of clay large enough for each part then roll them into smooth ball shapes.
Step 2
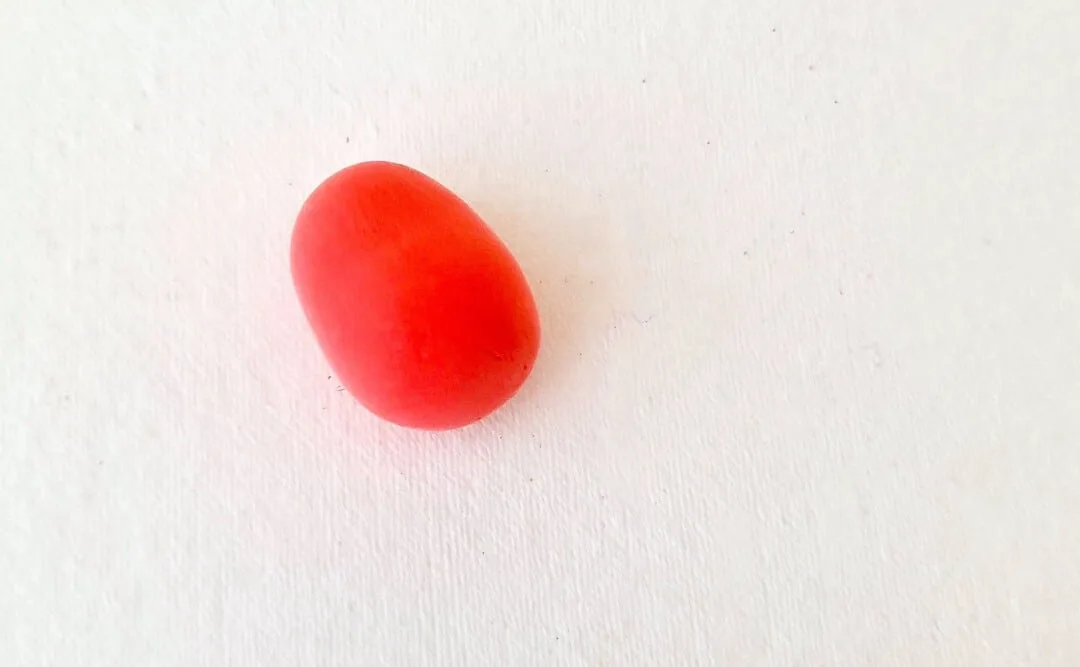
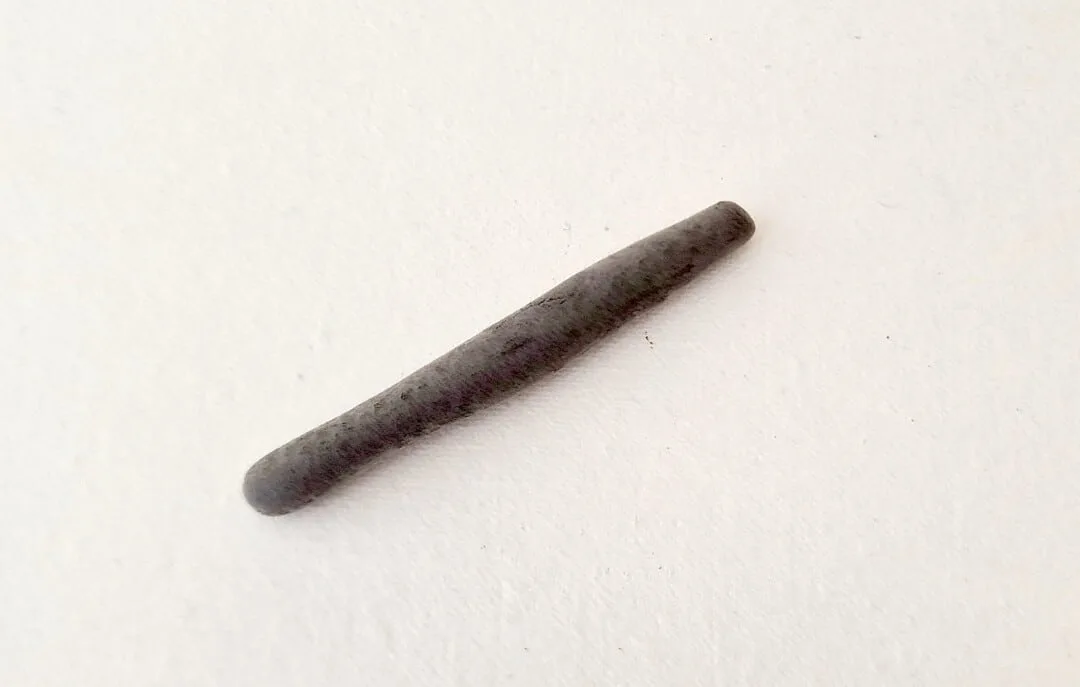
Using the color you chose for the dress or shirt, roll it into a cylinder like shape.
Step 3
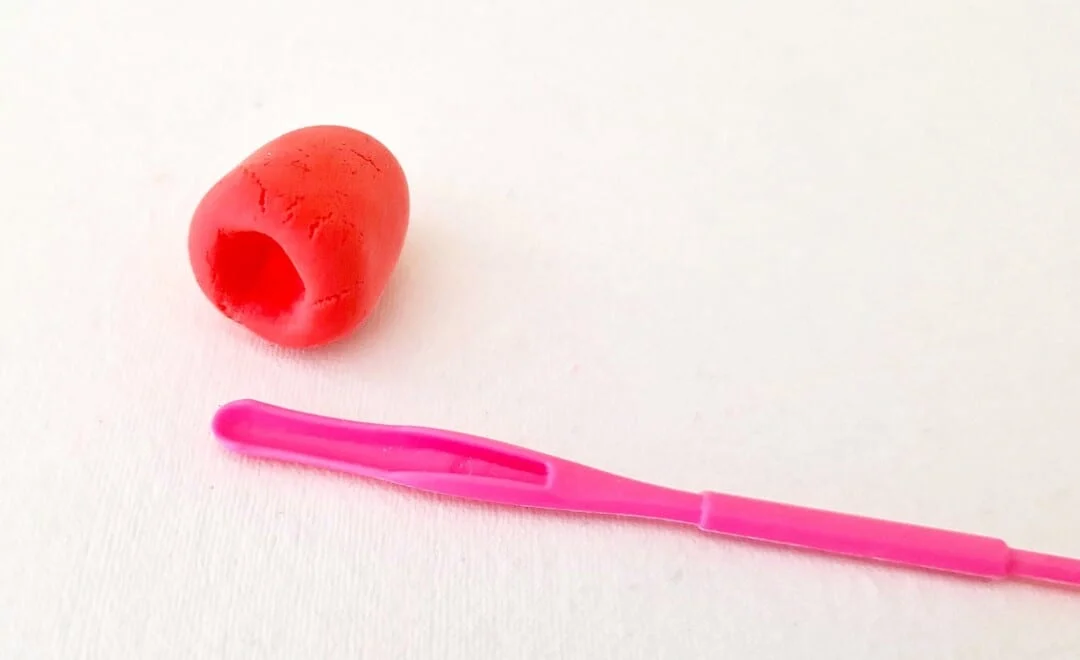
Use a round object or clay tool to make a small hole in one end of the cylinder-like clay shape. This will be bottom side of the gnome.
While making the hole, also make sure that end of the cylinder shape is flattened. This will be the side where the gnome stands on.
Step 4
Next, it’s time to make the hair.
For the boy gnome, shape a piece of thin clay into the shape of a beard. Using a clay tool, add vertical lines in the clay to complete the beard
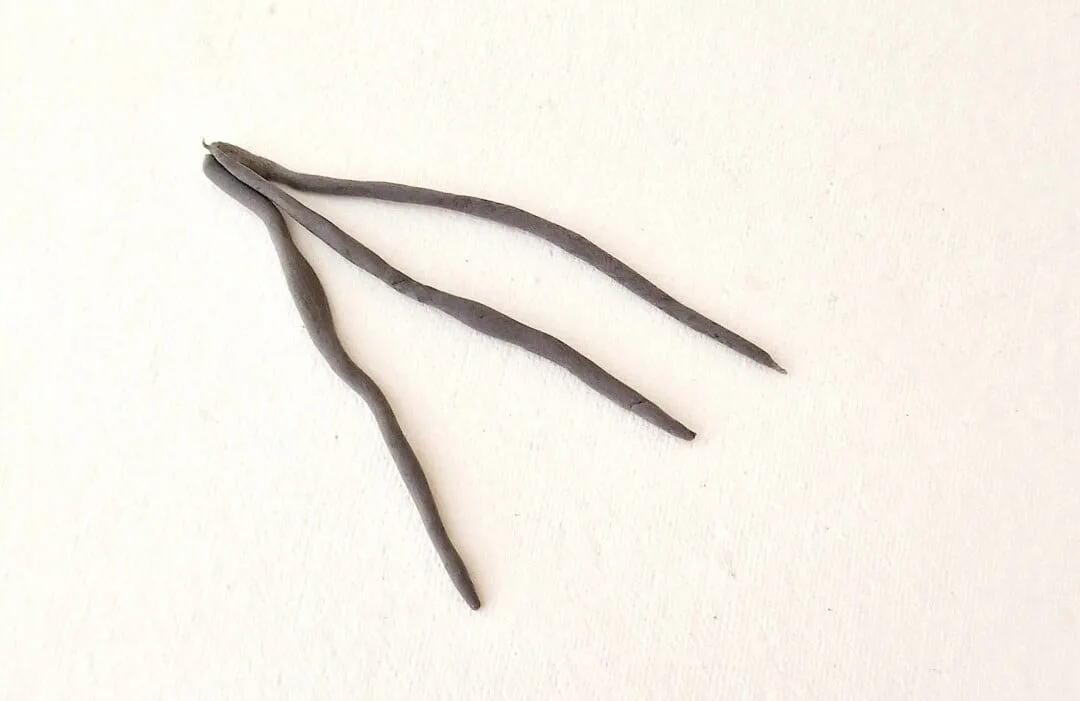
For the girl gnome, take a small amount of clay and roll it into a very thin rope.
Step 5
Divide the thin clay rope into 3 equal parts. Join them together at one end by pinching the ends together.
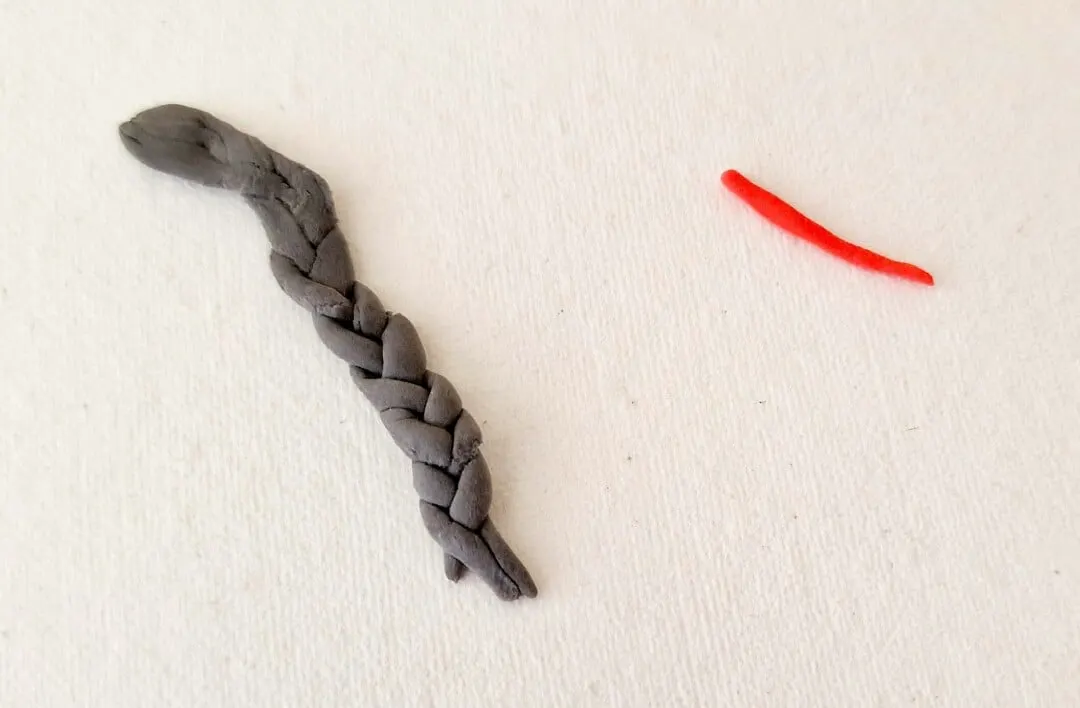
Step 6
Make a braided pattern with the 3 parts of clay, being very gentle and careful. Repeat the process to make a second braid.
Step 7:
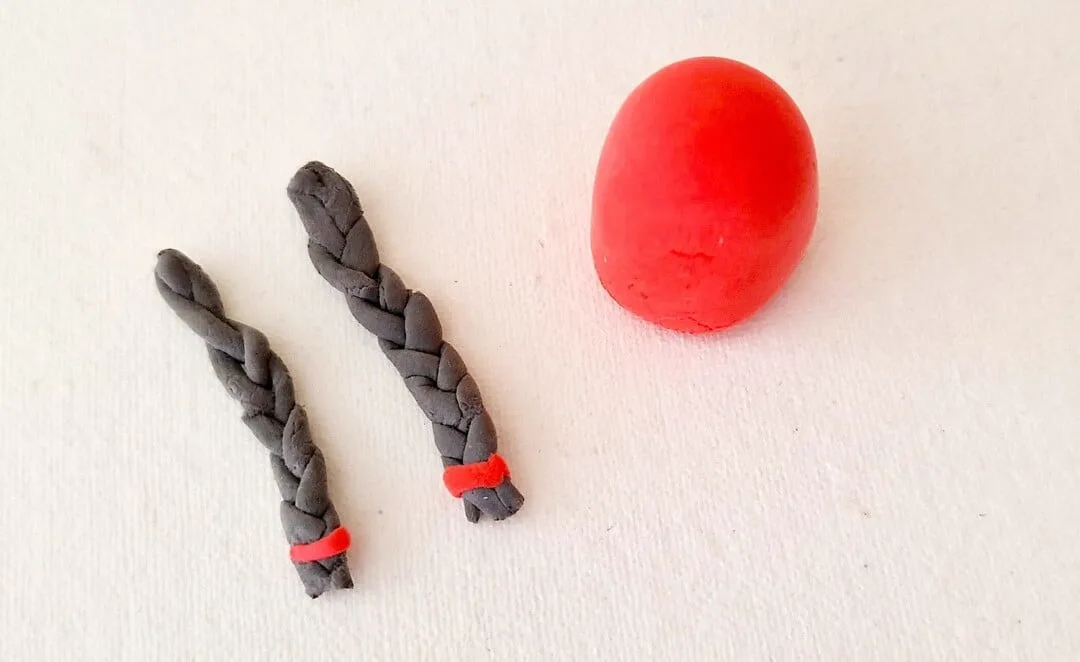
Take a small amount of clay (we used the same color that we made the dress out of) and make very thin rectangle pieces. Attach the thin clay pieces as ribbons at the open ends of the braids.
Step 8
Take a very small piece of clay used for the nose and roll into a small ball.
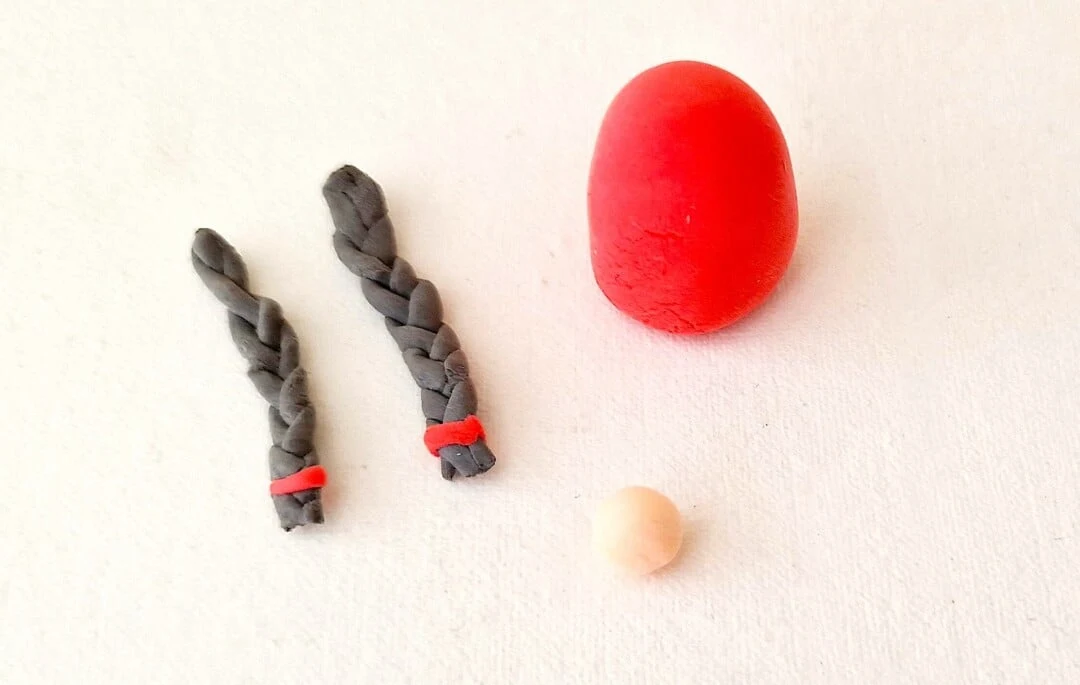
Attach the clay nose near the top end of the clay body.
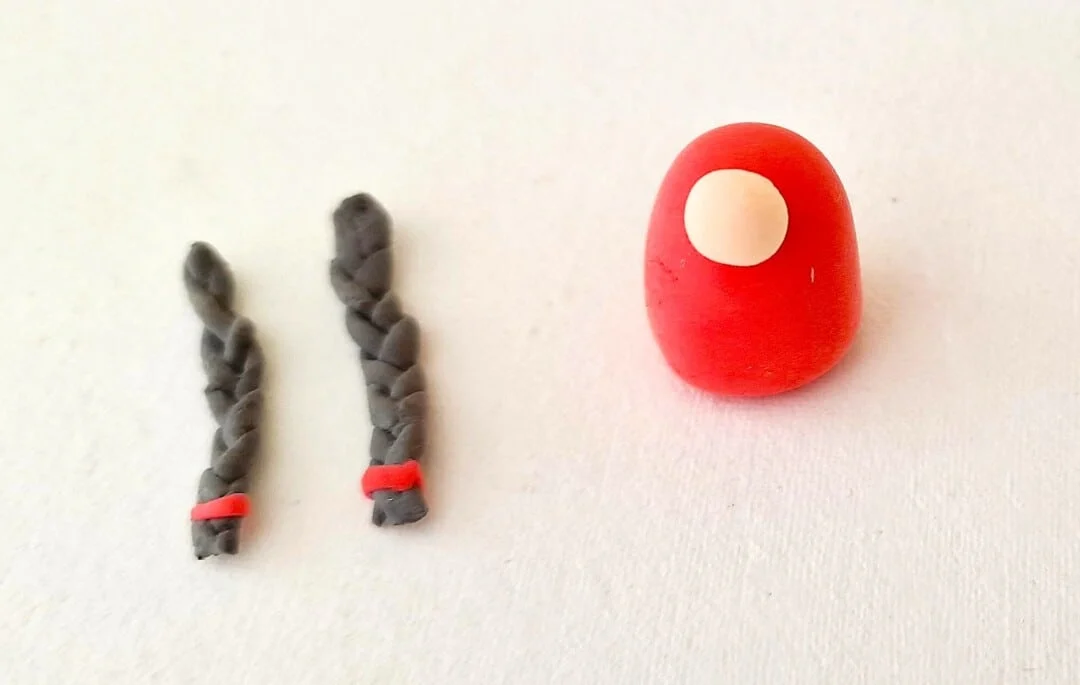
Step 9
For the boy gnome, press the beard onto the body around the nose.
For the girl gnome, press the 2 clay braids on both sides of the nose, overlapping the braids on top of the head.
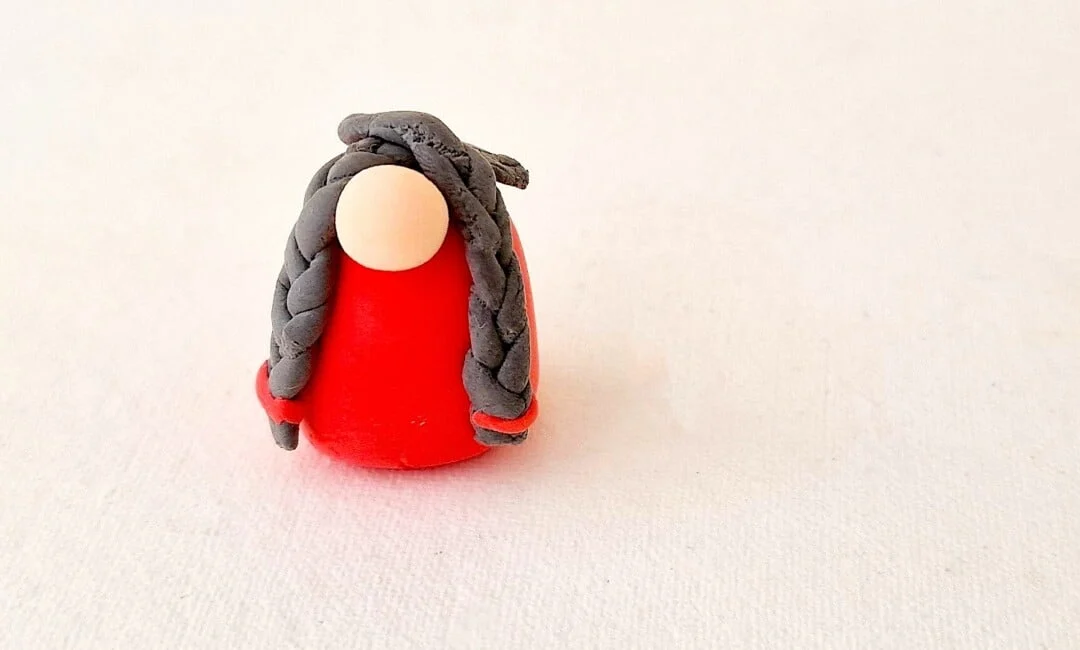
Step 10
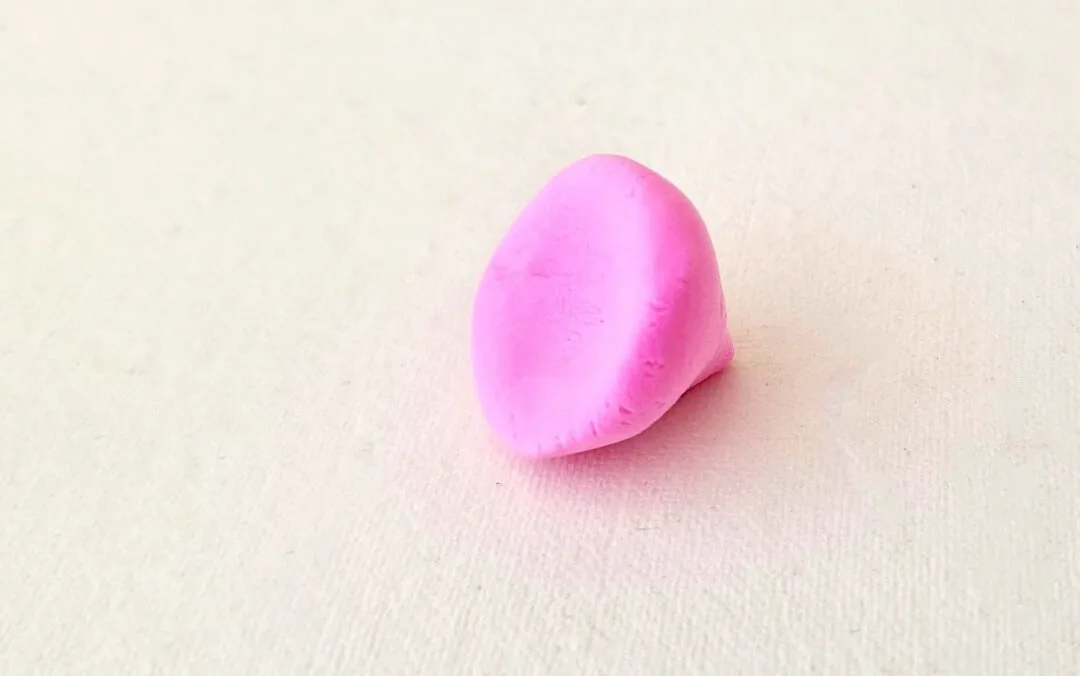
Take a piece of the clay that will be used for the hat.
Roll into a ball. Then make a pointy edge on the top end of the hat clay.

Step 11
Push the wide side of the clay hat inwards using the tip of your thumb.
Step 12
Attach the clay hat on the top side of the clay gnome body pattern. Cover the top parts of the nose and braids (or beard) by pressing down and molding the clay hat.
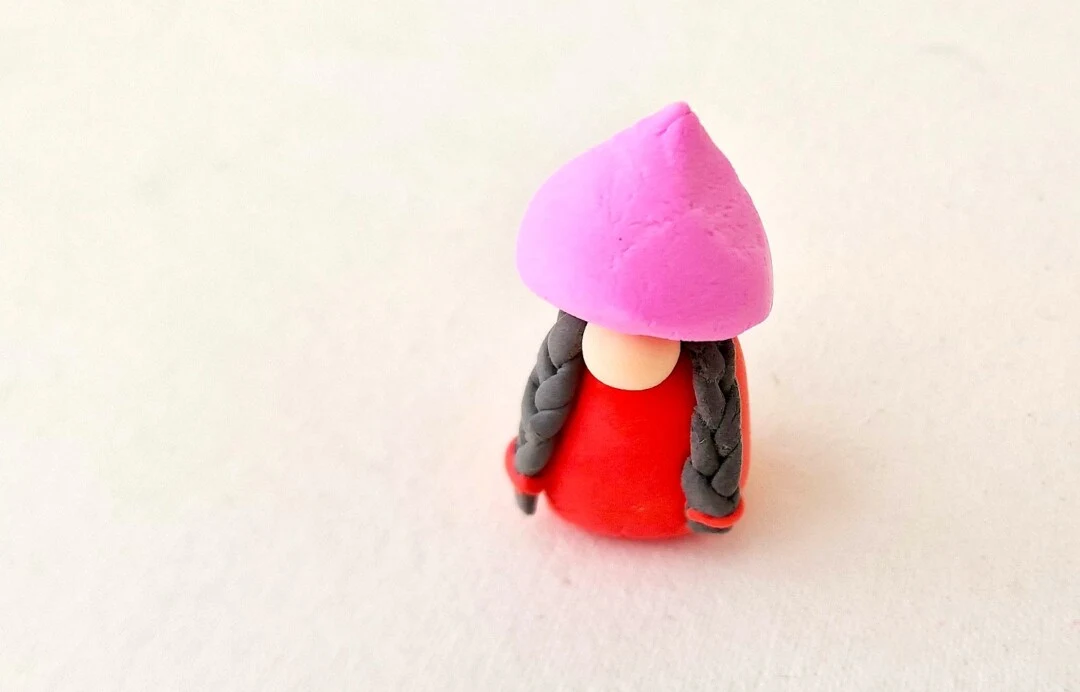
Step 13
Make a small clay heart with a complimentary color of clay. Attach to the middle of the hat.
For the girl gnome, roll very tiny pieces of clay into small balls and press onto the front of the dress in a vertical pattern.