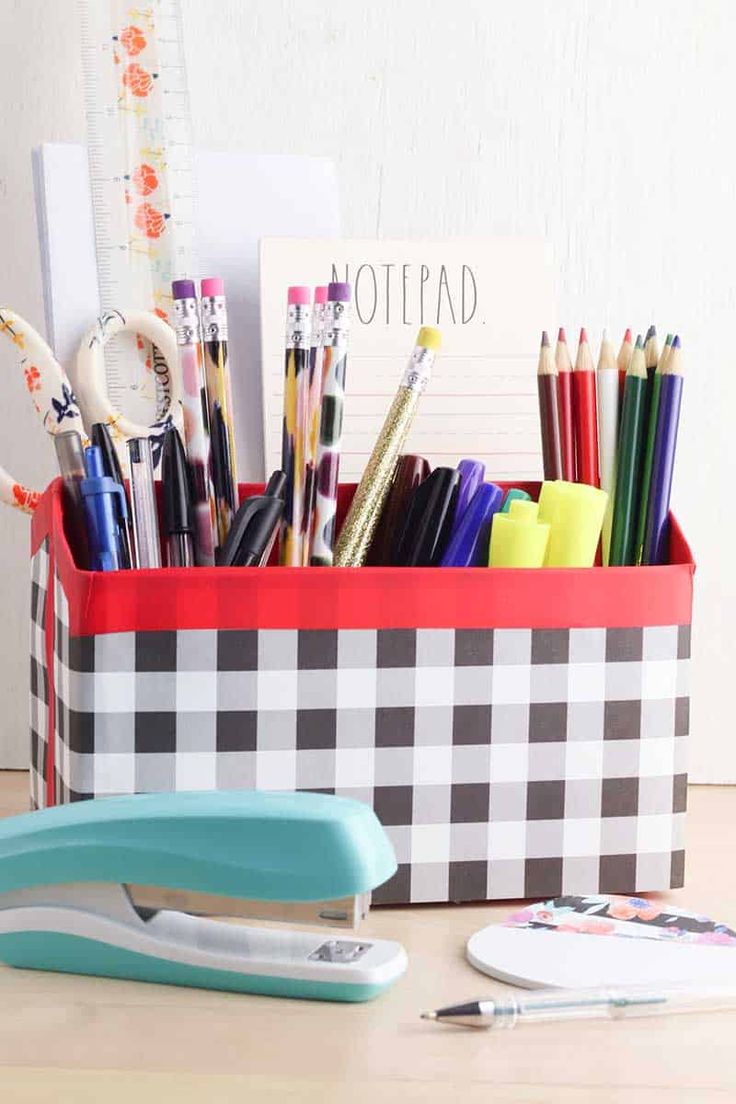
DIY Cereal Box Desk Organizer
Looking to add a touch of creativity to your workspace? Why not try making your own DIY Cereal Box Desk Organizer! This fun and easy project not only helps you stay organized but also gives a personal touch to your desk. It's a great way to upcycle materials and bring some joy to your daily routine!
Supplies
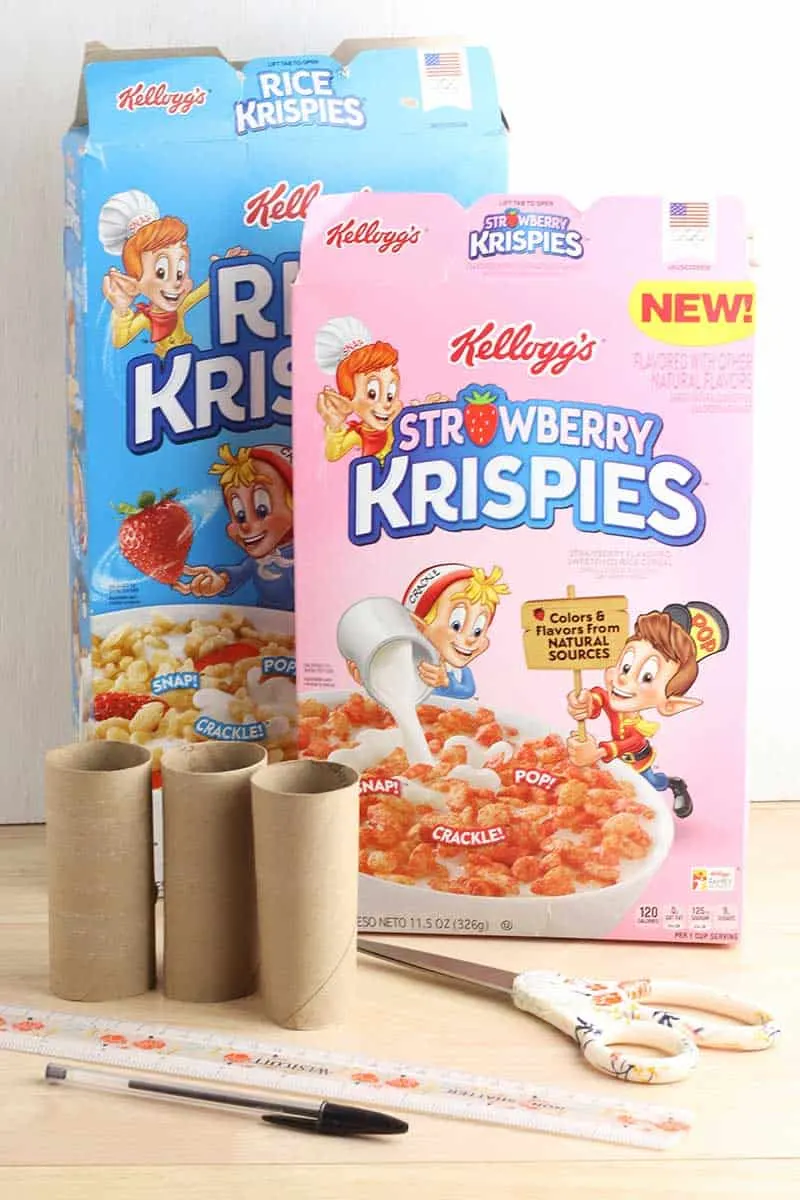
2 empty cereal boxes
3 to 4 empty toilet paper rolls
2 pieces of buffalo plaid scrapbook paper
Red washi tape
Tape
Scissors
Pen
Ruler
Instructions
Step 1
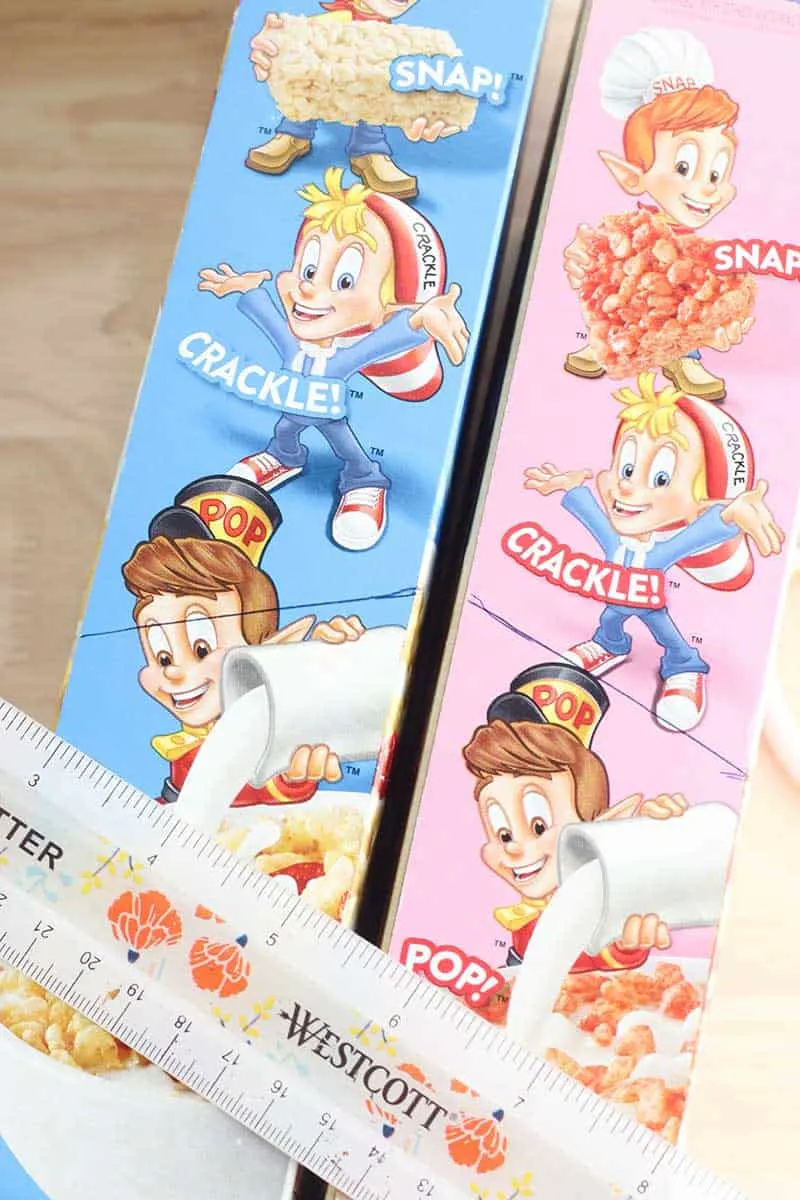
Make sure the two cereal boxes are the same width. Tape the two boxes together to measure and mark the box.
Use a ruler to measure a line five inches from the bottom of each box and draw a line across the front of each box.
Step 2
Turn the boxes on their side and draw two angled lines meeting each other at the center of the box. Repeat the process on the opposite side of the box.
Step 3
Pull the boxes apart and draw a line on the back of each box five inches from the bottom.
Step 4
Use your scissors to cut along each line and recycle the tops of the boxes.
Step 5
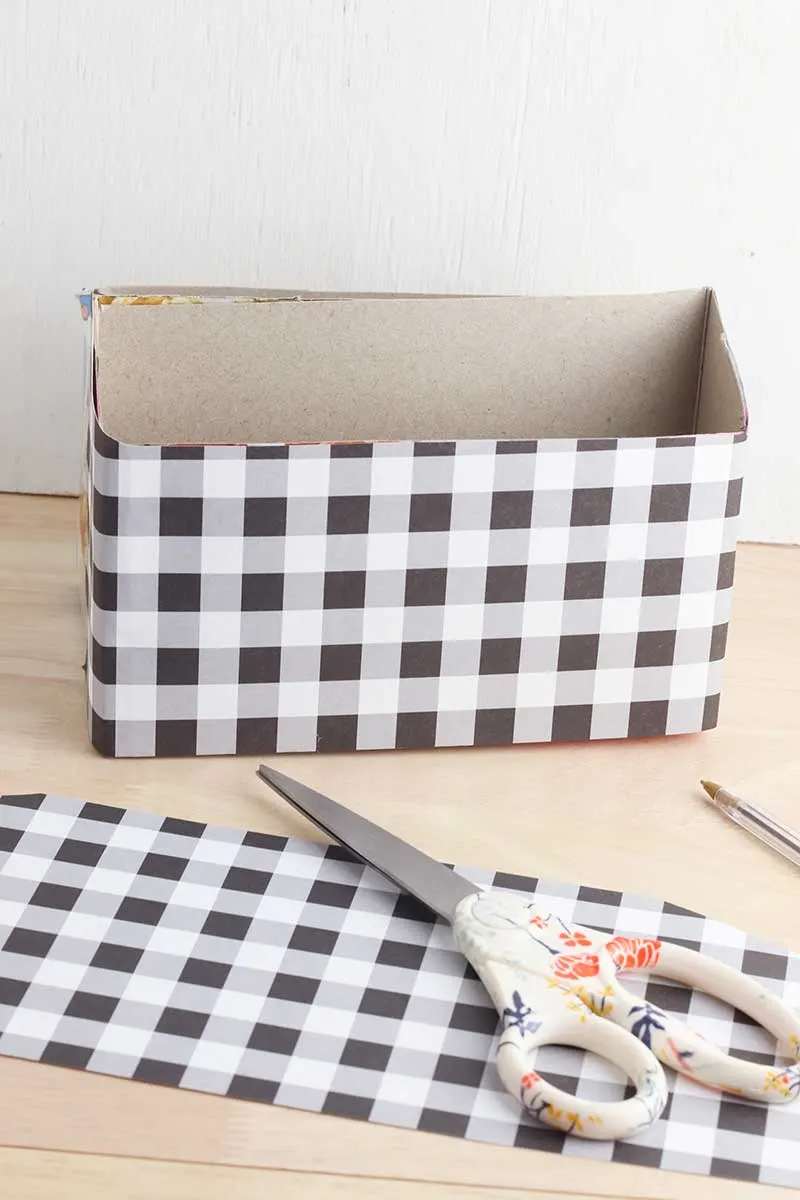
Glue the two boxes together along the back of the boxes.
Step 6
Cut the scrapbook paper to cover each side of the box and glue it in place.
Step 7
Use the washi tape to cover the edges and the center seams. Then, use the tape to cover the back of each side of the organizer.
Step 8
Cut the toilet paper tubes in half and place them along the bottom of each side of the organizer to hold smaller items, like pens, pencils and markers.
For larger items, like envelopes or a notepad, leave the space open without toilet paper rolls.
No comments
Write a comment