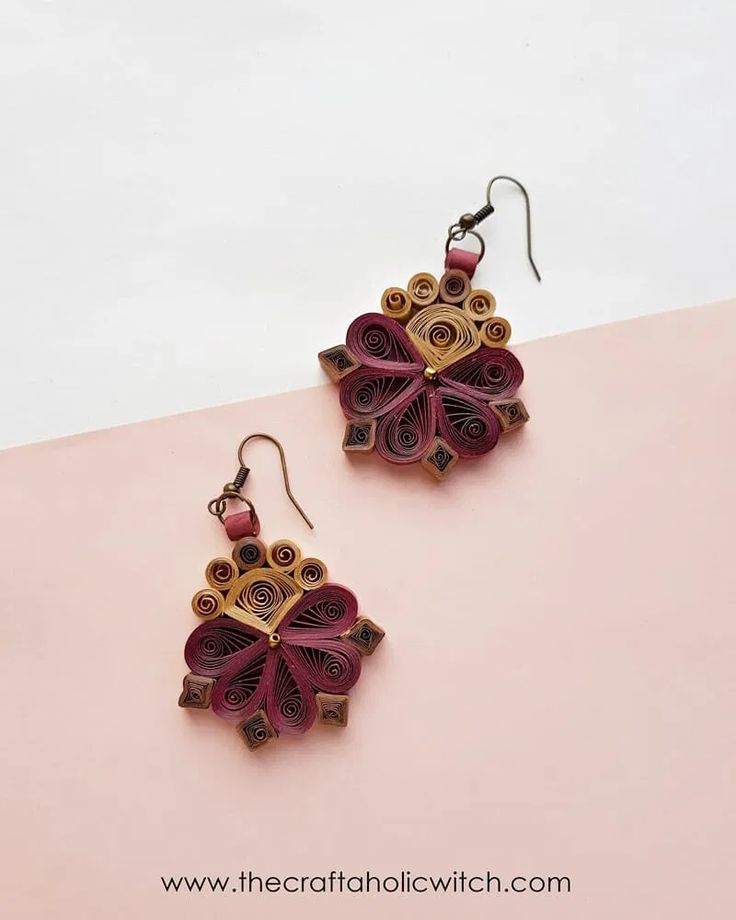
Pretty Quilled Paper Earrings are not just accessories; they are tiny works of art that brighten up any outfit! These intricately crafted earrings boast vibrant colors, unique designs, and a touch of whimsy that add a fun flair to your look. Whether you're heading to a casual brunch or a special event, these lightweight earrings are sure to spark joy and receive compliments wherever you go. So, go ahead and treat yourself to a pair of these delightful earrings - you deserve to feel stylish and happy every day!
Things You’ll Need to Make Quilled Paper Earrings
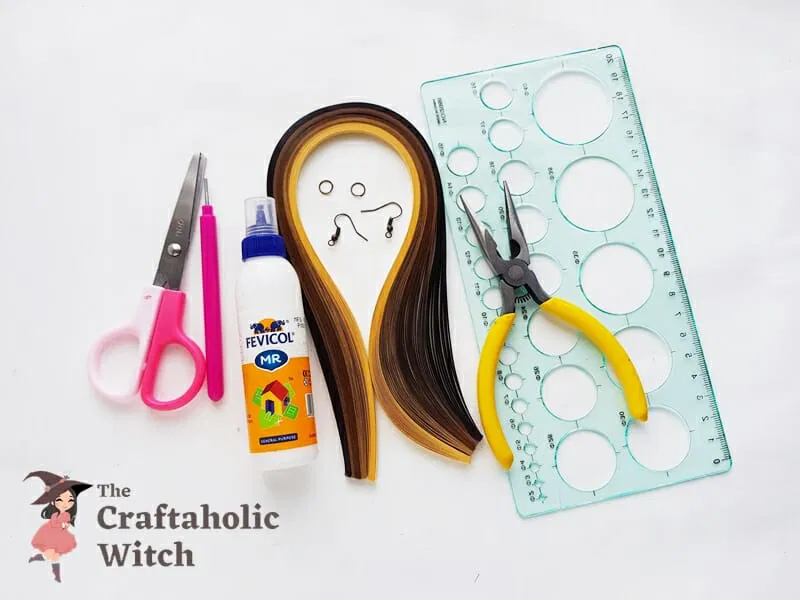
Materials
Quilling paper strips
Jump rings and Earring hooks
Tools
Shaping tool
Slotted tool
Scissors
Craft glue
Craft pliers
How to Make Quilled Paper Earrings
Step 1: Making Triangular Teardrop Shape
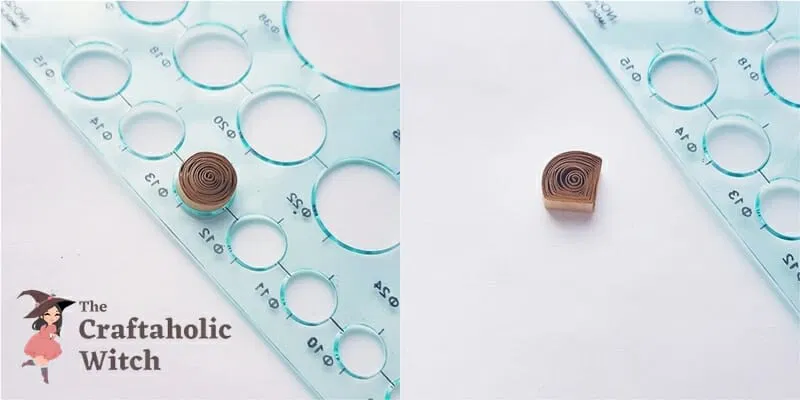
The first shape that we’ll make is not commonly used for paper quilling crafts, however, it’s very easy to make. Grab a 12 cm strip and form it into a loose coil with the help of the slotted quilling tool. Carefully get the coil out of the tool and then place it inside slot 13 of the shaping tool. Once the coiled paper stops to loosen up, take it out of the slot and press any one side to form a pointy edge. Now, press 2 more points on both sides of the first point; these 2 points can be opposite to one another. We will need only one shape of this pattern.
Step 2: Loose Coils and Square Shapes
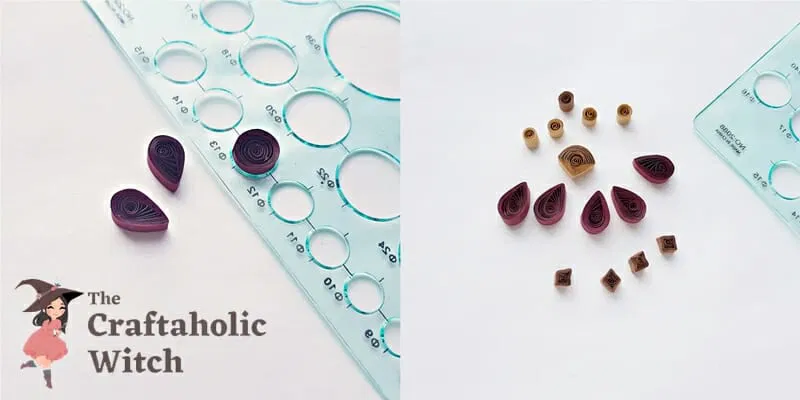
Use 4 cm strips to create 5 loose coils on slot 6 of the shaping tool and use 6 cm strips to create 4 quilled square shapes on slot 7 of the shaping tool.
Step 3: Making Teardrop Shapes
Use a 12 cm strip to create 5 teardrop shapes on slot 13 of the shaping tool. There, we have our basic shapes ready to craft the earring. Check if you have the following shapes ready, 5 teardrops, 5 loose coils, 4 squares and 1 triangular shape.
Step 4: Attaching the Teardrops and Square Shapes
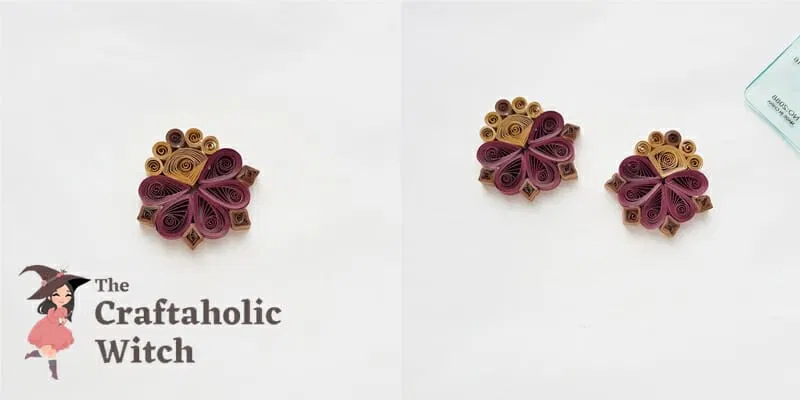
We are going to use white glue to join the quilled paper shapes together to create the earring base. firstly, grab the teardrop shapes and join them side by side with their pointy ends facing towards the center. Attach the triangular shape on the blank space of the attached teardrops, also keep the pointy end of the triangular shape facing towards the center. Attach the quilled small square shapes between the teardrop shapes, along their open sides.
Step 5: Attaching the Loose Coils
Now grab the quilled loose coils and attached them along the top side of the triangular shape. Try filling the top side of the triangular shape, if it requires less than 5 loose coils then keep it like that; if it requires more than 5 loose coils, create another one and fill the top side. Similarly, craft the other earring base.
Step 6: Attaching the Earring Hooks
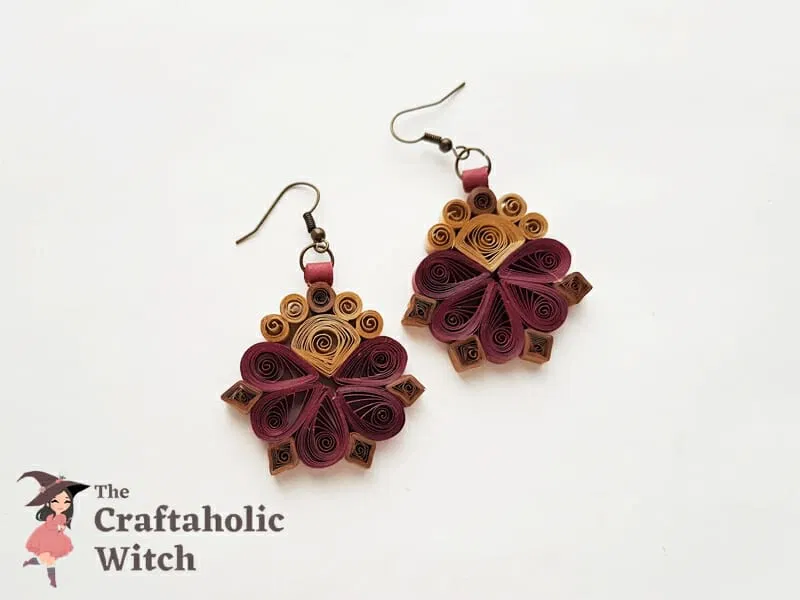
Use a thick strip to create a tight coil with a big hole in the center, we will need 2 of these. Attach the tight coil on the top side of the center loose coil but make sure to rotate the tight coil to a 90 degrees position. We need the tight coil’s holes faced left-and-right (not back and front like the rest of the shapes). Allow the glue to dry completely before proceeding to the next step of attaching earring findings.
Grab a jump ring and attach it with the earring pattern through the holes of the tight coil on top. Attach an earring hook with the jump ring to complete the earring. Similarly, complete the other pair.
Tips for Paper Quilling Projects (Quilled Paper Earrings)
Having difficulty with the quilled paper earrings? Here are some tips that can help you.
If you’re trying paper quilling craft for the first time, we suggest you use a store-bought quilling strip set for better practice.
Select strips that are thick and sturdy for this earring craft. Try not to select thin strips.
Do not use hot glue as it works quickly. You will need to adjust each shape after placing them to make the pattern, so using white glue or craft glue is the best option.
Use a ruler to measure the strips and the shaping tool to shape the quilled paper pieces.
Apply a coat of clear nail polish to make earrings waterproof.
Don’t be upset if the pattern doesn’t turn out well in your first attempt. Always keep practicing, the more you practice the better your skills will get.
You can mix and match different colored quilling strips to recreate our quilled paper earrings to give each pair a different look.