Creating a DIY bird feeder can be a fun and rewarding project for all ages! Whether you decide to repurpose old materials or get crafty with new ones, the possibilities are endless. Not only will you attract beautiful feathered friends to your yard, but you'll also get to enjoy the sights and sounds of nature up close. So gather your supplies, unleash your creativity, and get ready to delight in the joy of watching your handmade bird feeder bring happiness to your outdoor space. Happy crafting!
What You'll Need
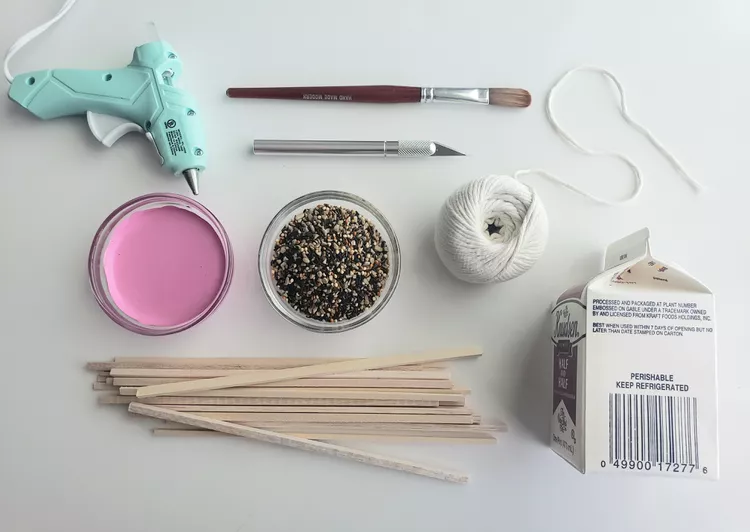
Equipment / Tools
Paint brush
Hot glue gun
Craft knife
Materials
1 clean pint carton
18 inches butcher’s twine
Scrap wood/twigs
Acrylic paint and primer
Instructions
Gather Your Materials
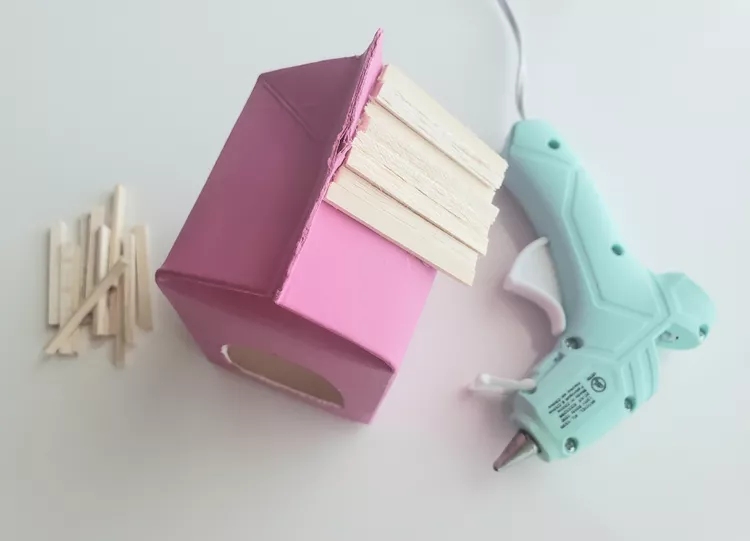
Reach into the recycling bin for the base of this simple project: an empty dairy pint. Rinse the carton well, and allow it to dry completely before using it in any craft. For your bird feeder’s personal touches, opt for homespun materials in neutral hues. Consider using scavenged twigs for a thatched roof, or tortoise-shell buttons to mimic windows. Here, we used balsa wood scraps and butcher’s twine to complete a cozy cottage-inspired bird feeder.
Step 2:
Paint the Pint Carton
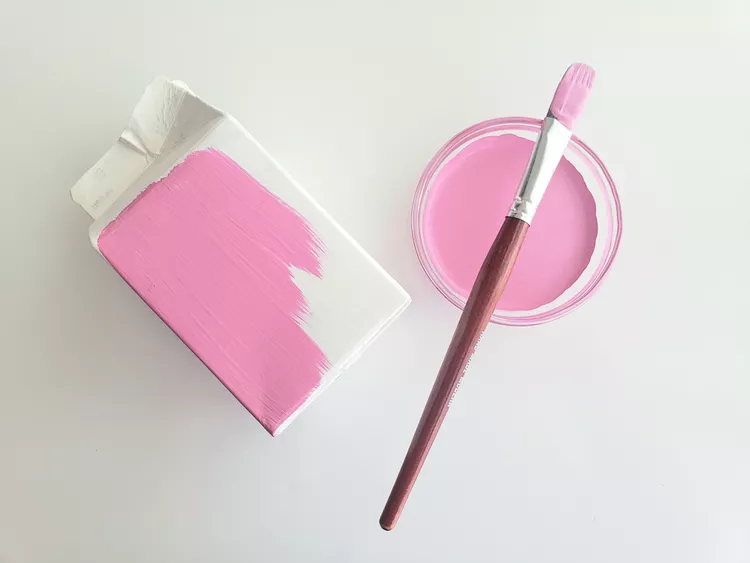
Opt for acrylic paint when selecting a medium for this bird feeder; it’s animal safe and has great lasting power. If your climate is rainy or moist, consider adding a bird-friendly clear coat, too, before hanging your feeder outdoors. Especially if your pint carton’s original label is a bold color, prime the container with a neutral white acrylic paint before adding color. Be sure to dry completely between layers to avoid a chunky finish.
Step 3:
Trim the Balsa Wood
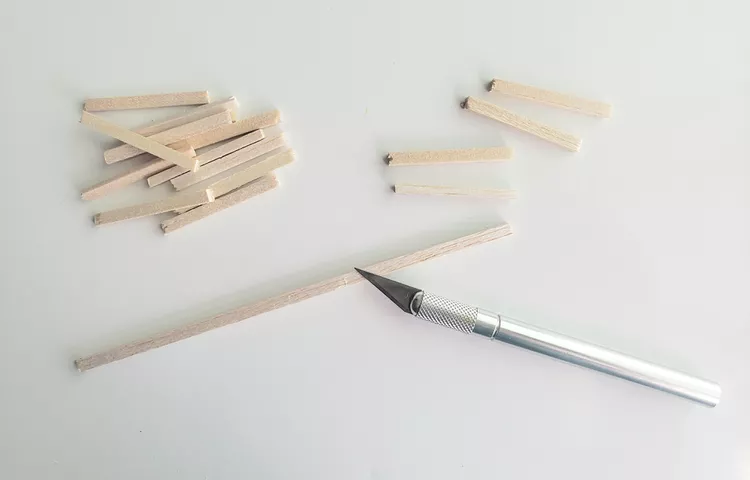
To create a thatched roof for your rustic-chic birdhouse, source scraps of soft wood or twigs with a similar thickness. Trim each balsa wood length to fit the top of the carton using a sharp craft knife (or a strong pair of scissors). Create enough “shingles” to completely cover both sides of the sloped top of your milk carton. For a more refined, polished look, sand down the cut edges of each bit of wood.
Step 4:
Cut a Doorway
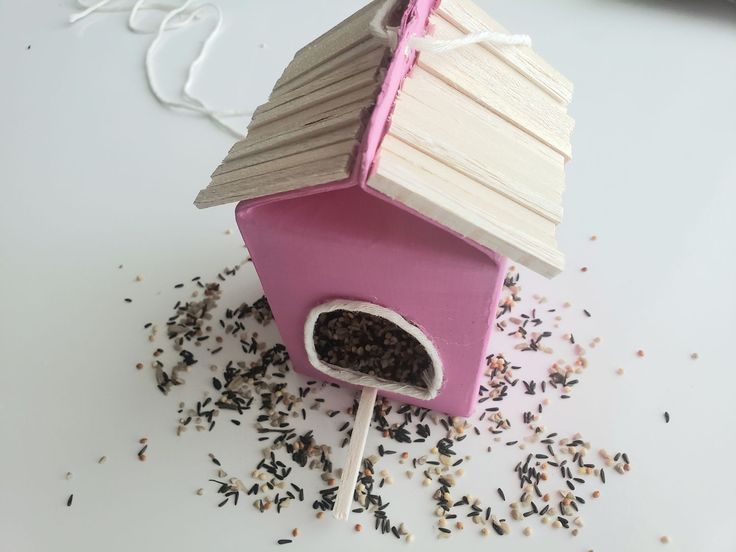
Using the craft knife, carefully cut an archway into the front of the dry, painted pint container to act as an entry point for birds. Be sure to keep a small lip at the bottom of the carton so that it can still retain a handful of birdseed. To perfect any jagged edges, run a bit of sandpaper along the cut rim then touch up with a little extra paint.
Add Decor
Embellish your painted pint container by hot gluing the balsa wood shingles to the top, then adding a cute perch. Add butcher's twine to cover any unfinished edges, or along each of the carton's edges as trim. Don’t forget to poke a small hole into the top fold of the pint container, then loop a bit of butcher’s twine through for easy outdoor hanging.
Step 6:
Fill with Seed
Carefully pour songbird seed into the bird feeder just up the bottom edge of the archway. Store extra seed in a spouted plastic container for easy refilling, and add it to your weekly task list along with watering your outdoor plants.
Display the Bird Feeder
Using a sturdy step ladder if needed, tie the butcher’s twine onto an accessible branch of a bird-friendly tree. Maple, oak, and dogwood are all species proven to attract songbirds, but ultimately, invite birds to a cute corner of your outdoor area no matter what fauna grows there (just be sure to avoid driveways or busy walkways).