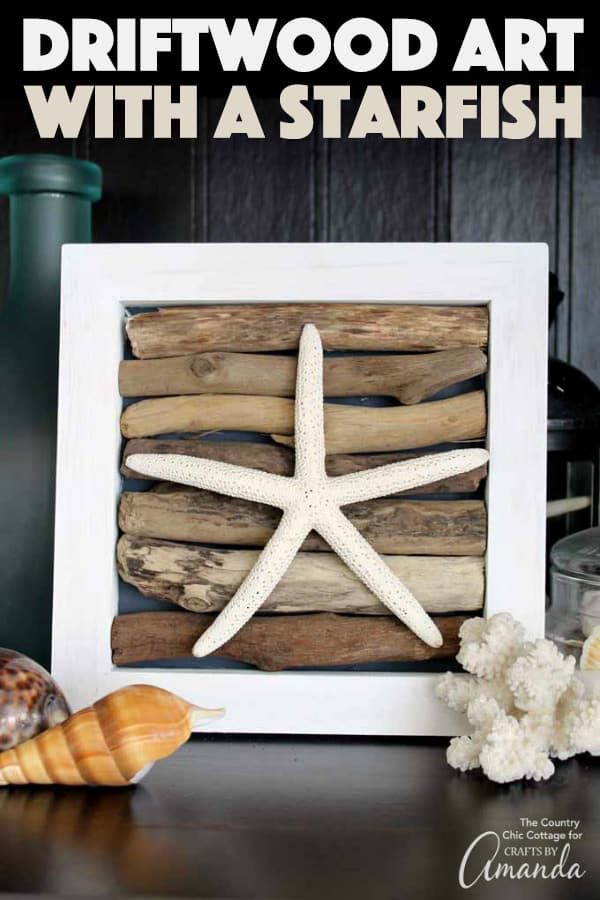
Driftwood Art with a Starfish
Creating driftwood art with a starfish is a delightful way to bring a touch of coastal charm into your home decor. The unique texture and shapes of driftwood, coupled with the bright and beautiful starfish, make for a whimsical and eye-catching piece of art. Whether you hang it on a wall or display it on a shelf, this craft project is not only fun to make but also adds a personalized and beachy vibe to any room. So grab some driftwood, a lovely starfish, and let your creativity flow as you craft your own piece of coastal art that is sure to make a statement in your home.
Supplies
Driftwood
Starfish
Wood panel with recessed back
Hot glue and glue gun
Saw
White craft paint
Gray craft paint
Instructions
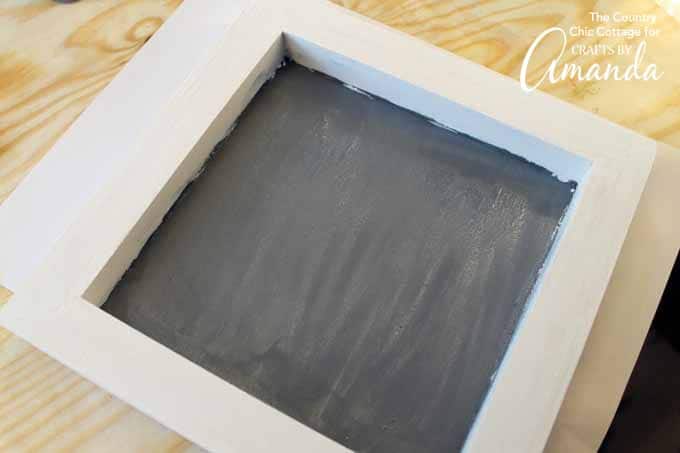
Start by painting your wood panel or shadowbox. The outer edge should be white while the very back should be grey. Allow to dry completely before continuing.
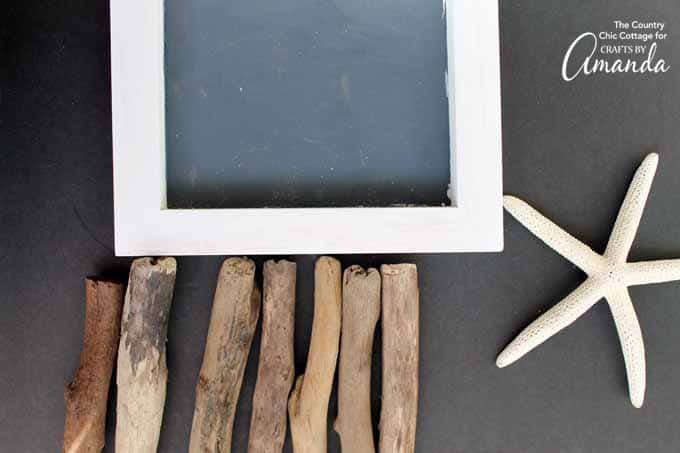
Use a saw to cut your driftwood pieces to size. (Remember to follow all safety precautions and use your safety gear when using power tools.) This is like a puzzle. Try different combinations until something fits well and works for your piece. No two pieces of driftwood are the same but that is the beauty of it.
Use hot glue to secure everything into place. First add the driftwood to the back of the box then the starfish on top.
Expert Tips & FAQs
Choose a shadow box or other wood frame with a recess for your driftwood. Choose driftwood pieces that are slightly longer than your wood panel. The gray craft paint in the back of your box will make areas between the driftwood dark. Use a very dry brush and very little paint when adding the white to give a slightly rustic appearance. Always be careful when using power tools and follow all manufacturer’s instructions and safety precautions.
No comments
Write a comment