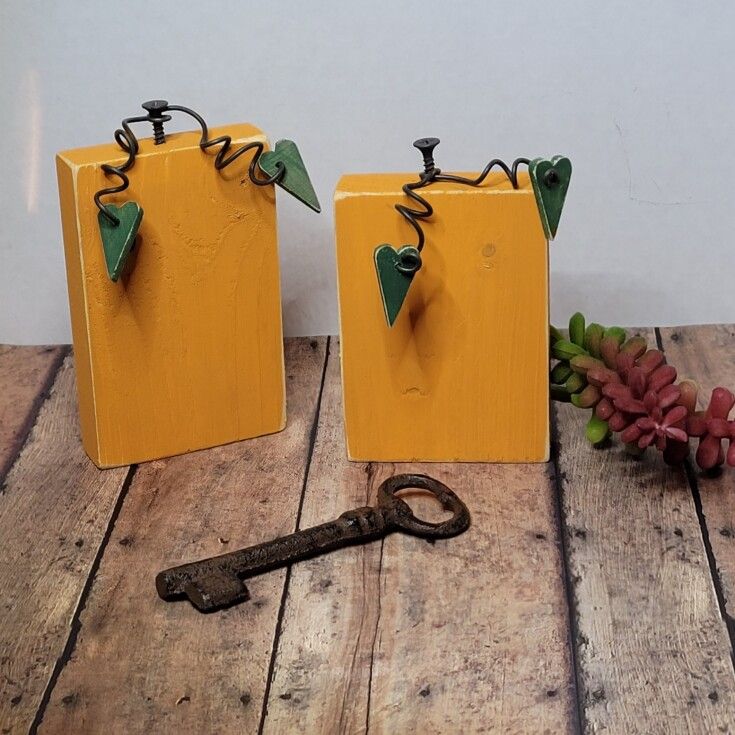
Diy Wood Block Pumpkins
Creating DIY wood block pumpkins is a fun and festive way to decorate your home for the fall season! These charming decorations can be personalized to match your style and add a cozy touch to your space. To make them, simply paint or stain wooden blocks in warm autumn colors, stack them to form a pumpkin shape, and add a cute stem on top. You can even get creative with adding faces or patterns to make each pumpkin unique. This craft is perfect for getting into the autumn spirit and adding a touch of homemade charm to your home decor!
Supplies:
Start off with a scrap piece of wood or two. Sand off the rough edges then paint orange or the color of your choice.

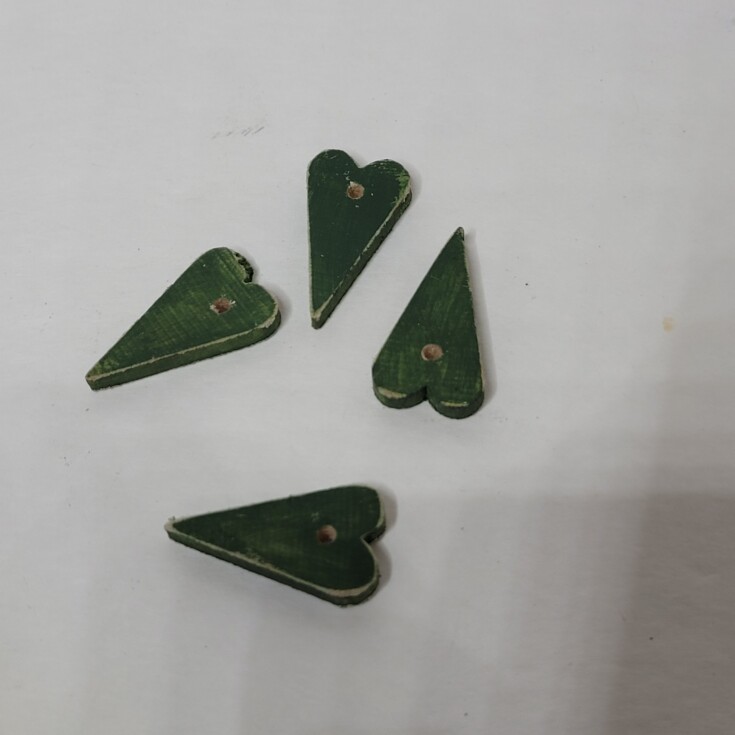
For the leaves I will be using small wood hearts that I have in my wood parts stash. These I painted green.
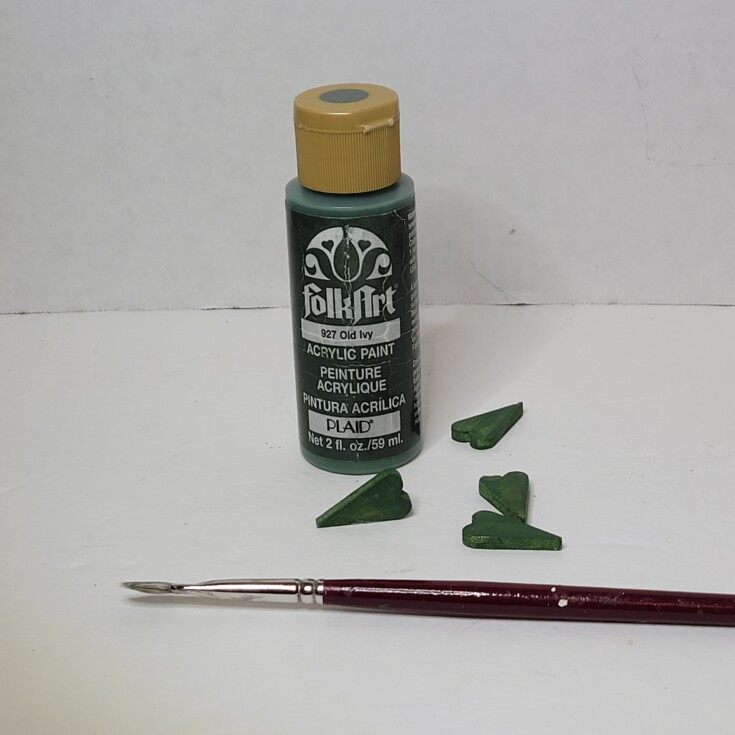
Can’t forget to sand the edges of the diy wood block pumpkins, and hearts for that distressed look I love.
Drill a small hole in the hearts just large enough for a piece of wire.
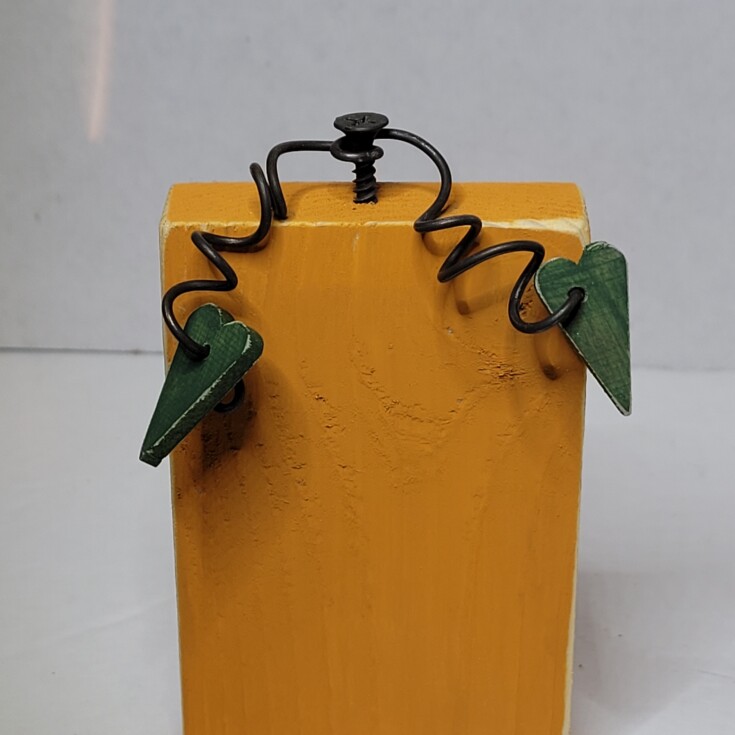
For the wire tendril cut two pieces of anneal wire approximately eight inches in length. Make a small loop in the center using needle nose pliers. The loop needs to be just large enough for a screw to go through. I was going to use upholstery tacks but they were a little to small so I used wood screws instead.
Wrap the ends of wire around a paintbrush leaving about ¾” of each end straight to thread through the leaf/heart. (Don’t forget like I did).

Now thread the wood hearts onto the wire then use pliers to form a small loop or bend to hold the hearts in place.
Now run a screw through the wire loop and screw in halfway in the top center portion of the diy wood block pumpkins.
Bend the wire tendrils of the pumpkins in position. There you have it two super easy diy wood block pumpkins.