DIY Layered Rustic Cross From Wood
Creating a DIY layered rustic cross from wood is a delightful project that can bring a touch of warmth and charm to your decor. With some simple tools and materials, you can craft a beautiful cross that adds character to any space. Whether you're a seasoned crafter or a newbie, this project is both fun and rewarding. Get creative with different types of wood and finishes to customize your cross to your liking. Embrace the rustic vibes and enjoy the process of bringing your vision to life!
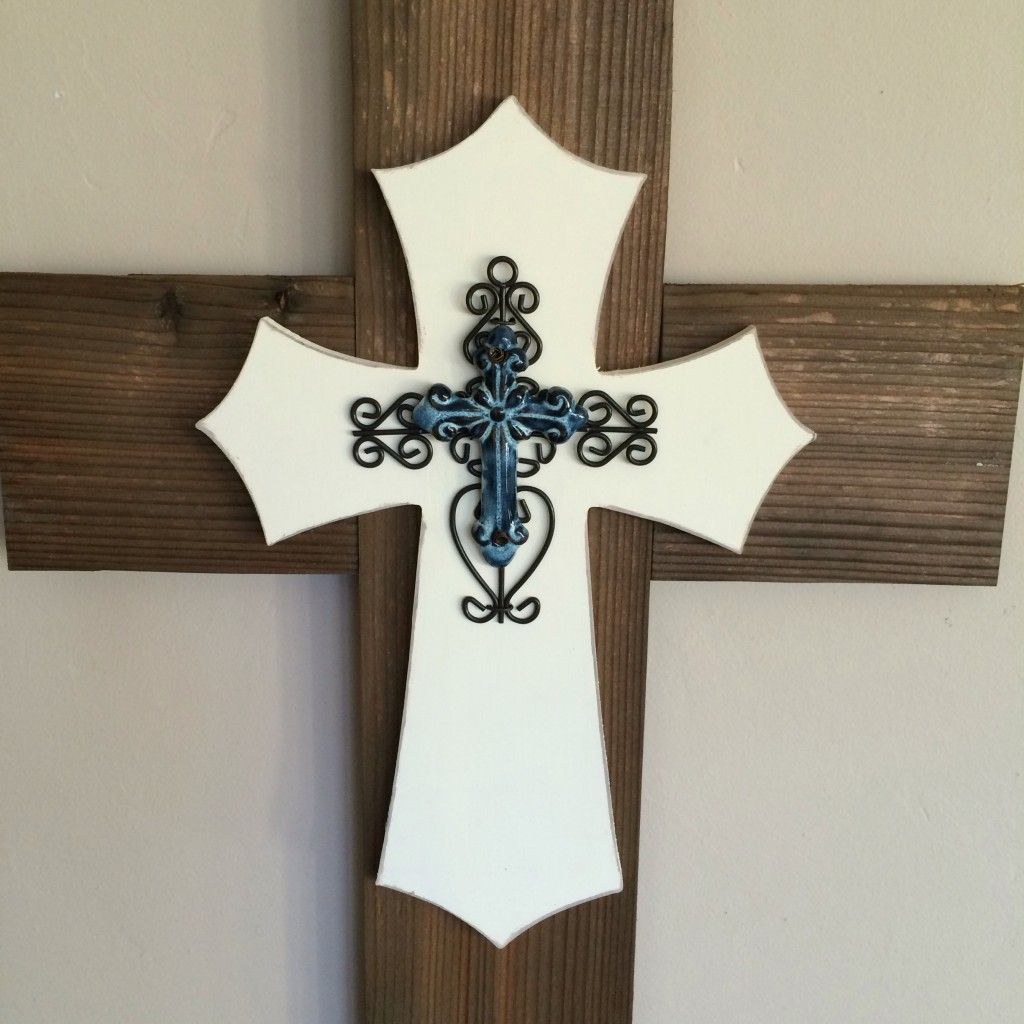
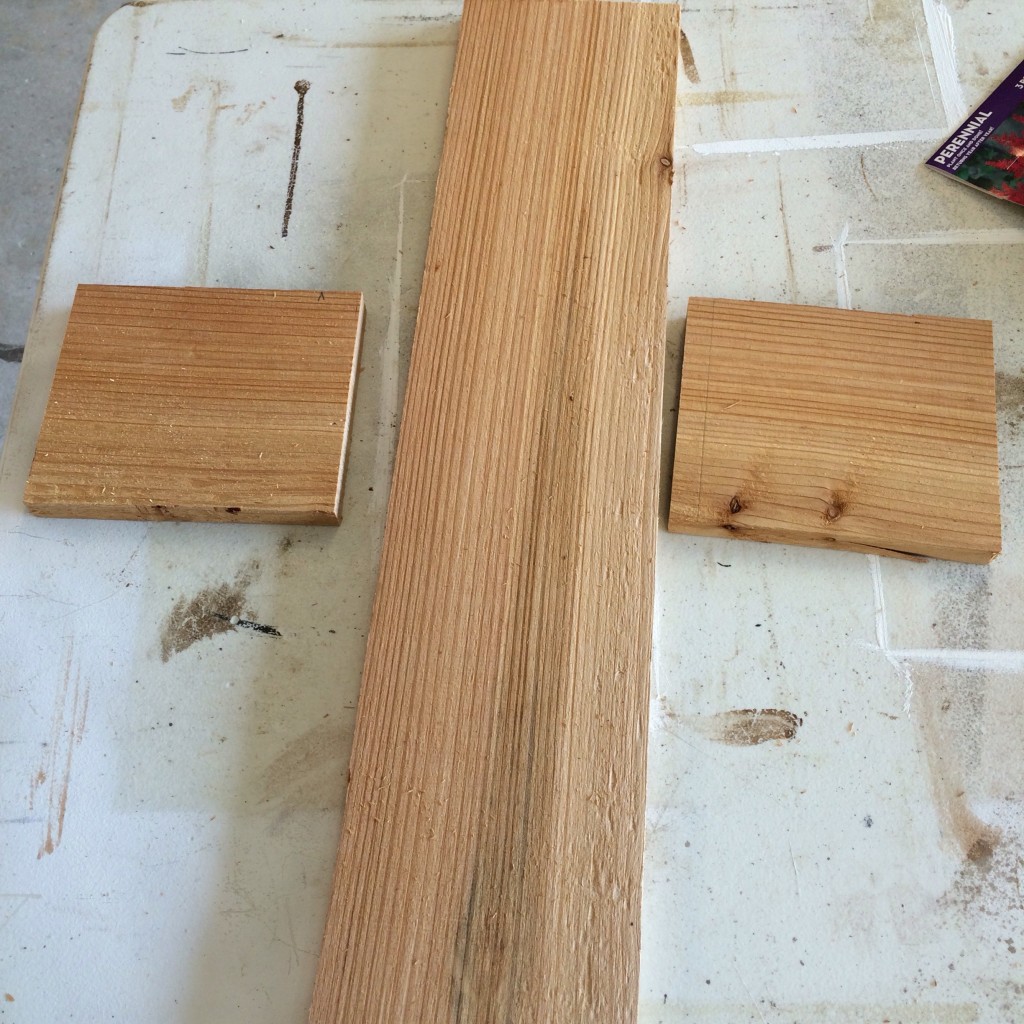
My layered rustic cross was really easy to make. All I did was make the bottom cross out of cedar, then added the middle cross that I had painted. Then I wired the smaller ceramic and wire cross to the top to form my layered rustic cross.
4. Once glue is dry add an aging solution to the wood.
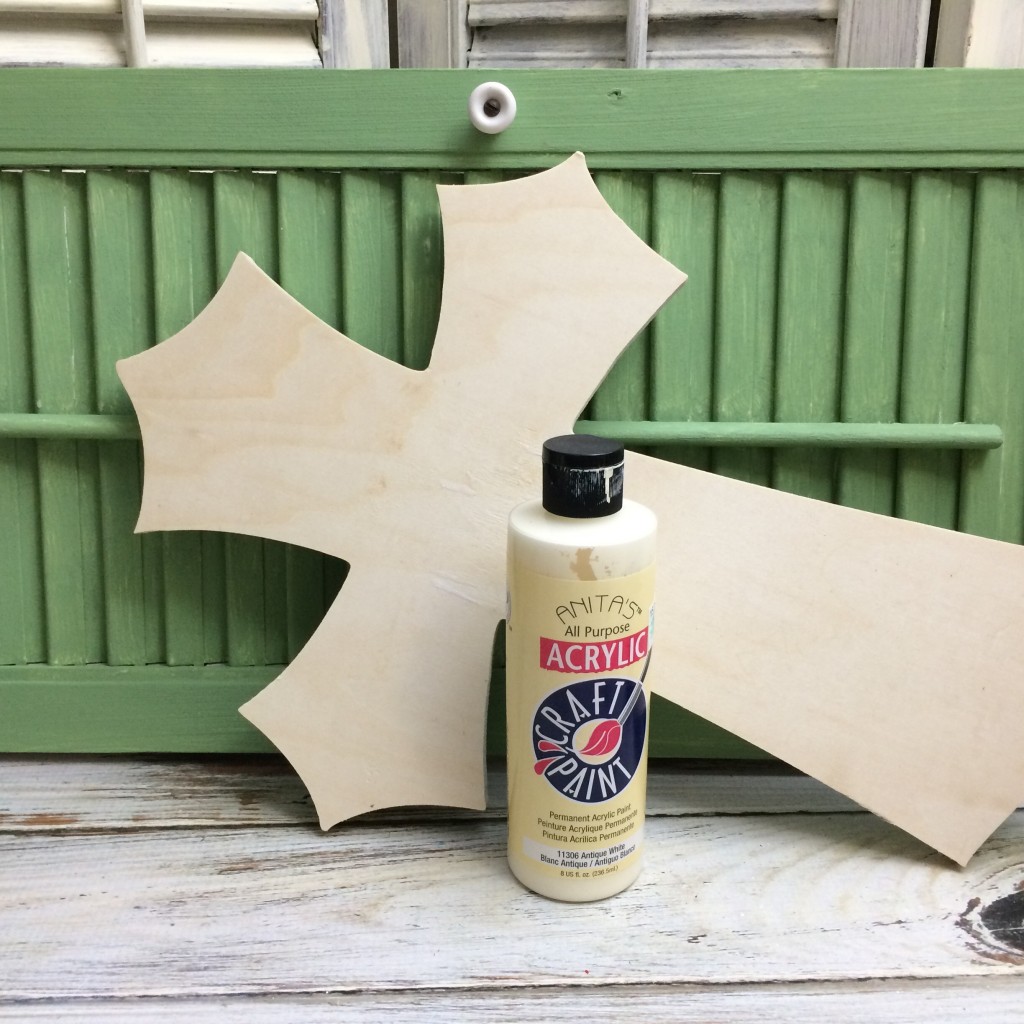
5. Paint the top and edges of your pre-cut middle cross antique white.
6. Glue your middle cross down using wood glue. Set something heavy on top till it dries.
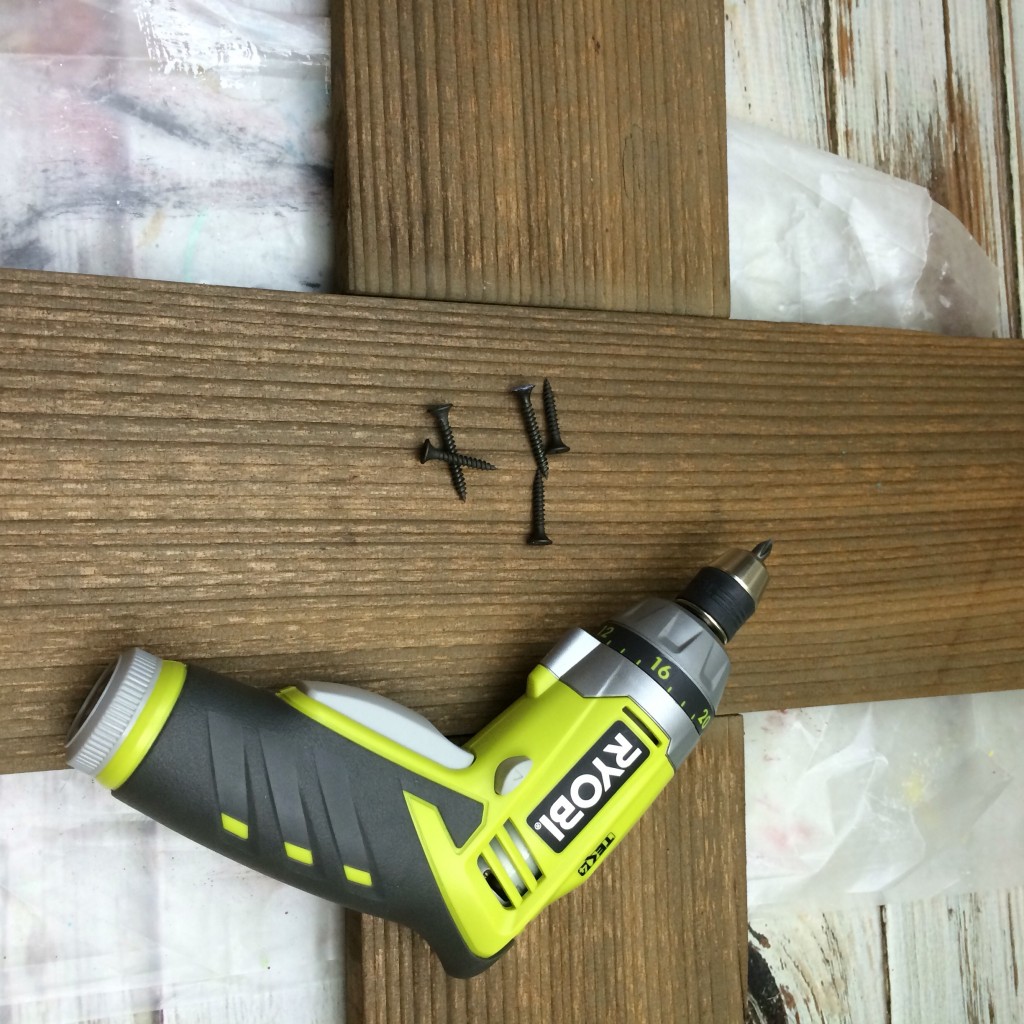
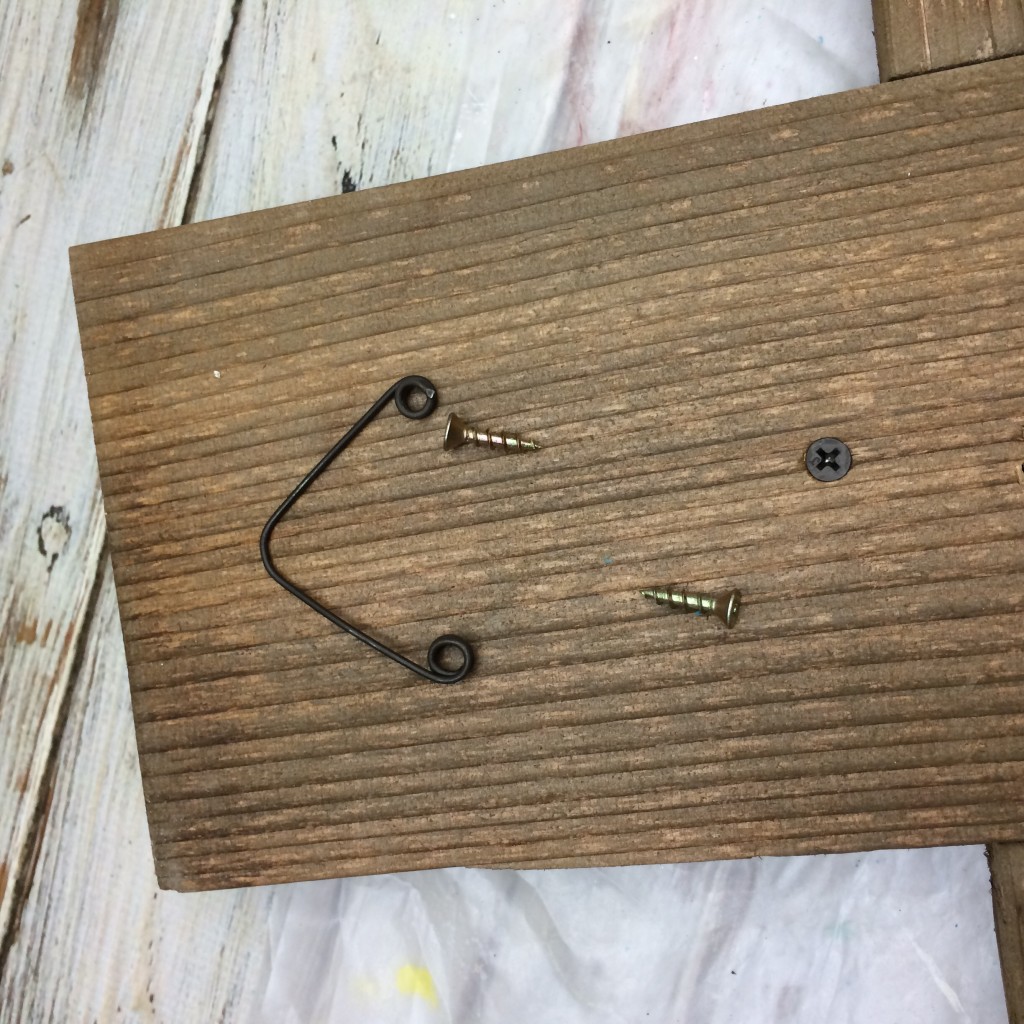
7. Now flip over and using wood screws that are long enough to go through cedar wood to the middle cross, but not so long that they go through the middle cross. (I used 1 1/2″)
8. Four screws is enough to hold it secure.
Next add some distress stain to the edges of your middle cross.
Add more or less of the distress stain to get the desires look you are seeking.

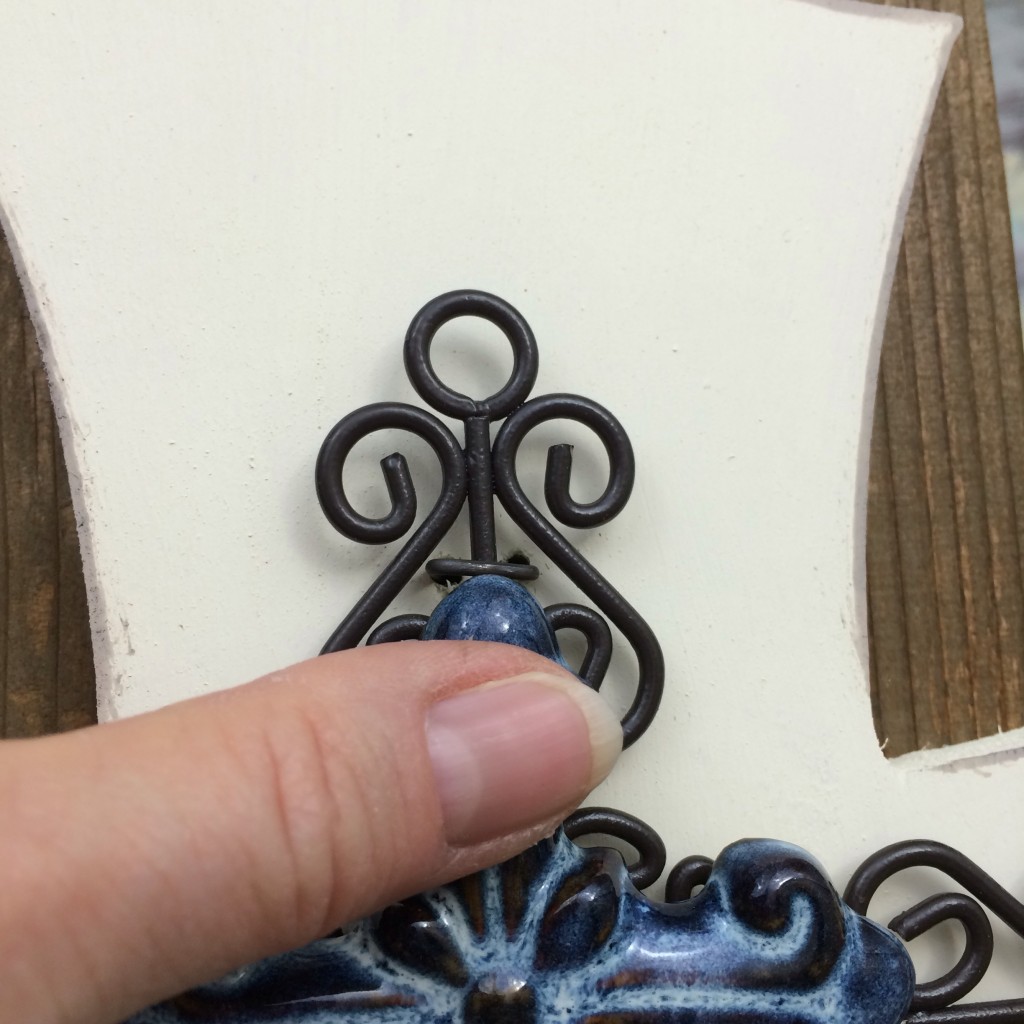
12. Flip layered rustic cross over and using pliers pull the wires tight and twist to secure. Then push wires flat against the board.