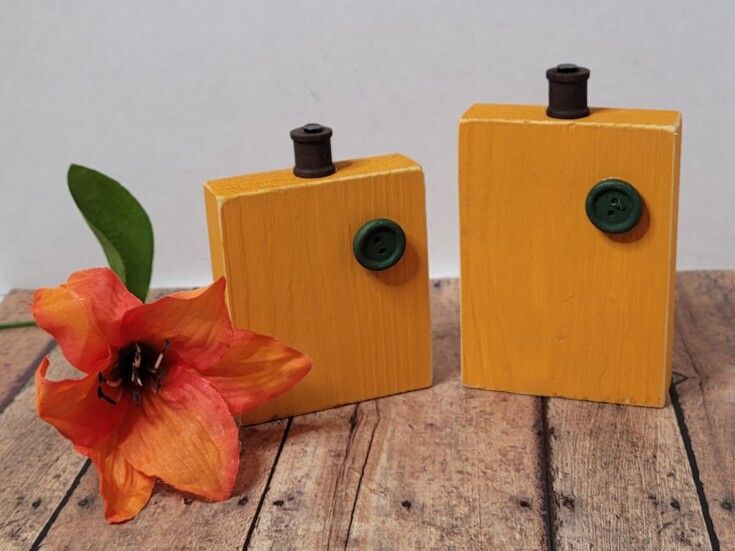
10 Minute Block Pumpkins
Creating 10 Minute Block Pumpkins is an enjoyable and simple craft that can bring a touch of autumn into your home! By following easy instructions, you can quickly transform these blocks into charming pumpkin decorations that will surely add a festive flair to your space. Whether you are a seasoned crafter or just starting out, this project is a fun way to get creative and embrace the season's spirit. Happy crafting!
Supplies for 10 Minute Block Pumpkins
2 wooden blocks
2 mini wood spools
2 wood buttons
Orange and green paint
Paintbrushes
Sandpaper
Wood glue
10 Minute Block Pumpkins
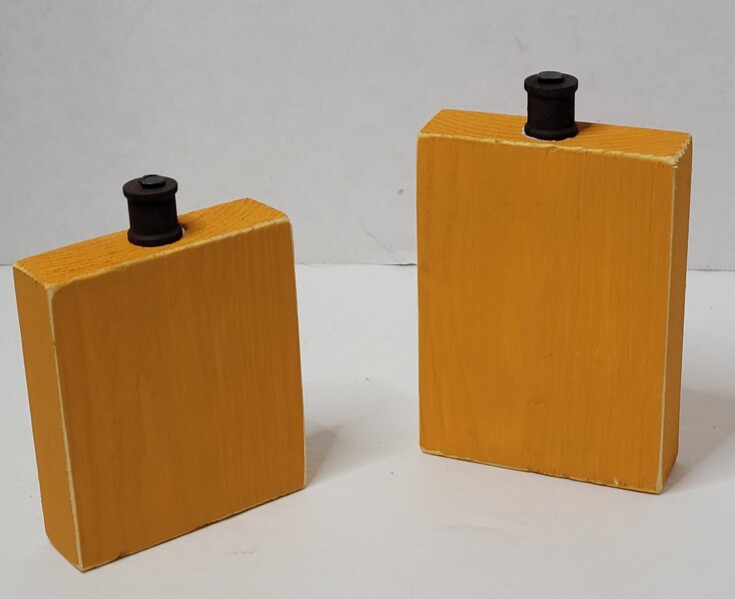
Let’s get started by adding one coat of orange paint to two scrap wood blocks. All sides except the bottom of each pumpkin.
While that is drying paint the two mini spools brown. If you put them on a toothpick, you can paint all sides.
Go back to the pumpkins blocks and paint the bottoms while the buttons are drying.
Now paint the two wooden buttons green. I placed the buttons on a toothpick as well for easier painting.
Distress the block pumpkins by giving the edges a quick sanding while the buttons are drying.
Add some wood glue to the end of the spools and place them top center of the wooden 10-minute block pumpkins. Since I bought some upholstery tacks that I wasn’t able to use in my diy wood block pumpkins project in my last post. I decided to use two and tack down the spools with them. Just a little added measure of keeping the pumpkin stems in place.
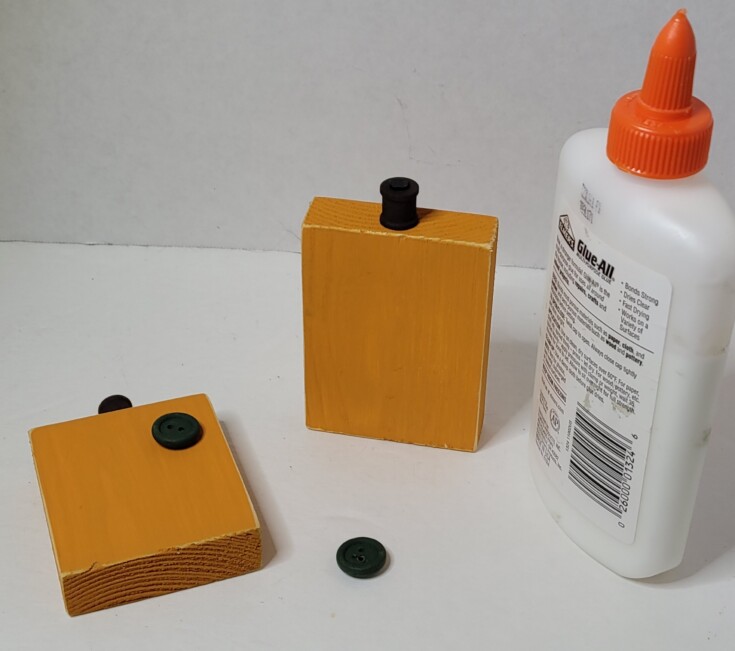
Lay the pumpkins down flat and glue the buttons down in place, and let thoroughly dry.
That’s all there is in making these cute 10-minute block pumpkins
No comments
Write a comment