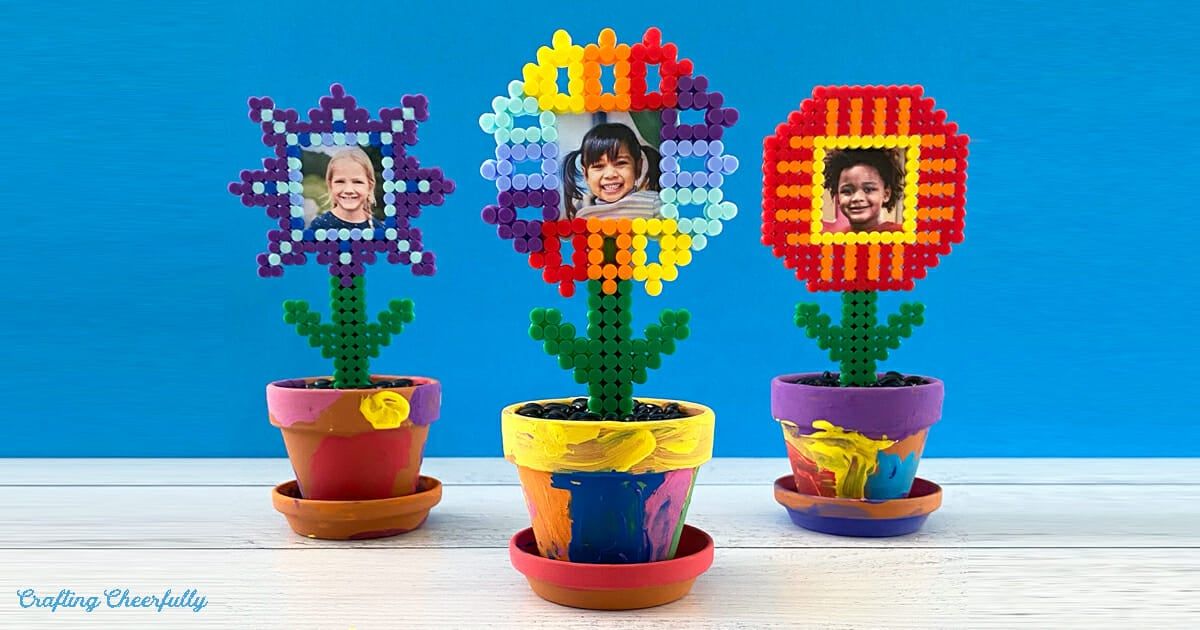
Flower Frame with Perler Beads
Creating a flower frame with Perler beads is a delightful craft project that brings a pop of color and charm to any space. The process involves arranging colorful beads in lovely floral designs to adorn a simple frame, resulting in a fun and unique piece of décor. Whether you're a beginner or a seasoned crafter, this project is sure to bring a smile to your face and brighten up your surroundings with its whimsical touch. So gather your beads, unleash your creativity, and enjoy the therapeutic process of making your very own flower frame with Perler beads!
Supplies Needed
Perler Bead Caps
Large Pegboard
Mini 2.5″ Terra Cotta Pots
Crayola Kids Paint and paintbrushes
Popsicle sticks
Playdoh
Pot filler like dried black beans, small pebbles or potting soil
Hot glue
Step by Step Tutorial
Step One: Paint the terra cotta pots.
I set up a little painting station for my kids with Crayola paint.
Painting station set up with kids finger paint and terra cotta pots.
Small terra cotta pots painted by kids.
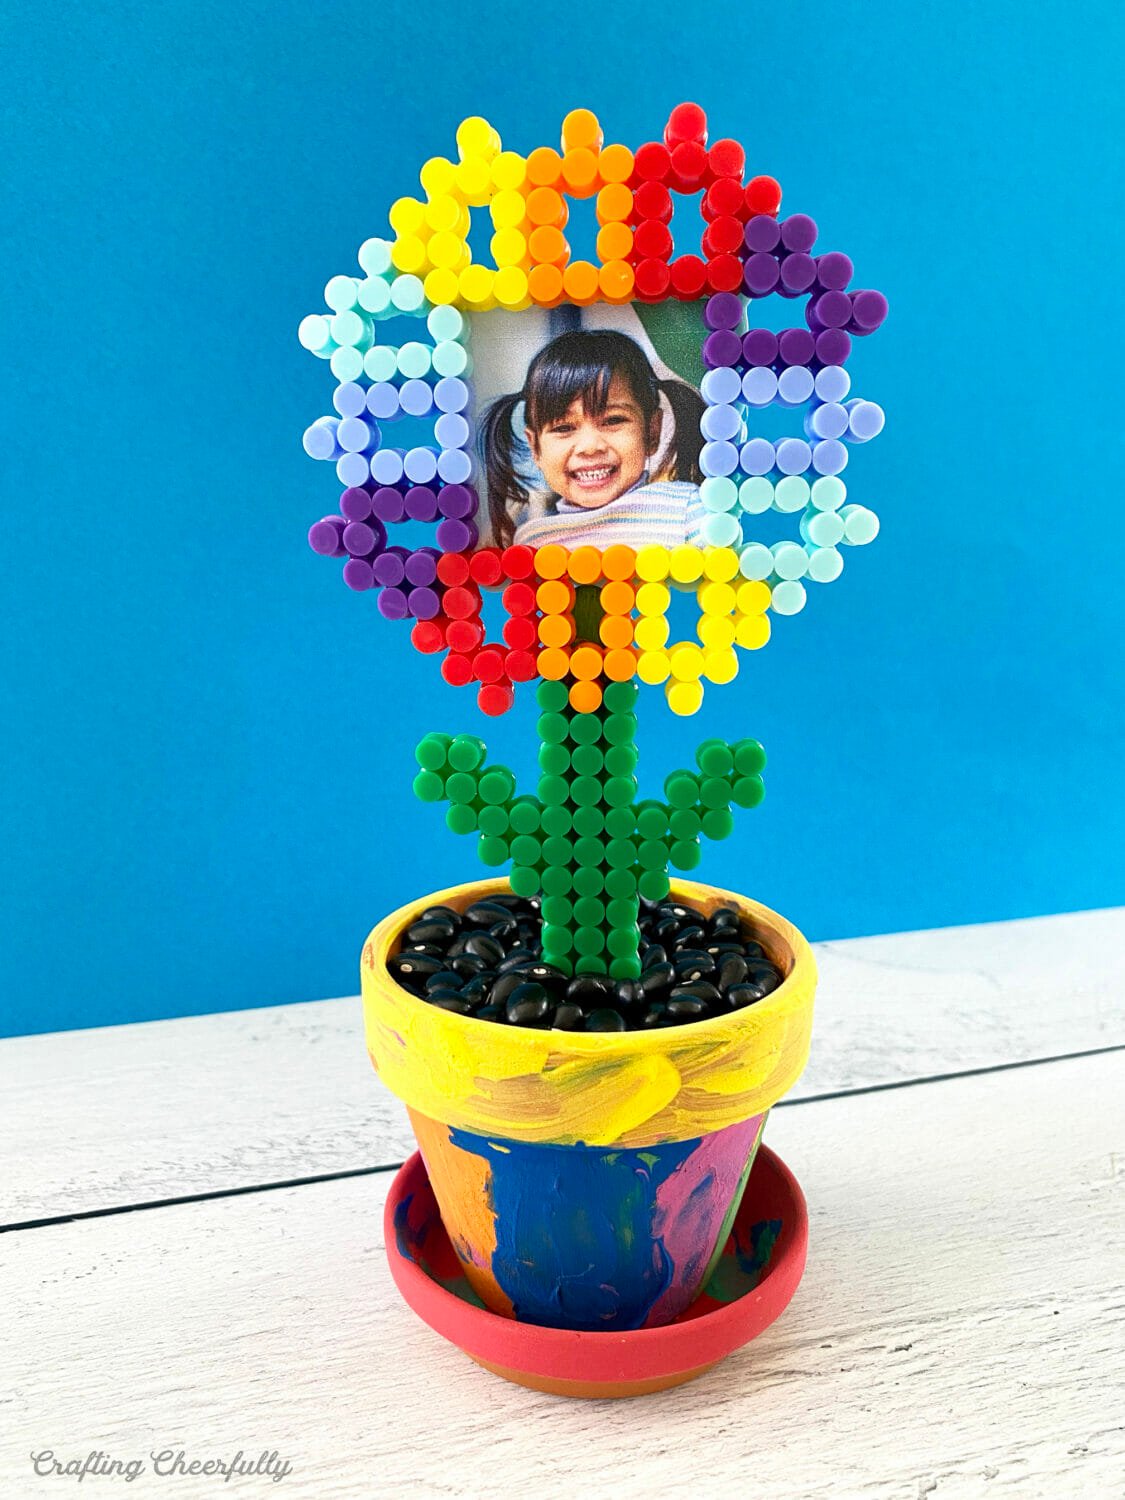
Step Two: Make the flower frames using Perler Bead Caps following my guide.
Each flower will also need a small square made from Perler Bead Caps for the back of the frame.
A flower is made from Perler Bead caps on a pegboard.
If you use Perler Bead Caps as we did, make sure you place the caps smooth side down in-between the pegs on the pegboard.
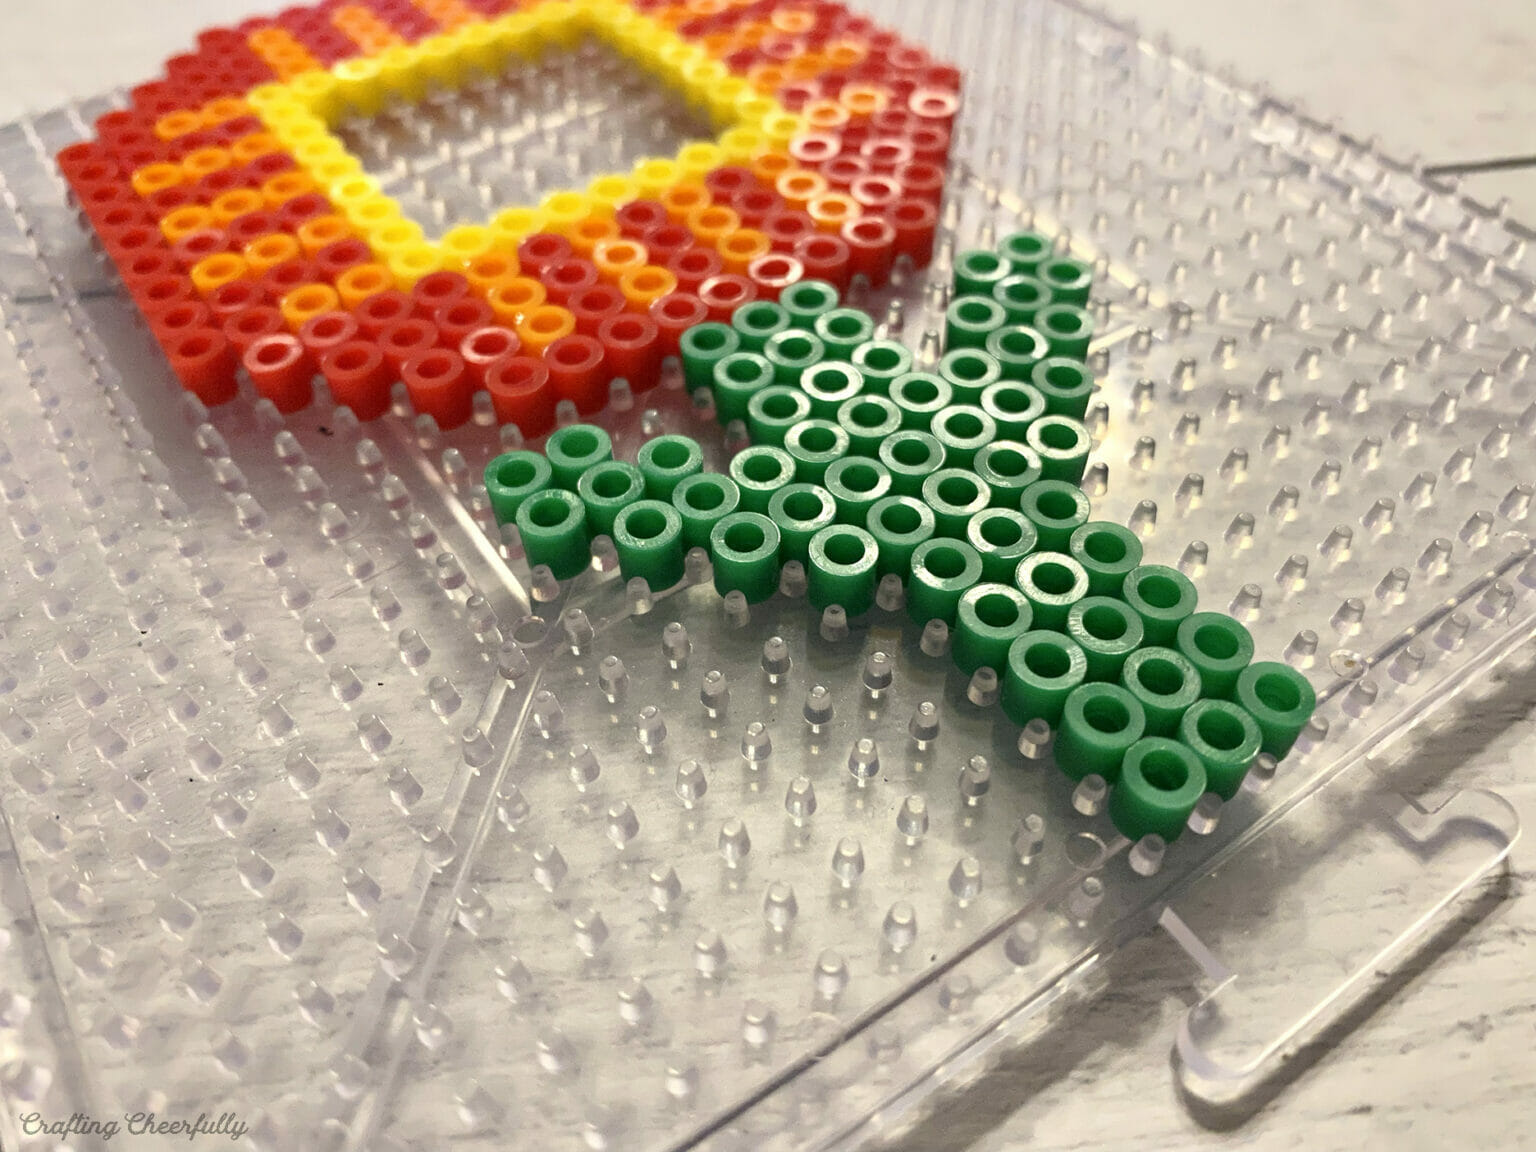
Iron them following the directions on the package and using the pressing sheet they come with. Be sure all of the beads are fused so the flower won’t fall apart when it is stood up vertically in the pot.

Iron goes over perler bead flower.
Flowers and small squares made from perler bead caps.
Step Three: Add photos to the frames and attach each flower to a popsicle stick.
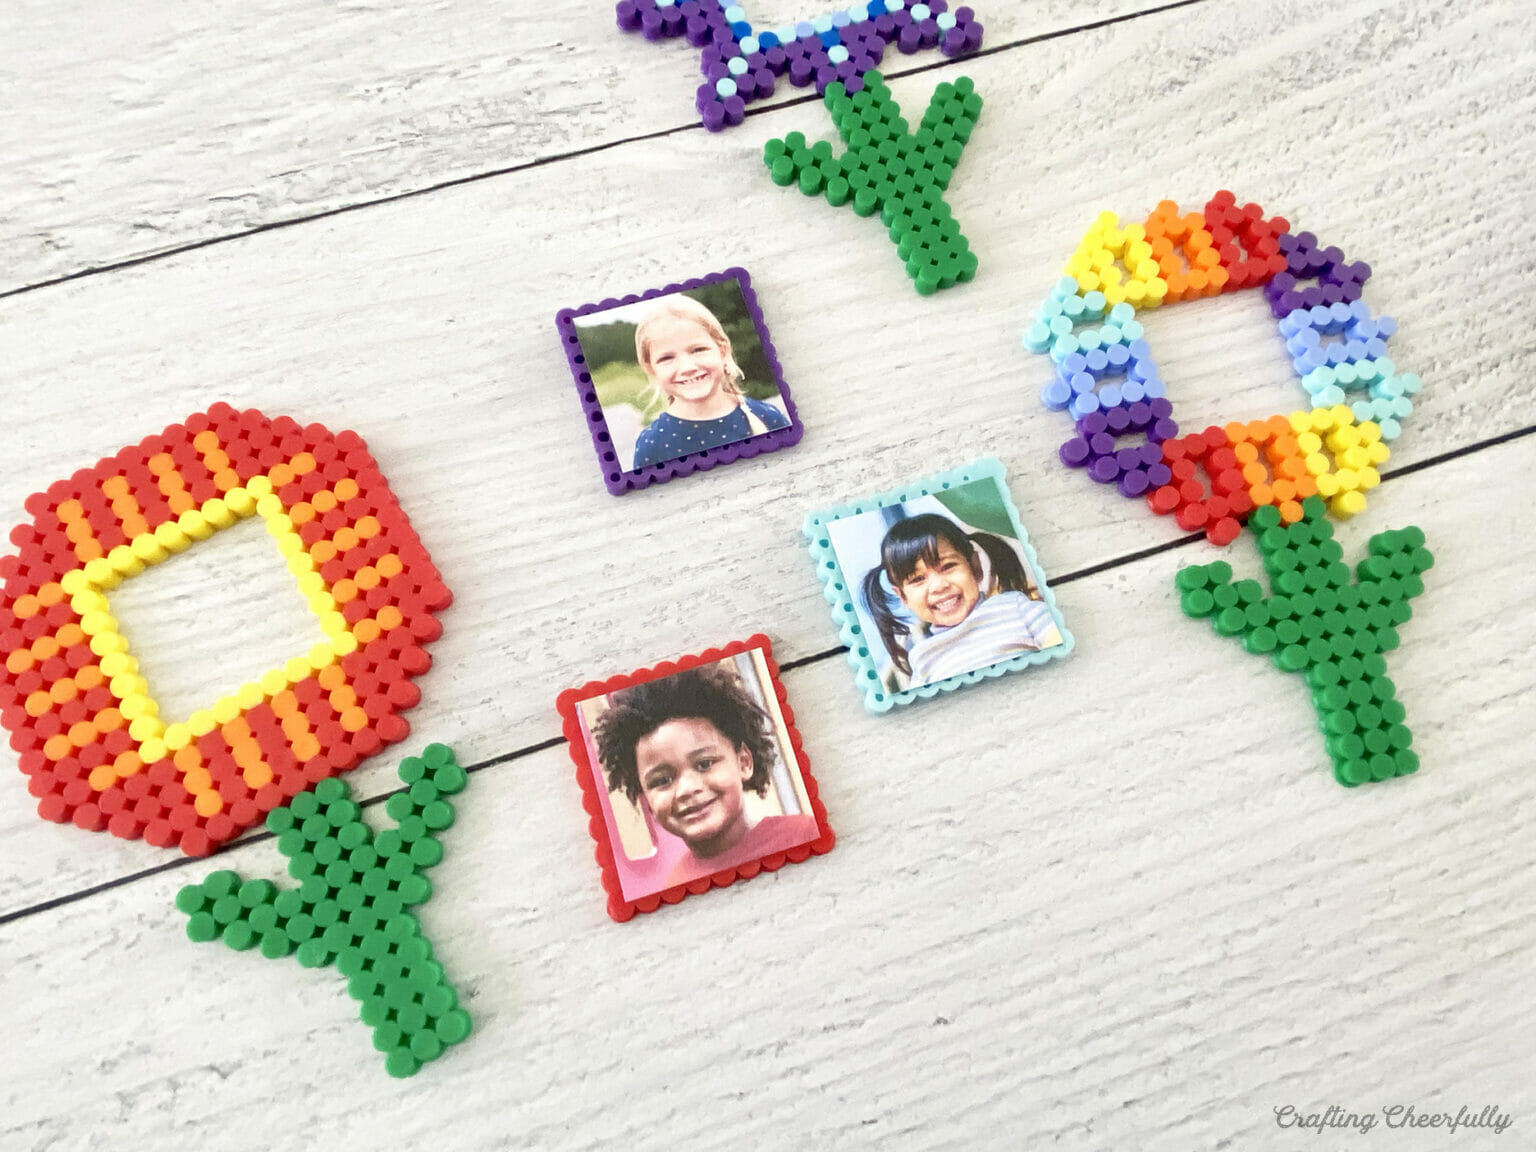
Glue or tape a photo that measures 1.5″ x 1.5″ to the wrong side of the Perler Bead square. Use hot glue around the edges of the square and attach it to the back of the flower so the photo shows through the frame.
The back of perler bead flowers.
Next, attach a popsicle stick to the stem of the flower. This gives the flower more stability and height.
The back of a perler bead flower with a popsicle stick glued to the stem.
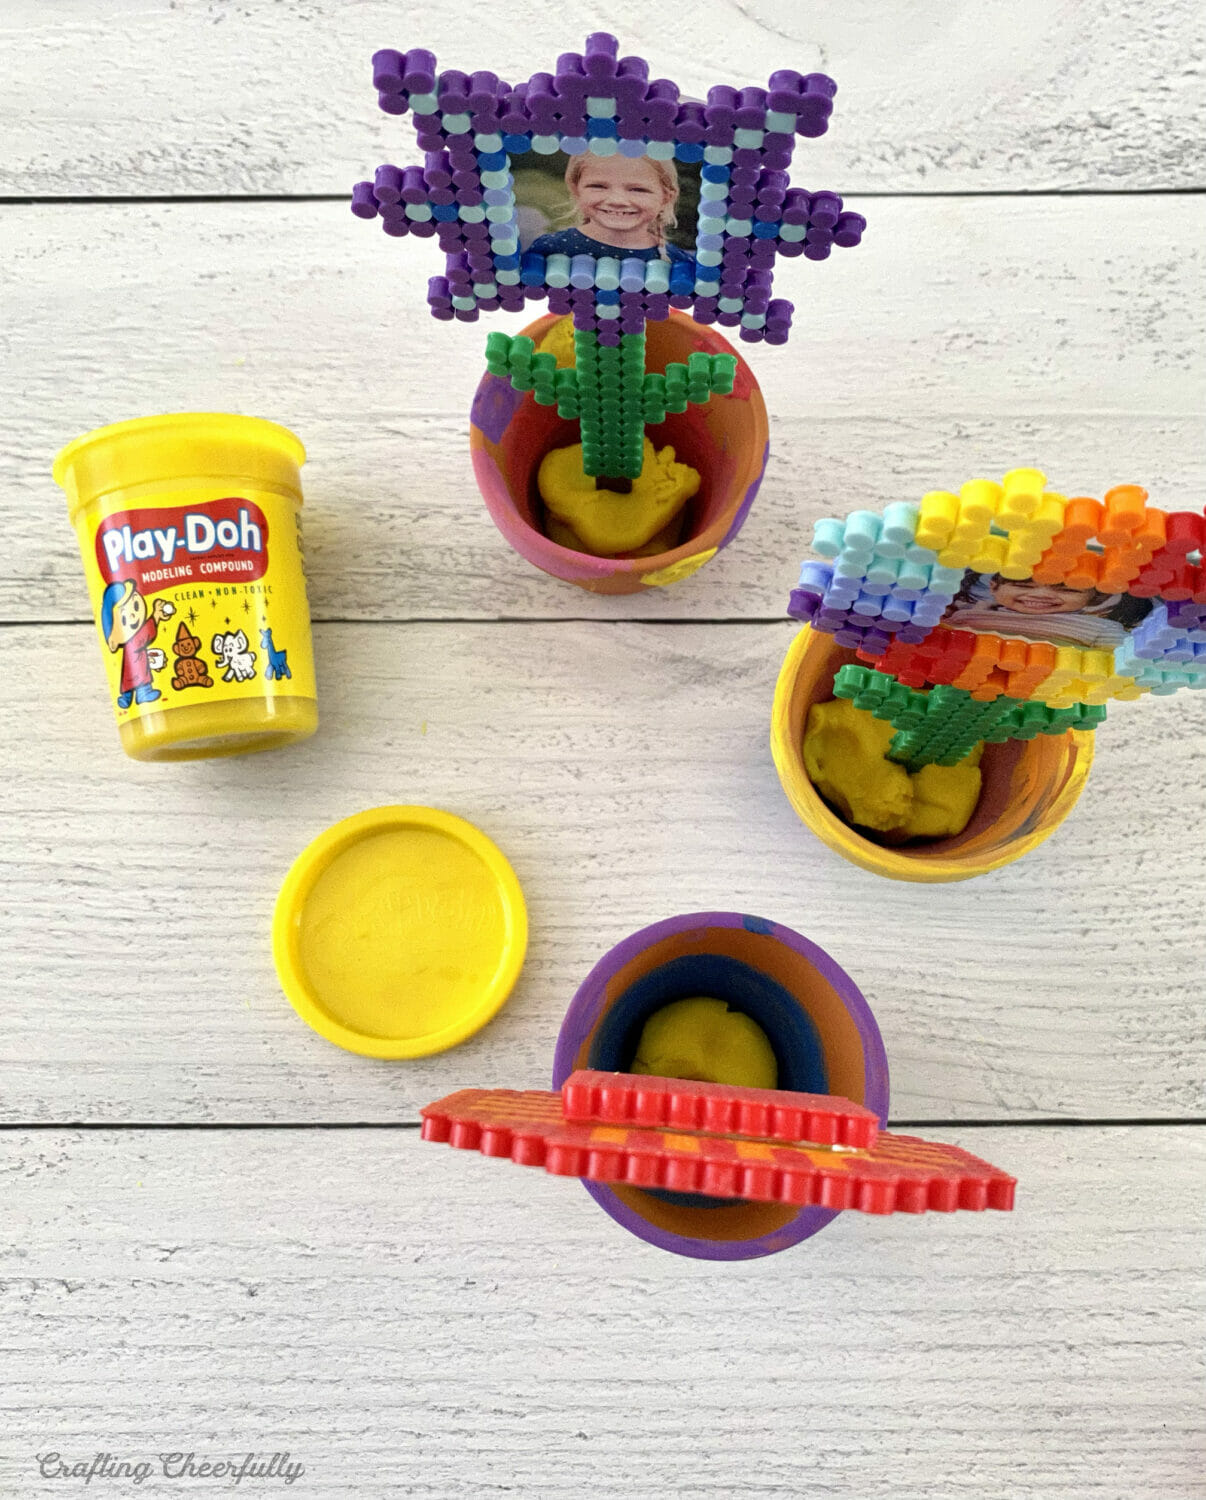
Step Four: Plant the Perler Bead flower in the painted pot.
I placed a large ball of Play-doh at the bottom of each pot and stuck the popsicle stick in it. We then added black beans. You could use tiny pepples, rocks from outside, colorful pom poms, or potting soil to fill in each pot.
Terra cotta flower pots filled with yellow playdough.
Yellow playdough is squished into the bottom of the flower pots.
Black beans fill in the terra cotta pots around the perler bead flowers.
The flower pot crafts are finished!
No comments
Write a comment